How to Sector-by-Sector Clone SSD Successfully in Windows 10/8/7?
Quick Navigation:
- What is a sector by sector clone?
- When need sector by sector clone SSD/HDD?
- Best sector-by-sector clone software
- How to sector by sector clone SSD in Windows 10/8/7?
- What if sector-by-sector cloned SSD or HDD not boot?
- Summary
What is a sector by sector clone?
The sector by sector clone SSD or HDD is to copy all sectors, even if the sector is blank or has a logically bad sector, from the source disk or partition to the destination location. This clone method can ensure that the destination hard disk/partition is exactly the same as source hard disk/partition.
Therefore, the target HDD or SSD must be at least equal in size to the source disk being cloned. If the destination disk is larger than the source disk, the rest disk space will become unallocated space after cloning. And you cannot sector by sector clone to smaller SSD.
When need sector by sector clone SSD/HDD?
As explained above, the sector-by-sector clone will copy all sectors (used or empty) of the selected disk/partition to another location. And this method is quite useful and necessary in the below cases:
- When your hard drive is encrypted with BitLocker and the regular cloning method cannot access data on it and finish the disk copying task, you can use a sector-by-sector clone method to copy it without unlocking the drive.
- If your system hard disk is failing now and about to die, you can copy the system disk sector by sector, then you will be able to run easy recovery on the new disk rather than on the failing one.
- When you need to copy the deleted (not wiped) data stored on the source disk to the destination disk, sector-by-sector clone SSD/HDD is a great option.
Best sector-by-sector clone software
To clone SSD or HDD sector by sector, you need to apply a reliable sector-by-sector copy tool. Here we recommend trying Qiling Disk Master Professional. It is compatible with all versions of Windows 11/10/8/7 and Windows XP/Vista (32 bit and 64 bit).
It comes provides the “Sector-by-Sector Clone” method for both copying an entire hard disk and cloning a specific partition to SSD or HDD. So you can clone a whole disk or a certain partition sector by sector from one disk to another in Windows PC. And its contrary copying solution is to clone only used sectors to the destination location. Besides, if the destination disk is an SSD drive, you can align SSD partitions during the cloning process to optimize its data reading and writing performance.
How to sector by sector clone SSD in Windows 10/8/7?
In this section, we would like to tell you how to perform sector-by-sector clone SSD or HDD task step by step via the recommended Qiling hard drive cloning tool.
- ★Before you start, please note:
- Ensure the destination disk has an unallocated space to hold all sectors from the source disk. If there is no unallocated space, you can delete or shrink other partitions to get one first.
- The destination partition/disk should be equal or larger than source partition/disk.
- Back up important files on the destination disk because they will be deleted after cloning SSD or HDD sector by sector.
You can download the Demo Version for a free trial.
Step 1. Install and launch the sector-by-sector clone software. Click “Clone Disk” in the tools page.
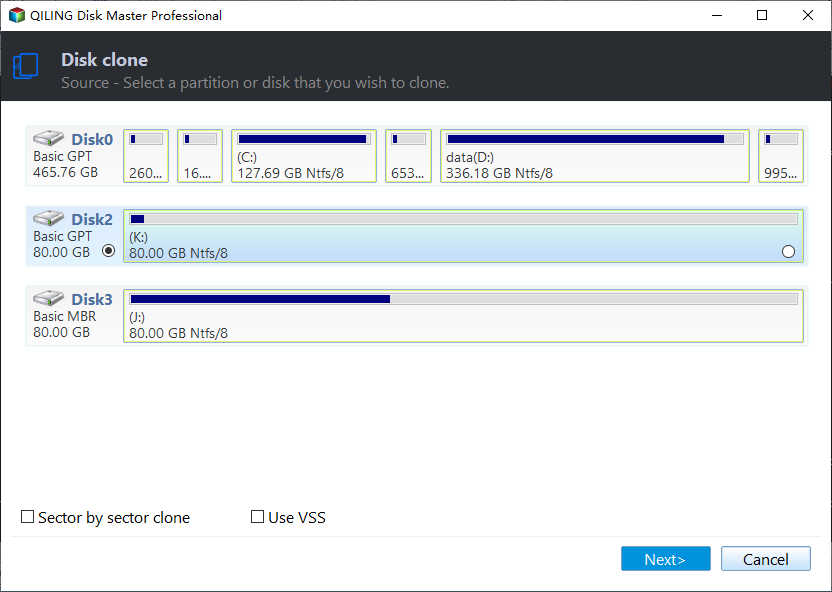
Step 2. Select source disk from the disk list, here we select disk 1 (system hard disk). Tick “Sector-by-Sector Clone” from the available two copying methods and click “Next”.
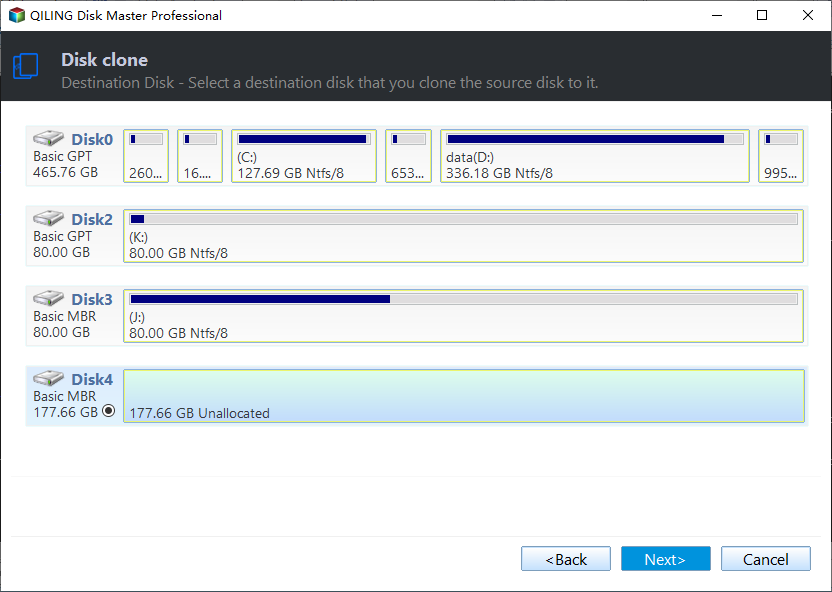
Step 3. Now select the destination disk, and then hit on “Next”.
Step 4. Here you will receive a note on how to boot computer from the destination disk. If you are cloning data disk, ignore it.
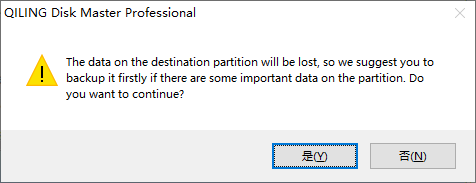
Step 5. Click “Proceed” to commit the sector-by-sector cloning operation. in the pop-out data loss warning window, click “Yes”.
Step 7 (optional). Boot computer from the cloned SSD or HDD.
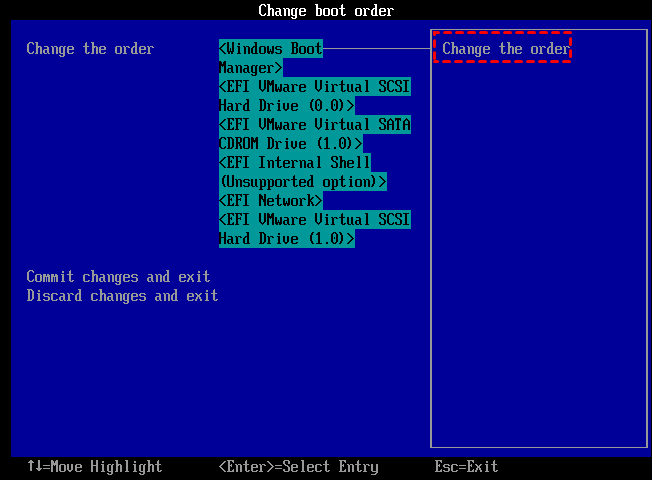
7.1. Reboot your computer and press a specific key (usually the DEL, ESC, F2, F8, F9, F10, F11, F12) constantly to enter the BIOS menu.
7.2. In the BIOS tab, use the arrow keys to set the cloned SSD/HDD as the prior boot drive, and save the changes and exit. Then boot computer from the cloned disk.
What if sector-by-sector cloned SSD or HDD not boot?
If the cloned SSD or HDD won’t boot after cloning process, you can check the following possible reasons.
1. The source disk has some bad sectors and cannot boot, either.
2. The SSD drive connection cable is loose or damaged.
3. SSD is not set as the first boot drive.
4. Partition style is not compatible with the boot mode (MBR goes with BIOS whereas GPT goes with UEFI). Upgrade BIOS to UEFI or switch UEFI to BIOS based on your situation.
5. System partition was not set as an active partition.
6. Some boot related drives or partitions such as system reserved partition are missed and not cloned to the destination disk.
Summary
With the help of the Qiling Disk Master Professional, you can easily clone SSD/HDD sector by sector, no matter clone HDD to SSD, or HDD to SSD in Windows 10/8/7 computer.
If your disk is of insufficient space for cloning disk or partition sector by sector, it also provides a workaround method called “Clone Disk Quickly” to only copy used space from one disk to another, allowing you to clone large drive to smaller drive. Last but not least, if you want to perform sector by sector clone SSD/HDD operation on Windows Server computer, try the Qiling Disk Master Server.
Related Articles
- How to Copy Recovery Partition to New Hard Drive in Windows 11/10/8/7?
Do you want to know how to copy recovery partition to new hard drive when the operating system won't boot? This article will show you how to do it. - How to Switch Windows 7, 8, 10 from HDD to SSD?
Do you know how to switch your Windows 7, 8, 10 or only OS from hard disk drive (HDD) to SSD? Find the answer to move everything from HDD to SSD in PC. - How to Transfer OS from HDD to SSD without Reinstalling
The easiest way to transfer OS from HDD to SSD is system cloning. It ensures booting from the target SSD, and eliminates the need of reinstalling Windows. - How to: Solve Samsung Data Migration Cloning Failed 00001 [ffffffff]
Feel frustrated when Samsung Data Migration cloning failed with error code 00001? This article will shows you how to solve this problem with various solutions.


