(Recommended) How to Recover Hidden Partition Windows 7?
How do I get my hidden partition back?
Manufacturers have created hidden partitions for system protection, such as Recovery Partition, EFI System Protection, and OEM Partition, to safeguard critical data and files from being deleted, lost or formatted. These partitions are often pre-installed on Windows computers at the time of delivery.
If you're unable to access certain partitions through File Explorer, it's likely because they're hidden. In this case, you can use Disk Management or a third-party program to access these partitions. This doesn't necessarily mean they're gone or missing, but rather that they're not visible in File Explorer.
How to show hidden partition in windows 7?
If you're having trouble showing hidden partitions in Windows 7, don't worry! You can use the Disk Management tool or a partition recovery software like Qiling Disk Master to access them. We'll show you how these tools work in the next part.
1. Use the correct disk name.
- Notes:✎...
- Do not add new data on the partition.
- Do not reformat the partition.
- Do not rebuild the partition table.
Solution 1. Assign drive letter CMD to recover hidden partition windows 7
Disk Management In Windows, the Disk Management utility allows you to execute advanced storage tasks, including unhidden partitions. Typically, hidden partitions are unlettered, requiring you to assign a drive letter using the Command Prompt (CMD) rather than changing the drive letter. This feature may be underutilized by many users, but it can be accessed by following specific steps to unhide partitions in Windows 7.
Step 1. To open the Disk Management utility from the Command Prompt, press the Windows key + R to open the Run dialog box, then type "diskmgmt.msc" in the text field and click OK. This will open the Disk Management utility.
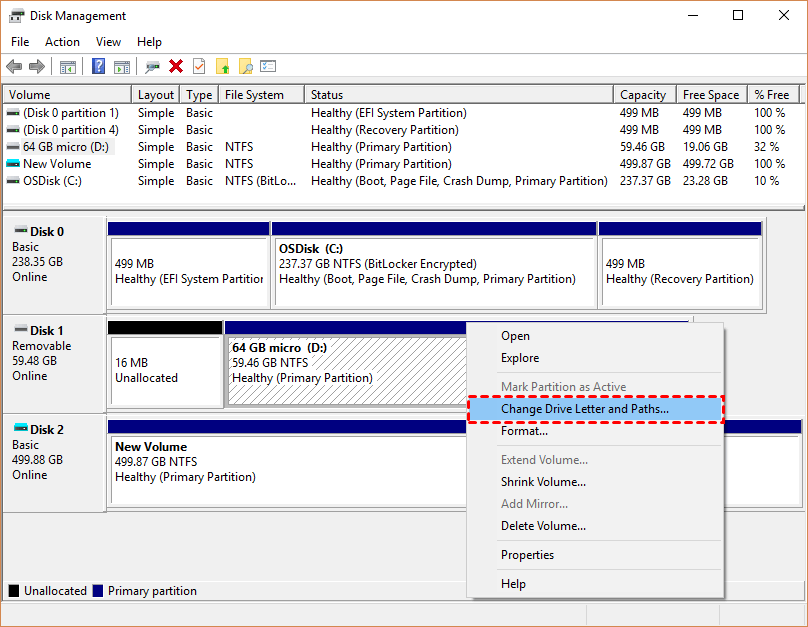
Step 2. After seeing all the partitions on the hard disk, locate the hidden partition and right-click on it, then select "Change Drive Letter and Paths".
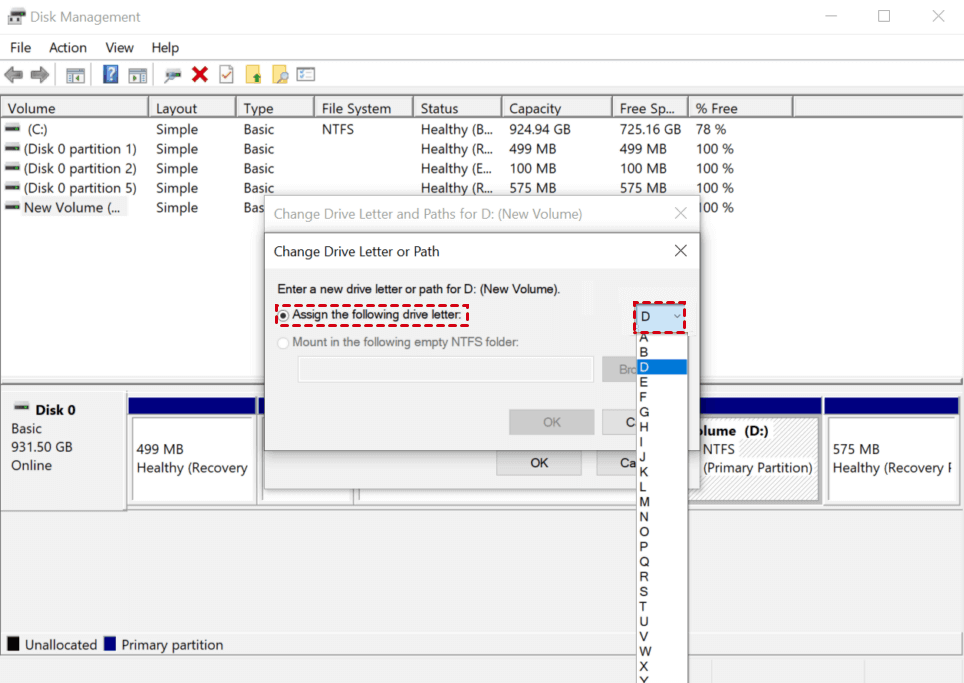
Step 3. To add a drive letter for the hidden partition, select the "Add" option.
Step 4. Assign a new drive letter to the hidden partition and check it after rebooting the computer.
Solution 2. Unhide partition windows 7 with partition recovery software
If you fail to recover a hidden partition in Windows 7 using Disk Management, it's likely that the partition has been deleted or lost, rather than hidden. In this case, you may want to consider using Qiling Disk Master Professional to recover the partition.
This highly recommended partition recovery software enables everyone to recover deleted/lost partitions on a hard disk, as long as the data is not overwritten by new data. The software allows you to recover the data stored in the partition as well. You can try out the demo version first and refer to the detailed steps for partition recovery on Windows 11/10/8/7.
Apart from that, Qiling Disk Master Professional also renders you other exciting features.
✿This software allows you to resize, move, merge, and split partitions without losing any data, making it a powerful tool for managing your hard drive. Additionally, it can also be used to migrate your operating system to a Solid State Drive (SSD) or a Hard Disk Drive (HHD).
✿This multifunction converter allows you to convert between different disk formats, including MBR to GPT, basic to dynamic disk, and NTFS to FAT32, among others.
✿Upgraded Qiling Disk Master Pro has more useful features that have improved on all features and quality.
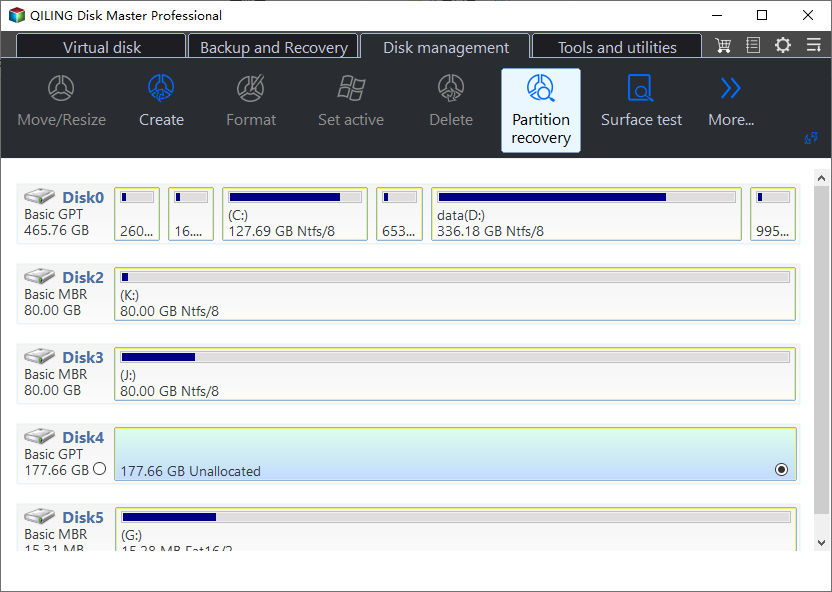
Step 1. Install and launch Qiling Disk Master Professional on your computer. Select your needed disk and click "Partition Recovery".
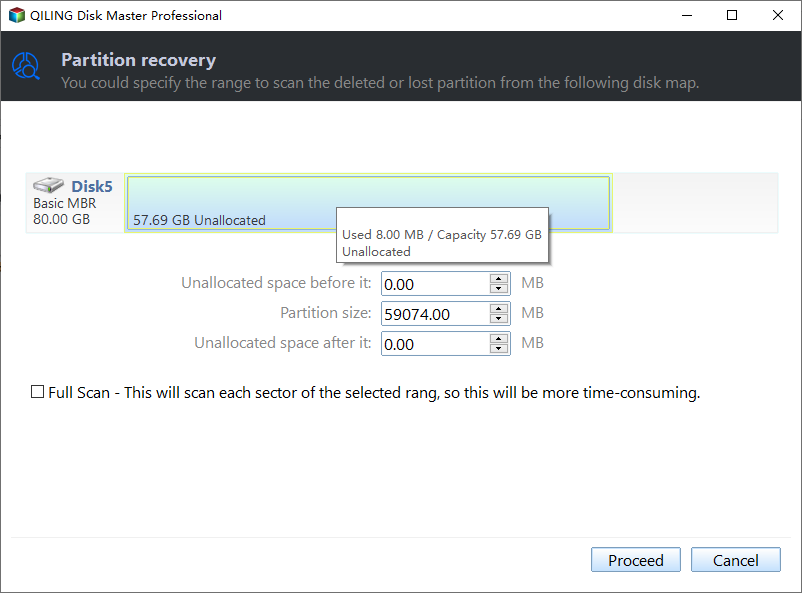
Step 2. To find your desired partition, select the "Full Search" option and then click "Proceed".
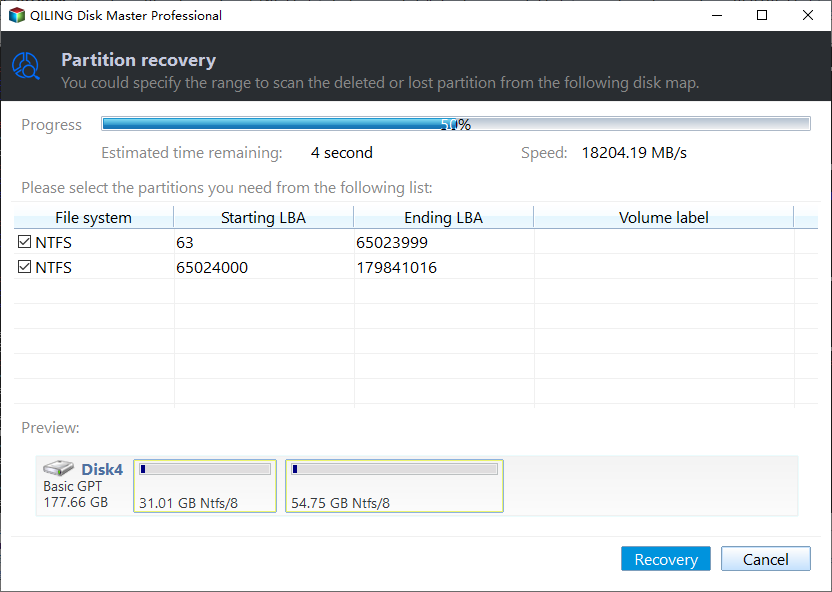
Step 3. This application will show all partitions on the hard disk. Select the desired partition and click "Recover" to initiate the recovery process.
Related suggestions
To show a hidden partition in Windows 7, you can use either the built-in Disk Management tool or a third-party software like Qiling Disk Master Professional, which is highly recommended for its effectiveness and ease of use.
If you've experienced data loss, you don't have to overstate the importance of regular backups. You can use the freeware Qiling Disk Master to keep your data safe by creating incremental, differential, or automatic backups.
Related Articles
- 2 Solutions to Recover Lost Partition SD Card
Working to recover lost partitions SD card? Read and check two solutions on how to recover lost partitions on SD card on this page.
