Windows 11/10/8/7: How to Shrink Volume Using Diskpart Command Line?
Why do you want to shrink volume?
The computer doesn’t have a perfect disk partitioning when it starts to be used. The sizes of all partitions will not be accepted over time, even they are perfect in the beginning. Thus, you have to resize it till you are satisfied. Some of them, you want to extend because they are not big enough, while some of them, you would like to shrink to get good performance.
Sometimes, you need to shrink the partition for creating a new one to store your personal files. Or you may want to shrink one partition to extend another one. Yes, you could shrink a partition in order to get a better use of the whole space.
How to shrink a volume?
To shrink volume, there are many methods. You can use Windows Disk Management to get interface performance, or use DiskPart to shrink volume in the command prompt with syntax. But how to shrink volume with CMD?
DiskPart
To use DiskPart, you need to open the command line prompt first. Click Start, type “cmd” to find the cmd program, right click it and select “Run as Administrator”, or press “WIN+R”, type “cmd” and press Enter. Type “diskpart” to open the DiskPart command prompt.
Then, you can type the syntax to shrink volume, as the following steps.
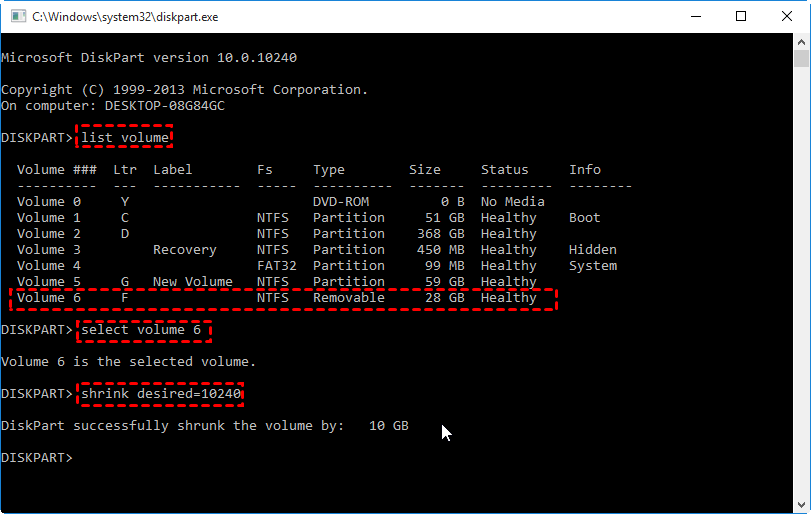
1. Type: list volume. You should remember the number of the volume you want to shrink.
2. Then, type select volume n to select the volume you want to shrink.
3. Type shrink desired=size to shrink the selected volume. And you will shrink volume successfully with DiskPart.
However, you may be warned by a shrink error, which means you may meet some trouble when you shrink volume.
There may be some unmovable files like the page files or the shadow copy storage areas, which are not automatically relocated and you cannot decrease the allocated space beyond the point where the unmovable files are. So, you can only shrink the partition to the unmovable file point. If you need to shrink more space, you need to move the unmovable files to another disk or delete it. If there are a number of bad clusters detected, you cannot shrink the partition either. Besides, DiskPart can only shrink/extend volume in NTFS file system, and so, if your file system is FAT, the DiskPart shrink cannot use.
Fortunately, Qiling Disk Master 6.6 Edition can replace DiskPart to shrink volume more easily, and it can overcome all the trouble we mentioned above.
Alternative to DiskPart - Qiling Disk Master
You can take advantage of the freeware Qiling Disk Master Standard, which can help you shrink volume/partition to the minimum size without the obstruction of the unmovable file with an intuitive GUI. And it supports resizing encrypted partition as well. You can operate with mouse-clicking. And, it is totally free. Here you can follow the guidance below:
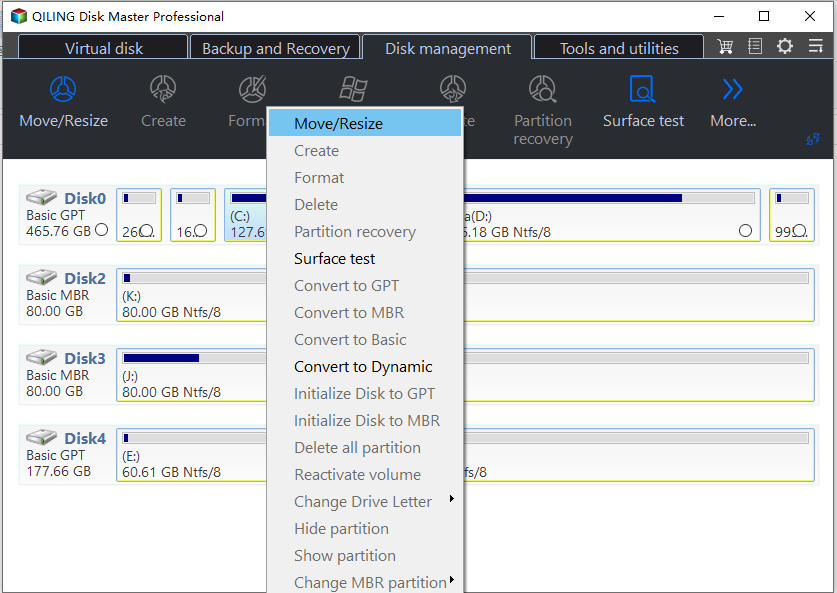
Step 1. Free download this software, install it to your computer in Windows 11/10/8/7, and launch it. Right-click the drive you need to shrink and then choose “Resize/Move Partition”.
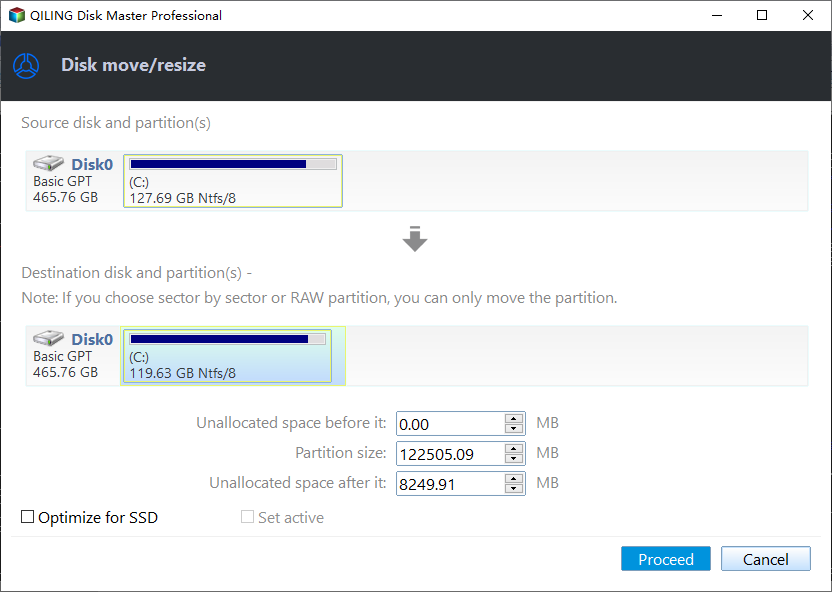
Step 2. Then, you can shrink volume/partition by dragging the bar or remount the volume.
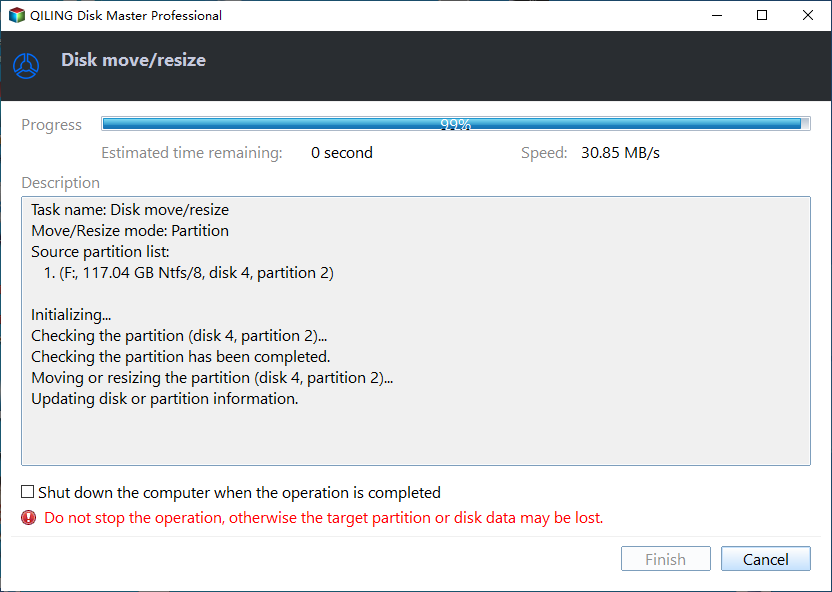
Step 3. Step 3. Here you can see the pending operations and if there is no problem, click Apply to submit the task.
Conclusion
How to shrink volumes with DiskPart command lines? In this post, you’ve learnt the way to use the Windows inbuilt utility DiskPart to shrink volumes correctly. However, as mentioned above, DiskPart has some limits and in this case, another more powerful alternative Qiling Disk Master is introduced to help you get it done more quickly and easily. Meanwhile, this software also contains 2 features for the volume shrink – “Resize Partition” and command lines. Which one to choose? It depends on you.
Related Articles
- Top 5 Best SD Card Benchmark Software Recommend 2024
Discover the top 5 best SD card benchmark software of 2024. In this comprehensive guide, we highlight the key features, usability, and performance metrics of each SD card benchmark software, helping you select the optimal tool for testing and enhancing your SD card's performance. - Full Guide to Upgrade PS4 to SSD [Quick & Easy]
Are you looking for a way to improve your PS4 performance? Here is a detailed guide to upgrading PS4 to SSD to make your experience more seamless. - Best Bootable Manager Software for Windows 2024 Recommend
Are you having an issue with booting on your PC? Do you need to manage the boot configuration? Then follow this complete guide to download and get the best bootable manager software to better manage Windows computers on their own without booting into Windows. - How to Change Boot Drive Windows 11 [Beginner's Guide]
There are many situations when you need to change the boot order, such as reinstalling the Windows OS, setting dual boot, or repairing errors. If you don't know how to operate it, this article will show you instructions to change boot drive Windows 11.


