Best Free File Sync Software for Windows 11, 10, 8, 7
- Best free file sync software - Qiling Disk Master Standard
- Example: how to sync files in Windows 10?
- How to manage sync task effortlessly
What does File Sync mean?
Syncing files involves transferring multiple files or folders to different locations, such as email, digital photos, MP3s, and videos. If changes occur, file sync software can easily and quickly sync these changes from the source directory to the destination directory, whether the storage is an internal hard drive, external hard drive, USB flash drive, network drive, or shared/NAS drive.
Manual copy and paste is typically a one-time synchronization method, but it's not ideal for frequent or long-term data synchronization, especially for large datasets.
To sync files from one folder to another and automatically update all changes, a file sync software is often required, which can help with scenarios such as keeping multiple computers in sync, backing up files, and updating files across different devices.
- To automatically copy a folder and its subsequent data changes to another location, you can use a combination of Windows Task Scheduler and Robocopy. Here's a brief summary: Create a batch file that uses Robocopy to copy the folder and its contents to the new location.
- To ensure both parties see the latest version of certain files while working on a project together, you can use a collaboration tool like Google Drive or Dropbox. These platforms allow you to share files and folders with others, and they automatically sync any changes made to the files.
- Want to always keep an up-to-date copy of important data as a double insurance...
Best free file sync software - Qiling Disk Master Standard
Qiling Disk Master Standard is the best free file sync software in Windows, offering a simplified sync process in just 3 steps. It provides numerous benefits, including the ability to sync files across multiple devices, automate backups, and protect data with encryption and password protection. With its user-friendly interface and robust features, Qiling Disk Master Standard is a reliable and efficient solution for managing and syncing files across different platforms.
- One-way file sync. It efficiently syncs files from one folder to another, and can also be used in conjunction with other backup settings like "Options" and "Schedule".
- Schedule sync. This software allows you to schedule syncs at various intervals (daily, weekly, monthly) and specify a particular time for each. Additionally, the schedule settings support the option to wake the computer before running the task, allowing you to sync files at any time, even without opening the software.
- Various sync targets. This software supports any devices detected by Windows, including internal and external drives, USB flash drives, cloud storage, NAS, network shares, and more.
You can download the freeware and start your file synchronization by following the tutorial below. The process is straightforward and allows you to synchronize your files with ease.
The Professional edition offers advanced sync modes, including real-time sync and two-way sync.
Example: how to sync files in Windows 10
To sync files from one directory to another on Windows 10 (or other Windows OS), follow these steps. You can also apply this to sync files to an external hard drive, just connect it in advance. First, open File Explorer and navigate to the source directory containing the files you want to sync. Then, select all the files you want to sync by pressing Ctrl+A.
1. Install and launch the Windows file sync software, then select "Sync" -> "Basic Sync" in order.
3 more sync modes in advanced editions:
✤ Real-Time Sync: This feature will monitor the files or folders in real-time and sync any detected changes from source to destination immediately, which is very useful when you work in a team or change files frequently.
✤ Mirror Sync: This feature will make the target folder exactly the same as the source folder, any changes and added data in the target folder will be overwritten.
✤ Two-Way Sync: Any changes in the source and target directory will be sync to the other side mutually.
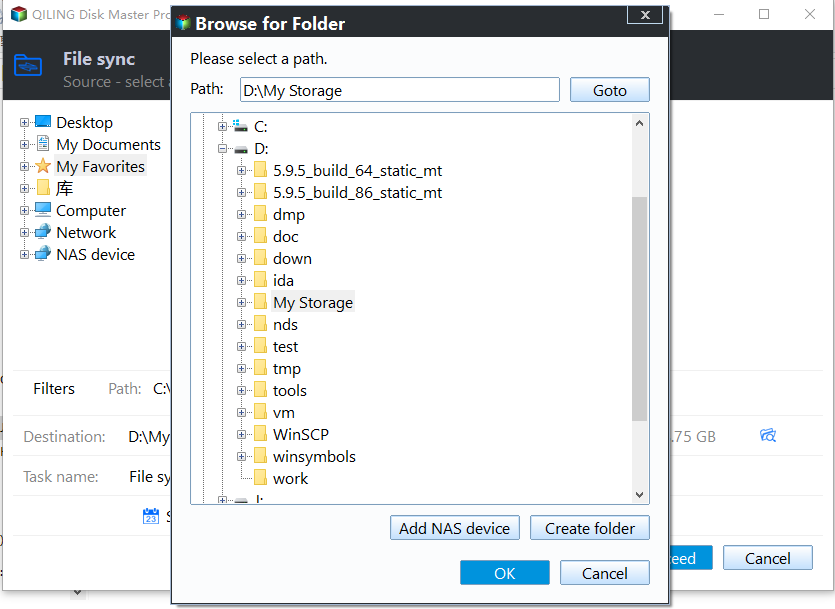
2. Click Folder to specify the directory you want to synchronize, then choose the destination path to store files.
3. To customize the automatic sync task, click "Schedule" and manage the options as desired. Then, click "Proceed".
- Options: You can enable email notification, make a comment, create a pre/post-command, and more.
- Schedule: The Professional edition offers features like daily, weekly, monthly auto syncs, as well as event triggers and USB plug-in syncs, allowing for more customized syncing options.
- Notes:✎...
- To ensure that the program can continue to sync files, do not modify the source folder name after the initial setup. This will prevent any issues with file synchronization.
- To sync deletions in the source directory to the target directory, enable the "sync deletions in source directory to destination" option, which will also sync newly added and changed files of this task to the destination directory.
- Currently, file or folder can't be synchronized to CD-ROM/DVD/Blue-Ray.
- The single file over 4GB cannot be synchronized to a FAT/FAT32 partition because FAT/FAT32 only supports file sizes up to 4GB.
- For more matters needing attention about File Sync, please visit the FAQ about Qiling File Sync.
How to manage sync task effortlessly
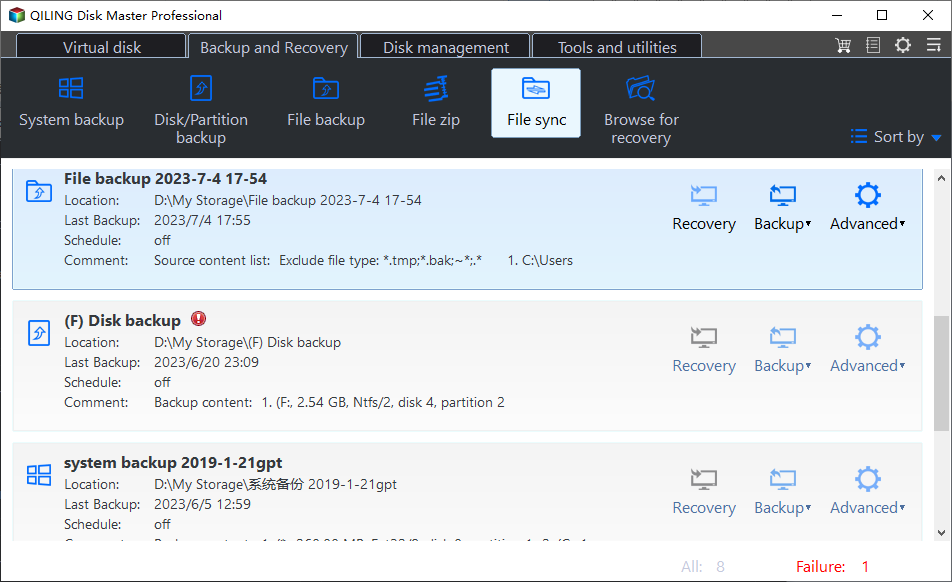
To manage your Windows file sync, head to the "Backup and recovery" tab, where you'll find all created tasks listed under Backup Management. From here, you can select a task and click the three horizontal lines button to access various options for backup management, allowing you to easily manage your sync tasks.
Sync Now: This option synchronizes all files in the source folder to the target folder with a single click, typically used for tasks that don't have a scheduled application, essentially serving as a manual sync.
Restore: It can restore all synchronized files from the target folder to the source folder or another folder.
Schedule: To set a schedule setting for one single sync task, you can specify the frequency and time of the sync, such as daily, weekly, or at a specific time. This allows you to automate the sync process and have it run on its own. You can also change the schedule setting of an earlier schedule task, which means you can modify the timing of a previously set sync task.
Edit Sync: To add a new folder to a previous created sync task, you can modify the destination, backup options, and schedule of the task. This allows you to tailor the sync task to your specific needs and ensure that your data is backed up and synced correctly.
Locate Sync: You can check your files or folders in the target destination.
Shortcuts: This feature allows you to create an exact copy of a task on desktop, making it easy to quickly run the task again, which is particularly useful for users who frequently perform manual syncs or make changes to files.
Delete: The code will remove the sync task from the home page.
Properties: You can see general information and source of this task.
Summary
With Qiling Disk Master Standard, the best free Windows file sync software, you can easily and quickly sync files across Windows 11/10/8.1/8/7/XP/Vista. The software's schedule sync option allows for automatic syncing without human intervention, saving time and effort. Additionally, you can enable email notifications to receive final results, comment on tasks for clarity, and more, all for free. This ensures that your important data is protected and safe.
ACDSee Backup & Recovery offers a range of backup features, including file backup, system backup, �isk backup, partition backup, and scheduled backup. It also supports �ncremental or differential backup and allows creating bootable media. The software protects data with image-based backups, which can only be accessed after restoration, providing an additional layer of safety. Additionally, it enables multiple backups and supports file/folder backup, system backup, disk backup, partition backup, and scheduled backup. The software also allows creating bootable media.disk backup, partition backup, and scheduled backup. It also supports �ncremental or differential backup and allows creating bootable media. The software protects data with image-based backups, which can only be accessed after restoration, providing an additional layer of safety. Additionally, it enables multiple backups and supports file/folder backup, system backup, disk backup, partition backup, and scheduled backup. The software also allows creating bootable media.incremental or differential backup and allows creating bootable media. The software protects data with image-based backups, which can only be accessed after restoration, providing an additional layer of safety. Additionally, it enables multiple backups and supports file/folder backup, system backup, disk backup, partition backup, and scheduled backup. The software also allows creating bootable media.
Related Articles
- Sync Folder to Network Drive in Windows 7/8/10 | 3 Ways
- How to Sync Any Local Folders to OneDrive Efficiently
- 3 Ways to Make Windows Sync Folders between Computers
- Best File Sync Software for Windows Server 2008/2012/2016
- Top Two Ways to Synchronize Files between Windows Servers


