How to Delete System Junk Files in Windows 10 (Available for Windows 11)
Why we should delete system junk files?
What? You still do not know the importance of deleting system junk files? Deleting system junk files is a common topic when talking about what keeps computers in good condition. If you are confused, please don't miss this article.
The longer you use the computer, the more system junk files it accumulates, such as duplicate files, temporary files, registry files, etc. Deleting system junk files on a regular not only free up disk space for storing more data, but also makes your computer running faster.
How to delete system junk files in Windows 10, 8, 7, and 11
To delete system junk files successfully, there are 4 options you can choose, including Microsoft Total PC Cleaner, Disk Cleanup, a third-party junk files cleaner, and built-in Storage feature.
▶ Option 1. Microsoft Total PC Cleaner
You can get Microsoft Total PC Cleaner for free from the Microsoft Store. It works on Windows 10 and above, and is designed to clean up system junk files including caches and downloads for users, speeding up the PC.
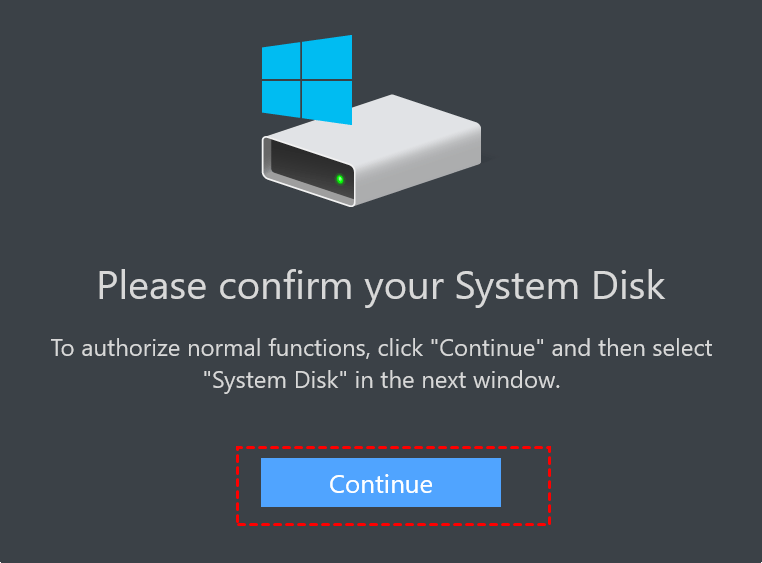
Step 1. Install Microsoft Total PC Cleaner on your Windows 10 PC. After opening, you will see the main interface, then click "Continue".
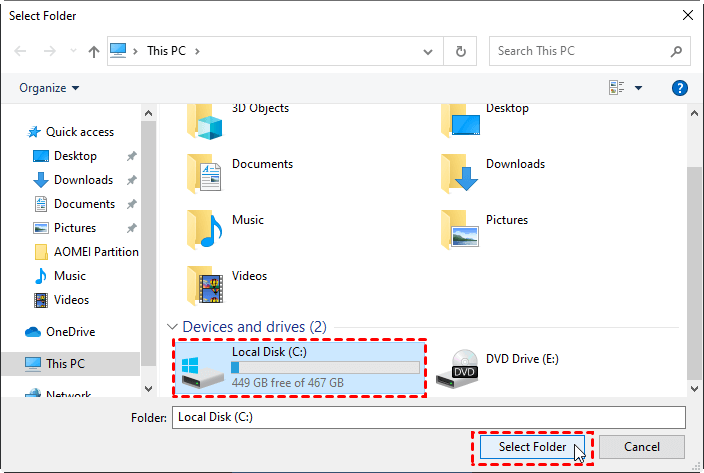
Step 2. Here, select the system partition (usually C drive). Click on "Select Folder".
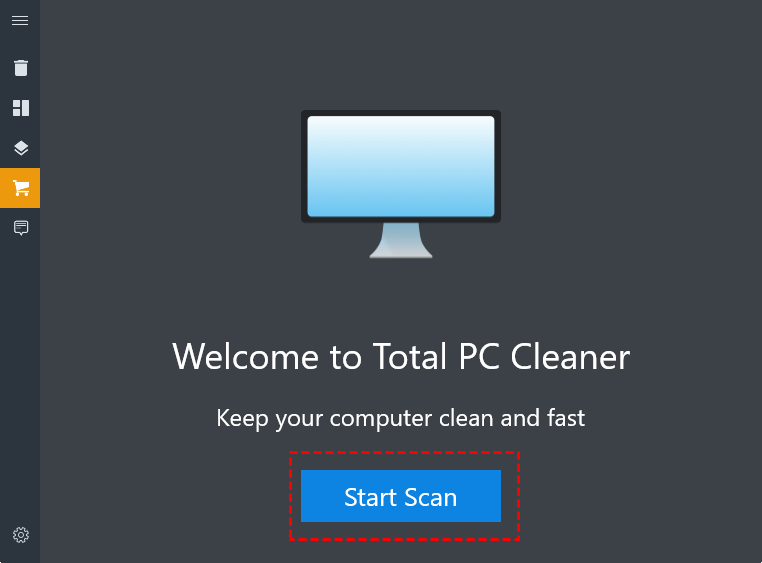
Step 3. After that, a new window will pop up. Click "Start Scan" to run the tool.
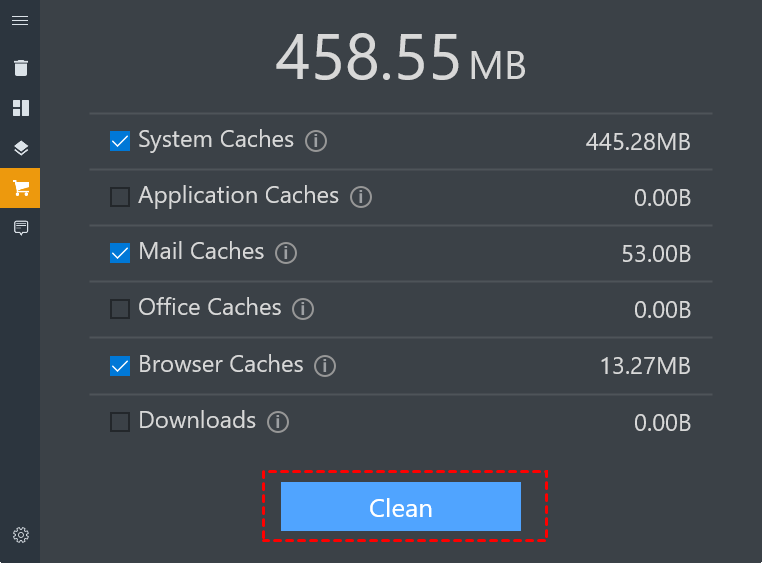
Step 4. Wait for a while, the scan results will be listed. You can click "Clean" to delete system junk files.
▶ Option 2. Disk Cleanup
Disk Cleanup is a Windows built-in tool that can delete Windows 10 junk files without installation. It supports cleaning junk files on different drives, if you have too many junk files on your system disk, it is a good choice to turn to this utility for help.
Step 1. Click"This PC" on the desktop.
Step 2. Right-click the system disk and select"Properties".
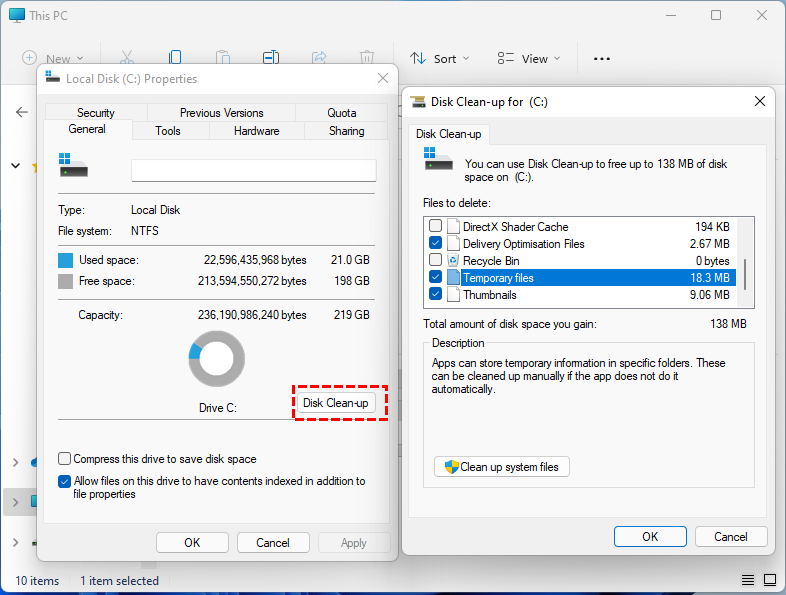
Step 3. Click Disk Clean-up under General option.
Step 4. Check the junk files and click"OK".
▶ Option 3. Free system junk files cleaner
How to clean up system junk files on Windows 10, 8, 7, and 11? You can also try Qiling Disk Master Standard. This is a completely different tool from other tools on the market. Because it can fully scan the junk files in the computer, including system junk files and registry junk files. After the scan, all junk files are automatically classified. You just need to click "Clean All" to remove them.
Note: In addition, you can upgrade to Pro Edition to enjoy more advanced features to free up space, such as Delete Large Files and App Mover. The former can find and delete files, and the latter can move installed apps to another drive without reinstalling.
▶ Option 4. Storage feature
For Windows 10 and above users can also try to use Storage to clean up system junk files, but it only includes temporary files.
Step 1. Open start bar and turn to "Settings" > "System" > "Storage".
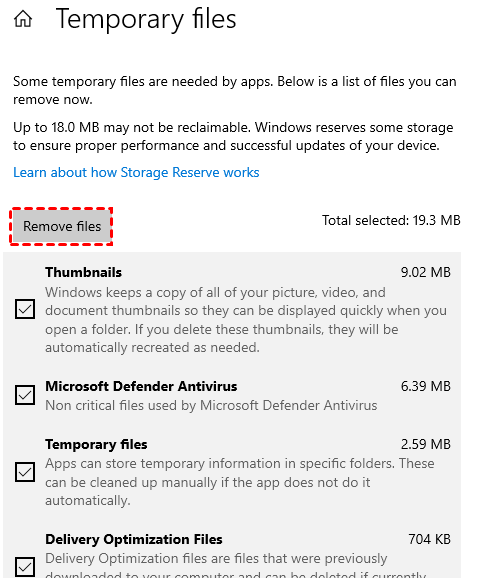
Step 2. After that, click"Temporary files".

Step 3. Then, click"Remove files"to remove all temporary files.
Conclusion
This is the ultimate guide of how to delete system junk files in Windows 10 and other OS, because this article provides 4 different options to delete system junk files.
There is no doubt that Qiling Disk Master is the only one which can delete system junk files fully. More importantly, it provides you other features to manage disk partitions flexibly and timely.
Related Articles
- A Powerful PC Junk Cleaner for Windows 10 And 11
How to make the computer run faster? An excellent PC junk cleaner for Windows 10 can help you, which can remove all kinds of junk files to free up more space and improve computer performance. - How to Delete Residual Files on Windows 10
After uninstalling the program, there're still some residual files in the computer occupying the computer space. To improve the computer performance, we will talk about 2 ways to delete residual files on Windows 10.