Fixed | System Image Restore Failed 0x80042412 in Windows 7/8/10
- Cases: System Image Restore Failed with Error 0x80042412
- How to Fix Windows 7/8/10 System Image Failed with 0x80042412?
- 1. The target disk is smaller than the source disk
- 2. The boot modes/partition styles are incompatible
- 3. The target disk hasn’t been formatted with NTFS
- 4. The target disk is corrupted
- Restore System Image without Error even in Dissimilar Hardware
- Conclusion
Cases: System Image Restore Failed with Error 0x80042412
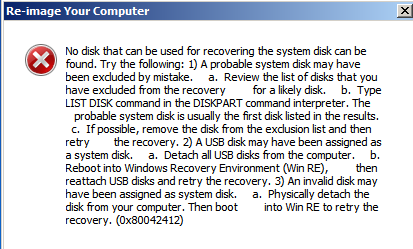
Such questions are nothing new in related forums, and the error 0x80042412 allegedly occurred in Windows 7, Windows 8 and Windows 10. As described in the cases, many users were stuck in the last step of restoring system image, and the error message was like: No disk that can be used for recovering the system disk can be found. Try the following...
How does this happen? Why Windows 7 or Windows 10 system image restore failed with code 0x80042412? Keep reading and fix this problem with following suggestions.
- How to Fix Windows 7/8/10 System Image Failed with 0x80042412?
- Restore System Image without Error even in Dissimilar Hardware
How to Fix Windows 7/8/10 System Image Failed with 0x80042412?
The "no disk can be found" issue during system image restore, also known as bare metal recovery, is a common problem that occurs when the system image is restored to a different hard drive or computer. This issue typically happens when the system image is not compatible with the target hardware, making it difficult for the restore process to find a suitable disk.
Error 0x80042412 during system image restore is a common issue that can be caused by several factors. Here are some possible causes and their corresponding solutions:
- If the target disk is smaller than the source disk, the system image restore process will fail with error 0x80042412. This is because the system image is being restored to a disk that is not large enough to accommodate the entire system image.
- Case 2. The boot modes/partition styles are different
- Case 3. The target disk hasn't been formatted with NTFS
- Case 4. The target disk is corrupted
1. The target disk is smaller than the source disk
When restoring a Windows system image, the process may fail with error 0x80042412 if the target partition is smaller than the partition included in the system image. This is because the system image retains information about the original partition sizes, and the restore process checks for sufficient space before proceeding.
How to fix it:
To complete the process successfully, you could shrink the source partition and expand the destination partition in Disk Management, and therefore ensure the destination partition equal to or larger than the backed up partition.
☛ Search for "diskmgmt.msc" in Windows and "Run as administrator".
☛ Find the partition you want to resize, right-click it and select "Shrink Volume" or "Expand Volume".
Tips: To expand a specific partition, the unallocated space must be on its right side.
2. The boot modes/partition styles are incompatible
When attempting to recover a system image, you must ensure that the target disk has the same boot mode (BIOS or UEFI) and partition style (MBR or GPT) as the source disk.
How to fix it:
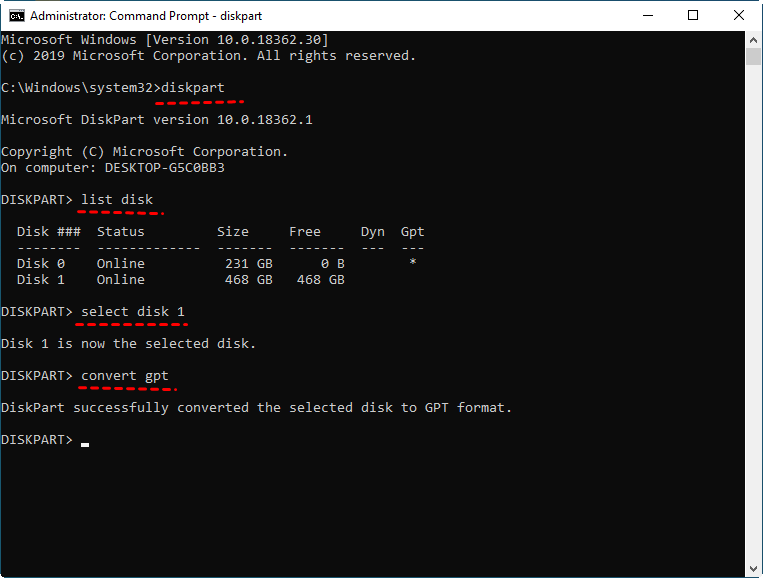
To put it simply, you need to convert the source disk and source disk to the same partition style. Usually you can do it in Disk Management, but if you want to convert the target disk from boot, try using DiskPart.
☛ Choose "Command Prompt" in Windows 7 Recovery Options or Windows 8/10 Advanced Options.
☛ Type following commands, press Enter key after finishing each line.
To troubleshoot issues with your system, you can use the Command Prompt to execute various commands. Here are some steps to follow:
To troubleshoot issues with your system, you can use the Command Prompt to execute various commands. Here are some steps to follow:
select disk (disknumber)
To troubleshoot issues with your system, you can use the Command Prompt to execute various commands. Here are some steps to follow:
convert gpt (or mbr)
Tips:
- You can only convert a disk from GPT to MBR or vice versa when it's empty and contains no volumes. So please backup your important files at first.
- Once you've converted the partition style, you should access the motherboard's firmware to switch boot mode as well. Press the manufacturer's key (F1, F2, F10, F12, ESC, etc.) during startup to enter the Boot menu, and make sure to enable the corresponding boot option (legacy BIOS/MBR and UEFI/GPT). Then save the changes and exit.
3. The target disk hasn’t been formatted with NTFS
Formatting a disk erases all data on the disk, including operating systems, programs, and personal files. Before formatting a disk, make sure to backup all important files to another location.
How to fix it:
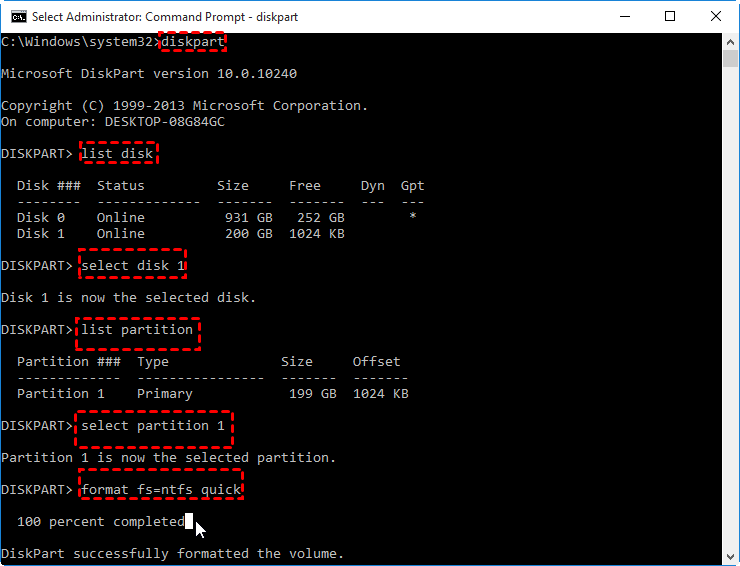
You could use DiskPart to format NTFS in Command Prompt from boot.
☛ Choose "Command Prompt" in Windows 7 Recovery Options or Windows 8/10 Advanced Options.
☛ Type following commands, press Enter key after finishing each line.
diskpart
list disk
select disk 0
clean
create partition primary size=100
format fs=ntfs quick
active
create partition primary
format quick fs=ntfs
Optionally, you could format the destination partition only after cleaning:
create partition primary
select partition 1
active
format fs=ntfs quick
assign letter=x
Tips:
- "Clean" will erase all the existing drive partitioning.
- "Active" command is only used on a fixed MBR disk.
- You can assign any letter you want to the destination partition.
4. The target disk is corrupted
You may also fail to restore system image with 0x80042412 in Windows 10/8/7 because of disk corruption.
How to fix it:
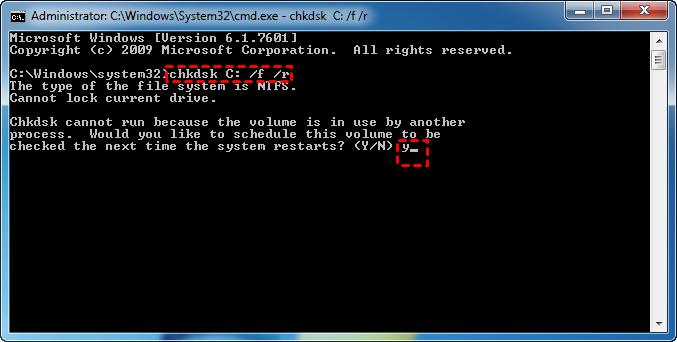
You could use command line to detect target disk and system file corruption from boot.
☛ Choose "Command Prompt" in Windows 7 Recovery Options or Windows 8/10 Recovery Environment.
☛ Run "sfc /scannow" to scan system file, and replace corrupted files.
☛ Run "CHKDSK C: /f /r" to fix disk errors, locate bad sectors and recovers readable information.
Restore System Image without Error even in Dissimilar Hardware
If you're experiencing issues restoring a system image with error 0x80042412, it's often due to hardware incompatibility. To avoid this problem in the future, consider using a reliable tool that supports restoring system images to dissimilar hardware. This way, you can skip the complicated troubleshooting process and easily restore your system.
If you're looking for a reliable tool to create system images and restore your system, Qiling Disk Master is an effective option. Unlike the built-in Backup and Restore feature, Qiling Disk Master provides an easier and faster way to create system images. With its user-friendly interface, you can �chedule automatic system backups in Windows 11/10/8.1/8/7/XP/Vista.schedule automatic system backups in Windows 11/10/8.1/8/7/XP/Vista.
In the completely free Standard Edition, you could enjoy most of the features including file/partition/disk/system backup and restore, which is more than enough for daily data protection and system restore.
And in the advanced Professional Edition, you are allowed to restore system image to dissimilar hardware, or even �lone OS to another hard drive directly without restoration.clone OS to another hard drive directly without restoration.
Here's an example of dissimilar hardware restore:
Step 1. Download Qiling Disk Master Professional and install it following the wizard.
Step 2. Go to System > System Backup, create a system image to removable devices or network location.
Step 3. If the target hard drive does not have a system installed, you can create a bootable drive and use it to boot the computer into WinPE. This will allow the program to run automatically and access the target hard drive.
Step 4. Restore the system image you created before.
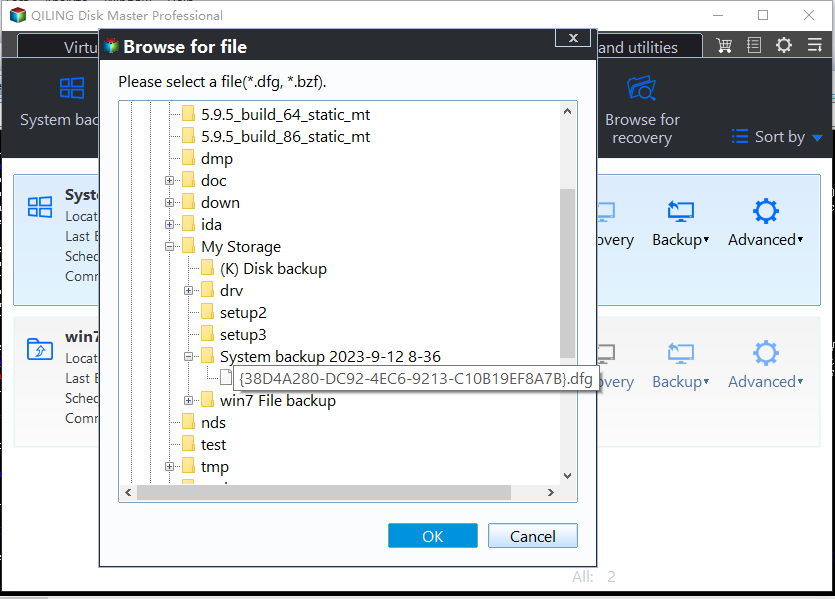
◆ Go to Restore tab and choose Select Image File to locate the system image.
If it's saved on a removable device, connect it first. If it's on a network location, click Share/NAS on the popping out window and then Add Share or NAS devices to specify the path.
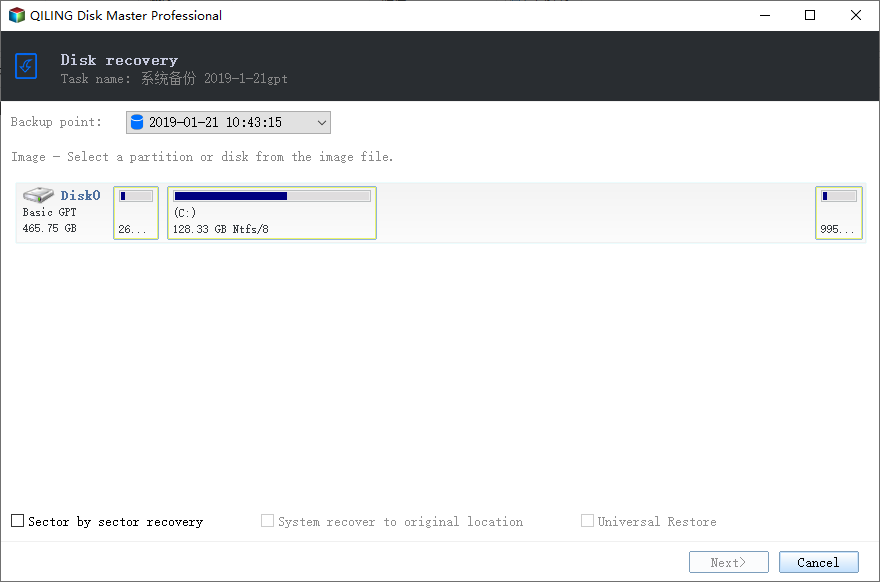
◆ Choose Restore this system backup and hit Next.
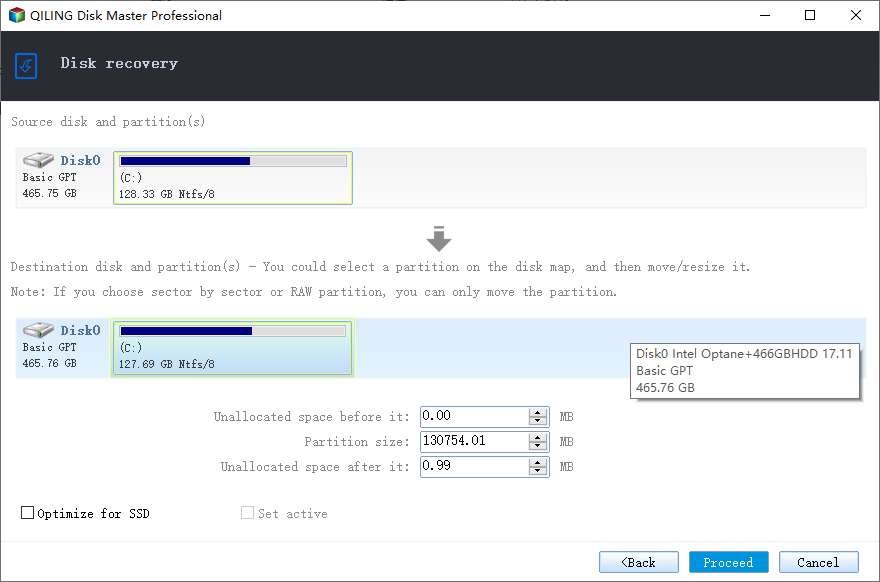
◆ Confirm the operation and tick Universal Restore, then Proceed.
When restoring your system to a new hard drive, you may want to consider optimizing the SSD (Solid-State Drive) for better performance. If your target hard drive is an SSD, you can take advantage of the SSD Alignment feature to enhance its reading and writing capabilities.
Conclusion
If you're experiencing issues with restoring a Windows 7 system image due to error 0x80042412, there are alternative solutions you can try to resolve the problem.
With Qiling Disk Master, you are not only able to create system image on schedule and restore it when necessary, but also allowed to clone OS to another hard drive, or even clone larger HDD to small SSD. Moreover, if you are trying to bare metal restore Windows �erver to different hardware, there's also Server edition can help you.Server to different hardware, there's also Server edition can help you.
Related Articles
- Fix System Image Restore Fails Because of EFI/BIOS (3 Solutions)
- How to Restore/Deploy Windows 7 System Image to Different Hardware?
- 5 Methods to Fix System Image Backup Failed in Windows 10/8/7
- 3 Ways to Transfer System Image to New Hard Drive
