How to Free Backup Windows 7/8/10 Data to Synology NAS
- Synology Data Replicator's lifespan has come to an end
- Alternative to Synology Data Replicator in Windows
- Backup to Synology via DiskStation Manager and built-in tool
- Create a shared folder on Synology NAS for preparation
- Create DSM local user for preparation
- Backup Windows 7 data to Synology using Backup and Restore
- Backup Windows 8/10 data to Synology using File History
- Backup data to Synology NAS with Qiling Disk Master Standard
- Conclusion
Synology Data Replicator's lifespan has come to an end
People used to backup data using Synology Data Replicator with three backup modes: Immediate, Sync, and Scheduled. However, Synology Data Replicator has reached the end of its lifespan in 2013. Since 2013, Synology Data Replicator has not been updated again and its download links have been removed from the utility page for newer products in Download Center.
Thus, if you want to backup data on Windows 7/8/10/11 to Synology NAS, you need to find the alternative to Synology and learn how to use it.
Alternative to Synology Data Replicator in Windows
Here're two alternatives you can use to backup data on your computer to Synology NAS.
Method 1: Use DiskStation Manager and Windows built-in tool
Synology DiskStation Manager(DSM) is an intuitive web-based operating system for every Synology NAS. It integrates the basic functions of file sharing, centralized backup, RAID storage, multimedia streaming, virtual storage.
To backup data using DiskStation Manager and Windows built-in tool, you need to create a shared folder on your Synology NAS for storing Windows backup. Then, you need to configure local users and give them the priority of the shared folder you made before. At last, enable Windows built-in tool and use it to backup data on Windows 7/8/10/11 to your Synology NAS.
Method 2: Use third-party file backup software
Qiling Disk Master is a great file backup software for Windows 7/8/8.1/10/11/XP/Vista, which allows you to backup data on your computer to NAS like Synology, cloud storage device like Dropbox, Google Drive, external hard drive, etc.
To backup data using Qiling Backkupper, you just need to select the files you want to backup and pitch on Synology as your destination path, then click Proceed.
Backup to Synology via DiskStation Manager and built-in tool
The first way is to backup data via DiskStation Manager and Windows built-in tool. In Windows 7, you can use Backup and Restore. In Windows 8/10/11, you can use File History. But if you want an easier way, you can directly go to the next part. Then, Let's have a closer at how DiskStation Manager and built-in tool works.
- Create a shared folder on Synology NAS for preparation
- Create DSM local user for preparation
- Backup Windows 7 data to Synology using Backup and Restore
- Backup Windows 8/10 data to Synology using File History
Create a shared folder on Synology NAS for preparation
The shared folders are the basic directories where you can store and manage files and folders on your Synology NAS. Before storing any files, you'll need to create at least one shared folder in DSM.
Step 1. Open the Control Panel on your Synology web interface and navigate to File Sharing > Shared Folder, then click Create button to create a new one.
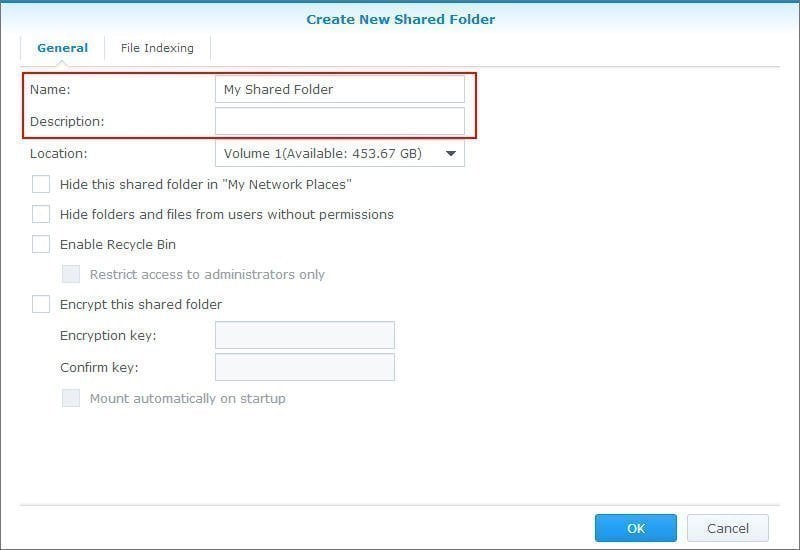
Step 2. Specify a name and description of your new shared folder.
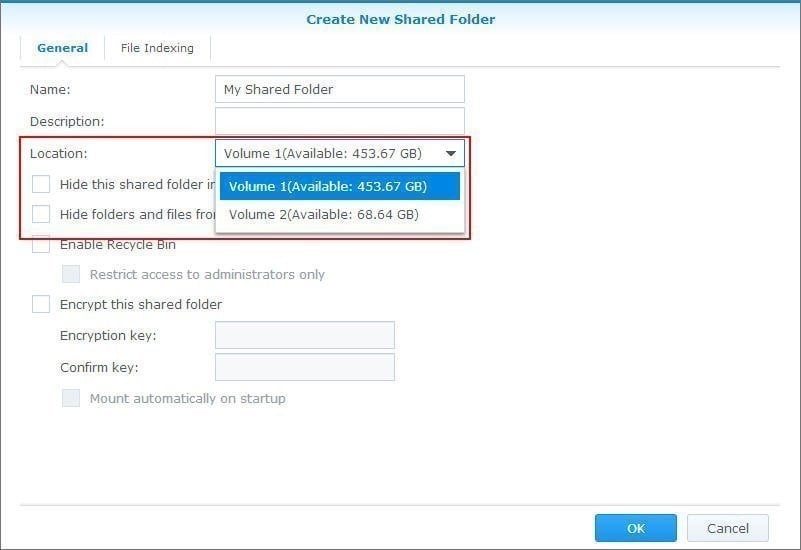
Step 3. Select a storage for your shared folder and tick other options, then click OK.
Create DSM local user for preparation
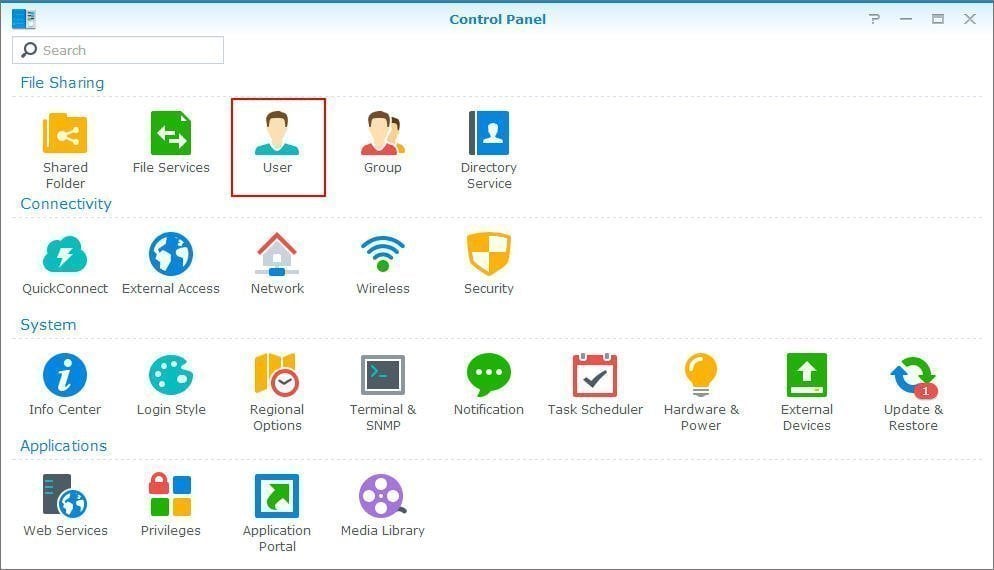
Step 1. Go to Control Panel, then click User to summon the next window.
Step 2. Click the drop-down menu of Create button and select Create User, then you will see User Creation Wizard.
Step 3. Specify options on the user information page, including Name, Description, Email, Send a notification mail to the newly created user, disallow the user to change account password.
Step 4. Go to Group > Create > Group Creation Wizard page and Specify a group for your newly created user.
Step 5. Specify access privileges for your new user on the Assign shared folders permissions page, including No access > Read/Write > Read only.
Step 6. Specify a storage space for your newly created user on the User quota setting page.
Step 7. Specify which services your newly created user can access the Assign application permissions page.
Step 8. Specify a speed limit for different services on the Group Speed Limit Setting page.
Step 9. Click Apply after you confirm all settings.
Backup Windows 7 data to Synology using Backup and Restore
Step 1. Click Start menu and type Backup and Restore in the search box, then select it from the start menu list.
Step 2. Select Set up backup or Change setting on the backup and restore page.
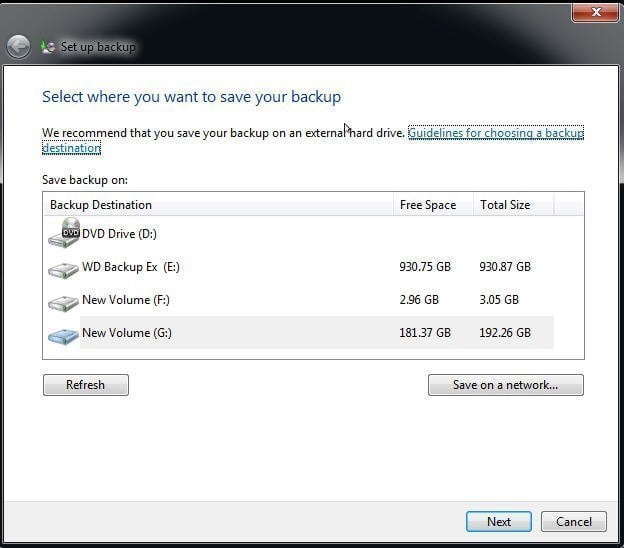
Step 3. Select Save on a network button and click Next, then type the IP address of your Synology NAS and select the shared folder you created to save your file backup. At last, click OK to finish this step.
Backup Windows 8/10 data to Synology using File History
Step 1. Click Start Menu and type File History in the search box, then select File History settings.
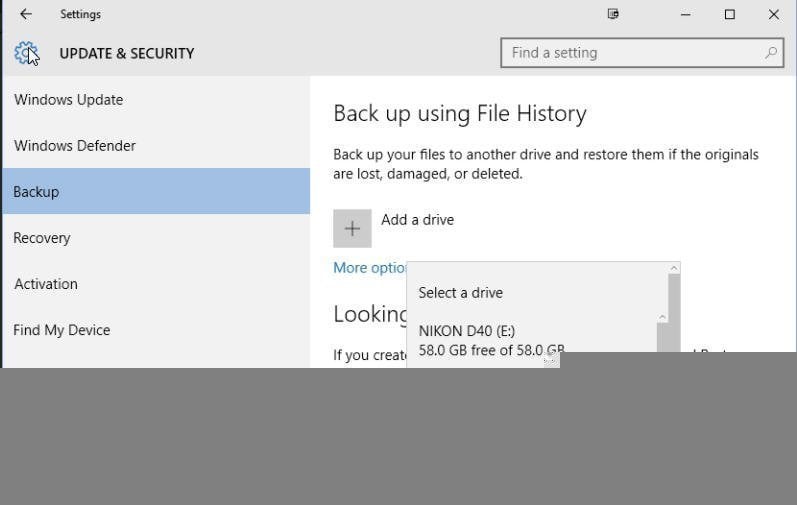
Step 2. Go to Backup button and pitch on + button to add a drive, then select a drive or network location (eg: Synology NAS).
Step 3. Click More options to configure other settings. After that, click Back up now.
Backup data to Synology NAS with Qiling Disk Master Standard
Want an easier way, you can turn to a third-party backup software. And here, I strongly recommend you Qiling Disk Master Standard. It has a wizard-like interface, which can guide you to backup data on Windows 11/10/8/7 to Synology NAS easily and quickly. Also, if you want to backup PC to Synology NAS, it will still work. Let's see the steps specifically.
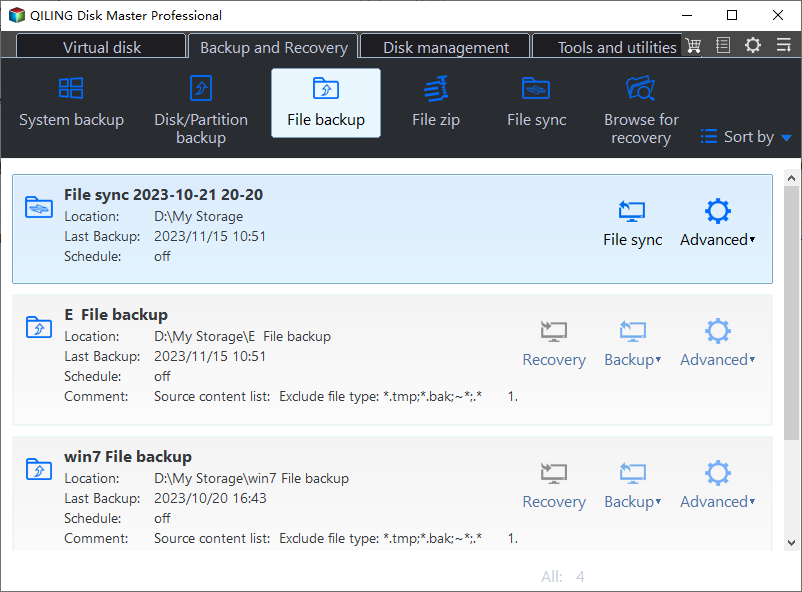
Step 1. Download Qiling Disk Master Standard and run it. Then, click Backup > File Backup subsequently.
Step 2. Click Files or Folders to select the data you want to backup to Synology.
Step 3. Click the inverted triangle > Select a network location > Add Network Location, then fill in the required information.
Step 4. Back to the main page, click Schedule and OK to enable daily incremental backup. It's the default backup settings in this software. Then, click Proceed button to finish.
Notes:
• Incremental backup requires all backups to be intact, otherwise subsequent backups will be invalid and the restore operation will fail. To ensure the most backups are valid, you could consider using daily differential backup (supported by the professional version).
• If you think the backup interval is too short, you can change it to weekly or monthly, depending on how often you may change files.
• If you want to manage backup disk space and delete file backup regularly, backup scheme on the paid version can do you a big favor.
• With a backup in hand, you can restore your files when something unexpected happens like hard drive failure, virus attack, etc.
Conclusion
With the help of the alternative to Synology Data Replicator, you can backup data on Windows 7/8/10/11 to Synology NAS. And the simplest way is to backup using file backup software Qiling Disk Master. With it, you can backup to various storage device, including NAS, cloud storage device, external hard drive, etc. And you can enjoy more features during the process, including Daily Backup, Weekly Backup, Event-trigger backup, etc.
Related Articles
- Backup Windows 7 Computer to Synology NAS Step by Step
- How to Backup Synology NAS to External USB Drive in Windows
- How to Backup Synology NAS to Cloud
- Backup Windows Server 2012 (R2) to Synology NAS

