Asus Recovery Partition Missing? Recreate A New One
Asus recovery partition missing problem
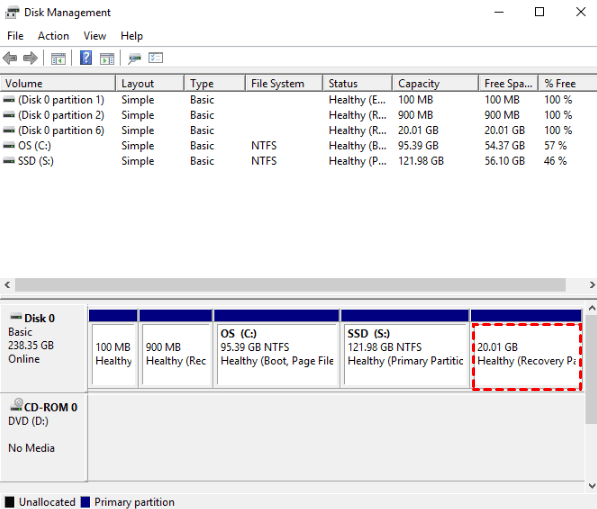
Asus recovery partition is a hidden partition containing a pre-load Windows operating system and has the ability to restore the computer to its factory settings in Asus desktop or all-in-one PCs. In fact, there are two types of recovery partition.
- Windows recovery partition: The Windows recovery partition is a hidden partition created during the installation of Windows on a disk. This partition typically takes up a few hundred megabytes of disk space and serves as a backup for the operating system.
- OEM recovery partition: The recovery media is a preloaded device provided by the original equipment manufacturer (OEM), such as Asus, Dell, HP, etc. It serves as a replacement for the attached CD/DVD that was commonly used in the past. The recovery media typically includes the operating system, drivers, and some preinstalled software.
Asus devices typically have a built-in recovery partition, which can be used to restore the system to its original state in case of a crash or system failure. The size of the recovery partition can vary depending on the specific model of the Asus device.
If you're experiencing issues with the Asus recovery partition F9 not working, don't worry, there are some possible solutions to try.
- You changed the original hard drive.
- You mistakenly delete recovery partition.
- The ASUS hard drive got crashed.
If you're experiencing issues with the Asus recovery partition missing, don't worry, there are some possible solutions to try.
I see that you're facing a problem with the Asus recovery partition missing after reinstalling Windows 8. Don't worry, it's possible to recover the factory Asus recovery partition. Here are some steps to help you out:
How to effectively repair Asus Recovery Partition missing
I see that you're facing a problem with the Asus recovery partition missing or damaged. Don't worry, it's possible to recover the factory Asus recovery partition. Here are some steps to help you out:
- If you're comfortable with the process and have the necessary skills, you can create a new recovery partition using the Asus ISO file. This method is more suitable for technicians and requires some technical expertise.
- If you're not comfortable with the more advanced method of creating a recovery partition with the Asus ISO file, you can use a third-party tool to create a recovery partition. This method is easier and more suitable for ordinary people.
You have two options to create a recovery partition: using the Asus ISO file or a third-party tool. Select the method that suits you best and follow the steps accordingly.
Solution 1: Create a new Recovery Partition with Asus ISO file
You can create a recovery partition in Windows 8 using the built-in tool, Windows Recovery Environment. Here's how to do it:
1. To create a Windows installation media using an Asus recovery disk ISO, follow these steps:
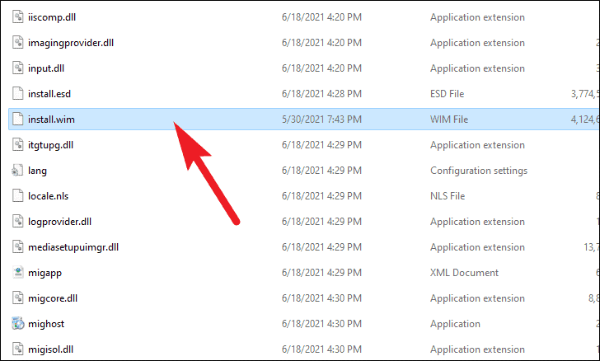
2. Search the sources folder for install.esd, which is the recovery partition that is currently useless. Move it to a location on your hard drive, and convert it to install.wim via some tools like WimConverter to make it work.
3. Copy the install.wim file to a new folder on C:\Win81-Recovery.
4. To register the recovery image, follow these steps:
- REAGENTC /SetOSImage /Path C:\Win81-Recovery\INSTALL.WIM /Index 1
- REAGENTC /Info
5. After executing the command line to register the recovery image, you should confirm that the operation was successful. If the operation was successful, you will see a confirmation message indicating that the recovery image has been registered.
Solution 2: Create a new Asus recovery partition with Qiling Disk Master
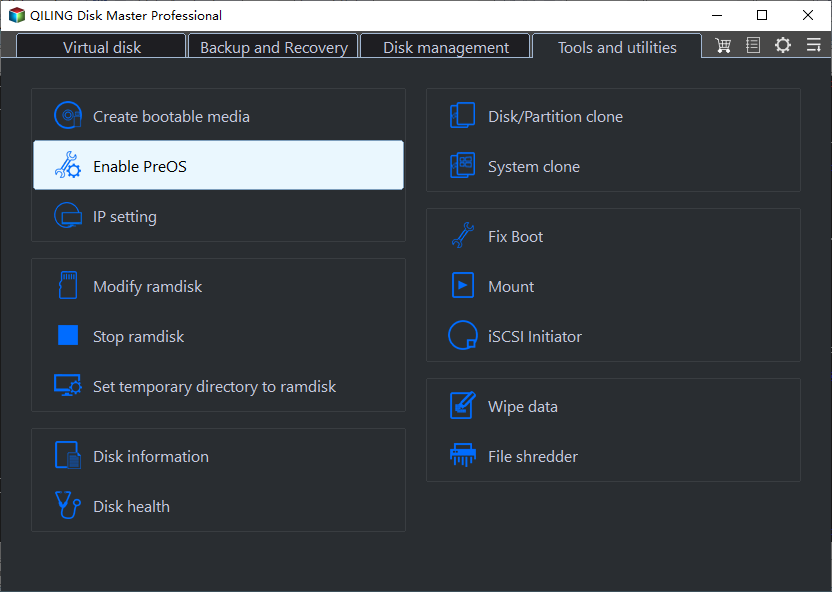
Qiling Disk Master Professional is a robust and user-friendly recovery software that not only helps to create a recovery partition but also provides a wide range of features to manage and maintain your computer's health. This software is compatible with various Windows operating systems, including:
- The recovery partition on your computer is a dedicated section that stores essential data, including:
- It is capable of scheduling system backup daily, weekly, or monthly to update changes in time. If the backup image is very large, you can choose to compress it to a smaller one to alleviate the disk space pressure.
- The software offers a convenient feature that allows you to quickly access it during the boot-up process. This feature is particularly useful for:
Are you tired of dealing with system crashes and data loss on your Asus computer? Look no further! With our innovative software, you can create a recovery partition and enjoy a hassle-free system recovery experience.
Are you looking for a solution to create a recovery partition for multiple Asus computers? Look no further! With our advanced edition of Qiling Disk Master, you can easily create a recovery partition for multiple computers, ensuring that your system recovery process is efficient and hassle-free.
1. Are you looking for a simple and efficient way to back up your system? Look no further!
2. Tick the first option to backup system to Qiling Disk Master partition. Then, click Next.
Tips:
- Backup Options: Are you looking for a more secure and efficient way to back up your system? Look no further!
- Scheduler: Are you looking for a reliable way to protect your system and data? Look no further!
- Are you looking for a reliable way to protect your system and data? Look no further!
3. Are you looking for a reliable way to protect your system and data? Look no further!
After a few minutes, your Windows operating system will be backed up and a recovery partition will be created in the selected partition automatically.
If this is a new computer that you just got, it is a factory image recovery partition. If not, it will be a custom recovery partition with everything for system recovery.
Tips:
- For GPT disk, you will get two partitions: Qiling (boot partition) and Qiling Recovery Partition (contains system image file suffix with .fvd).
- For MBR disk, you will get only one Qiling Recovery Partition.
- All these two partitions are hidden by default.
- This powerful software is also applied to other brands of computers, like HP, Lenovo, Acer, Dell, Toshiba, IBM, etc.
If you're experiencing issues with your Asus system and need to recover it to an earlier state or factory settings, you can use the OneKey Recovery system. This feature allows you to restore your system to its original state, which can be helpful in resolving various problems, including the Asus Recovery Partition missing issue.
Can I restore from Asus Recovery partition quickly?
If you're experiencing issues with your Asus system and need to restore it to its factory settings, you can use various recovery tools to achieve this. Here are some options you can consider:
Nevertheless, you might encounter Asus Backtracker failed to create factory default backup and if you are running Windows XP, Vista, 7, or 10/11, you will get the error "ASUS Backtracker does not support your system".
Besides, you can also use a recovery image created by Qiling Disk Master to help you. By comparison, it will keep your programs and data as much as possible, depending on if you back it up. Refer to the steps in the Lenovo desktop factory reset.
Summary
Hope this article can help you repair Asus recovery partition missing and Asus recovery partition F9 does not work issue, so you can easily recover Asus from recovery partition in the event of a system crash, disk failure, or other issues.
In the event of a system crash, disk failure, or other issues, having a customized recovery image can greatly reduce data loss. A recovery image is a pre-configured recovery environment that includes the operating system, programs, and data, making it easier to recover your system.
Related Articles
- How to Use Asus Recovery Key to Restore System When It Fails
When system fails to boot up in Windows 10/8/7 Asus computer, users can easily restore it back to factory default settings from Asus recovery hidden partition making use of Asus system recovery key. Solution to Asus recovery key not working is also included. - Windows 7 Recovery Partition Is Missing or Lost? Fixed!
Find Windows 7 recovery partition is missing or lost? Ease your mind and follow this article to resolve the issue easily. - How to Factory Reset ASUS Laptop with ASUS System Recovery Partition
In this article, you will get how to factory reset your computer with ASUS recovery partition in Windows 7/8/10. Here are x ways, you could try it according to your situation. - Top 5 Ways to Windows 10 Recovery Environment Missing
Windows 10 Recovery Environment is missing? Don't worry, here we show you 5 solutions for you to fix Windows 10 could not find recovery environment error easily.


