How to Recover Files from Erased Hard Drive on Mac
Quick Navigation:
- Best Erased Hard Drive Recovery Software for Mac to Rescue Files
- Your Effective Recover Erased Hard Drive Mac Software
Unfortunately, if you've already erased the hard drive on your MacBook Pro, it's unlikely that you'll be able to recover your data. However, if you act quickly, you may be able to recover some or all of your files. The first step is to stop using the MacBook Pro immediately. Next, you can try using a data recovery software like Disk Drill or Data Rescue to scan the erased hard drive for any recoverable files.

When you experience an issue on your computer, remain calm and take action to resolve the problem. If you've caused an expected issue, such as data loss, you can easily restore data from your Mac hard drive or recover an erased hard drive on Mac. Accidental erasure is common, and if you haven't used a secure erase tool like �iling File Shredder, you can recover your erased files. To do so, simply follow the necessary steps to recover erased hard drive on Mac.Qiling File Shredder, you can recover your erased files. To do so, simply follow the necessary steps to recover erased hard drive on Mac.
Stop using the erased hard drive immediately to prevent new data from overwriting the deleted files, making it difficult to recover them.
To recover erased data from a Mac hard drive, first, ensure the hard drive is not overwritten. Then, apply a powerful erased hard drive recovery software, such as Deep Data Recovery for Mac, which can restore the erased data to its original hard drive. A professional tool is necessary for this process, and with a few steps, Deep Data Recovery for Mac can successfully retrieve files from an erased hard drive.
Best Erased Hard Drive Recovery Software for Mac to Rescue Files
Your Effective Recover Erased Hard Drive Mac Software
- Recover deleted files from a hard drive that has been erased, deleted, formatted, initialized, or reinstalled.
- Restoring all erased hard drive data, including images, videos, music, documents, and other files, is a complex process that requires specialized software and expertise. The goal is to recover deleted or lost data from a hard drive, which can be caused by accidental deletion, formatting, or physical damage.
- The tool for undoing a disk utility erase on Mac is fully compatible with file recovery under Mac OS X 10.6 and later.
Deep Data Recovery for Mac fully supports all macOS, including macOS 11.0 (Big Sur), allowing you to install it on your MacBook or iMac running on any macOS. To recover an erased hard drive on Mac, follow these steps.
- Download Erased Hard Drive Recovery Software for Mac
- Cancel the file types you don't need
- Select Hard Drive to Scan
- Preview and select recoverable files to save
To recover data from your Mac, first download and install Qiling Data Recover on your computer, following the same process as installing other software. This tool is secure, so feel free to proceed with the installation.
Launch the software on your Mac. It fully supports documents, photos, videos, archives, etc. Uncheck unwanted file types to shorten the scanning process. Then, click "Next" to start the erased files recovery process.

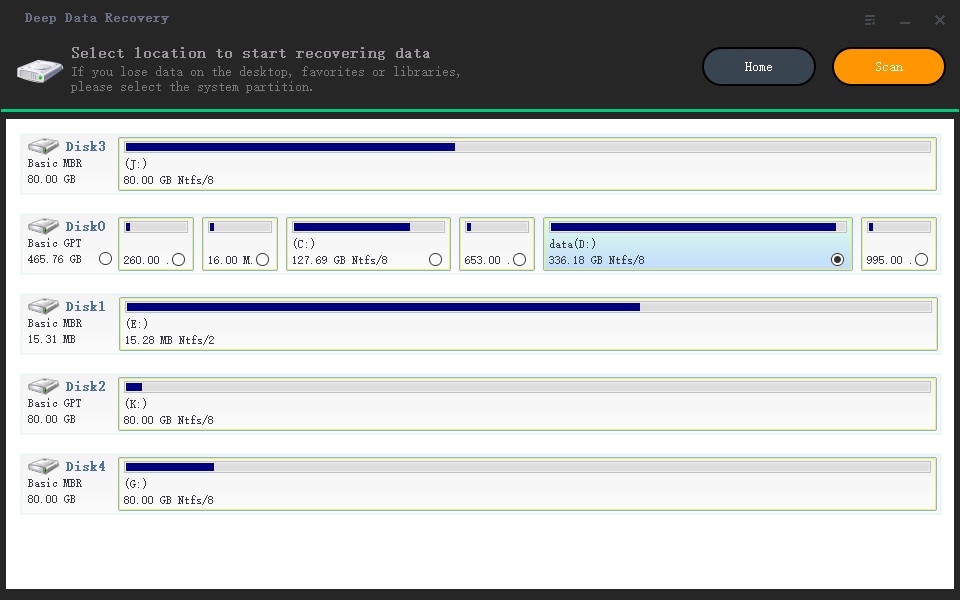
To recover data from an erased hard drive on a Mac, select the hard drive from the list of volumes in the next window, and then click the "Scan" button to initiate the scanning process. This will allow you to recover your lost files.

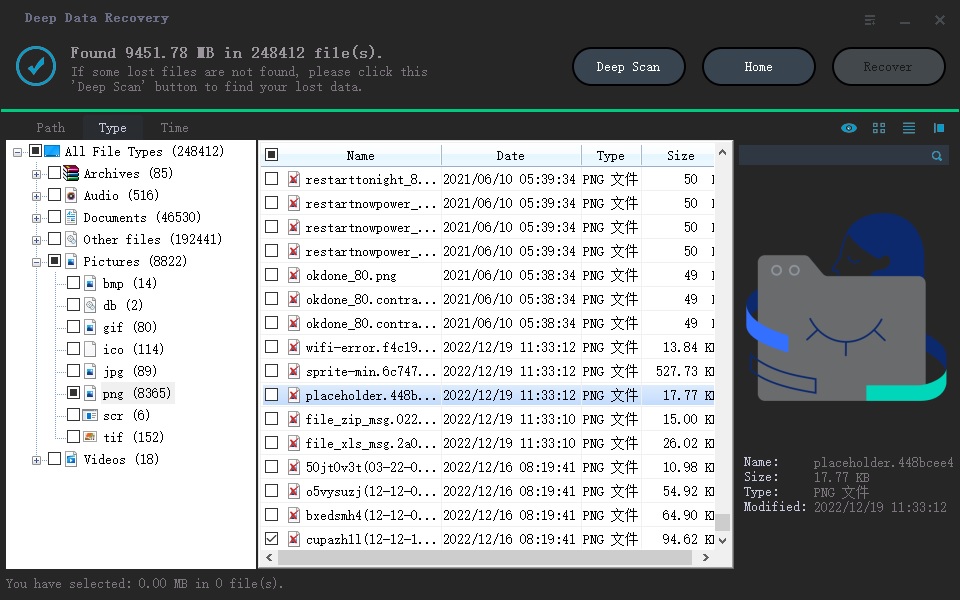
After scanning, all found files are displayed in the main window, sorted into categories. Select a category and unfold it in the left side to preview file details on the right. Find the target files, click "Recover", and save them back to your Mac.

If you're not satisfied with the scanning process, you can try the "deep scan" feature, which scans for deleted files more thoroughly, although it may take longer. This can provide a better result.
Related Articles
- Recover Data from a Wiped Hard Drive
- How to Recover Data from Unmounted Hard Drive
- Recover Deleted Files from SD Card on Mac
- Recover Data from BitLocker Encrypted Drive in Windows 10