TestDisk Data Recovery – How to Use TestDisk Recover Files
Quick Navigation:
- Advantages of TestDisk
- Disadvantages of TestDisk
- How to Recover Files with TestDisk
- 5 Best Alternatives to TestDisk
- 1. Qiling Free Data Recovery
- 2. EaseUS Data Recovery Free Wizard
- 3. Undeletemyfiles
- 4. MiniTool Data Recovery Software Free
- 5. Stellar Free Data Recovery
- Frequently Asked Questions
TestDisk is an open-source data recovery tool that can run on various desktop operating systems, including Linux, Windows, macOS, FreeBSD, OpenBSD, and NetBSD, without the need for installation. Its ease of use makes it a popular choice among users, and it can also perform additional tasks beyond file recovery.
- 💽 Check disk data structure and repair the corrupt partition table
- ✏️ Rebuild FAT12/FAT16/FAT32 boot sector
- 🛠️ MFT mirror function supports repairing MFT
- ↩️ Restore FAT32 boot sector from a backup
- 🗃️ Undelete files from exFAT, FAT, ext2, and NTFS filesystem
TestDisk, a powerful data recovery tool, boasts many excellent features, but its command line interface can be confusing for many users. Fortunately, this guide will walk you through the process of using TestDisk and explore alternative options that may better suit your needs.
Advantages of TestDisk
Here are the benefits of TestDisk in one paragraph:
- 🆓 This tool is great because it's completely free and open-source, which is a huge advantage, especially given its impressive features.
- ✅ TestDisk is a powerful data recovery tool that excels in handling various filesystems and devices, making it a reliable choice for recovering data from a wide range of devices and operating systems. Its open-source nature allows for further customization and expansion of its features.
- 🔥 The OS support of this tool takes the experience to the next level, allowing it to work with a wide range of scenarios. Not only can you run it on any normally running OS, but you can also run it as a bootable service if needed to fix your computer's internal storage.
Disadvantages of TestDisk
Being a tool of this caliber, TestDisk could potentially put file recovery in a tight spot. However, this software works incredibly well, and the only disadvantage for the average user is that it's that effective.
- 😦 The software's user interface is its main drawback, making it difficult for novice users to navigate, and potentially causing them to abandon the system.
The current software is outdated and less user-friendly compared to modern tools, which can perform the same tasks with greater ease and simplicity.
In the next section, we will demonstrate how to use TestDisk to recover permanently deleted files in Windows 11, 10, 7, and Mac.
How to Recover Files with TestDisk
To recover deleted files using TestDisk, start by running the program and selecting the undelete feature. Then, choose the disk where the deleted files were located and select the file system type. Next, select the partition where the files were deleted and choose the file system type again. After that, select the type of file you want to recover and TestDisk will scan the disk for deleted files. Once the scan is complete, you can preview the recovered files and select the ones you want to save.
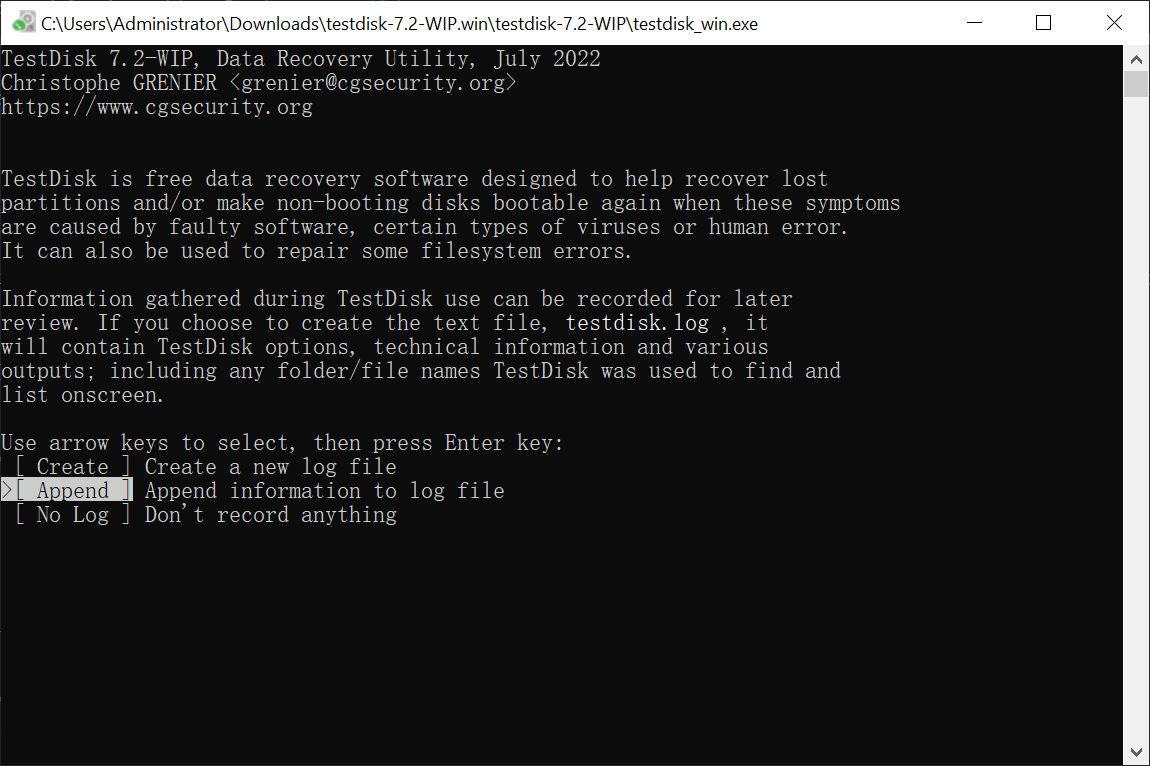
- To start the TestDisk recover deleted files process, run the program and choose the "Append" option.
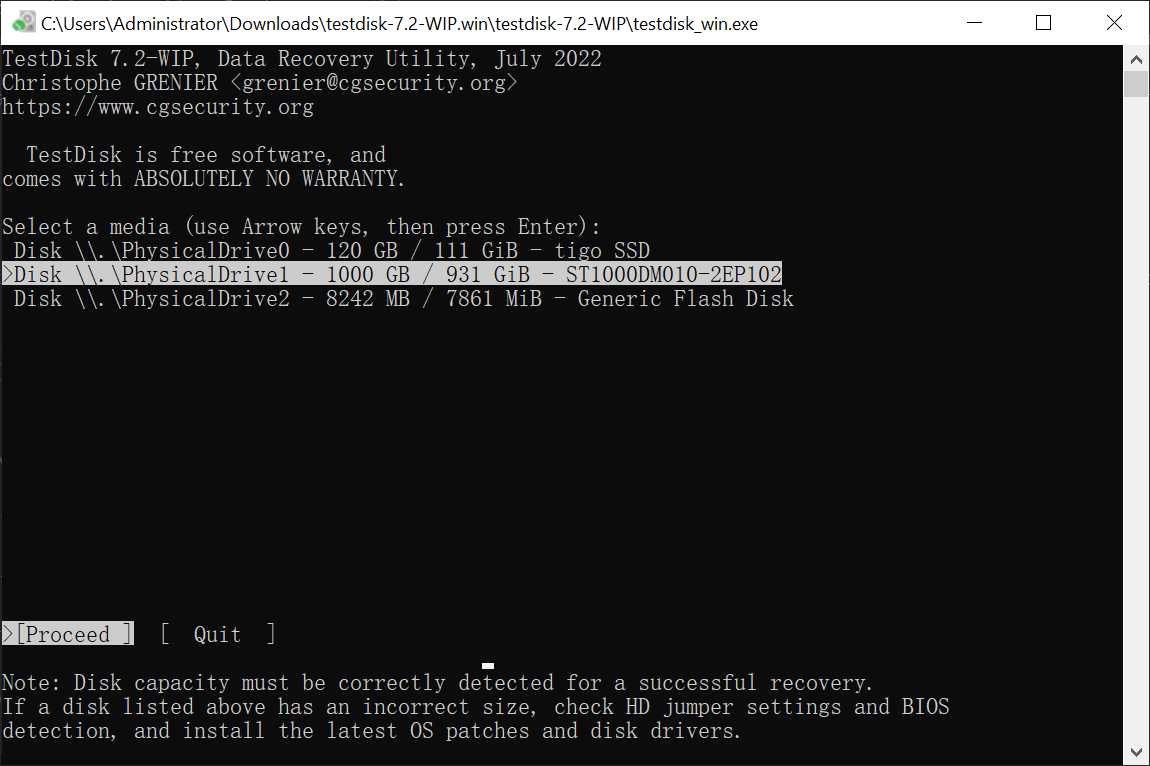
- Select the disk you want to recover deleted files from and then choose the 'Proceed' option.
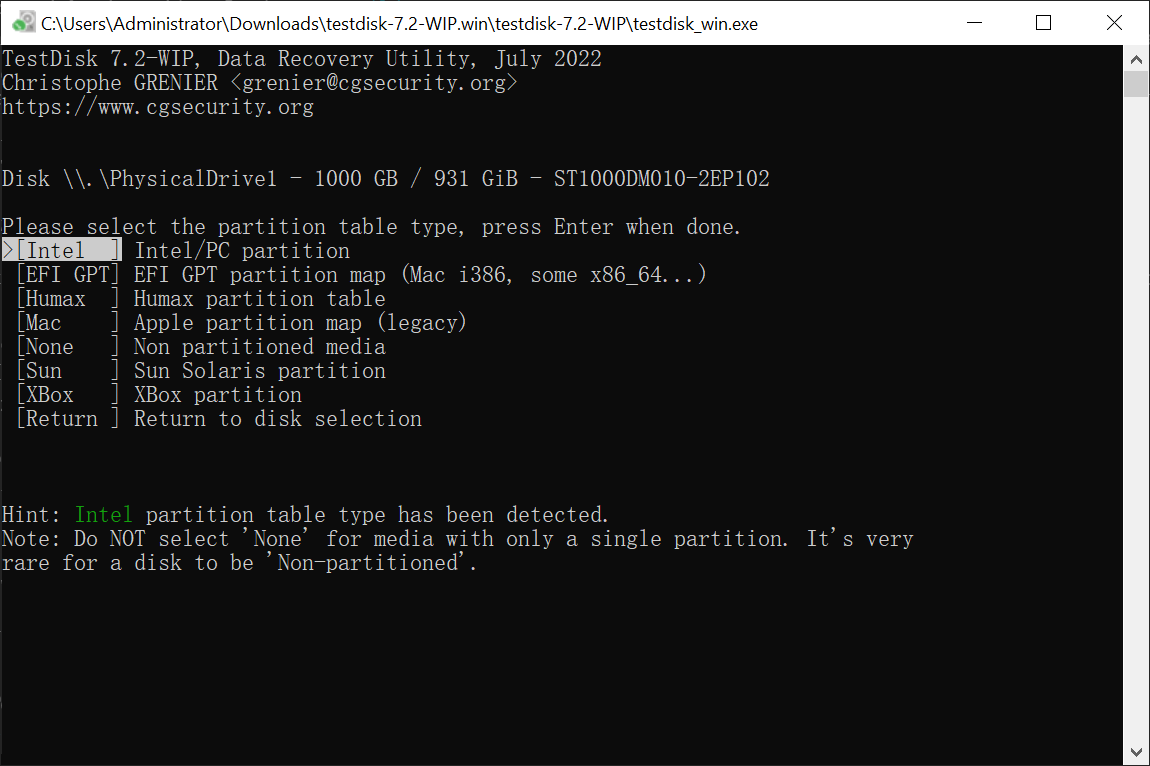
- You want me to select the partition table type and press Enter when done. I'll do that.
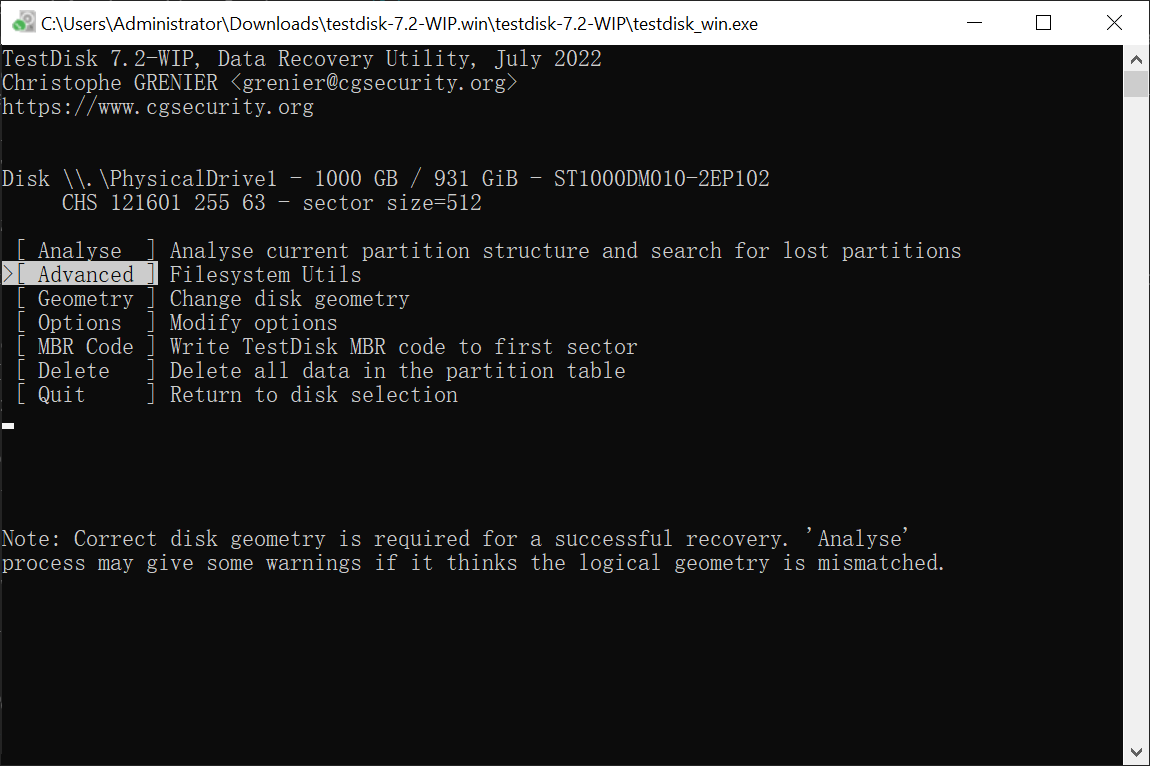
- To recover deleted data, select the 'Advanced' option, choose the target partition, and then select the 'Undelete' option at the bottom of the screen.
- TestDisk will now show all deleted files on the selected partition, allowing you to browse and select the desired file. Once selected, press 'C' to copy the chosen file for recovery.
- The process involves selecting a destination to paste the recovered files, confirming the selection, and then clicking 'C' to complete the operation.
- Finally, open the folder where the saved data is to check for any missing files.
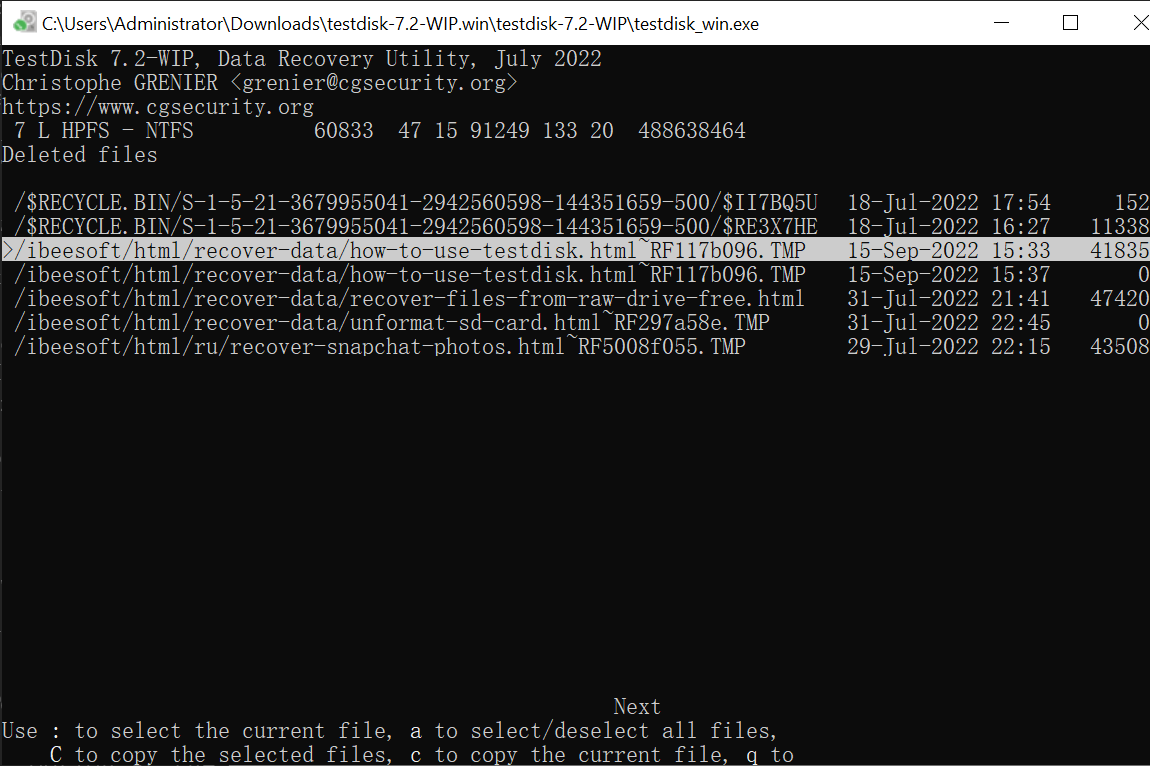
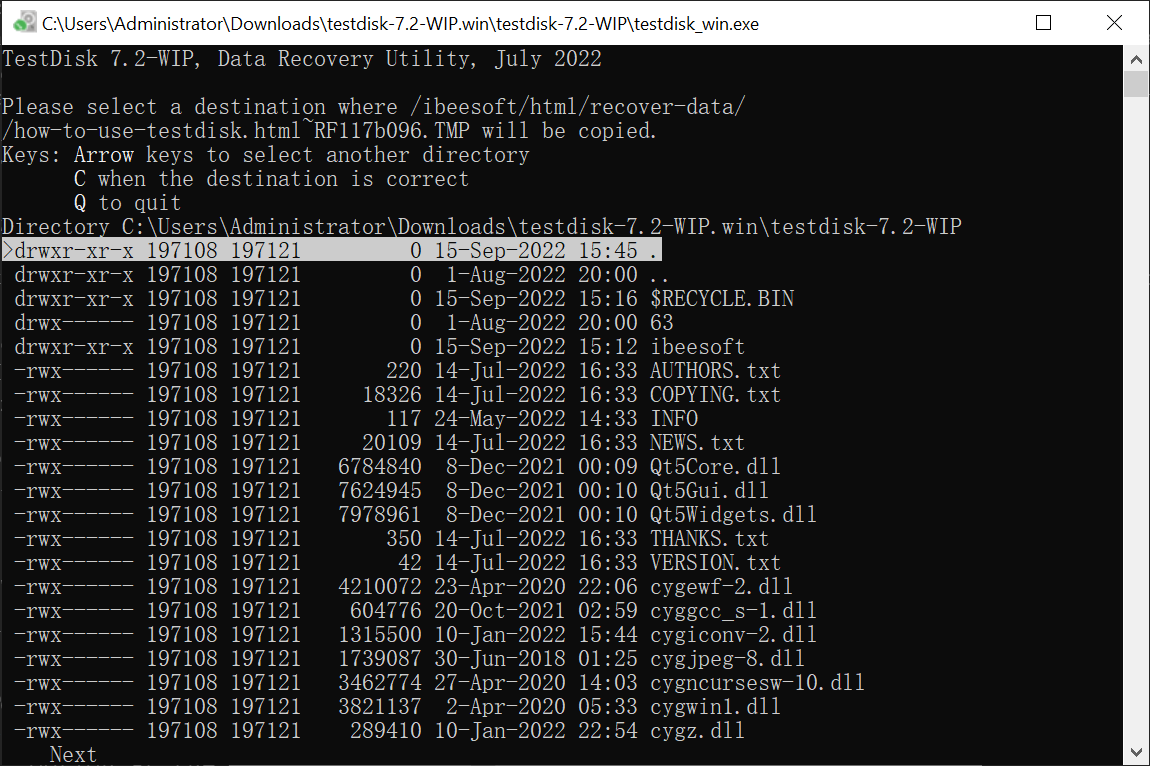
When using TestDisk for data recovery, it's crucial to keep the original partition untouched to maximize chances of recovering data, including photos, as any overwriting can significantly reduce success. If TestDisk doesn't yield the desired results, developers recommend trying PhotoRec for improved success.
5 Best Alternatives to TestDisk
TestDisk offers a wide range of recovery options, including restoring deleted partitions and recovering deleted files from Windows 10, 11, and more. However, its lack of a proper user interface can be frustrating for many users. If you've tried TestDisk and weren't satisfied with the results, there are alternative options available, and we've compiled a list of the top five alternatives for you to consider.
1. Qiling Free Data Recovery

Qiling Free Data Recovery is a top choice for its ability to satisfy both novice and professional users. It supports hundreds of file formats, making it easy to recover even the most hidden files, and works well with all major file systems. As a result, it can be a solid alternative to TestDisk for recovering files on Windows, especially when dealing with different types of storage media.
- Advantages:
- Highly intuitive and easy-to-use application
- Free recovery up to 2GB
- It can also automatically repair damaged files while extracting lost data.
- The best data recovery software for Windows 11, 10, and macOS also offers a preview feature that lets you select the files you want to recover in case you try to minimize your system load or stay within the free recovery limit.
- Disadvantages:
- The deep scanning process can take a long time
2. EaseUS Data Recovery Free Wizard
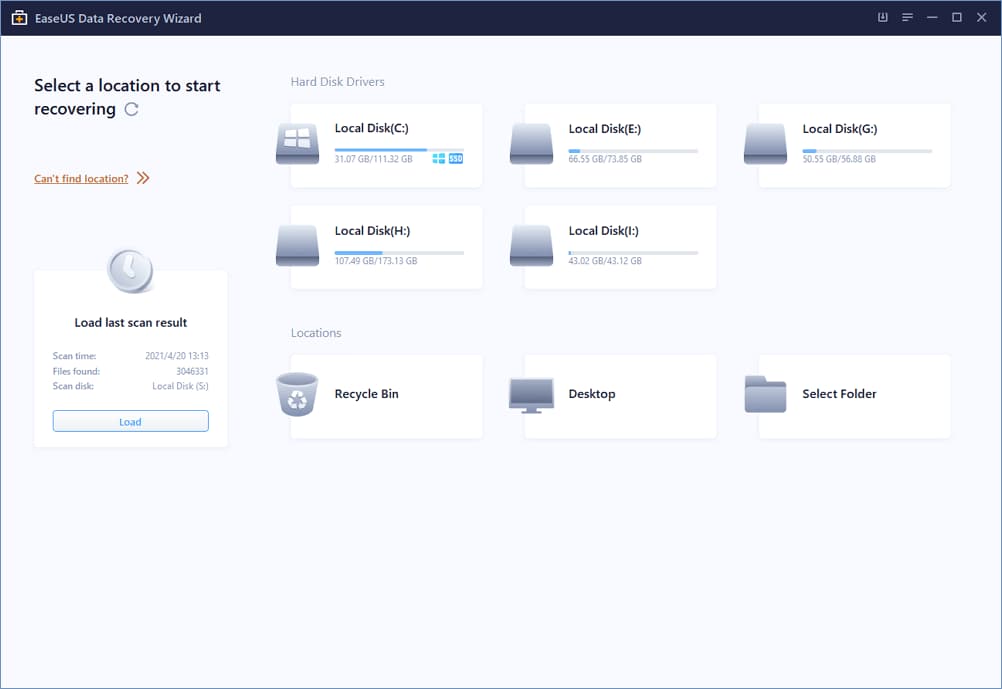
Another great TestDisk recover files windows alternative is the EaseUS Data Recovery Free Wizard, which supports all major file systems and can recover various file formats. It offers perfect recovery speed, making it critical in some scenarios, and can also be used for recovering mailbox data and databases. The tool's website provides comprehensive support documentation to make the process even more accessible, offering help to those in need.
- Advantages:
- Intuitive UI with a straightforward design and good support documentation
- 1GB recovery free, 2GB of files can be recovered for free after sharing to social platforms
- Recovery speed is better than most other tools in the market
- Disadvantages:
- The biggest drawback with this service is that if you need to recover more than 2GB, you must pay a hefty amount, either as a subscription fee or as a large one-time payment.
3. Undeletemyfiles
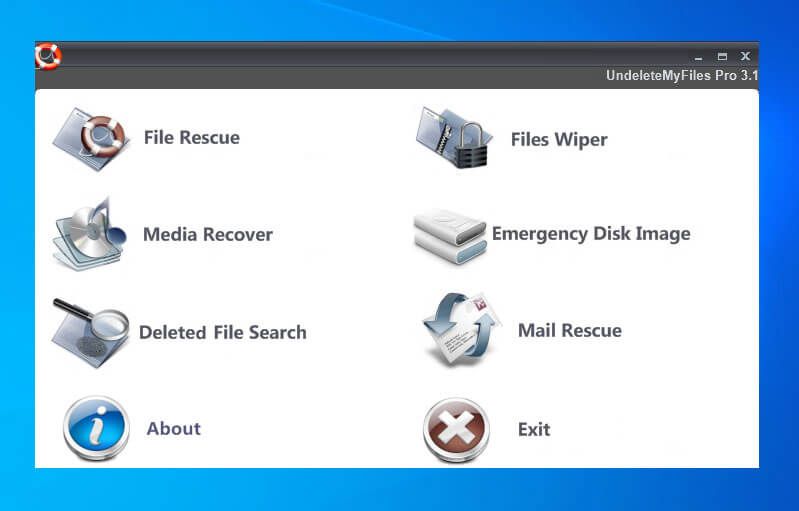
Undeletemyfiles Pro is a top-notch free hard disk recovery software, thanks to its user-friendly interface and comprehensive features. It allows for the recovery of individual files and entire partitions, with a handy preview feature for selecting specific files. The recovery process is also effective, yielding good results for the most part. Additionally, the software offers other useful features like mail rescue and disc image creation, making it a solid all-in-one solution. However, the only drawback is that the development has ceased, resulting in no further updates or support.
- Advantages:
- A great option for file recovery among free tools
- A combination of features makes it a jack-of-all-trades
- Quick scan brings up the most common files easily
- You can use it to recover emails as well
- Disadvantages:
- No deep scan option or custom scanning feature is available
4. MiniTool Data Recovery Software Free
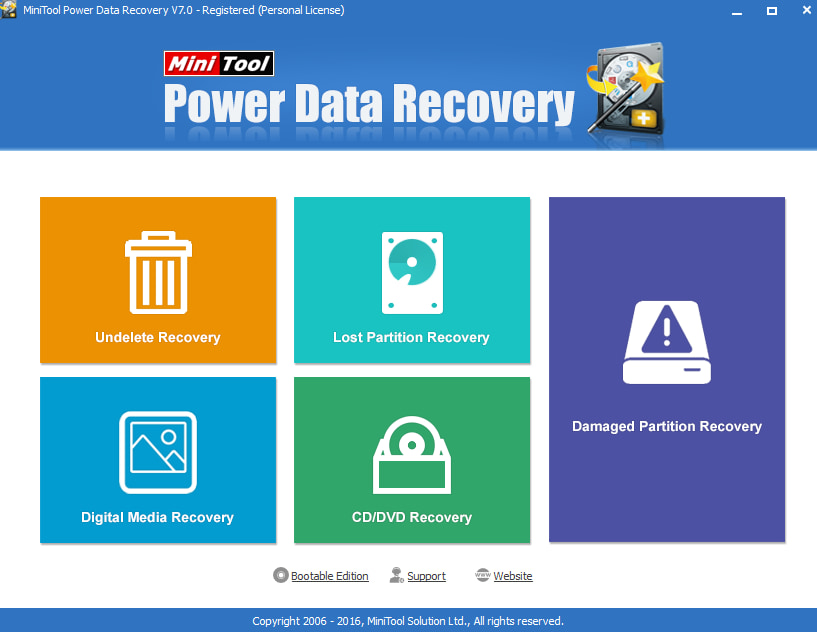
MiniTool Power Data Recovery is an excellent tool for recovering files from various storage media. It supports all popular file formats and can quickly recover files from internal and external drives. The scan process also offers a preview function, allowing you to select which files to recover, making it a helpful option for restoring limited data using the free recovery feature.
- Advantages:
- Well-designed software with an easy-to-understand interface
- It comes with the option to perform recovery as bootable media
- You can use it to restore media from DVDs and CDs
- The tool offers up to 1GB of free data recovery before you need to make any purchasing decision.
- Disadvantages:
- Software window does not minimize when performing recovery
5. Stellar Free Data Recovery
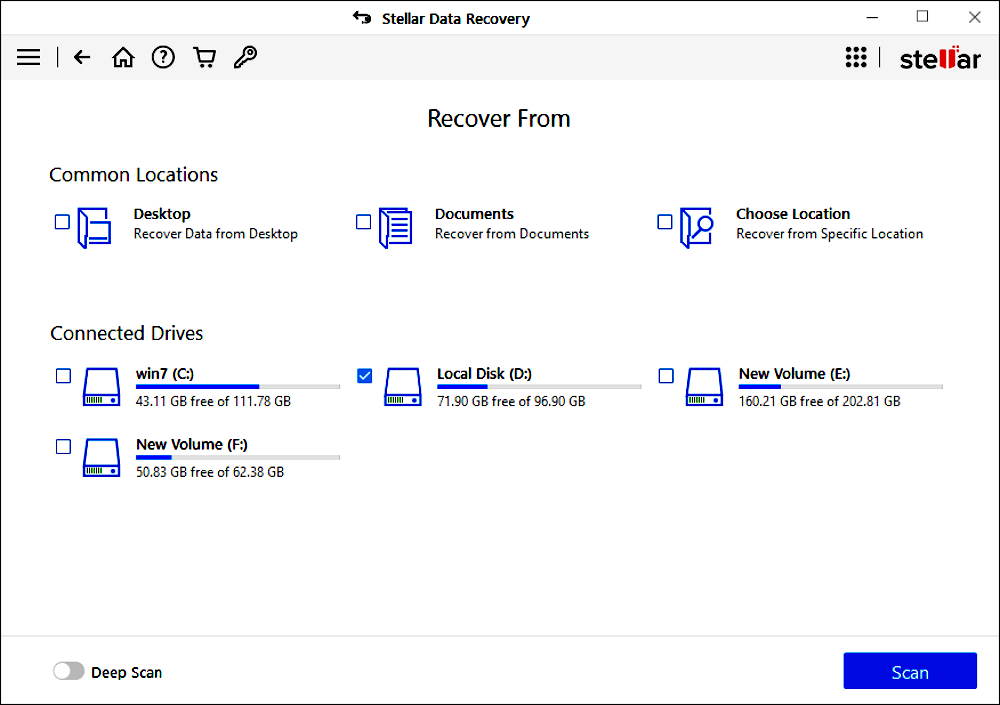
EaseUS Data Recovery Wizard is the go-to tool for the most challenging recovery scenarios, such as completely crashed devices and file systems. With a high success rate, it can even tackle hopeless cases effectively. The broad device support allows connection to any commonly used media storage and device, giving a good chance of recovering files. The plain and intuitive UI design makes navigation and recovery super easy, making it a reliable and user-friendly solution.
- Advantages:
- Excellent track record of recovery, even in the most challenging scenarios
- Intuitive UI design makes navigation and recovery easy, even for the most novice users
- File previewing option available for selective file recovery
- Free Restore up to 1 GB of data on the Windows PC
- Disadvantages:
- Recovery speed is relatively slow.
Frequently Asked Questions
-
TestDisk offers users the ability to recover lost partitions which can be used as an option to recover your windows drive.
-
To restore an entire folder, you will need to identify the partition where it is located, let the program search for the deleted files, and then copy the files that belong to the folder you wanted to recover to your destination drive.
-
Yes, TestDisk is entirely free of charge.
-
Yes, TestDisk is compatible with Windows 10. It also works on macOS, Linux, DOS, and other operating systems.
-
Follow these steps to recover files from a formatted hard drive free:
- Run TestDisk on your computer as Administrator
- Create a log file if you want
- Select the hard drive you want to recover files from on the next screen
- Select the partition table type (the default option will be highlighted, so select that)
- Select the 'Advanced' option on the next screen
- Highlight the 'Undelete' option on the next screen using arrow keys
- Let the app display all the recoverable files, and then navigate through them to select the file you want to recover.
- Press 'c' on the highlighted file to copy it
- Please select the destination folder in the next screen to paste the selected file to it
You can repeat this process as often as possible until you have recovered all the files. Ensure to avoid recovery failure and not overwrite the formatted hard drive.
Related Articles
- The 5 Data Recovery Services Near Me in Columbus, OH (2023)
In Columbus, data recovery services are commonly accessible. You may recover any digital data that was mistakenly lost with the assistance of these local businesses. We provide a list of data recovery services in Columbus, OH. - The Best 6 Data Recovery Services Near Me in Dallas, TX
How can I locate the top data recovery services in Dallas nearby? This chapter shows about 10 excellent data recovery services in Dallas, Texas. Once you've read the section, you'll receive comprehensive information. - Best Data Recovery Services in Denver, Colorado | Top 6
You've come to the right place to find the best data recovery services in Denver. You can easily restore lost data with the recommended top six data recovery labs. Keep reading to explore detailed information. - Ace Data Recovery Services Near Me in Houston, TX | Top 10
How to find the best data recovery services near me in Houston? You can learn ten ace data recovery services in Houston, TX, in this passage. You'll get detailed information after reading the passage.