How to Partition a Hard Drive in Windows 7 Without Formatting?
What the purposes of partitioning a hard drive?
In Computing hard drive, a partition is a section of a hard drive, like hard disk drive, solid state drive. It is essential to store system and data. Besides, lots of Windows hard drives contain a "Recovery Partition", which keep files used to restore and repair your PC.
Sometimes, people may need to partition a hard drive in Windows 7, 8, 10 for the following 2 purposes.
● Better manage hard drive: It helps you to organize data and files, such as videos, photos, and applications, especially if you need to keep a large amount of data on your hard drive.
● Protect system and data: Most computer manufacturers create a C drive (boot partition) when they bring a new PC to market. But it is ricky because once the partition encounter an issue, all the data can be lost or corrupted. And separate partitions on your disk don't affect each other, and provide better security for your system and data.
Next, we will guide you on how to partition a hard drive in windows 7, 8, 10, without formatting.
How to partition a hard drive in Windows 7 without formatting (2 Methods)?
There are two methods of partitioning a hard drive listed on this part. You can use the Windows built-in tool-Disk Management or GUI freeware-Qiling Disk Master to perform it.
✍ Note: You need to check the partition style of your disk before partitioning it. A MBR disk supports only 4 primary partitions at most, or 3 primary partitions plus 1 extended partition, while a GPT disk can create 128 primary partitions. And you can convert a MBR hard drive to GPT if it reaches the limit.
Content:
- Partition a hard drive with Disk Management
- The best way to partition a hard drive in Windows systems
Partition a hard drive with Disk Management
Step 1. Open your PC, and press "Win + R" to launch Run box, and type "diskmgmt.msc" and press Enter to open Disk Management.
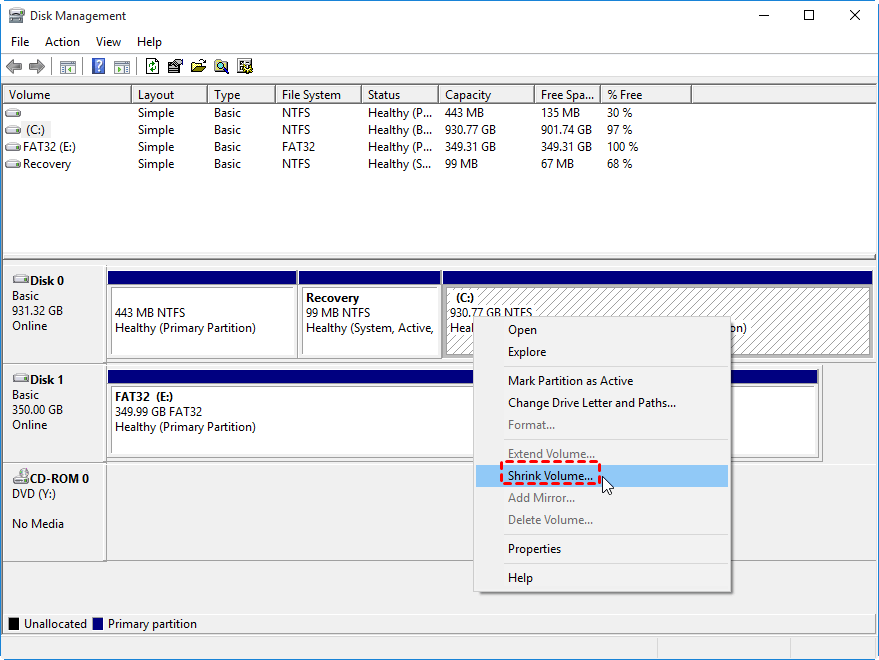
Step 2. And you will see all the disks and partitions demonstrated on the Disk Management window. And right-click on a partition, and choose "Shrink Volume".
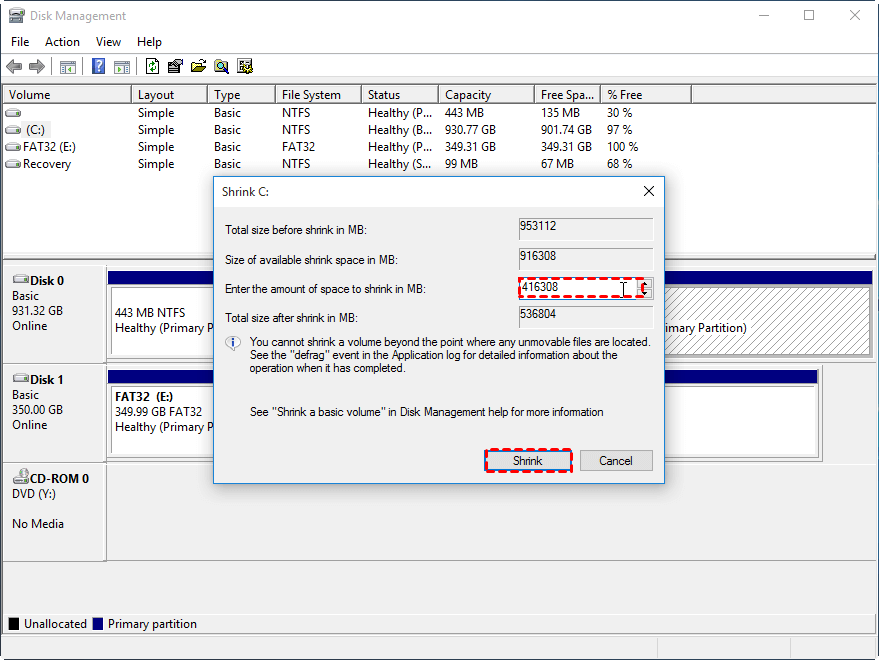
Step 2. And enter an amount of space that will be the maximum size of the new partition. And press "Shrink".
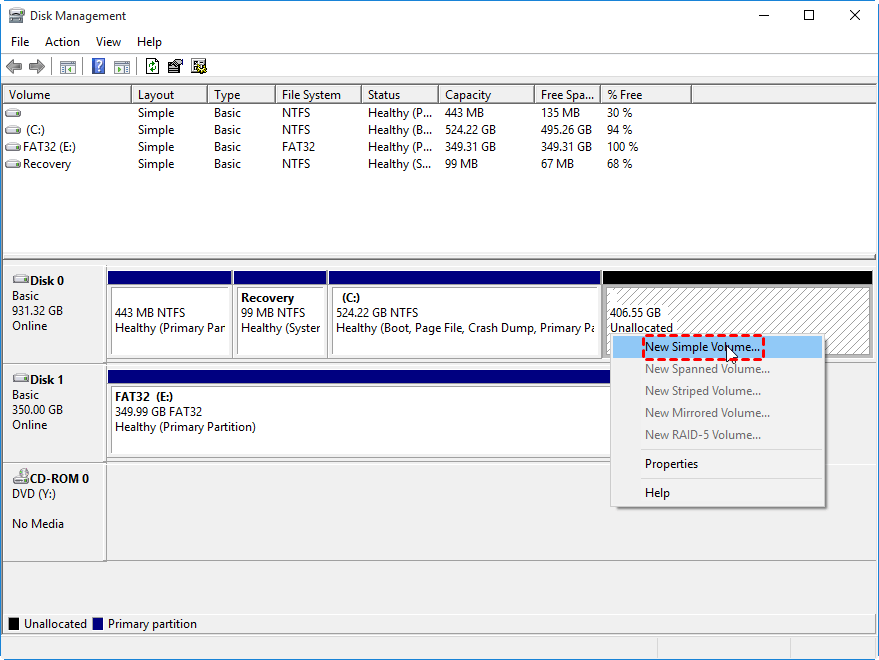
Step 3. When the shrink operation is complete, the reduced space will become unallocated space. And right-click on it, and choose "New Simple Volume".
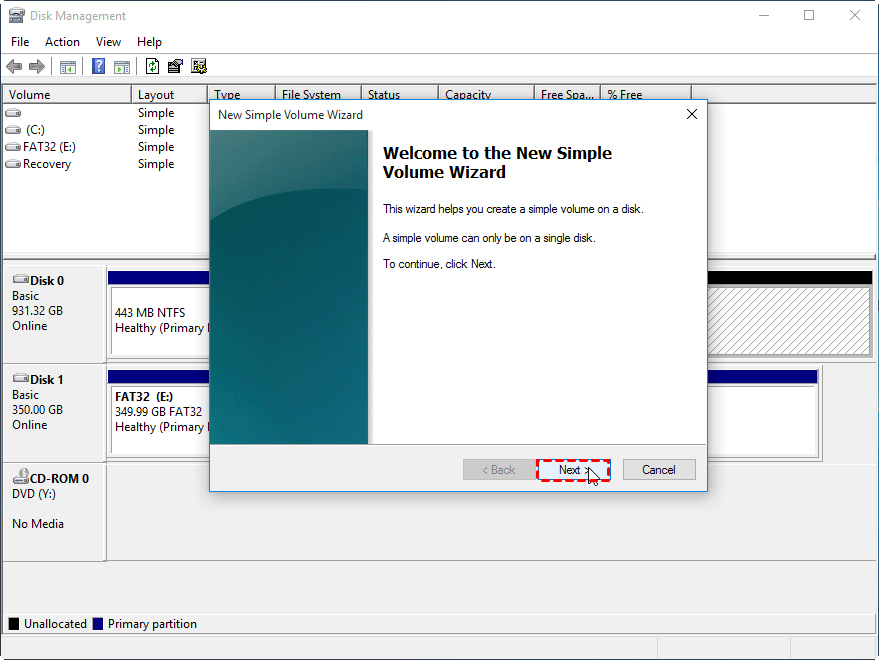
Step 4. And the creating new volume wizard will be launched, and choose "Next".
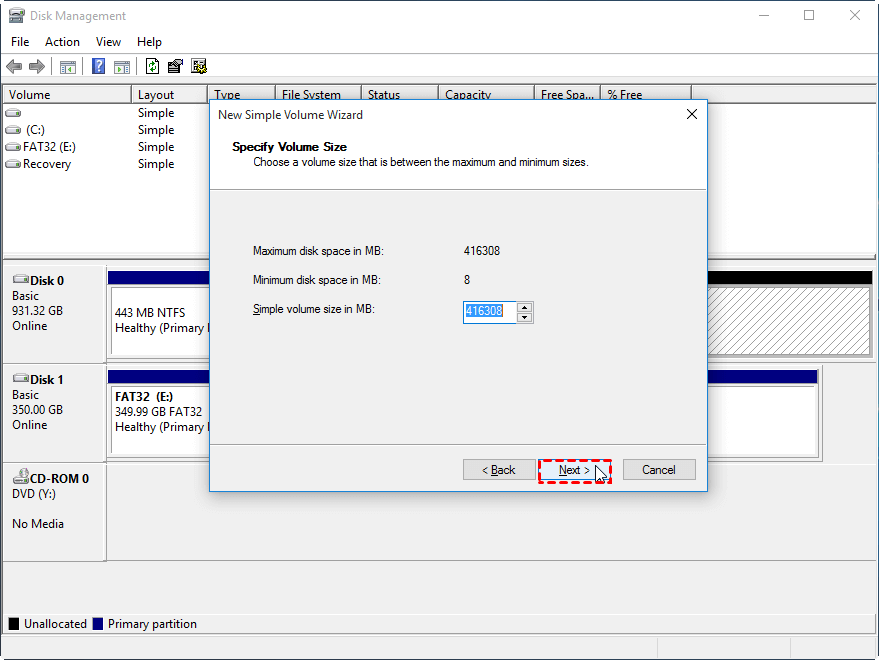
Step 5. And enter the new partition size in this window.
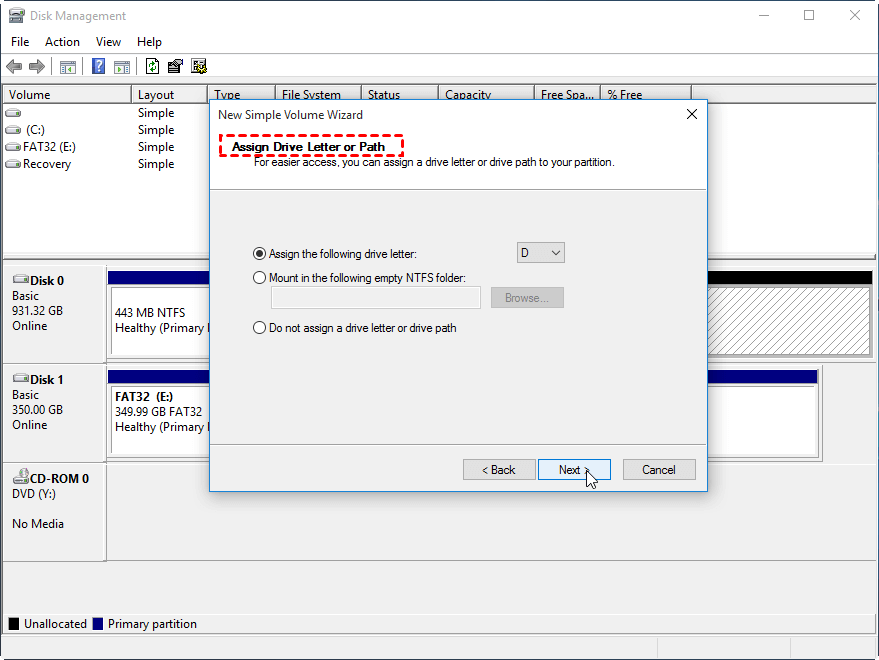
Step 6. Pick a letter for the new partition. And click "Next".
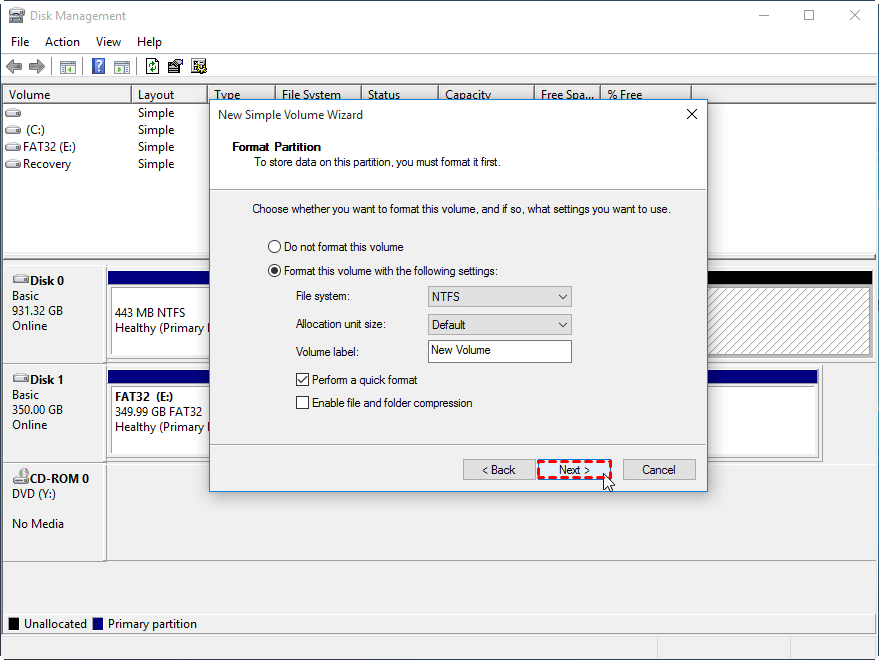
Step 7. And it will pop up a format wizard, you can choose "Do not format this volume" and click "Next". If you want to format it. NTFS and FAT32 file systems are recommended, and click "Next".
And waiting for the process get finished. And you will see the hard drive is divided into 2 partitions/volumes. And you can repeat the steps to create more partitions.
But this method is tedious, shrinking a partition is neccessary if there is no unallocated space. And as a lightweight partition and disk managing tool, it has lots of limitations making it not that convenient. For example, it needs an adjacent unallocated space when you want to extend a volume.
Best way to partition a hard drive in Windows systems
You can employ a professional disk managing freeware named Qiling Disk Master Standard. It provides multiple ways to partition a hard drive in Windows 7. You can directly create a new partition or volume on free space or unallocated space without formatting. And it has more features including resize, delete, format, copy partition.
Then you can download this freeware and follow the steps below to see how it works.
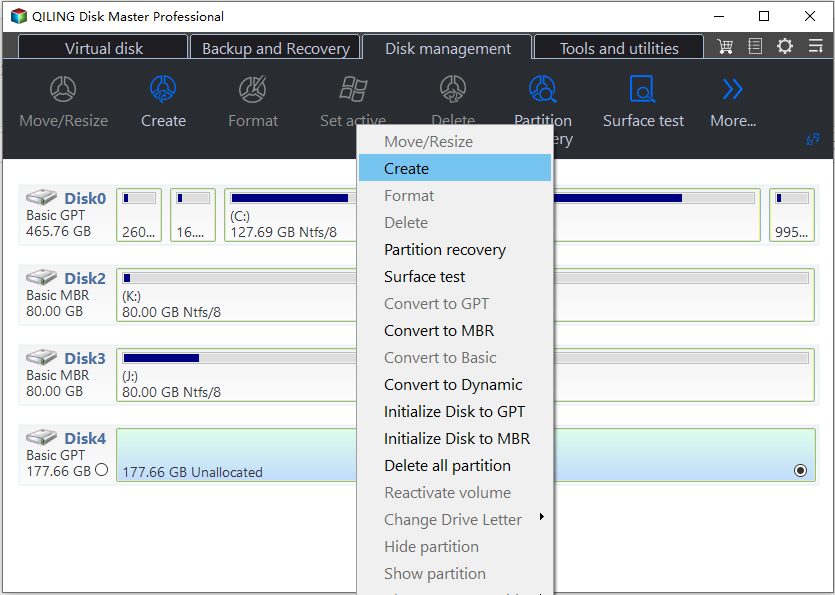
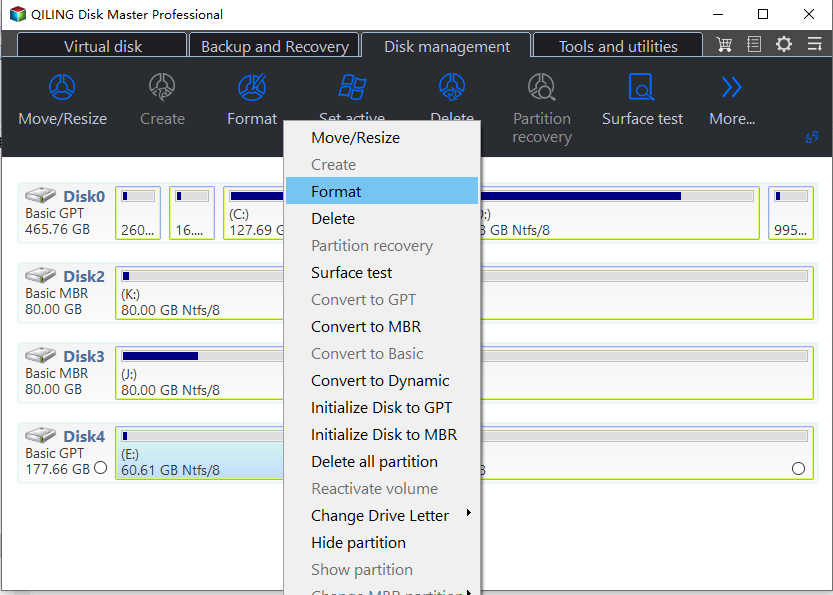
Step 1. Install and open Qiling Disk Master, and right-click on a partition that has enough free space, or unallocated space, and choose "Create Partition".
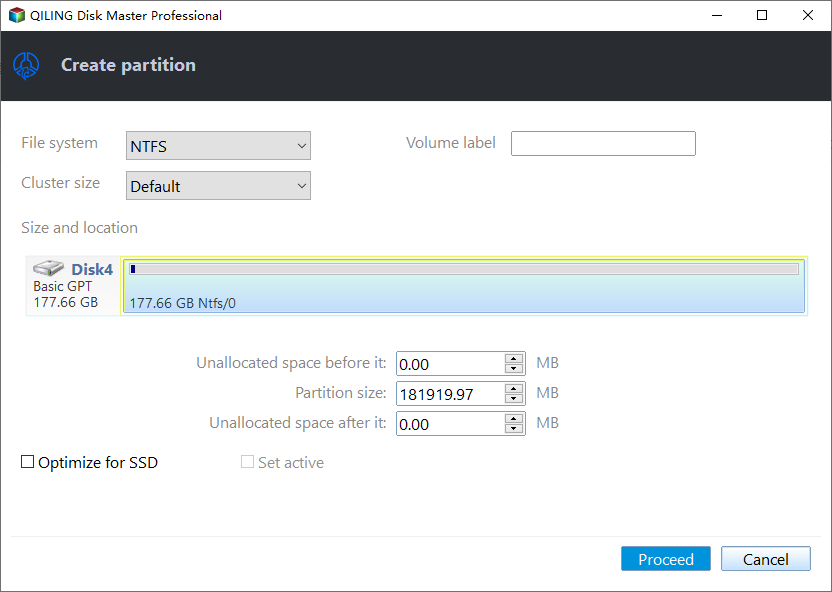
Step 2. And you can adjust the size of the new partition, and assign the drive letter, decide the file system in this window.
Step 3. And you can preview the change and click "Proceed" to commit the operation.
● Additional content: Partition a new hard drive in Windows 7, 8, 10 before installing Windows
If you want to create multiple partitions at a times before installing Windows, you can upgrade to Professional edition. It helps you to create a bootable WinPE USB and use its "Quick Partition" features that allows you to quickly partition a hard drive.
1. Just install and launch Qiling Disk Master on another PC, Choose "Create Bootable Media" in the main interface. And follow the instructions.
2. After creating the bootable USB, insert it to your PC, and turn it on, and enter BIOS to set the USB as boot drive.
3. Then you will see the Qiling Disk Master shown on the screen. And click "Quick Partition" on the Disk Operation column, you can see the window shown as below. Here you can set partition size, label, partition type, and disk type, etc. And click "Start Partitioning".
Conclusion
This is how to partition a hard drive in Windows 7. By contrast, Qiling Disk Master is the best way to perform it. Providing its concise interface, it can finish the operation easily and safely, even a 500GB, 4TB hard drive. Besides Windows 7 system, it also enables you to partition an HDD/SSD/USB drive in Windows 10, 8, XP, Vista. If you are using Windows Server, you can use Qiling Disk Master Server.
Related Articles
- How to Repartition Hard Drive without Losing Data in Windows 10/8/7?
Sometimes. you may need to repartition hard drive to make partition allocation more reasonable. Here we will show you how to repartition hard disk without losing data via different methods in Windows 11/10/8/7. - Create Hard Disk Partitions Before Installing Windows 10/8/7
Learn how to create hard disk partitions before installing Windows 11/10/8/7 operating system on your hard drive for your system, applications, games and other data better organized. - Is Seven Pass Secure Erase Good Enough? Get Clear Ideas Here!
Can seven pass secure erase wipe a hard drive clean? How long will it take? This article will answer all these questions for you. Please read on. - Completely Wipe External Hard Drive in Windows 10 with Freeware
Learn the best way to securely wipe all data on external hard drive like WD Maxtor external drive completely on Windows 10 with free disk eraser.
