How to Sync Folders to NAS Automatically in Windows 11/10/8/7
Sync folders to NAS vs. backup folders to NAS
Syncing data to NAS (Network-Attached Storage) devices has become a popular practice among individuals and businesses alike. The convenience of accessing and sharing files across multiple devices makes NAS an attractive option for data storage and backup.
Syncing folders to NAS (Network-Attached Storage) devices has become a popular practice among individuals and businesses alike. The convenience of accessing and sharing files across multiple devices makes NAS an attractive option for data storage and backup. In this article, we'll explore the benefits of syncing folders to NAS and provide a step-by-step guide on how to do it.
1. The folders are backed up.
2. Network-Attached Storage (NAS) devices have revolutionized the way we store and access files. By connecting a NAS device to your network, you can enjoy the convenience of accessing your files from any computer in the same network.
Network-Attached Storage (NAS) and cloud storage are both popular solutions for storing and accessing files. While they share some similarities, they have distinct differences that set them apart.
1. Backup and sync are two related but distinct concepts in data management. While both involve copying data from one location to another, they serve different purposes and have different outcomes.
2. Backup and sync are two related but distinct concepts in data management. While both involve copying data from one location to another, they serve different purposes and have different outcomes.
Syncing folders to a Network-Attached Storage (NAS) device or another computer can be a convenient way to share files within a company or transfer files between devices. However, choosing the right file sync software can be a challenge. Here are some of the best free file sync software options:
Best freeware to sync folders with NAS
Syncing files to a Network-Attached Storage (NAS) device can be a convenient way to share files within a company or transfer files between devices. Qiling Disk Master Standard is a popular and highly-regarded free NAS sync software for Windows that makes it easy to sync files to NAS without effort.
- Syncing files and folders between devices is an essential aspect of modern computing. Qiling Disk Master Standard, a powerful and user-friendly software, makes it easy to sync files and folders between different devices and storage locations. With its intuitive interface and robust features, you can sync local folders to a different drive on your PC, an external hard drive, NAS, or cloud drive, and vice versa.
- Syncing files between devices and storage locations is an essential task for many users. Qiling Disk Master Standard, a powerful and user-friendly software, makes it easy to sync files and folders between different devices and storage locations.
- Syncing files and folders between devices and storage locations is an essential task for many users. Qiling Disk Master, a powerful and user-friendly software, makes it easy to sync files and folders between different devices and storage locations.
Ready to experience the power of Qiling Disk Master? Download this amazing file sync software now and discover a world of convenience and productivity.
How to auto sync folders to NAS step by step
Step 1. Ready to experience the power of Qiling Disk Master? Download and install this amazing file sync software now and discover a world of convenience and productivity.
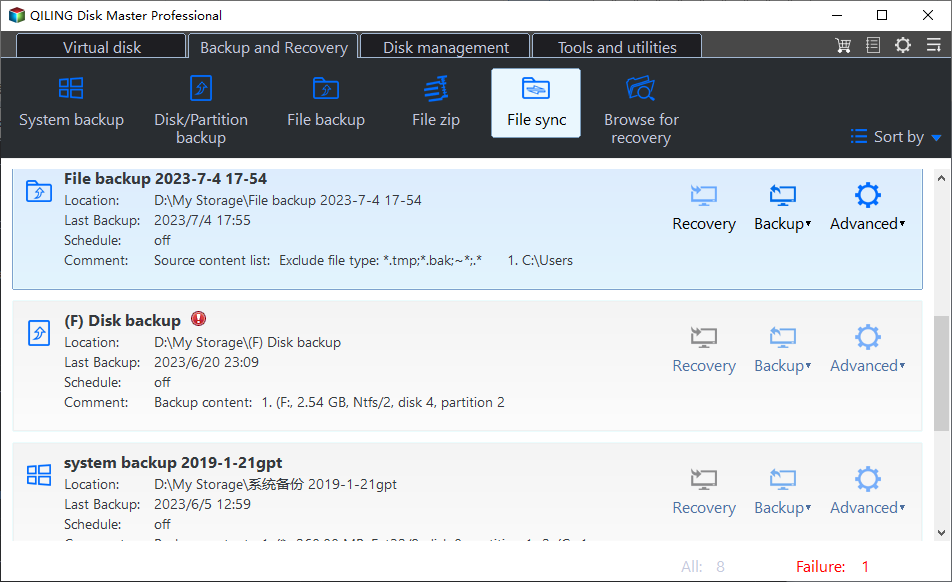
Step 2. Click Folder to select the folder(s) you want to sync.
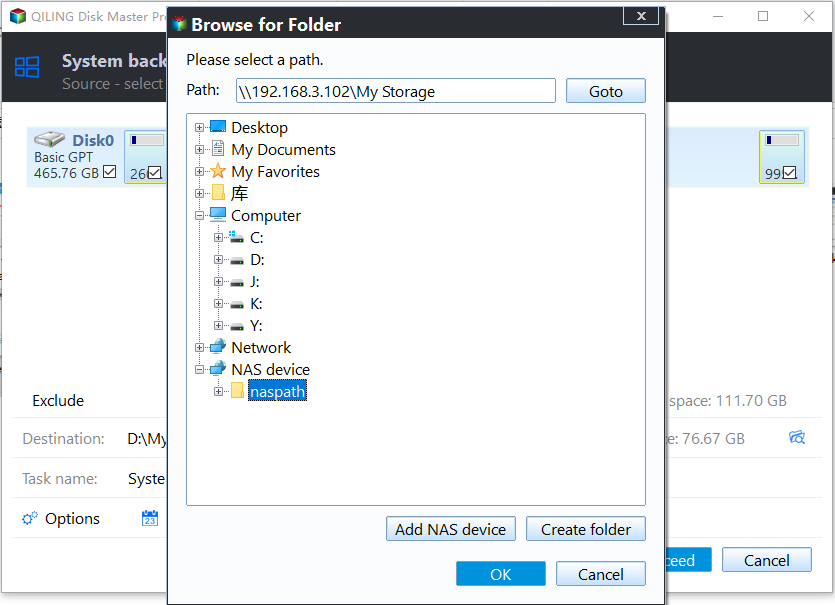
Step 3. Click the inverted triangle icon at the second bar > Add Share or NAS Devices > input the IP address of the NAS device (Network Path) and click the blue button at the right.
Step 4. After the NAS device is added, all the shared folders will be listed in the window. Select one folder as the destination folder and click OK.
Step 5. To automatically sync folders to NAS, here you need to click Schedule Sync in the bottom. Then, you will get into the window where you can set the task to run daily, weekly, or monthly. If you want to sync folders based on event triggers, or USB plug in, please upgrade to Qiling Disk Master Professional.
Step 6. After setting up a schedule, click Proceed > Add the schedule and Proceed now to launch the progress.
Conclusion
You have got all the steps to automatically sync folders to NAS. It is very simple and easy to operate due to the intuitive interface of Qiling Disk Master. Besides the sync feature, Qiling Disk Master owns the backup, restore, and clone features. You can use it to backup Windows 10 to Synology NAS and clone Dell hard drive to SSD, etc.
If you've signed up for a Qiling account, you're now eligible to take advantage of the 1TB free storage offered by Qiling Cloud. This generous allocation is available for 15 days after creating your Qiling account. To explore this feature, simply log in to your Qiling account and navigate to the Qiling Cloud section. From there, you can discover the benefits of using Qiling Cloud for your file backup needs.
Related Articles
- How to Synchronize NAS to NAS
- How to Sync Folder to Network Drive in Windows 7/8/10?
- How to Transfer Files from Windows 7 to Windows 10 over Network?
- Top Two Ways to Automatically Upload Photos to Dropbox
Saving photos manually to Dropbox is too much trouble. Things will get much easier if you can automatically upload photos to Dropbox. Luckily, there are two feasible ways.


