Easily Backup WD My Cloud to Google Drive | Best Freeware
Why backup WD My Cloud to Google Drive?
WD My Cloud is a line of personal Network-Attached Storage (NAS) devices and multi-purpose servers designed and marketed by Western Digital Corporation. With WD My Cloud, you can backup PC to NAS, as well as backup photos and videos for smartphones and tablets. The most amazing part is that it creates a common place for friends and family to share memorable photos. It, in turn, can be backed up to other places such as the cloud drives.
You may need to backup WD My Cloud to Google Drive for the following reasons:
• Double secure your crucial photos, videos and files.
• Access the shared files from Google Drive anywhere you have an Internet connection, not just within the LAN.
Then, how to realize WD My Cloud backup to Google Drive? Please read on.
Error: Drive for desktop can’t sync NAS folder
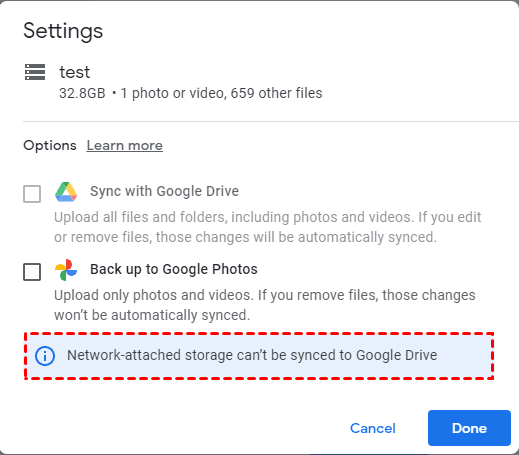
Google provides a desktop app named Drive for desktop to help users sync files from PC to Google Drive and vice versa. However, if you add a folder from WD My Cloud, Drive for desktop won’t sync it but throw you an error message: Network-attached storage can’t be synced to Google Drive. Don’t worry! There’s a third-party sync tool that can finish this job.
Best freeware for WD My Cloud cloud backup
Since the MyCloud.com web app and My Cloud Home mobile app only support backup Dropbox, Google Drive, OneDrive and Adobe Creative Cloud to My Cloud, but not the way in reverse. You will need third-party software to help you backup WD My Cloud to Google Drive.
Here I’d like to recommend the best free backup software—Qiling Disk Master Standard to you.
- It offers the File Backup and Sync features to help you backup NAS to a cloud drive and vice versa. It is suggested to use Sync so that you can access the backed up files without the restoration process.
- It supports NAS devices of all brands, including WD, Synology, QNAP, and Seagate. It also supports many mainstream cloud drives like Google Drive, OneDrive, Dropbox, and Cloudme.
- It supports Windows 10/8.1/8/7/Vista/XP as well as the latest Windows 11. For Windows Server users, try server backup software.
Learn how to use Qiling Disk Master for WD My Cloud cloud backup from the next part.
How to backup WD My Cloud to Google Drive simply
To complete WD My Cloud backup to Google Drive with Qiling Disk Master, you should download and install Drive for desktop first, and set it up as follows:
1. Click on the Drive for desktop icon in the taskbar, hit the Settings button and choose Preferences.
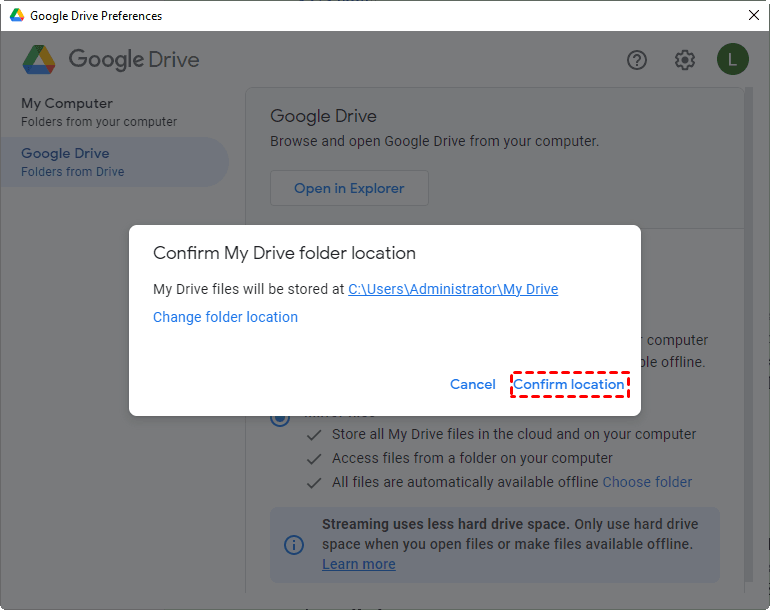
2. Go to the Google Drive section and select Mirror files. Check My Drive folder location and click Confirm location. If you’d like to choose another location, click Change folder location.
Now follow the instructions below to begin the file synchronization process:
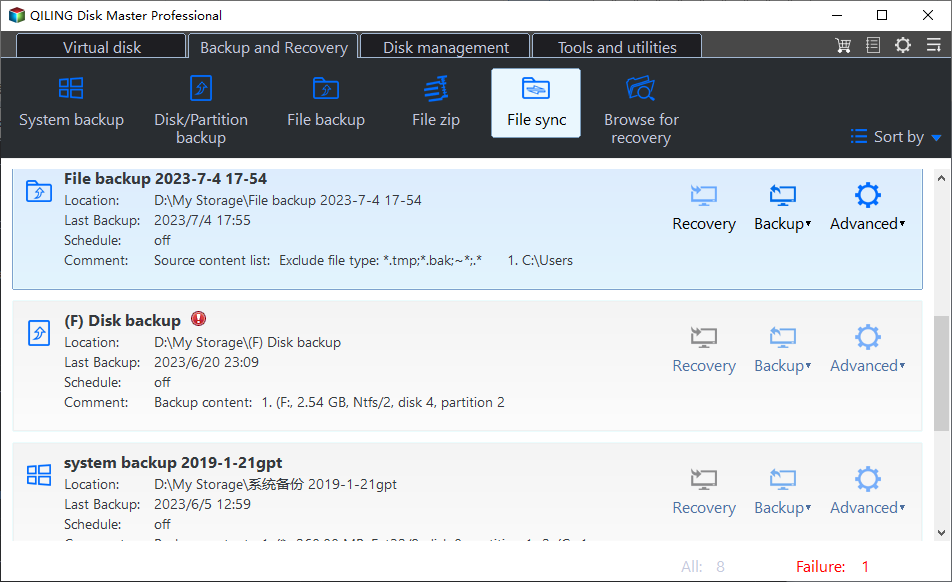
1. Install and run Qiling Disk Master. Click “Backup and recovery” and select “File Sync”.
2. Name the task so that you can distinguish it from other sync tasks. Then, click “Folder”.
3. In the pop-up window, click “Share/NAS”.
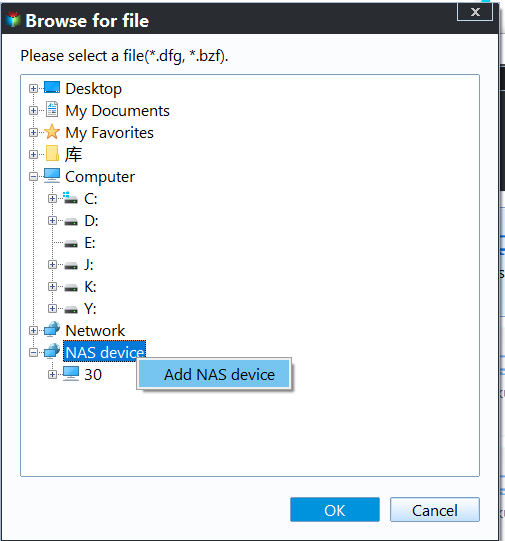
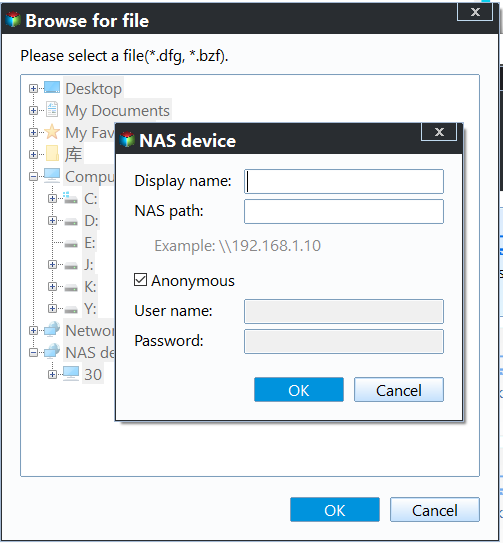
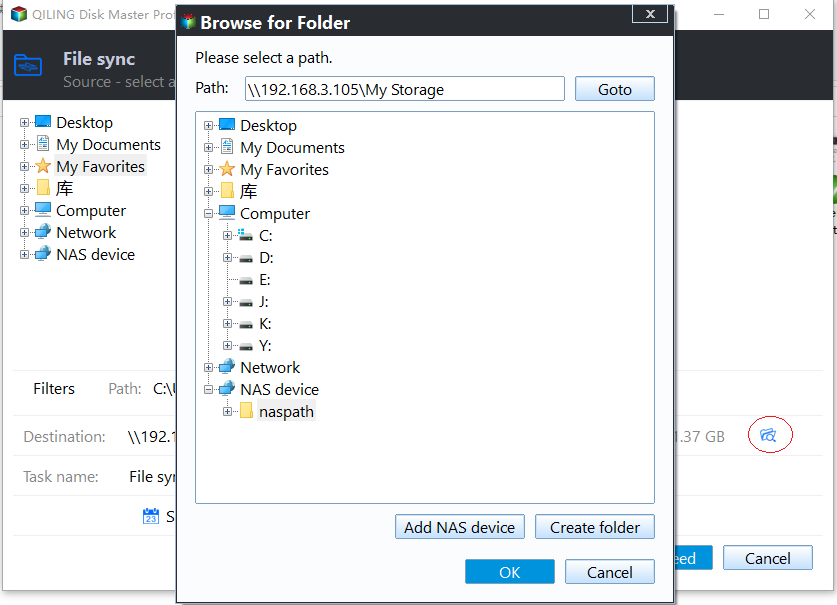
4. In the Select Share/NAS Device window, click “Add Share or NAS Devices”. Type the NAS path of My Cloud and click “OK”. Type username and password if it prompts.
5. After My Cloud has been added, all the folders under it will be listed. Choose one folder to be synchronized and click “OK”.
Tips: To sync more than one folder, you can click the “+" icon after you add the first folder.
6. Confirm the source folder and the destination path. Click “Proceed”.
✎ Note:
There are other sync options offered in the lower-left corner of Qiling Disk Master:
• Options: you can write a comment for your sync task so that you can figure out the specific sync contents. You can also enable email notification here.
• Schedule Sync: you can set the sync task to run periodically. There are five modes supported: Daily, Weekly, Monthly, Event triggers, and USB plug in.
Verdict
With Qiling Disk Master, you can backup WD My Cloud to Google Drive/OneDrive/Dropbox easily. Also, you can backup WD My Cloud to external drive, which adds an extra protection layer to your valuable data.
Other than the backup, restore and sync features, it owns the clone feature. You can use Qiling Disk Master as free SSD migration tool as well. Don’t hesitate to get this tool and enjoy all the wonderful features right now!
Related Articles
- Automatically Sync OneDrive to External Hard Drive in Windows 10/8/7
Want to sync OneDrive to external hard drive in Windows 11/10/8/7? This page offers you a free tool to setup scheduled OneDrive sync task. - How to Backup Data on External Hard Drive to Dropbox?
You will learn the best way to backup external hard drive, it's to backup or sync external hard drive to Dropbox. I'll introduce you three free ways, select one per your needs. - Solved: External Hard Drive Freezes When Copying Files
Does your external hard drive freeze when copying files? Don't worry! Follow this article to solve the problem efficiently. - Best Free Folder Sync Software in Windows 7/8/10
Qiling Disk Master Standard is the best folder sync software for Windows 10, you can use it to perform folder sync on a regular basis or in real-time. Learn more about it below and the detailed steps!
