Auto Sync Folder to Network Drive in Windows 10 (2 Ways)
Any way to automatically copy files to a network drive?
"Hello all!
You're looking for a way to mirror your My Documents folder on the C drive to another mapped network drive folder. This would allow changes made to files saved in My Documents to be automatically duplicated to the network drive folder.
Is this possible within windows and is it possible to set up so the duplication happens in real-time?"
Need to auto sync local folder to network drive in Windows 10
Syncing folders between two locations, including syncing a local folder with a network drive, is an effective way to ensure data safety by creating identical copies of the same files. To maintain synchronization and keep all changed files up-to-date, you can opt for manual or automatic file copying from source to destination directory.
Manually syncing files comes with a risk of data loss if changes aren't synced after they're made, especially in situations where modification frequency is high. Therefore, scheduling file sync tasks as needed helps ensure that all changed files get updated across the source and destination directories without any gaps.
Real-Time: Files will sync in real-time as soon as any change occurs. This can also be set up to run at specific intervals such as hourly or daily; for instance, syncing now, every hour, once, twice, 3 times, 4 times, 5 times, and 6 times a day. For less frequently changed files, you may opt for weekly or monthly sync schedules.
How to sync folder to network drive automatically
There are several methods for automatically copying files to your network drive. For most users, using dedicated file sync software is the simplest and most straightforward approach. However, IT professionals may prefer more customizable options like command-line utilities, specifically Robocopy, which offers advanced features tailored to their needs.
Automatically sync folder to network drive with Qiling Disk Master
Qiling Disk Master Professional has a user-friendly design, and easy to operate. With it, you can sync files to network drive automatically in simple clicks.
- For sync solutions, you can choose to sync files from local drive to network drive with its Basic Sync, Real-Time Sync (to sync files in real-time) or between them with Two-Way Sync.
- Besides a network drive, you are able to sync files to external hard drive, flash drive, cloud drive like OneDrive, etc.
- For sync settings, you can sync files once or multiple times in a day, weekly, monthly, event triggers or USB plug in.
- For Windows systems, it is capable of syncing files in Windows 7, 8, 10, 11, XP, Vista. For server users, try Qiling Backupepr Server.
To get started, please download Qiling Disk Master Professional first.
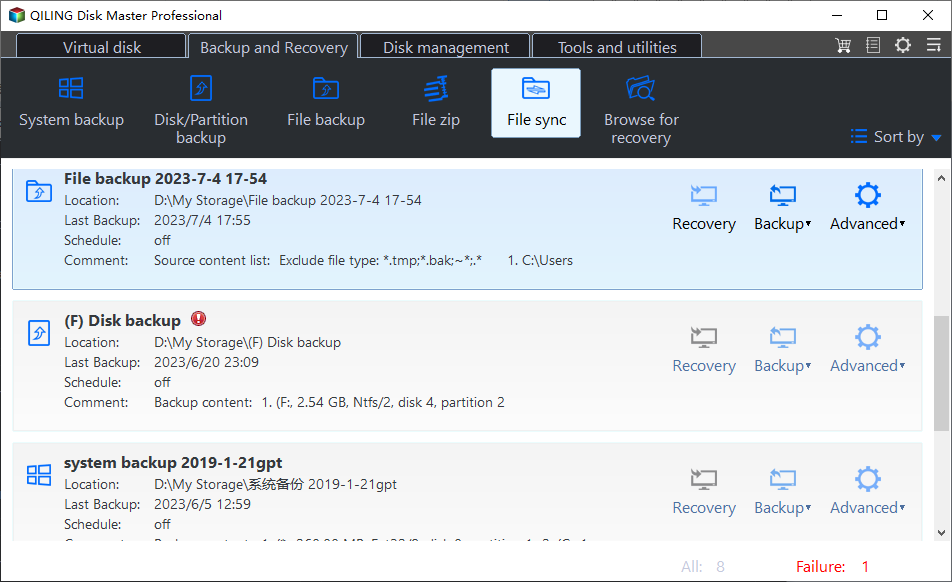
Step 1. Launch file sync software - Qiling Disk Master after installation. Then, click "File Sync" in the "Backup and recovery" tab.
Step 2. In this window, you need to do two steps sequentially. First, you should click "Folder" to choose the folder you want to sync. Then, you are supposed to select your network drive as your destination path.
To select network drive, click the inverted triangle and select Add Share or NAS Device, then type the network path and select files or folders on network drive. Note that only the shared folder will be displayed on the network path.
Note: To sync files with certain file extensions, click "File Filter", at the right side of the selected folder, displayed like a funnel shape button. It helps you to exclude or include certain file types, you can directly type it in the corresponding box.
Step 3. Click "Schedule Sync" at the bottom and enable it, then select any schedule sync you like. Then, click "Proceed" to sync folder to network drive.
You can select schedule settings based on different frequencies, specific events or USB drive ( to automatically sync files between computer and flash drive). For frequencies, you can choose daily (from every 1 hour to 6 hours or only once), weekly, or monthly. For specific events, you can use system startup or shutdown, user logon or logoff.
Tips:
- Don't modify the source folder name, otherwise it will not sync files anymore.
Method 2: Automatic mirror folder to network drive using Robocopy
To use Robocopy with /MIR option when syncing folders, follow these steps: combine it with both /e (copying subdirectories) and /purge options to ensure that empty directories are also copied. The result is the deletion of files or directories no longer present in the source directory while maintaining an up-to-date sync between the two locations. Additionally, note that using /MIR overwrites existing security settings on destination directories if they already exist.
Step 1. Type cmd in the search box and open cmd.
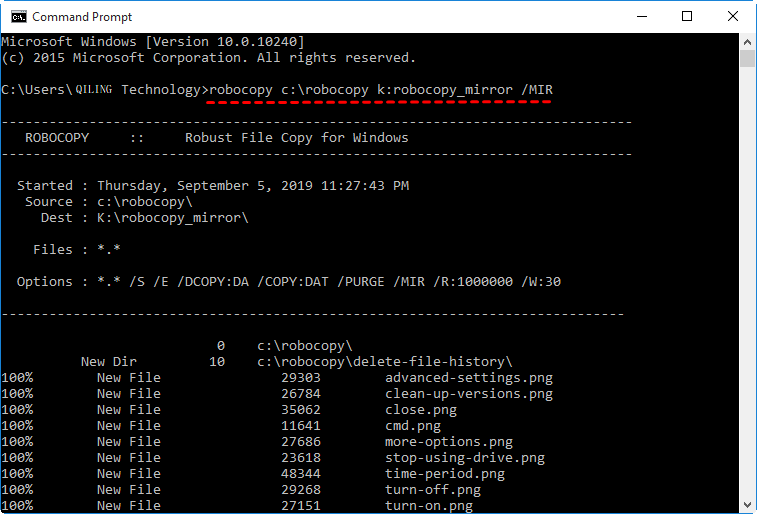
Step 2. To copy files from c:\robocopy to k:\robocopy_mirror, you can type the following command and hit Enter.
robocopy c:\robocopy k:robocopy_mirror /MIR
Notes:
① Replace the following path with yourself.
② Please remember to add quote if the path has space.
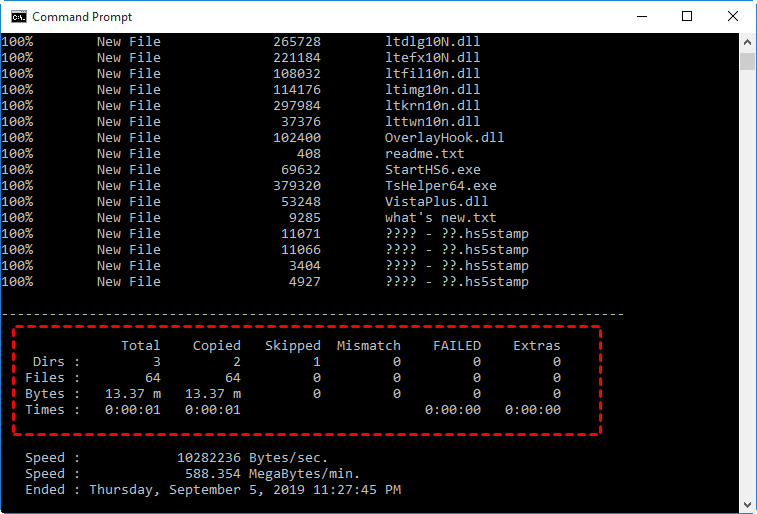
Wait until the process is complete, you will see the sync details and then check it in the destination path.
Step 3 (optional). To simplify running Robocopy with /MIR for repetitive tasks without needing to type out the command each time, you can copy it into a text editor like Notepad and then save it as a .bat file extension. This way, when ready to execute the sync process again, simply double-clicking on this saved batch file (.bat) will initiate Robocopy with /MIR automatically.
How to schedule sync folder on network drive
Besides syncing a folder with your network drive for redundancy, some users also want their entire network folder to be available offline using Windows Sync Center in versions 7 through 11. This allows access to files on that network location even when disconnected from the internet or there's no active network connection.
You need to map network drive locally, enable offline offline, and finally set schedule sync task. The previous process is included in previous article, please refer to this page: enable offline files in Windows 10. Here, I'll take Windows 10 as an example to sync folders on network drive,
Step 1. Go to Sync Center, then select "Offline Files" under the Folders (1) and click "Schedule". You can also right-click the Offline Files and select "Schedule for Offline Files" from the context menu.
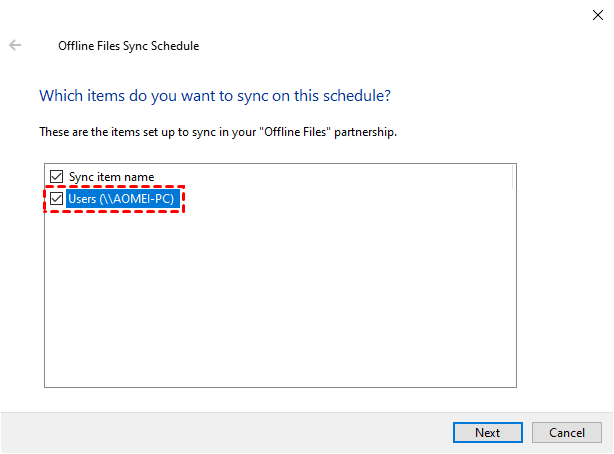
Step 2. Tick an item when you are asked "which items do you want to sync on this schedule?".
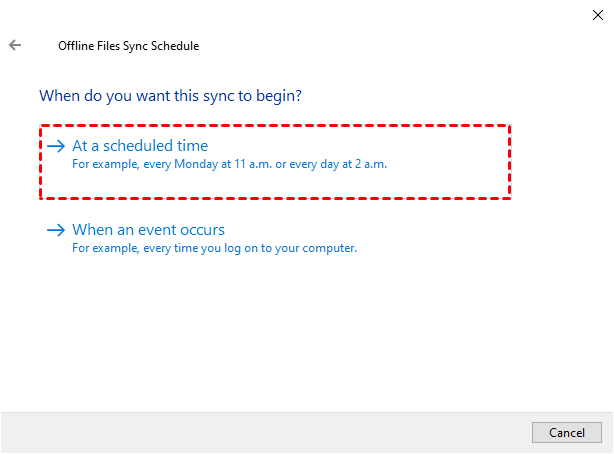
Step 3. Click "At a scheduled time" under the "When do you want this sync to begin" link.
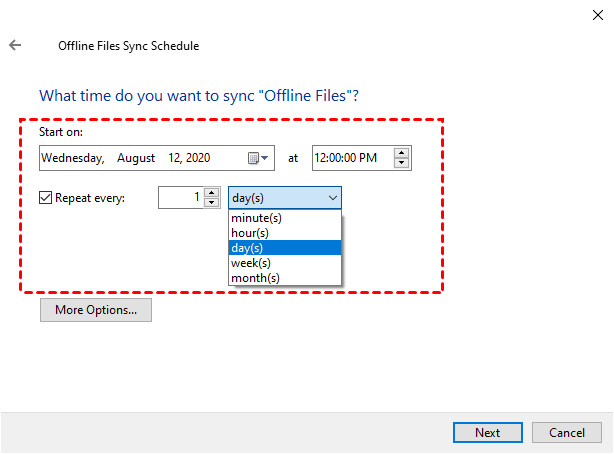
Step 4. Set the time you want to start on and select "Repeat every 1 minute(s)" as sync interval.
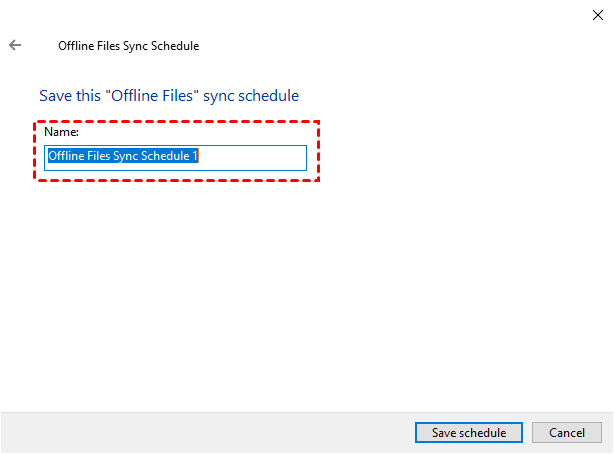
Step 5. Then, name this schedule sync task and click "Save schedule" to automatically copy files to network drive.
Tips:
① The process of synchronizing a local folder with a network drive also applies similarly for users running Windows versions prior to 10 (specifically, Windows 7 & 8). Although steps might slightly vary due to interface differences, overall procedure remains nearly identical.
② If you encounter issues where your offline network files become unavailable while connected online, consider altering settings within Sync Center itself or using the Local Group Policy Editor as a troubleshooting measure. Specifically, configuring "Allow or Disallow use of the Offline Files feature" to 'Not Configured' and disabling offline file capabilities might resolve these connectivity challenges.
Summary
Automatically syncing folders between your Windows 10 system (or other systems) with a network drive has been significantly simplified thanks to third-party sync software such as Qiling Disk Master. This tool allows you to schedule synchronization tasks at various intervals, including daily options ranging from once per day to every hour up until six times a day; weekly or monthly schedules can also be selected depending on your needs.
In addition, to further improve data security, you still can use it to auto backup files to external hard drive, network drive, cloud drive, flash drive, etc. In this way, it will compress all the data into an image file, so no one can modify it at will. And it helps to minimize backup image size and disk usage with multiple features, such as, compression, splitting, incremental or differential backup, automatic backup cleanup, etc.
Related Articles
- How to Sync Local Folder to Dropbox (2 Ways Included)
- Fixed: Windows 10 Sync Center not Working
- Top Three Ways to Automatic Backup Windows 7 to Network Drive
- Free Download Windows Easy Transfer Alternative in Windows 7/8/10
Try the best free Windows 10 Easy Transfer alternative to perform Windows 7 to Windows 10 migration easily.
