Top 2 Ways to Sync QNAP NAS to OneDrive in Windows 11/10/8/7
Why backup QNAP to OneDrive?
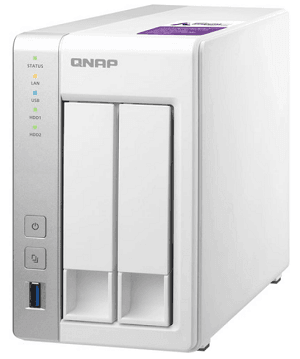
QNAP NAS (Network Attached Storage) is a high-quality storage solution designed for various user groups, including home, small office/home office (SOHO), and small to medium-sized businesses. QNAP NAS operates on the intelligent operating system QTS, QuTS hero, or QES, making it easy for users to manage their files and data with minimal effort. The NAS is widely used for data backup and sharing files with others.
When it comes to backing up important files to a Network Attached Storage (NAS) device, there are potential risks to consider. While a NAS can provide a convenient and centralized storage solution, it's not entirely foolproof. You may encounter issues with the device itself, such as:
When it comes to sharing files on a Network Attached Storage (NAS) device, there are limitations to consider. While a NAS can provide a convenient and centralized storage solution within the local area network (LAN), it's not ideal for accessing shared files beyond the LAN.
How to sync QNAP to OneDrive efficiently
To sync QNAP NAS to OneDrive, there are two methods for your reference. Method 1 only supports QNAP NAS while Method 2 supports various NAS brands like WD, Seagate, Buffalo and Synology.
Method 1: Sync between QNAP NAS and OneDrive via Cloud Drive Sync
Syncing your QNAP NAS to OneDrive can be a convenient way to access your files from anywhere and ensure they're backed up. Cloud Drive Sync is a feature that allows you to perform file sync between a QNAP NAS and a cloud drive, including OneDrive. Here's how to run QNAP to OneDrive sync:
1. Download and install Cloud Drive Sync from the QTS App Center. Click "Open" to open the Cloud Drive Sync App.
2. Create a cloud account
- Click "Cloud Account Management" > "Create Account".
- Choose OneDrive from the "Cloud storage" drop-down menu and enter a name for the account. Click "Sign in".
- Enter your OneDrive username and password in the authentication page. Then, Click "OK" to finish.
3. Create a sync job
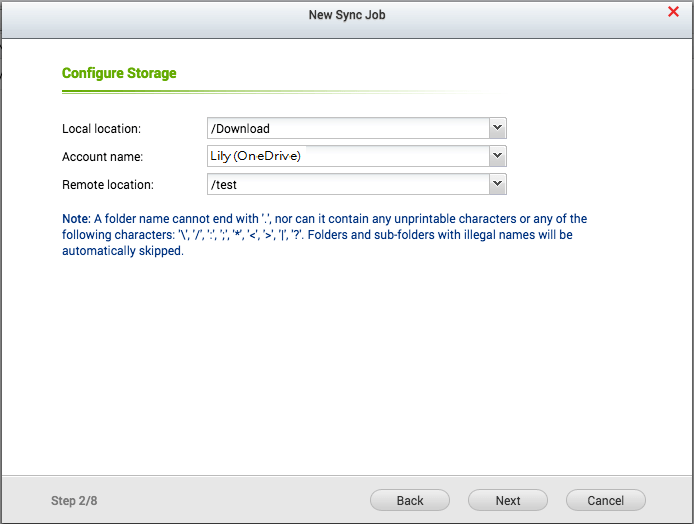
- Click "Sync Job Management" > "Create Job". Then, click "Next".
- Select a folder on your QNAP NAS, choose your OneDrive account, and select a OneDrive folder in "Local location", "Account name", and "Remote location" successively. Then, click "Next".
- Follow the wizard to set a schedule for the sync job, configure the file conflict policy, and set file filters in turn. After that, you can set other options like"Timeout", "Number of retries", and "Retry interval" based on your needs.
- After configuring the advanced settings, review your settings to ensure everything is correct. Once you're satisfied, click "Next" to proceed.
✐ Tips: Cloud Drive Sync is designed to perform two-way sync, ensuring that files are synchronized in both directions. This means that files will be synced from your QNAP NAS to the cloud drive, as well as from the cloud drive to your QNAP NAS.
Method 2: QNAP sync with OneDrive using Qiling Disk Master
Qiling Disk Master Professional is a robust file sync software designed to facilitate seamless synchronization between your QNAP NAS and OneDrive. This powerful tool is compatible with Windows 11/10/8.1/8/7/Vista/XP, ensuring a smooth user experience.
- Basic Sync: Qiling Disk Master Professional is a robust file sync software designed to facilitate seamless synchronization between your source and destination directories. This powerful tool is compatible with Windows 11/10/8.
- Real-Time Sync: Qiling Disk Master Professional is a cutting-edge file sync software designed to provide real-time synchronization between your source and destination directories. This powerful tool is compatible with Windows 11/10/8.
- Mirror Sync: Qiling Disk Master Professional is a powerful file sync software designed to maintain a consistent file system across multiple locations. This tool ensures that the files in the destination directory are exactly the same as the source directory.
- Two-Way Sync: Qiling Disk Master Professional is a powerful file sync software designed to maintain a consistent file system across multiple locations. This tool ensures that any changes in the source or destination directory are synced to the other side.
Qiling Disk Master is a powerful file sync software that supports a wide range of NAS devices and cloud drives. In this guide, we'll show you how to set up QNAP sync with OneDrive using Qiling Disk Master's Two-Way Sync feature.
✍ Note: To sync files to OneDrive using Qiling Disk Master, you should install the OneDrive desktop app and sign in with your account beforehand.
Step 1. Download, install and run Qiling Disk Master.
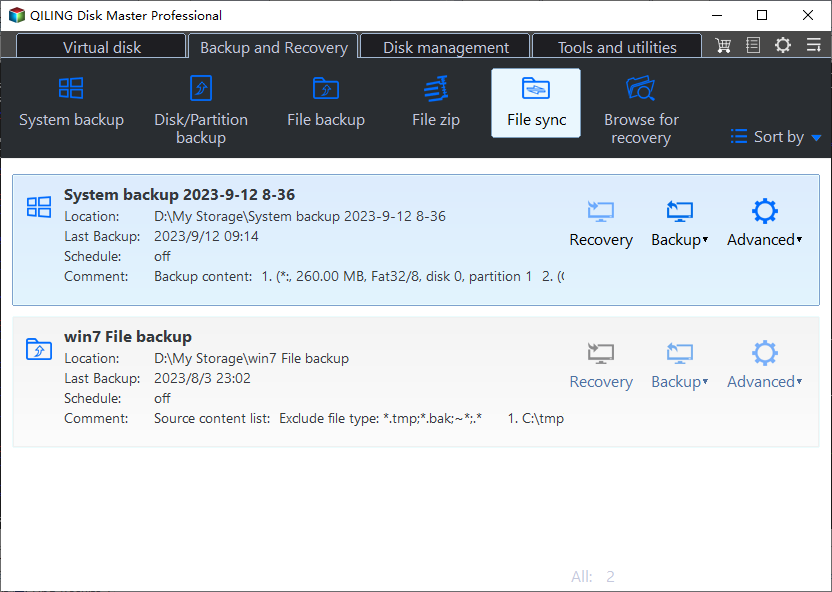
Step 2. To sync files using Qiling Disk Master, you should click on the "Backup and recovery" option and select "File Sync". This feature allows you to sync files between your local computer and cloud storage services like OneDrive.
Step 3. Click Folder > Share/NAS.
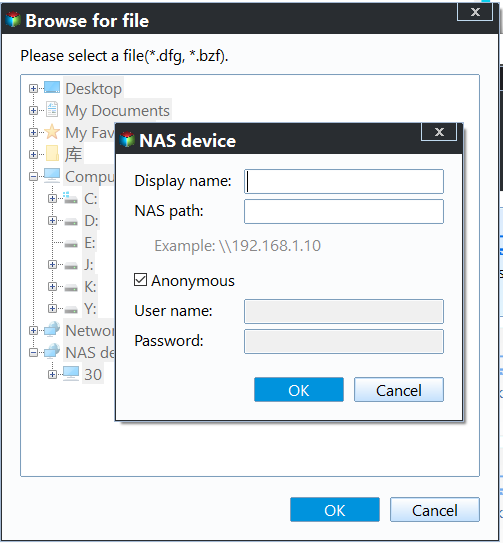
In the next window, click Add Share or NAS Devices. Then, type the IP address of QNAP NAS and click OK. Type username and password if they are required.
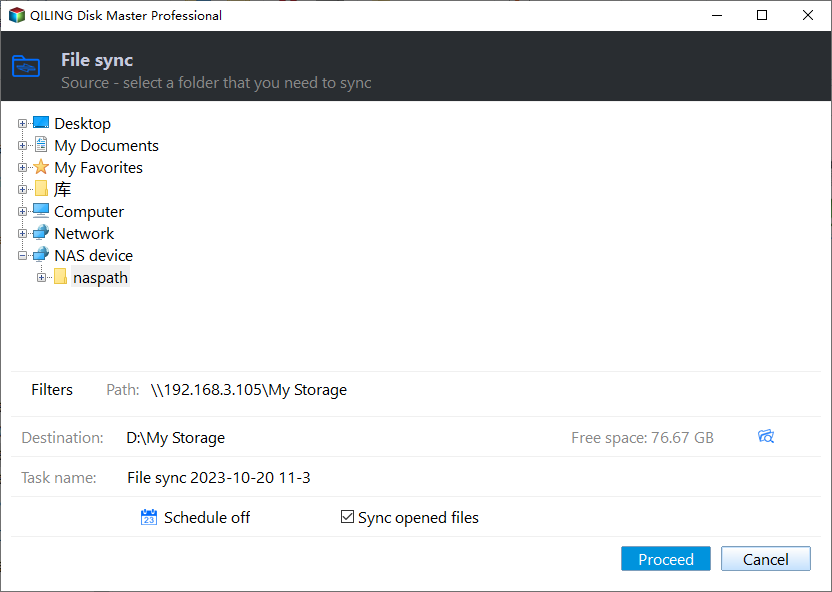
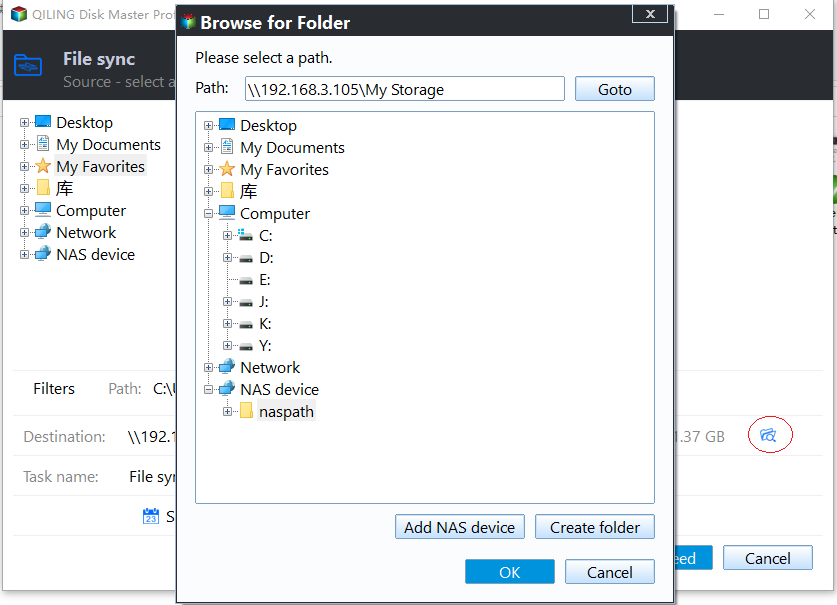
Step 4. After QNAP NAS has been added, all the folders under it will be listed. Choose the folder you want to sync and click OK.
Step 5. Expand the drop-down menu of the second bar and choose Select a cloud drive.
Step 6. Confirm the source and destination directory and click Proceed.
>> Options: To enhance the sync experience with Qiling Disk Master, you can add a comment to your sync task. This allows you to provide context and details about the sync contents, making it easier to identify specific files or folders being synced.
>> Schedule Sync: To automate your sync tasks with Qiling Disk Master, you can set them to run periodically. This ensures that your files and folders are synced at regular intervals, without requiring manual intervention.
Verdict
If you're looking for an alternative to Cloud Drive Sync, Qiling Disk Master is a great option. With its user-friendly interface and support for multiple NAS devices, Qiling Disk Master makes it easy to sync your QNAP to OneDrive.
Related Articles
- Easy Steps to Sync QNAP NAS and Google Drive Cloud
- Backup WD My Cloud to Google Drive with the Best Freeware
- How to Backup Synology NAS to Cloud with Ease
- How to Backup Network Shared Files in Windows 10
This article tells you how to backup network shared files in Windows 10 with the best network backup software Qiling Disk Master.
