Best Free Syncthing Alternative to Sync Files Between PCs
What is Syncthing used for?
Syncthing is a free file synchronization program that allows you to sync files between multiple computers over LAN or the Internet, compatible with various operating systems. It enables syncing of multiple folders with different users or between personal devices, such as a laptop and desktop.
To use Syncthing, first download and install the software on your devices, then create a new device and add it to your Syncthing instance. Next, configure the device to connect to your Syncthing server, and set up synchronization settings for the folders you want to share.
1. Download Syncthing from the official website on both your computer and the computer you want to sync files with.
Tips: If you're new to Syncthing or prefer not to use the command line, it's recommended to download Syncthing integrations instead of using the File Syncthing command.
2. Run Syncthing from both computers and launch SyncTrayzor.exe from the downloaded Syncthing integrations.
3. To sync your devices, add a remote device in the SyncTrayzor window on both computers. This will allow the two computers to communicate with each other and exchange data.
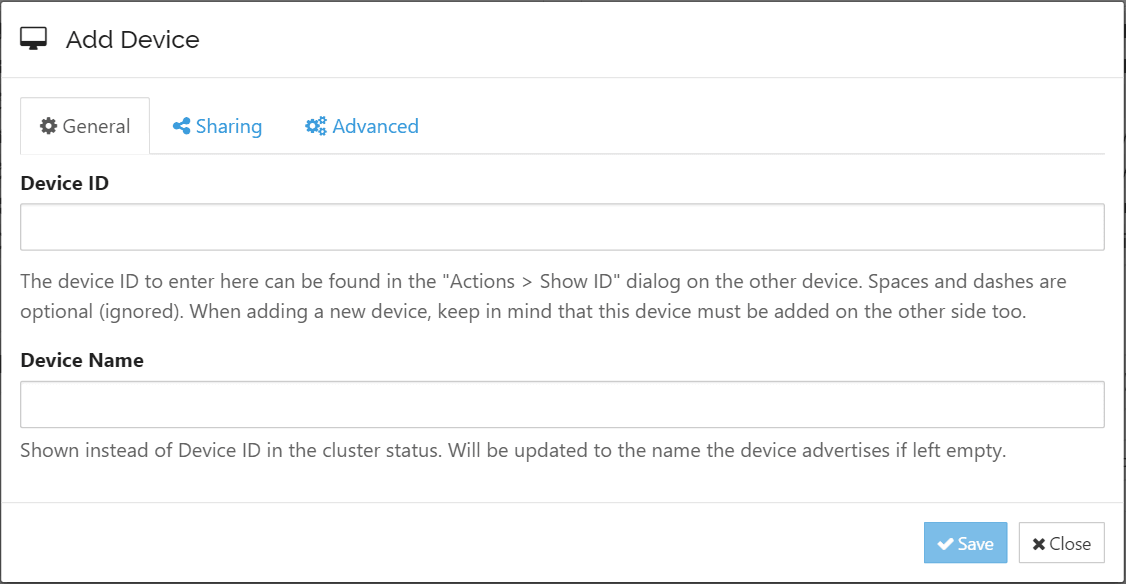
- Find the device ID on both computers by going to Actions > Show ID, and copy them.
- To add a remote device, click "Add Remote Device" under "Remote Devices" on one computer. In the pop-up window, paste the device ID of the other computer and input a device name, then click "Save". Note that the first device should also be added to the second device.
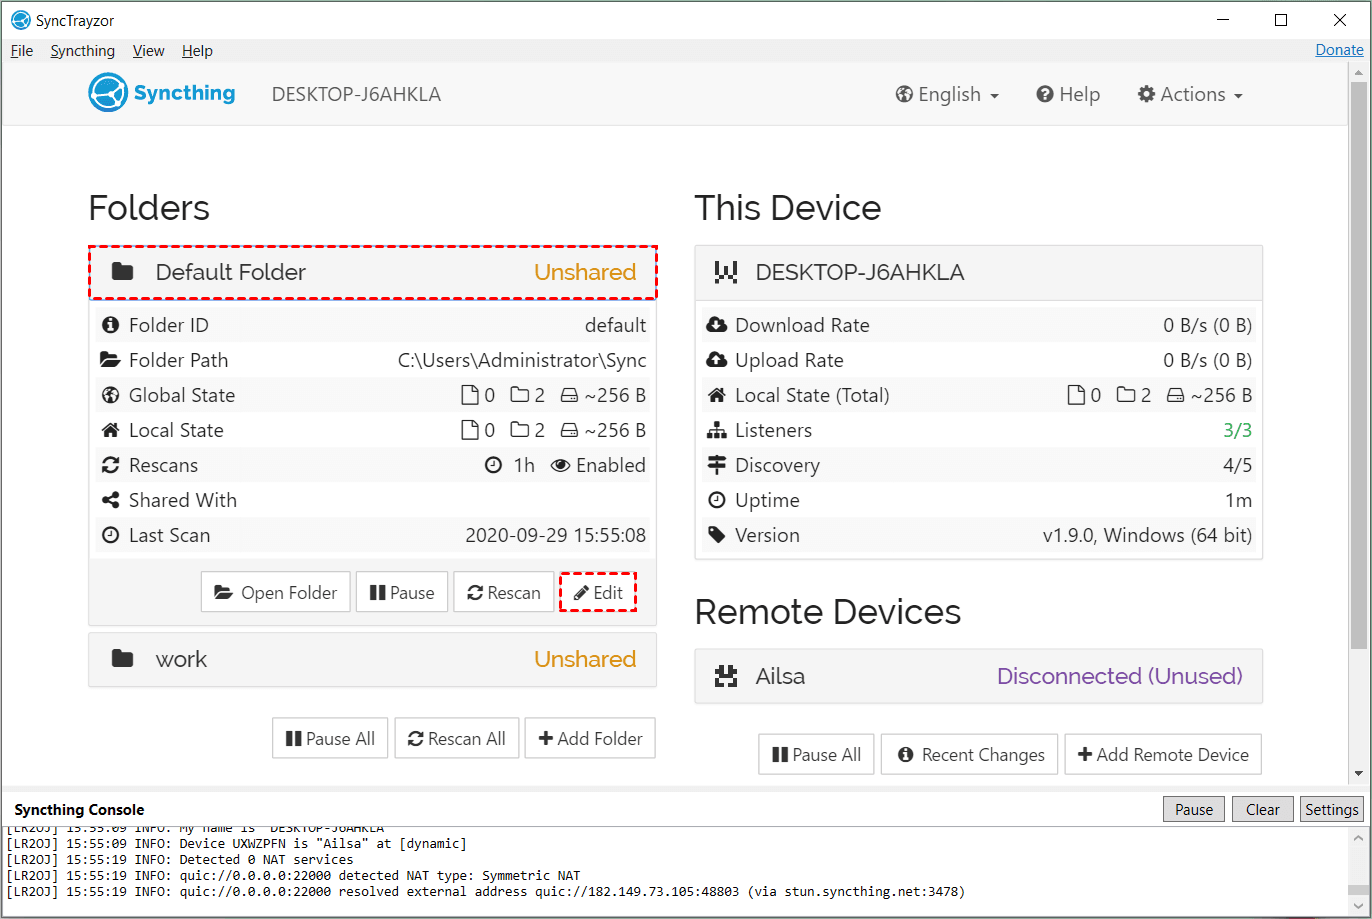
4. Syncthing creates a default folder under C:\Users\Username\Sync, where you can copy files or folders to sync. Alternatively, you can add a folder by clicking "Folder" under "Folders" and entering a label, ID, and path.
5. To sync a folder, click on the folder you're preparing to sync to, expand the menu, and select the default folder. Next, click the "Edit" button.
6. To share a folder, open the sharing tab in the pop-up window, select the device you want to share with and click save, then wait for the sync process to complete.
▶ How to access the web GUI of Syncthing?
To access Syncthing's web GUI, visit the default address 127.0.0.1:8384 in your browser, but note that it's only accessible from the same machine for security purposes.
To access the web GUI from another computer, change the listen address to 0.0.0.0:8384, set a strong username and password for authentication, and enable HTTPS.
▶ Syncthing limitations
While Syncthing appears to be a powerful tool, it may fall short in certain situations, leaving users disappointed.
- It doesn't support syncing between folders on the same system.
- The program is not ideal for backing up files because it syncs all changes, including modifications and deletions, to all devices.
- A cloud storage service like Google Drive, Dropbox, or OneDrive should be installed on all devices you want to sync files with.
Best free alternative to Syncthing in Windows 11/10/8/7
Fortunately, there's another tool that can help fill the gaps of Syncthing, and that's Qiling Disk Master Standard, a top-notch free file sync software that runs seamlessly on Windows 11/10/8.1/8/7/Vista/XP. Its key features make it a reliable alternative.
- Various sources and destinations: Qiling Disk Master enables syncing of folders between the same computer, networked computers, local folders to cloud drives or NAS devices.
- Automatic sync: Qiling Disk Master allows you to schedule regular file syncing between locations, such as daily, weekly, or monthly.
- Backup functions: Qiling Disk Master enables you to create image backups for your operating system, disks, partitions, or specific files, and recover data from these backups when needed.
How to sync files between computers with Qiling Disk Master
To run file sync between computers with Qiling Disk Master, simply download and install it on the source computer. This is the detailed process: download and install Qiling Disk Master on the source computer.
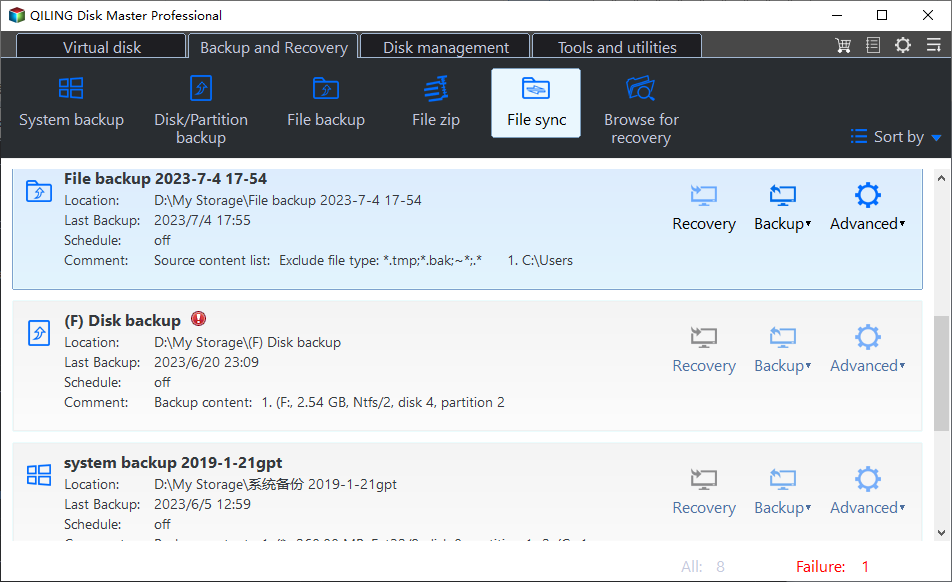
Step 1. Download, install, and launch Qiling Disk Master on the source computer. Click "Backup and recovery" and select "File Sync" to proceed.
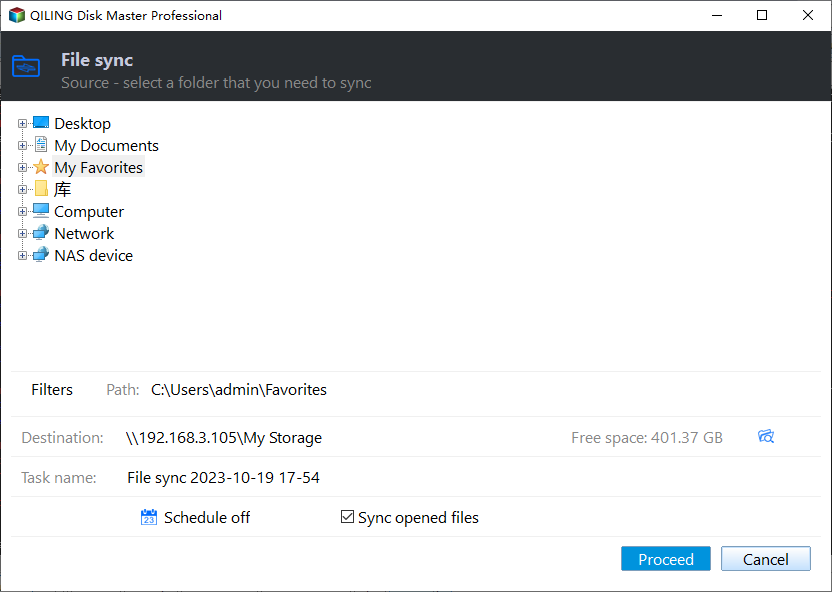
Step 2. 1. Edit the task name so it can be distinguished from other tasks. 2.
Step 3. Expand the drop-down menu of the second bar and choose Add Share or NAS Devices.
Step 4. In the pop-up window, enter the IP address of the source computer and click the blue button on the right, then enter the username and password if prompted.
Step 5. After adding the IP address, all network-shared folders on the computer will be listed. Choose a folder to store the folder(s) you plan to sync and click OK.
Tips: If you haven't created a shared folder on the source computer, create one by following the guide provided.
Step 6. Confirm the operation and click Proceed to begin.
Note: To access the synced folder on another computer, go to "This PC" > "Network", find the source computer's name, and double click it, where all shared folders will be listed.
Wrapping things up
Qiling Disk Master is a great Syncthing alternative for Windows OS that can perform tasks Syncthing can't, such as syncing between folders on the same computer and file backup. The free version supports one-way file sync, while higher editions offer additional features like two-way file sync.
Related Articles
- How to Run PC to PC Sync for Folders in Windows 10/8/7?
Want to sync your PC folders to another PC or a cloud drive in Windows 11/10/8/7? Read this article to get the best free PC sync software to help you. - How to Resolve WD Sync Not Working in Windows 10 Easily?
Are you troubled with WD Sync not working error? Read this article to get efficient solutions and the best free alternative to WD Sync. - What Is the Best Free WD Sync Alternative?
This article will show you how to fix WD Sync not working and two WD sync alternatives to sync files from or to WD My Cloud. - Quick Solutions to Micro SD Card Not Detected in Windows 10
Find micro SD card not reading in Windows 10? Follow this guide to get it fixed. You can also get a way to protect your SD card data.


