Fixed: Synology Cloud Sync Not Working Even Up to Date
The Issue: Synology Cloud Sync Not Working
Synology Cloud Sync is a feature that allows syncing data between a local Synology NAS and cloud drives, including Google Drive, Dropbox, OneDrive, and Amazon Drive. It supports one-way and two-way syncing, as well as scheduled syncing. However, some users may experience issues with Synology Sync not working.
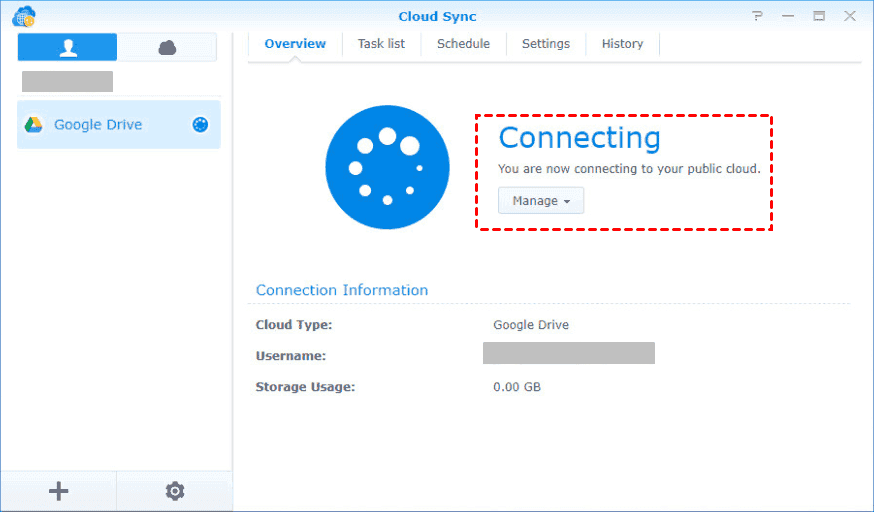
"Cloud Sync on Synology NAS stopped syncing with Dropbox, stuck on 'Connecting' status. Restarted the task, but the issue persists. Unable to find a solution. What steps can be taken to resolve the syncing problem and get data synced again?"
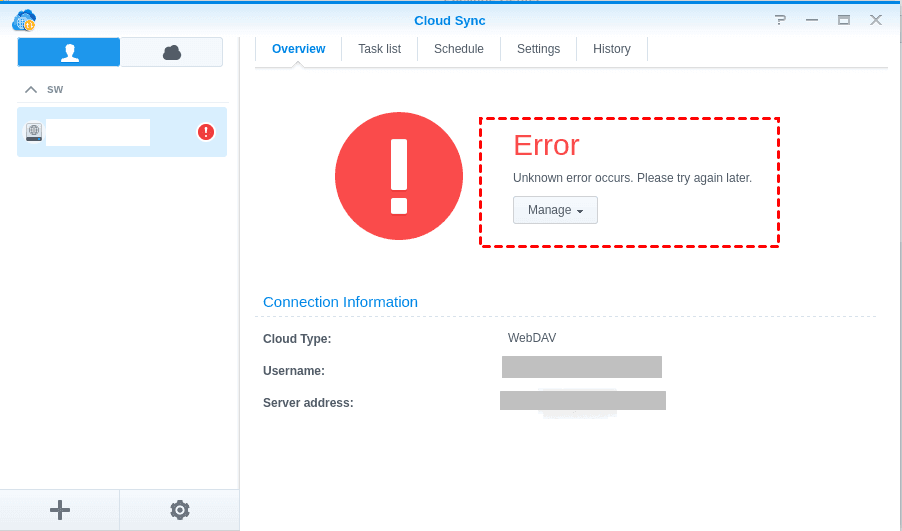
Synology Cloud Sync may not work due to various reasons, including outdated software, poor network connectivity, insufficient storage space, incorrect settings, or an unknown error, leading to incomplete or no syncing at all.
Quick Fixes to Synology Cloud Sync Not Working
If you're experiencing issues with Synology Cloud Sync and Dropbox, try the following solutions. It's been proven to be effective, although not 100% guaranteed. Ensure you're using the latest versions of both Synology Cloud Sync and Dropbox. If that's the case, but the problem persists, consider trying other solutions.
Wat 1: Check Your Internet Connection
If Synology Cloud Sync is taking a long time or stopping mid-sync, it might be due to a weak network connection. Ensure a stable internet connection while syncing files to Cloud Drive.
Way 2: Upgrade Dropbox for More Space
The Synology Cloud Sync stuck issue may also be caused by not enough cloud space, specifically with Dropbox. To resolve this, you should check your Dropbox cloud storage and upgrade it if it's full, or perform the recommended operations.
- Complete the getting started checklist.
- Invite your friends - up to 16 GB.
- Submit feedback to Dropbox.
- Try Dropbox Business free for 30 days.
Way 3: Unlink and Relink Dropbox Account
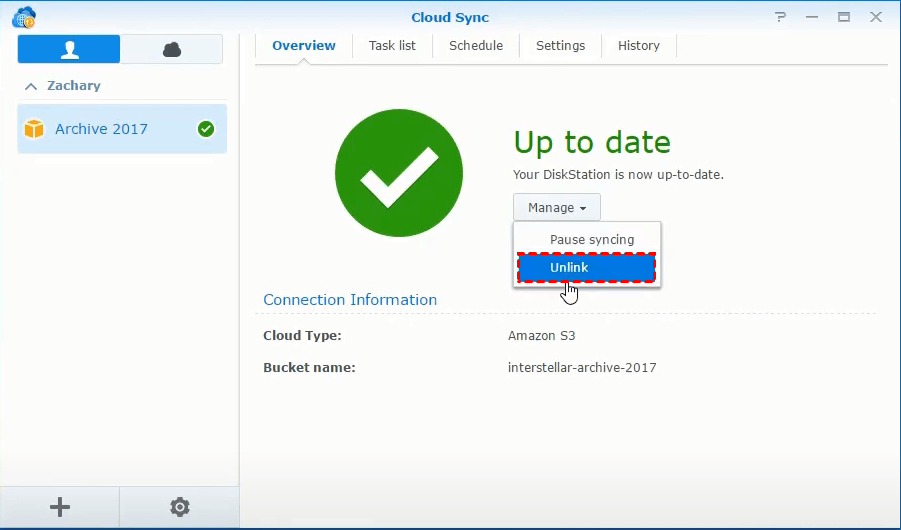
If Synology Cloud Sync and Dropbox are not connecting well, you may encounter the Synology Cloud Sync Dropbox not working issue. To resolve this, click the "Unlink" option under Manage.
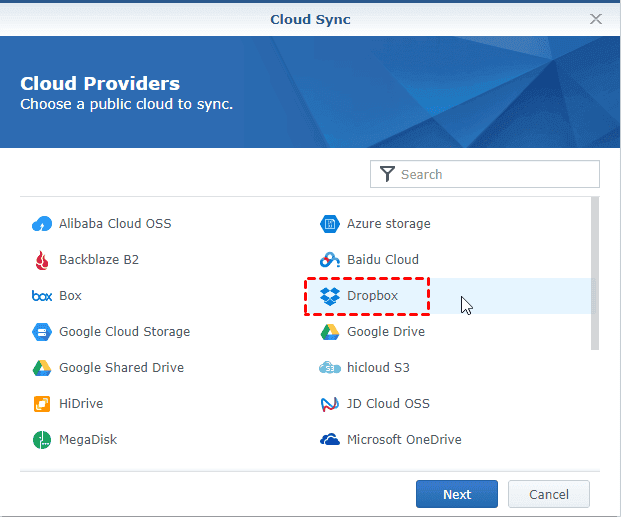
To add Dropbox to Synology, click the + button at the lower left corner, select Dropbox in the Cloud Providers page, and press Next. Then, click Allow and Agree when Synology asks to grant access priority.
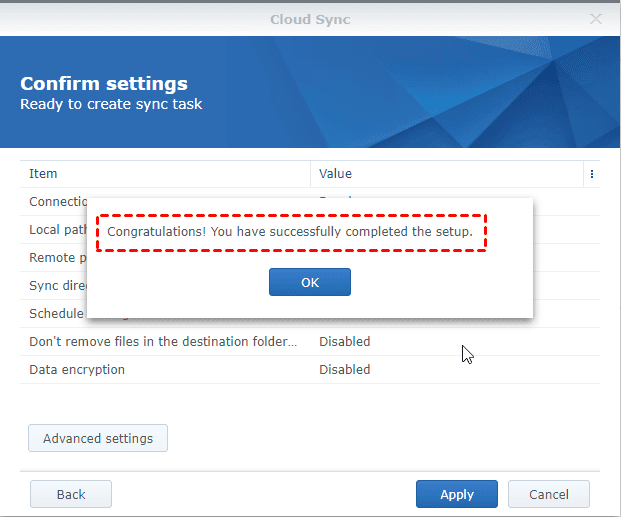
To relink your Dropbox account to Synology NAS, select the specific source and destination folders respectively in Synology NAS and Dropbox, then choose the sync direction as one-way or two-way sync, and finally press Next and click Apply.
Way 4: Resume Synology NAS and Sync Your Files
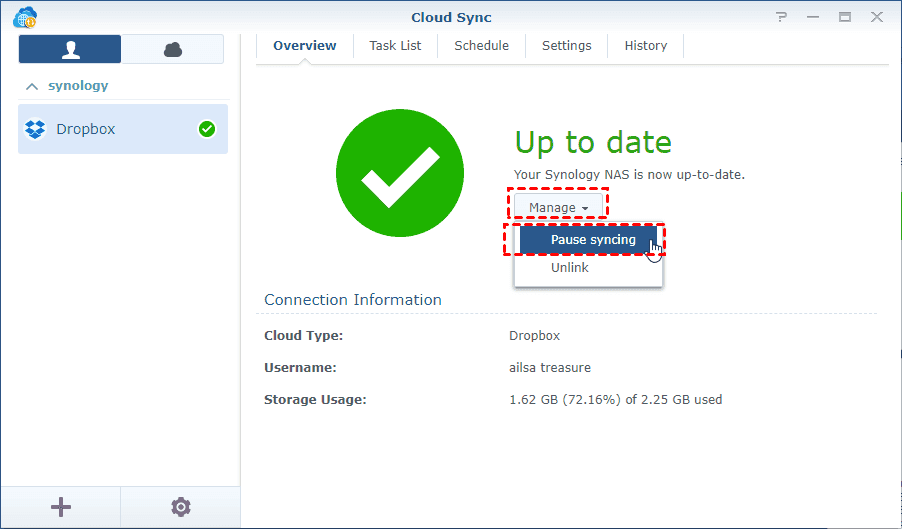
If the Synology Cloud Sync is stuck, click the "Manage" button under it and select "Pause Syncing".
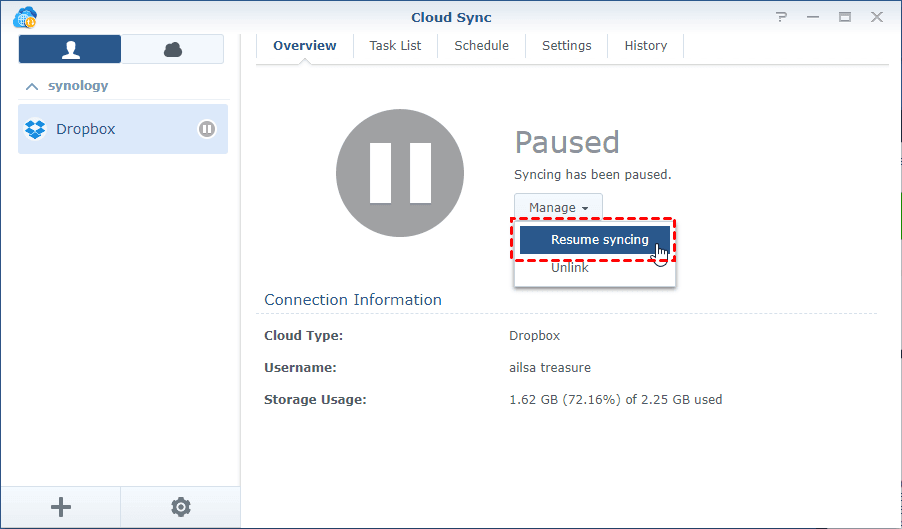
Wait a few minutes, then select Resume Syncing under Manage. This may allow Synology Cloud Sync to run normally.
Way 5: Get cloud authority again
Synology Cloud Sync may not work due to expired authorization of the cloud API, which can fail silently without prompting the user about the issue.
To resolve the issue, try restarting your computer, checking your internet connection, and ensuring that your Clouds are properly connected and configured. If the problem persists, consider reaching out to your Cloud provider's support team for further assistance.
Cloud Sync does not allow syncing incremental parts, requiring a full download or upload of files even if only minor changes are made.
Workaround to Sync Synology NAS to Dropbox
To resolve the Synology Cloud Sync not working issue, you can try running it manually or schedule the stop and Proceed task, or use third-party software to automate the process.
Set a scheduled task to stop and start Synology Cloud Sync
To restart the Synology Cloud Sync, simply go to the Control Panel, click on "Sync" under the "Package Center" section, and then click on "Start" or "Stop" to toggle the service. This will allow you to easily restart the Synology Cloud Sync as needed.
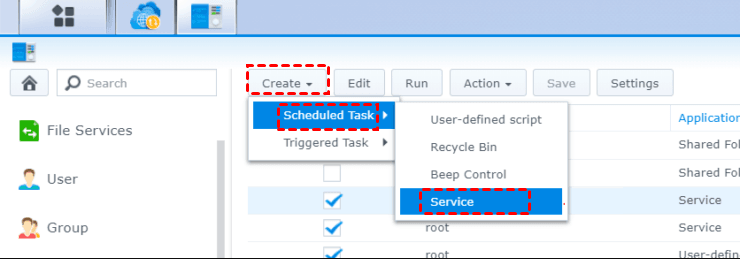
Step 1. To create a scheduled task in Synology Cloud Sync, go to Control Panel, then Task Scheduler, click Create, select Scheduled Task, and choose Service.
Step 2. In the Edit Task window, set general settings, schedule and task settings, then click Next.
- For General Settings, You can specify the task name, such as CloudSync Stop, and then select the user.
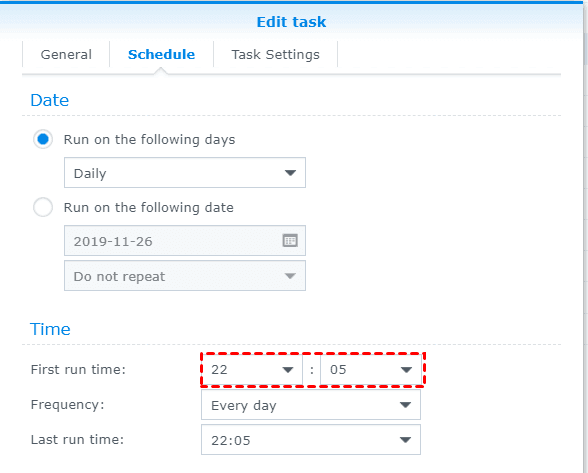
- For Schedule, you are able to specify the schedule date and time. My stop time is 10 pm every night.
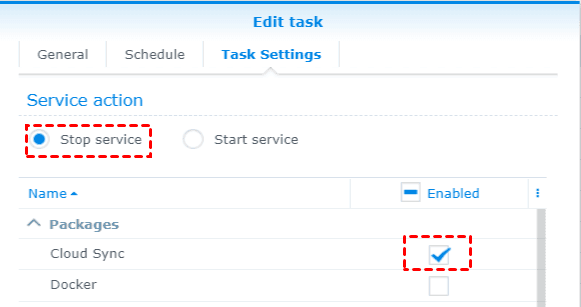
- For Task Settings, I am capable of selecting service action. Here is Stop service, and then Cloud Sync app under Packages.
Step 3. You need to select Start services in the Task Settings tab, making sure the start time is later than the stop time. Specifically, you've chosen to start the services 5 minutes after the stop time. This allows for a buffer period between the two. You can adjust this duration to suit your needs if desired.
Run Synology Cloud Sync Schedule With Third-Party Software
Qiling Disk Master Professional is the best file sync software that allows users to easily sync their Synology NAS to the cloud in Windows XP, Vista, 7, 8, 8.1, 10, 11. It has been highly recommended by millions of users due to its reliable performance, comprehensive features, and intuitive interface.
There are multiple sync features provided in this file sync software:
👍 Basic Sync: Sync files and folders to local disk, external hard disk, USB flash drive, CD/DVD, network share or NAS, cloud drives, schedule sync, etc.
👍 Mirror Sync: Always keep the files in the destination exactly the same as the source.
👍 Real-Time Sync: Once the changes made on the source, it will sync changed or newly added files and folders to the destination immediately.
👍Two-Way Sync: Sync files and folders from each other. Any changes in the source or destination directory will be synced to the other side.
And you can set the sync task to run schedule, such as, daily, weekly, monthly, event trigger and USB plug in. Among them, the daily sync is limited to only once or ranges from every 1 hour to 6 hours. Thus, you can automatically sync files in simple steps.
Please download it to have a try! For server users, try Qiling Disk Master Server.
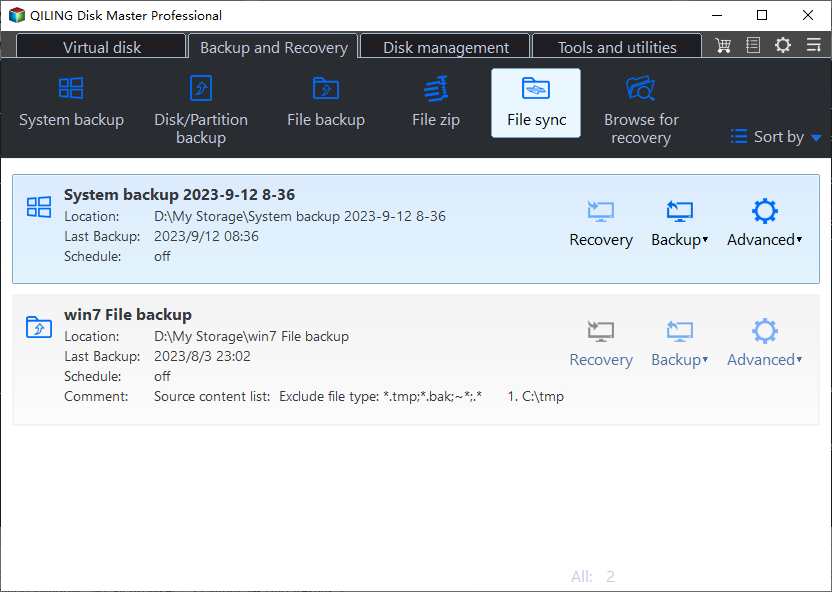
Step 1. To perform a file sync in Qiling Disk Master Professional, go to the "Backup and recovery" tab and select the "File Sync" option.
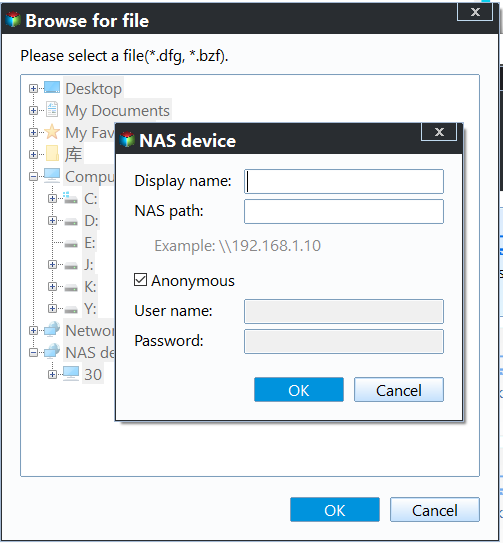
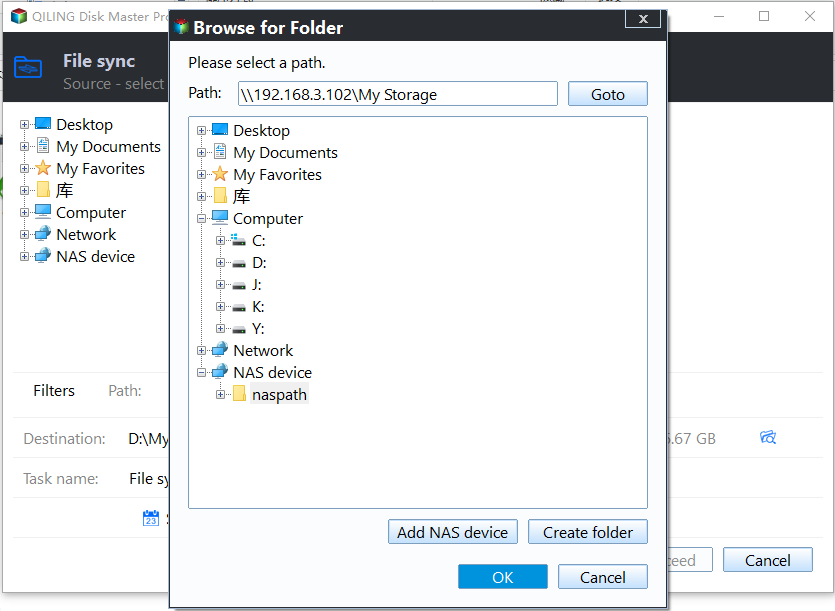
Step 2. To add a Synology NAS device, click on "Folder" or "Share/NAS device", then select "Add Share or NAS Devices". Enter the network path, which is the IP address of the Synology NAS, along with the user name and password.
★Tip: 1. Rename the task name to something meaningful like "Real-time Sync" or "Sync with Server" if you want to differentiate it from other sync tasks.
Step 3. To upload a file to Dropbox, tap the inverted triangle icon, select a cloud drive, and choose Dropbox as the destination.
★Tip: Ensure you have installed Dropbox desktop app first.
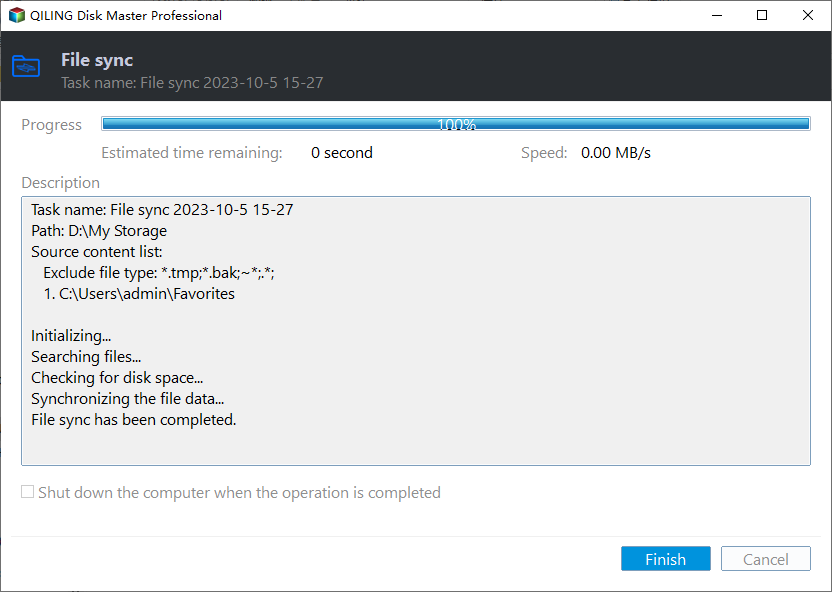
Step 4. To sync your Synology NAS to Dropbox automatically in Windows 10, click "Proceed" on the prompt that appears after connecting your Synology NAS to your Windows 10 computer. This will initiate the synchronization process, allowing your NAS to automatically upload files to your Dropbox account.
★Tips:
The Options feature could provide additional functionalities, such as the ability to comment on sync tasks, check the integrity of files in the destination during synchronization, and potentially other features.
For syncing files with a longer frequency, you can consider using Basic Sync, Mirror Sync, or Two-Way Sync.
After the initial full file sync, changes to the source directory are synced in real-time to the destination, preserving Dropbox cloud storage space.
Write in the End
If Cloud Sync in Synology NAS is not working, try troubleshooting solutions. If you can't resolve the issue, consider scheduling sync files through workarounds in Synology NAS. Alternatively, use file sync software like Qiling Disk Master Professional to schedule sync tasks in real-time, syncing files between multiple locations and ensuring no changes are missed.
Related Articles
- Automatically Mirror Folders to Synology NAS | 2 Simple Ways
- Perform Synology NAS to NAS Sync with 4 Steps | 2020 Guide
- How to Backup Synology NAS to Cloud with Ease
- Solved | Windows 10 File Copy/Transfer Very Slow (8 Methods)
Are you stuck in the situation that copy speed very slow in Windows 10, and the file transfer speed even drops to zero? If so, here are some solutions that have been proven to work.
