How to Transfer Files from PC to PC Using an Ethernet Cable
User case
How do I transfer files from PC to PC using Ethernet cable?
If I want to transfer files between two PCs, and all I have is an Ethernet cable, how can it be done? I've read/seen about Windows easy transfer, but when I tried it (with Ethernet cable connecting the two PCs), it says cannot find easy transfer cable?
Can files be transferred by simply connecting the two PCs using Ethernet cable? (apparently that doesn't work---need settings? router or what? I thought router is for wireless??)
- Question from City-Data Forum
Benefits of transferring files from PC to PC with an Ethernet cable
When you acquire a new computer, you'll need to transfer files between devices. For smaller file transfers, a USB flash drive can be a convenient option. However, for larger file transfers, using an Ethernet cable is often a more efficient solution.
Compared to USB flash drives, an Ethernet cable offers several advantages:
- More suitable for transferring plenty of files: One notable benefit of using an Ethernet cable for data transfer is that there is no capacity limit, allowing for the transfer of large amounts of data without restriction.
- Faster transfer speed: Using an Ethernet cable to connect computers enables faster data transfer due to the physical connection, which bypasses the limitations of wireless connections.
- Avoid repetitive work of plugging and removing USB flash drives: Additionally, you'll have peace of mind knowing that you won't encounter connectivity issues, saving you the hassle of troubleshooting problems like a non-detected pen drive.
Read on to discover how to transfer data from one PC to another using a LAN cable in Windows 11/10/8/7. Alternatively, you can use a free file sync software to transfer large files with greater ease and flexibility.
- Follow these easy steps to transfer files from one PC to another using an Ethernet cable in Windows 11/10/8/7. You can also consider using a free file sync software for a more convenient and flexible experience.
- Advanced way to transfer files between computers on same network
Stepwise guide to transfer files from PC to PC via an Ethernet cable
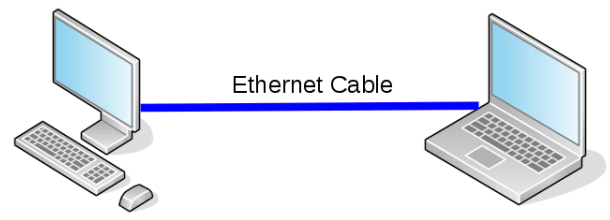
Before you begin, ensure you have a LAN cable (CAT5 is a suitable option) and a basic understanding of how to share files between two computers using an Ethernet cable. Below is a step-by-step guide to help you transfer files from one PC to another using a LAN cable.
1. Connect both computers to a LAN cable.
2. Turn on the sharing options on both computers. Search for Control Panel and open it. Go to Network and Internet > Network and Sharing Center > Change Advanced sharing settings. Then perform the following settings for both computers and "Save changes".
- "Turn on network discovery"
- "Turn on file and printer sharing"
- To allow anyone with network access to read and write files in the Public folders, you'll need to enable Public Folder Sharing on your computer. Here's how:
- "Turn off password protected sharing"
When enabling Public Folder Sharing, it's essential to consider the security implications. Turning off password protection can expose your computer to significant security risks, making it vulnerable to unauthorized access and data breaches.
3. Share a folder on the source computer.
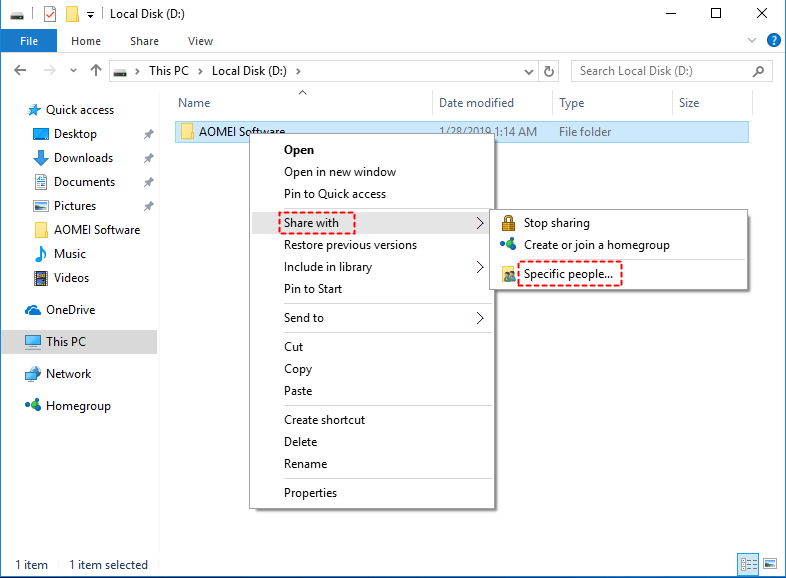
3.1. Select the folder you want to share and right click on it. Choose "Share with" (or "Give access to") and then select "Specific people".
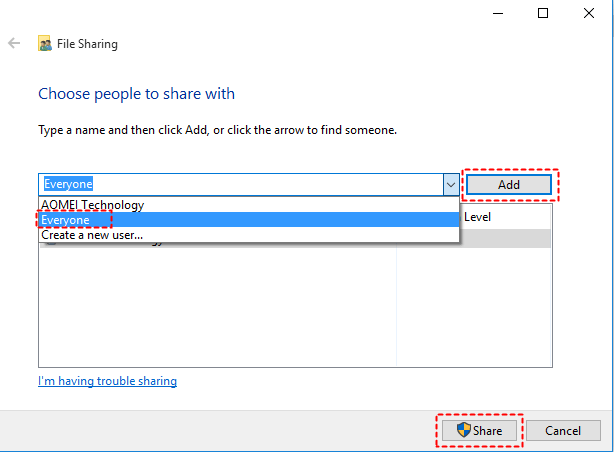
3.2. In the File Sharing window, select "Everyone" from the drop-down menu, click on the "Add" button next to it and then click on the "Share" button.
3.3. When you see "Your folder is shared", click "Done".
4. Access the shared folder on the destination computer.
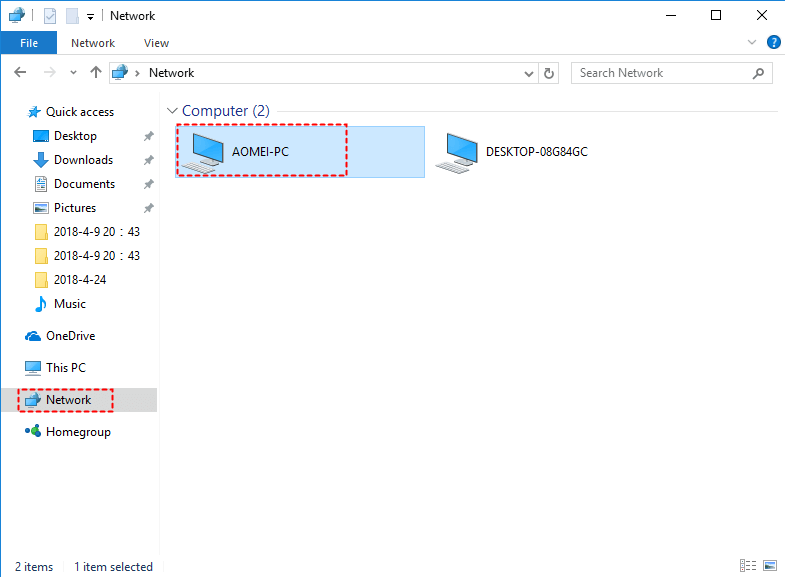
4.1. Press Win + E to open File Explorer and click "Network" on the left-hand panel.
4.2. Find the source computer and double click it. Enter the source computer's password if prompted.
4.3. You will see the folder you just shared. Copy the shared folder to anywhere else based on your needs.
You've noticed that sharing a single folder at a time can be cumbersome, especially when dealing with multiple folders and files. This approach can indeed be time-consuming, especially when you have dozens of files from different folders to transfer.
Advanced way to transfer files between computers on same network
When two computers are connected to the same wireless or wired network, you can easily transfer files between them without the need for an Ethernet cable. This convenient feature allows you to share files across devices, making it ideal for collaborative work or personal file sharing.
|
📍 Various sync locations |
You can synchronize PC files to local folders, network shared folders, NAS devices or cloud drives and vice versa. You can also sync two external hard drives and the like. |
|
⏰ Automatic file sync |
It enables you to create a schedule to auto run the file sync task daily/weekly/monthly. |
|
📮 Batch file transfer |
It supports transferring multiple folders simultaneously, thus saving you from tedious work. |
|
💻 Compatibility |
It works with all Windows PCs running Windows 11/10/8.1/8/7/Vista/XP (32 bit and 64 bit). |
Wanna try it out? Just download the freeware right now!
Looking for the fastest way to transfer files between computers on the same network? You're in luck!
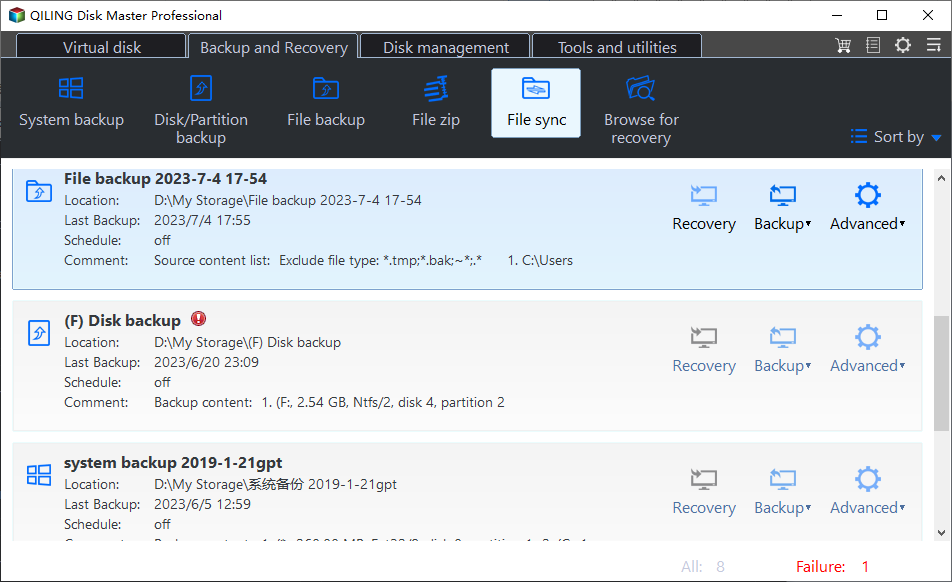
1. Launch Qiling Disk Master on the source computer. Click "Tools and utilities" tab and select "File Sync".
Notes: In addition to the File Sync feature, Qiling Disk Master also offers three other sync features, which are available in the **professional version**. These features can be accessed through the "Tools and utilities" tab, providing users with a comprehensive set of tools for managing their files and data.
- Mirror Sync: This feature ensures that the source directory remains identical to the target directory at all times. As a result, any files in the target directory that are not present in the source directory will be automatically deleted, maintaining the consistency and integrity of the target directory.
- Two-Way Sync: This feature enables the synchronization of changes between the source file directory and the target file directory in both directions. Changes made to files in the source directory will be reflected in the target directory, and vice versa, ensuring that both locations are always up-to-date and identical.
- Real-Time Sync: The software is designed to detect any changes made to files in the source folder in real-time. Upon detection of such changes, it will automatically synchronize the updated files to the target folder, ensuring that both locations remain identical and up-to-date.
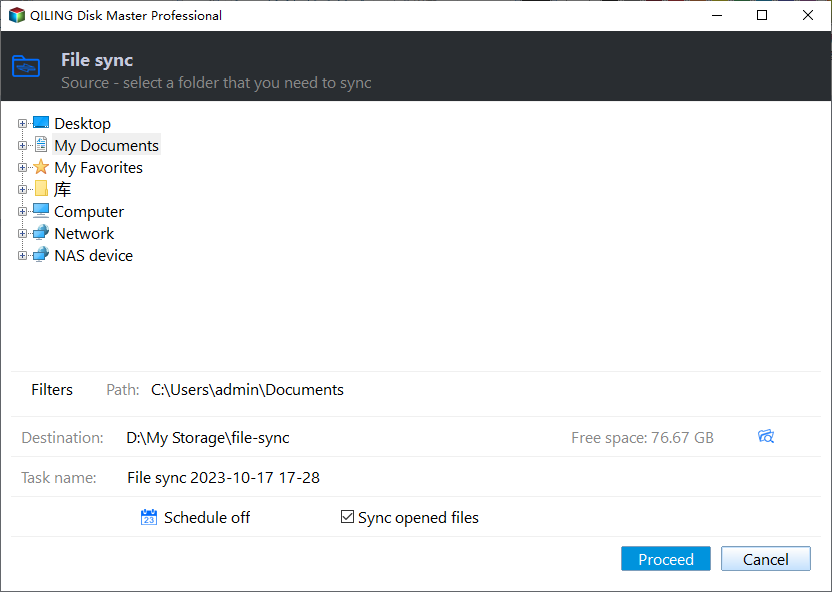
2. To begin the synchronization process, specify a unique name for this task to differentiate it from other sync operations. Then, click the "Add Folder" button to select the specific folder(s) that you wish to transfer files from.
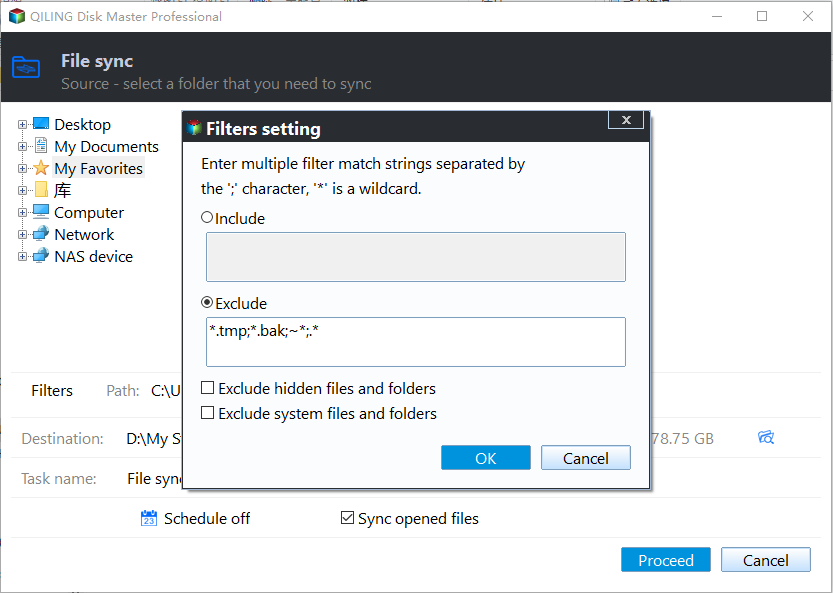
✐ If you need to exclude specific file types from the selected folders, consider upgrading to a higher edition of the software. This will grant you access to advanced filter settings, allowing you to precisely control which files are included or excluded from the synchronization process.
3. To add a share or NAS device as a destination, click on the inverted triangle in the destination box and select the option labeled "Add Share or NAS Devices" from the drop-down menu.
4. In the **Add Share or NAS Devices** window, enter the IP address of the source computer and click the blue **Connect** button. If prompted, also enter the username and password for the device.
5. Once the IP address is added, the **Add Share or NAS Devices** window will display a list of all network-shared folders on the source computer. Select the desired folder to store the files you plan to transfer, then click the **OK** button.
6. Click on "Proceed" button to perform the operation.
>>Options: You can add a comment to your sync task to help you remember the specific contents of the sync. This can be especially useful if you're performing a complex sync operation. Additionally, you can enable email notification to receive updates on the sync status.
>>Schedule Sync: you can set the sync task to run periodically. There are five modes supported: Daily, Weekly, Monthly, Event triggers, and USB plug in.
7. Once the sync process is complete, you can access the shared folder(s) on the destination computer by following the steps outlined above.
A more convenient way to transfer files from PC to PC:
In addition to using an Ethernet cable, you can also transfer files between computers using cloud storage services like Qiling Cloud. As a new user, you'll enjoy 1TB of free storage for 15 days, and you can monitor your total storage capacity and used space after logging in to your Qiling account.
Qiling Cloud also allows you to set up regular backup schedules, including daily, weekly, or monthly backups. If you frequently modify files, it's recommended to set an hourly backup within the daily backup schedule, ensuring your data is consistently up-to-date and secure.
Summary
While transferring files from PC to PC via Ethernet cable is possible, it can be a tedious process, especially when dealing with multiple folders. A more efficient solution is to use the free and reliable Qiling Disk Master Standard software, which can streamline the file transfer process and save you time.
Qiling Disk Master Standard offers a convenient way to transfer multiple folders between computers, saving you time and effort. In addition to its file transfer capabilities, this software also allows you to sync files at set frequencies, such as daily, weekly, or monthly. Furthermore, it provides advanced features like cloning dynamic disks in Windows 10 and backing up WD My Cloud to Google Drive. Experience its capabilities firsthand and discover more features to simplify your data management tasks.
Related Articles
- How to Transfer Files Between Laptop and Desktop PC Regularly
- How to Transfer Files from Old PC to New PC on Windows 7/8/10
- Clone Old Computer to a New One in Windows 10/8/7 Easily
- 4 Free Way to Transfer Files from C Drive to D Drive
