3 Ways to Make Windows Sync Folders between Computers
The need to sync folders between two computers
With multiple computers becoming increasingly common, transferring files between them is a frequent task. Traditionally, this involved copying files from one computer to a USB flash drive and then pasting them on another, a process that was both inconvenient and time-consuming.
Fortunately, things will become easy with the help of file sync. The synchronization operation can help you keep files in multiple locations up-to-date, so when you change the files on one computer, the other computers will update too. This is a great way to keep folders the same on all computers, and in this guide, we've collected 3 methods that can make Windows sync folders between computers. You can read and choose one as per your need. Let's get started!
3 methods to make Windows sync folders between computers
You can sync folders between computers using three methods: shared folders, reliable sync software like Qiling Disk Master, or SyncToy. To use a shared folder, you can create a shared folder on one computer and access it from another computer. Qiling Disk Master and SyncToy are software tools that can automatically sync folders between computers, making it easy to keep files up-to-date across devices.
- Method 1. Sync folders over the network
- Method 2. Sync folders with Qiling Disk Master
- Method 3. Sync folders with SyncToy
Method 1. Sync folders over the network
Windows has a feature that allows users to create a shared folder, making it accessible to anyone on the same network, with customizable permissions. This can be used to sync folders between two computers in Windows 10.
Step 1. Find the folder you want to share > Right-click the folder and choose Properties.
Step 2. Click the Sharing tab and then choose the Advanced Sharing... option.
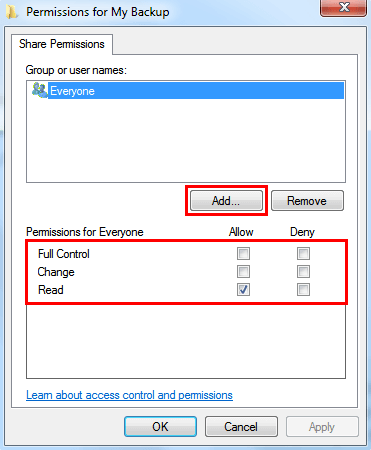
Step 3. Check the Share this folder > Click Permissions to set the share permissions.
Step 4. To share files with a specific user, click Add to enter their username. Then, select the desired permissions: Full Control, Change, and Read, and click OK to confirm.
To access a shared folder on another computer, press the Windows key and R key to open the Run box, then type \\computername (replace computername with the name of the computer where you created the shared folder or its internal IP address).
Method 2. Sync folders with Qiling Disk Master
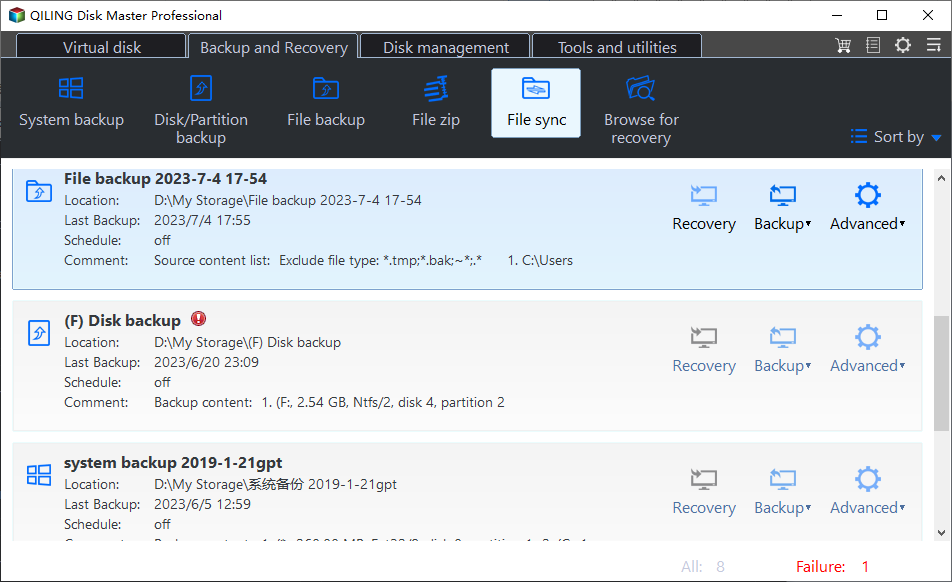
Qiling Disk Master Standard is a free and powerful file sync software that works well on all Windows PCs.
- The software can synchronize folders between computers in Windows operating systems, making it easy to keep files up-to-date across different devices without manual effort.
- You can sync folders from various storage devices, such as hard drives, external hard drives, or USB flash drives, to a network drive.
- It allows you to set a schedule for syncing folders, so you can sync them daily, weekly, or monthly, eliminating the need to manually remember to sync them.
Here are the steps to make Windows sync files between computers on home network with Qiling Disk Master.
Step 1. Download, install and launch Qiling Disk Master > Click Sync and then choose Basic Sync.
Step 2. Name the task > Click Add Folder to browse the computer and select the folder you need.
Step 3. Expand the drop-down menu of the second bar and choose Add Share or NAS Devices.
Step 4. In the pop-up window, enter network path and fill in the blanks with accurate information > Click OK.
Select the destination path and then click OK to continue.
Step 5. Click Schedule Sync to set the scheduled task > Click Proceed to confirm.
Notes:
1. Remember not to rename the source folder after doing the sync, otherwise the sync task will fail.
2. To access shared folders on other computers, click on "This PC", then select "Network", find the source computer's name, and click on it to view the shared folders.
3. Users can upgrade to Qiling Disk Master Professional or other higher editions to enjoy more advanced sync modes like Mirror Sync, Two-Way Sync, and Real-Time Sync.
Method 3. Sync folders with SyncToy
SyncToy, a free sync tool from Microsoft, helps users sync files between two folders. You can choose any folder to be your source or destination, such as the internal hard drive, USB flash drive, or a network share. To sync files between computers with SyncToy, follow these steps.
Step 1. Go to Microsoft Download Center to get SyncToy > Download and install the tool as instructed.
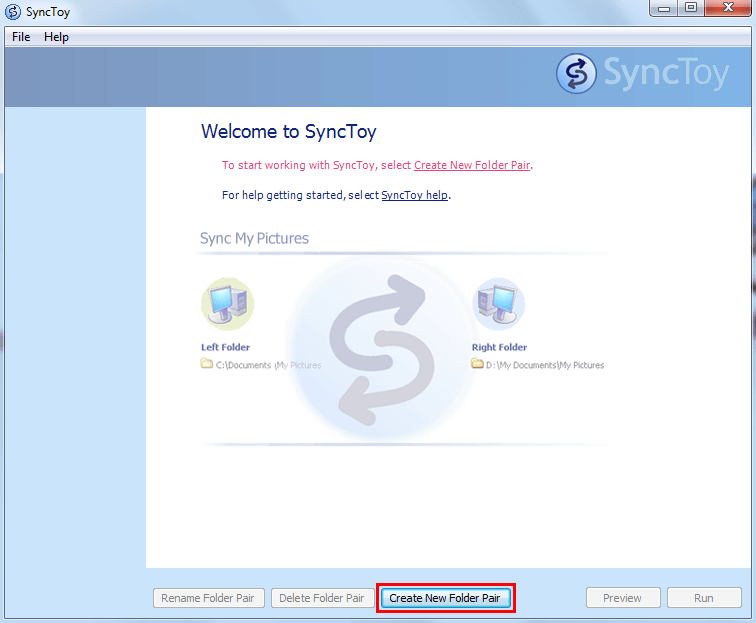
Step 2. Open SyncToy and click Create New Folder Pair.
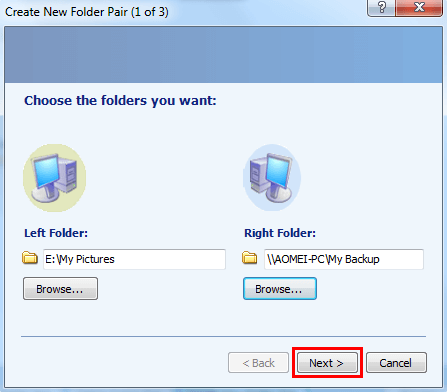
Step 3. To compare two folders, click "Browse" to select the folders you want to compare. The left folder will be the source folder and the right folder will be the destination folder.
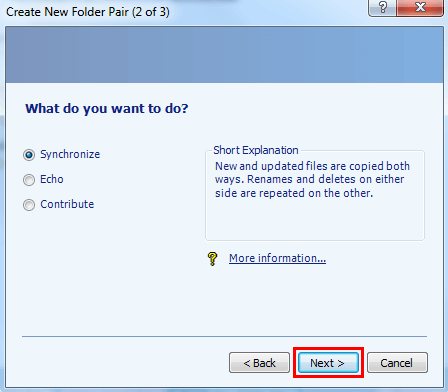
Step 4. To synchronize the data, you need to choose a method of synchronization. You have three options: Synchronize, Echo, and Contribute. Each option has its own explanation, which you can read by clicking on it. Once you've decided on a method, click Next to proceed.
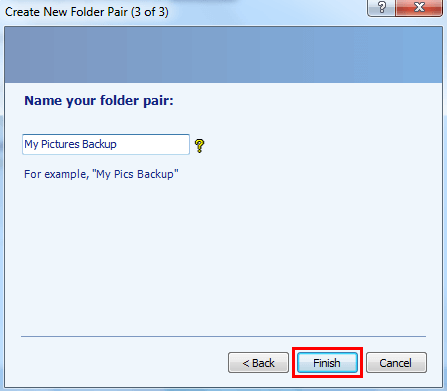
Step 5. Name the folder pair and click Finish. Now the sync job has been successfully created.
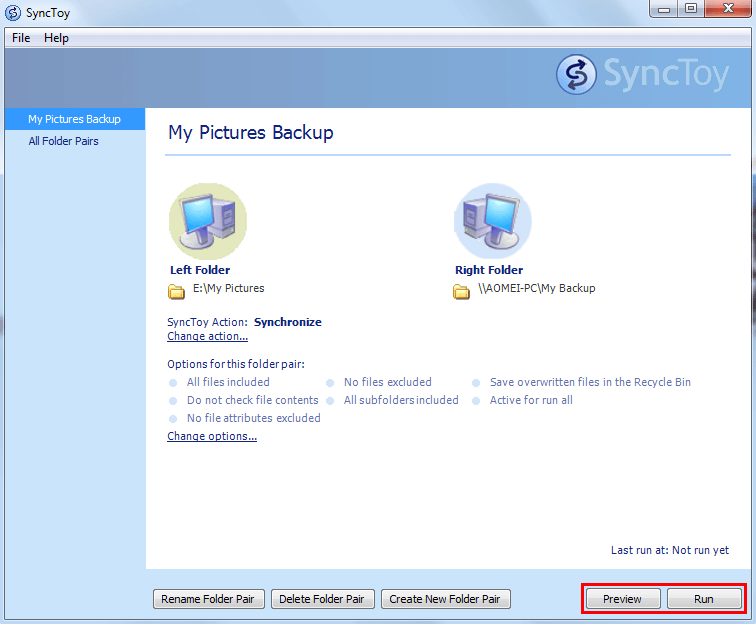
Step 6. To create a folder pair, you can change the sync settings anytime after the process is initiated. You can click the "Preview" button to review the details, and if everything looks correct, click the "Run" button to proceed. If the sync is successful, a confirmation screen will appear, indicating that the sync has been completed.
Conclusion
To sync folders between computers, you can use one of three methods: using the built-in Windows feature, syncing with OneDrive, or using a third-party tool like Qiling Disk Master. This can be a helpful way to keep your files organized and accessible across multiple devices. Qiling Disk Master not only facilitates folder syncing but also offers additional features, such as backing up your system, disks, or partitions, making it a useful tool for protecting your computer data.
Related Articles
- 2 Easy Ways to Sync Files between Computers without Cloud
- Transfer Files from One Computer to Another in Windows 10/8/7
- Windows 7 Professional/Home Premium Backup to Network Drive
- Upgrade Windows 7 32 bit to 64 bit without Losing Data
You can easily upgrade Windows 7 32 bit to 64 bit without losing data as long as you backup files beforehand. Click on this article to learn the complete guide.

