Sync Two Folders with Robocopy Command Line in Windows
- User Case: How Do I Sync Two Folders with Robocopy?
- Robocopy Command Line Syntax and Options
- How to Perform Robocopy One-Way Sync Two Folders
- Situation 1: Robocopy Sync Two Shared Folders
- Situation 2: Robocopy Incremental Sync
- Situation 3: Robocopy Real Time Sync Two Folders
- Other Robocopy Sync Situations
- Windows Sync Two Folders Command Line Limitation
- Easier Way to Sync Two Folders in Windows
- The Epilogue
User Case: How Do I Sync Two Folders with Robocopy?
"Hi, we have two shared folders. One is primary which is shared with the user and almost about to fill and the other is not shared yet but I want to sync all the data from primary to new one with Robocopy command line.
To sync changes from the primary folder to the new folder using Robocopy, you can use the following command:
Sometimes, you may need to sync two folders located in different computers or other locations, such as, internal or external drives, to make the two folders keep the same content. Here we will show you different ways to perform Windows sync two folders with command line tool.
- Robocopy Command Line Syntax and Options
- How to Perform Robocopy One-Way Sync Two Folders
- Windows Sync Two Folders Command Line Limitation
- Easier Way to Sync Two Folders in Windows
- The Epilogue
Robocopy Command Line Syntax and Options
Robocopy is a robust file copy command for Windows PCs and it allows you to copy files, directories, and even drives from one location to another. It provides you with different parameters to sync two folders in Windows 11/10/8/7.
👉 Robocopy command line syntax: To sync two folders, you can use the Robocopy command-line tool. Here are the steps:
robocopy [Source] [Destination] [(File)( ...)] [(Options)]
| Source | It specifies path to source directory, type as, drive:\path or \\server\share\path. |
| Destination | It specifies path to destination directory, type as, drive:\path or \\server\share\path. |
| File | It specifies files you want to copy, type as, names/wildcards: default is "*.*". |
| Options | It specifies copy, file, retrt, logging, and job options to use with robocopy command. |
👉 Common used options in Robocopy:
- /s: Copies subdirectories. Note that this option excludes empty directories.
- /e: Copies subdirectories. Note that this option includes empty directories.
- /lev: Copies only the top N levels of the source directory tree.
- /z: Copies files in restartable mode.
- /b: Copies files in Backup mode.
- /zb: Uses restartable mode. If access is denied, this option uses Backup mode.
- /efsraw: Copies all encrypted files in EFS RAW mode.
- /copyall: Copies all file information, including D (Data), A (Attributes), T (Time stamps), S (Security: NTFS access control list (ACL)), O (Owner information), U (Auditing information)
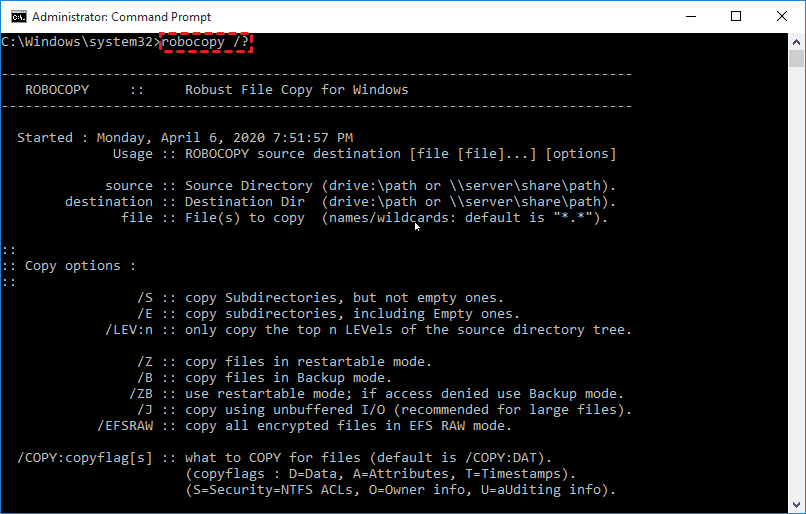
👉 To know more parameters you could use, please input robocopy /? to get more details.
How to Perform Robocopy One-Way Sync Two Folders
Robocopy is a powerful tool for synchronizing files between two locations. Here are some common scenarios where you can use Robocopy:
Situation 1: Robocopy Sync Two Shared Folders
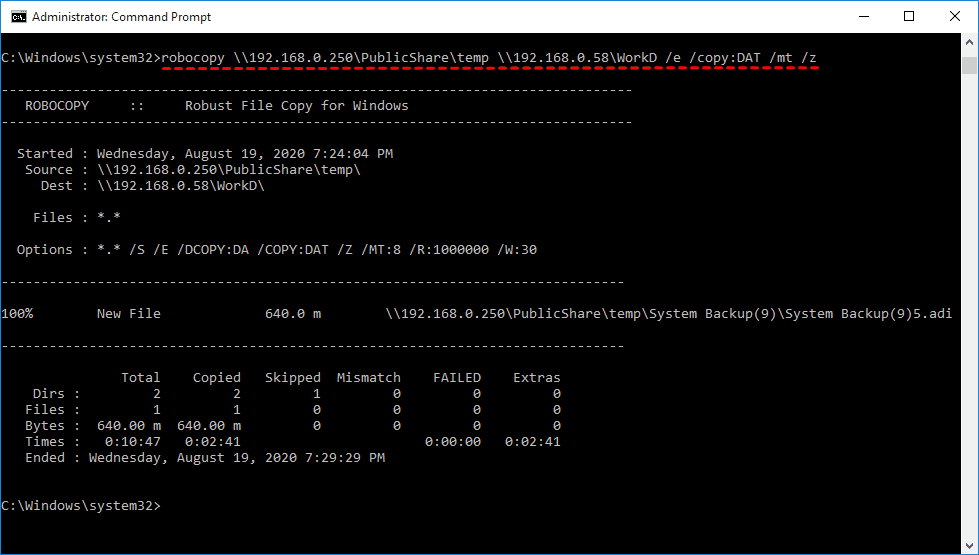
To sync two folders on different computers through a shared folder, you can use the following command line:
robocopy \\192.168.0.250\PublicShare\temp \\192.168.0.58\WorkD /e /copy:DAT /mt /z
Notes:
- /copy:DAT: means you will copy the source folder to destination folder with D (Data), A (Attributes), T (Time stamps), and you could modify these copied files. If you don't want to modify these folders and files, you could replace /copy:DAT to /copyall or /copy:DATSOU.
- /mt: Creates multi-threaded copies with 8 threads.
Situation 2: Robocopy Incremental Sync
To create an incremental sync task with Robocopy, you can use the `/xo` or `/xc` option. These options allow Robocopy to sync only the changes made to the source folder since the last sync, rather than re-copying all files.
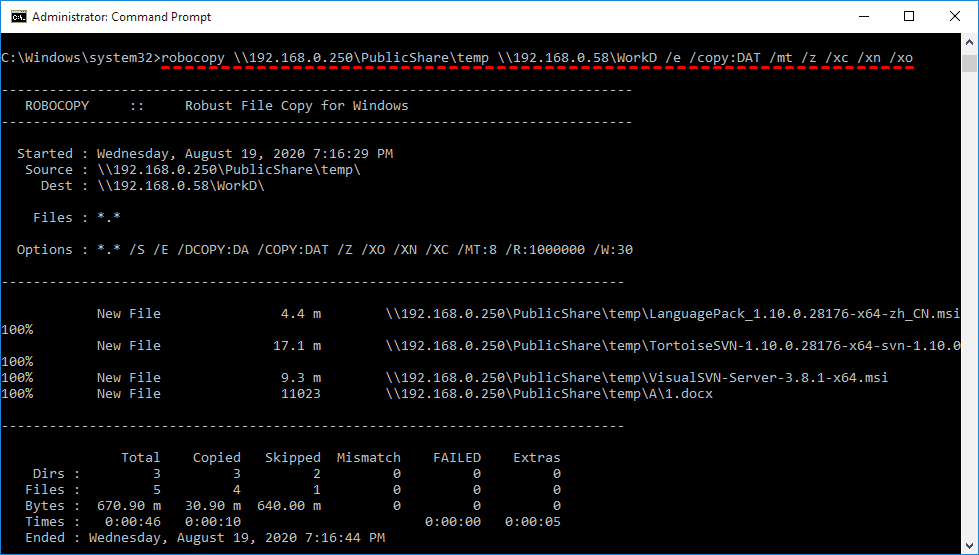
To sync changed part from source `\\192.168.0.250\PublicShare\temp` to `\\192.168.0.58\WorkD` in restart mode and create multi-threaded copies with 8 threads, use the following command line:
robocopy \\192.168.0.250\PublicShare\temp \\192.168.0.58\WorkD /e /copy:DAT /mt /z /xc /xn /xo
Notes:
- /xo: To exclude older files (i.e., exclude existing files older than the copy in the source directory), use the following command line:
- /xc: To exclude changed files (i.e.
- /xn: To exclude newer files (i.e.
- /mt: To enable multithreaded copying with Robocopy, use the following command line:
- With /xc, /xn, /xo specified, Robocopy will exclude files existing in the destination directory.
Situation 3: Robocopy Real Time Sync Two Folders
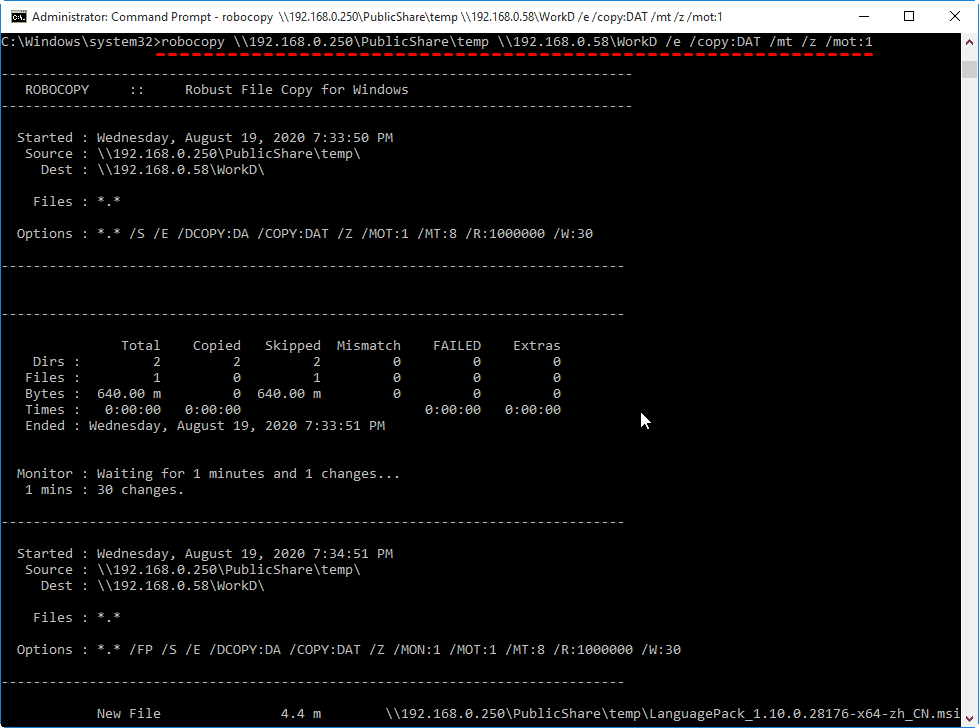
In addition to excluding files existing in the destination directory with `/xc`, `/xn`, and `/xo`, Robocopy also offers the `/mot` option to monitor changes in a specified time interval.
To monitor changes every one minute, you can use the following command:
robocopy \\192.168.0.250\PublicShare\temp \\192.168.0.58\WorkD /e /copy:DAT /mt /z /xc /xn /xo /mot:1
Note:
- /mot:: The command `robocopy \\192.168.
Other Robocopy Sync Situations
In addition to using the Robocopy command, you can also utilize batch files and the Windows Task Scheduler to continuously copy all file changes. This approach allows for a more manual and customizable solution to monitor file changes and synchronize them to a destination.
In addition to the Robocopy command, you can also utilize the /purge parameter to specify a mirror sync task. This will delete any files or directories in the destination that no longer exist in the source, effectively maintaining a mirror image of the source at the destination.
To perform a two-way sync, you will need to create a batch file using Notepad. For a detailed guide on how to do this, please refer to the article on Robocopy two-way sync.
Windows Sync Two Folders Command Line Limitation
Robocopy is a helpful tool for one-way file copying, but it has limitations when it comes to syncing two folders in a two-way sync.
- Robocopy parameters are quite complicated for computer novices to understand.
- Robocopy does not copy open files.
- Robocopy does not mirror files properly on systems older than Windows Vista.
- Robocopy will suppress the progress percentage reporting for files that are ignored when the /mt option is used.
- Be aware that specifying incorrect parameters can result in the permanent loss of important files and folders.
Easier Way to Sync Two Folders in Windows
Except for the Robocopy command line, you still can try GUI-based file synchronization software - Qiling Disk Master Professional. It supports Windows XP, Vista, 7, 8, 8.1,10 and 11(32-bit and 64-bit) and helps you sync two folders easily with the following options.
- Basic Sync: It will sync files from one location to another and supports daily, weekly, monthly, event trigger and USB plug in schedule sync settings.
- Real-Time Sync: It will monitor and sync changes imediately once it's detected, thus maximizing the retention of changes.
- Mirror Sync: It is a one-way file sync method and more concerned about files in the destination, any change will be undo, and you cannot add new files to it, or delete files already in it.
- Two-Way Sync: Unlike previous 3 methods, it will sync files between source and destination directory. All the schedule sync settings are supported.
Besides, it still allows you to sync two folders to multiple destinations, such as local disk, external hard drive (HDD or SSD), CD/DVD, USB flash drive, network share or NAS, even to cloud drives like Google Drive, Dropbox, OneDrive, Box, etc.
To begin, download and install Qiling Disk Master Professional on a Windows PC. If you're a server user, you can try Qiling Disk Master Server instead.
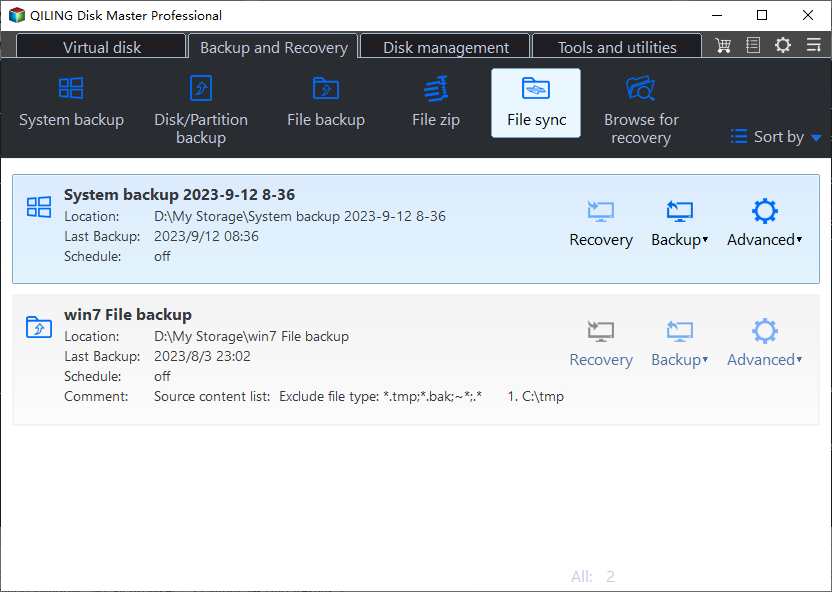
Step 1. Launch Qiling Disk Master Professional on your Windows 10 computer. Navigate to the Backup and recovery tab and select a method to sync two folders.
Step 2. Press Folder or Share/NAS device.
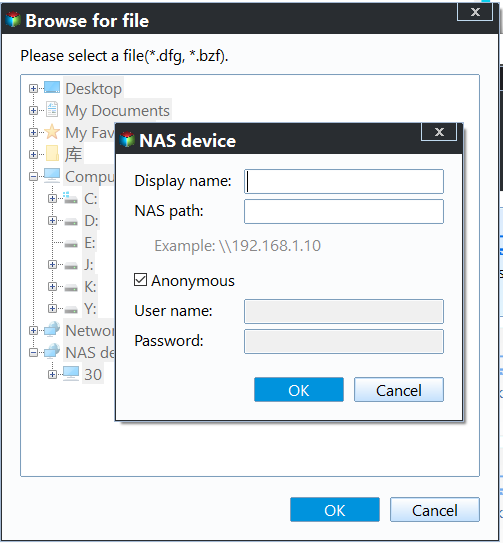
Step 3. Click Add NAS Devices and input the display name and network path to add the network share. You will also need to specify the folders you want to sync. If you encounter an error while adding the network path, you will need to enter your username and password.
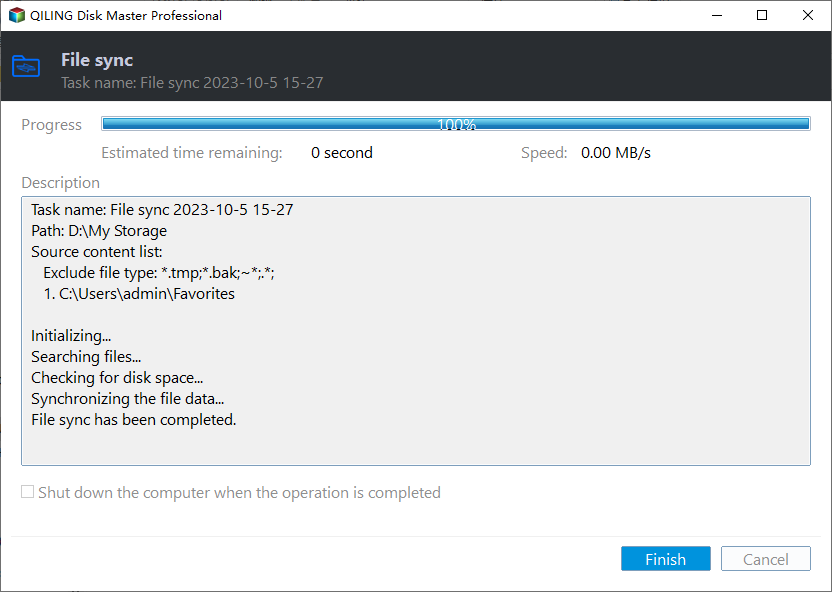
Step 4. Click Proceed to enable real-time folder synchronization in Windows. Alternatively, you can click Options to configure additional settings, such as commenting on the sync task, enabling email or SMS notifications, and verifying the integrity of files in the destination location during synchronization.
Following the initial full folder sync, any subsequent changes made to the source folder will be synced to the destination in real-time. This approach provides the highest level of file protection, but it also requires the most disk space compared to other synchronization methods.
If disk space is a concern, alternative sync methods can be employed. These include Mirror Sync, which can be scheduled to run at daily, weekly, or monthly intervals, or triggered by specific events, such as a USB device being plugged in. This approach can help mitigate the disk space issue to some extent.
To fully resolve the issue, consider utilizing the Backup feature to create duplicates of files. This not only schedules backup files but also automatically deletes old backup images, freeing up disk space. Three options are available:
- By quantity: The default number of backup sets is 1, and old backups in this set will be automatically deleted once the limit is exceeded.
- By time: The default retention time for backups is 7 days, but you can customize this setting to store backups for a longer period or based on weeks or months.
- By daily/weekly/monthly: This approach is the most secure, as it keeps all backups within a few days, then stores full backups on a weekly basis, and finally retains only one full backup per month.
In addition, you can also choose to backup folders to Qiling Cloud, a cloud drive that offers 1TB of free storage, and provides 15 days of free access after registration. This allows you to automate the backup task, running it on a schedule such as daily, weekly, or monthly.
The Epilogue
In comparison to using the Robocopy command-line tool to sync two folders on Windows, Qiling Disk Master Professional offers more flexibility and convenience. This powerful file sync software allows you to choose from various sync methods and schedule settings, tailored to your specific needs, on Windows 11, 10, 8, and 7.
In addition to its file sync capabilities, Qiling Disk Master Professional is also a professional backup software. If you're concerned about disk space, the File Backup feature can help. This feature allows you to schedule backups, choose between incremental or differential backup methods, and automatically clean up backup files to efficiently manage your backup tasks and disk space.
Related Articles
- How to Sync Two Folders on Same Computer Easily
- Easy Way to Mirror Folder to Network Drive in Real-Time
- Top Two Ways to Synchronize Files between Windows Servers
- Best Free One-way File Sync Software for Windows 7/8/10
