5 Effortless Ways to Backup Data in Windows 10
Why should you backup data in Windows 10?
You may never meet a data loss problem, but you should know that your computer is facing more threats that you may not aware of.
A recent study reveals that about 12,000 laptop computers get lost or stolen weekly in the US, a tenth of computers are infected with a virus monthly, 5% of new computers experience hardware failure in its first year.
You should feel lucky if none of these has happened to you. Do not wait until it is too late. Therefore, you should get started to backup your data in Windows 10. With a simple backup, you can restore all your valuable data back when your computer is in issues.
Method 1: Backup data with File History in Windows 10
File History was first introduced in Windows 8. It is often used for backing up files.
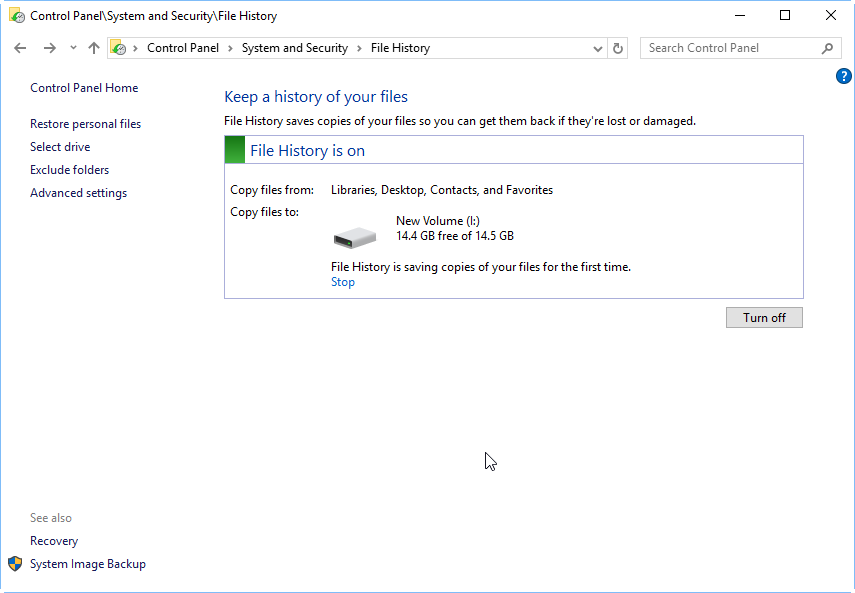
- Click Start and then Settings -> Update & Security -> Backup, and then you will see Backup using File History. You can also open File History from control panel.
- It needs you to use an external hard drive to save the backup files. If you have an external storage device connected and USB flash drive is also doable, you can just click Add a drive to select the external drive as backup drive.
- After you select the backup drive, File History will start backing up the first version of your files.
If you do not have an external storage device and you want to save backups to local disk, there is a workaround. You can create a shared folder on your internal hard drive, find the network address, and then you can configure File History to save backups to the network location (your shared folder).
Method 2: Enable system restore point in Windows 10
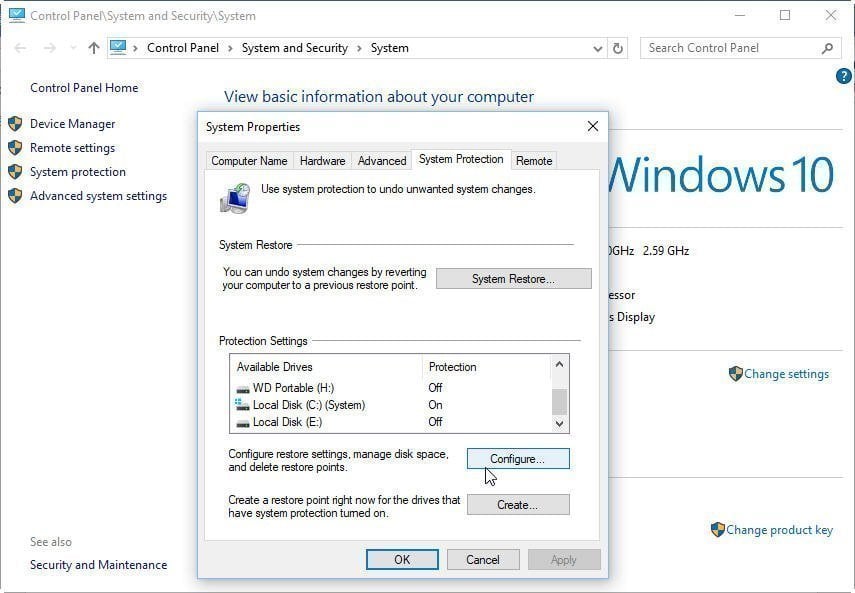
System restore point allows you to restore Windows 10 system to an earlier date when your system not running well. By default, system protection is disabled, you need to configure it first.
You can right click on This PC and select Properties and then select System Protection. From there, click Configure to turn on system protection and then select which of the drives that you want to protect. It is recommended to turn on system protection on system drive.
When you enable system restore in Windows 10, it will automatically create system restore points when it detects some changes has been made to system or in 7 days.
If system restore points have taken much disk space, you can use Disk Cleanup to remove the earlier restore points to free up some disk space.
Method 3: Backup data with Backup and Restore (Windows 7)
If you want to be able to restore your Windows 10 back when system crashes or is in a major problem, you can create a system image backup. Also, you may want to include some value files into the backup. In that case, you can use an older backup tool, Backup and Restore (Windows 7)
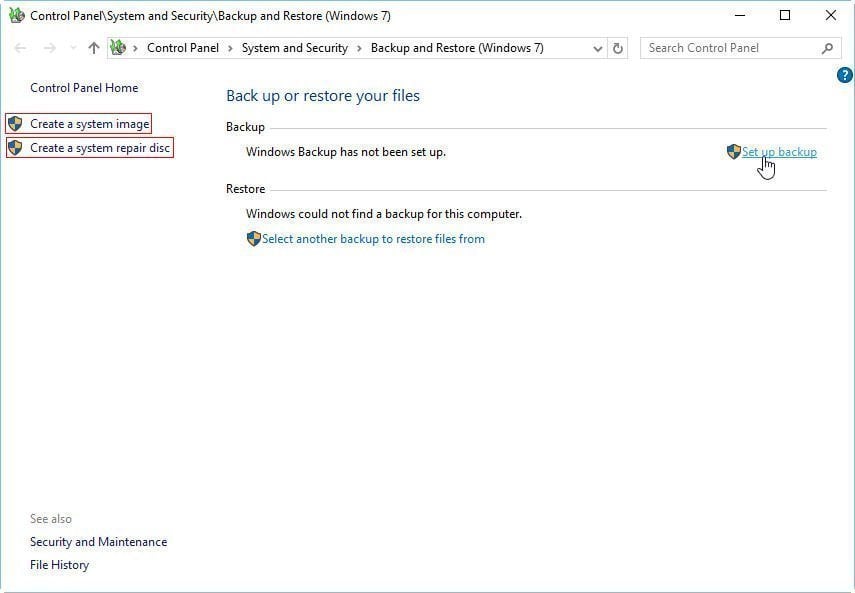
In Settings -> Update & Security -> Backup, you can find the backup tool under File History, and click Go to Backup and Restore (Windows 7).
From there, you click Set up backup and follow the wizard to complete the backup.
You can select any files and volumes to include in the backup. You can also set up scheduled backup to automatically backup Windows 10 data. The image backup is not compressed, so you need to prepare a relatively larger drive as the backup drive.
Method 4: Perform data backup using Windows 10 OneDrive
If you prefer online backup, you can backup Windows 10 to OneDrive. You can select files and save it to OneDrive local folder and it will automatically sync to OneDrive cloud drive.
If you want to use File History to backup to OneDrive, you can mount OneDrive as a network drive, so you can select OneDrive as the backup location.
Method 5: Backup files with Windows 10 free backup software
In addition to the Windows 10 built-in backup tool, you also can choose a free professional backup software to backup your data or system. Qiling Disk Master Standard, an excellent and free backup software, can be used in Windows 10, Win 11/8.1/8/7/XP/Vista PCs.
◑ No matter file backup, folder backup, disk backup, partition backup, or system backup, this freeware can meet your needs which provides you an easy-to-operation interface and can finish backups in three steps.
◑ External hard drives or internal hard drives, NAS, USB/DVD/CD can store backup image. If you create an Qiling account, you can also backup files to Qiling Cloud.
◑ During backup, you can set for automatic backup for day by day, week by week, and month by month backup.
◑ In addition to scheduled backup, you can also use this freeware to do incremental and differential backup for some new increased and modified data.
◑ Besides, there are some another backup options, you can click to add a comment for your backup, compress the data backup image, split an image into multiple file images, encrypt for backups and enable email notification after finishing backup.
The user-friendly interface allows you to set up a data backup task in a few click. Let’s take system backup as an example to show you how it works. If you want to backup data on Windows Servers, please turn to Qiling Disk Master Server.
- Free download this software and install it.
- In its Home screen, click Backup and select System Backup.
Tip: Choose Disk Backup if you want to back up all the data on the hard drive, not just the operating system.
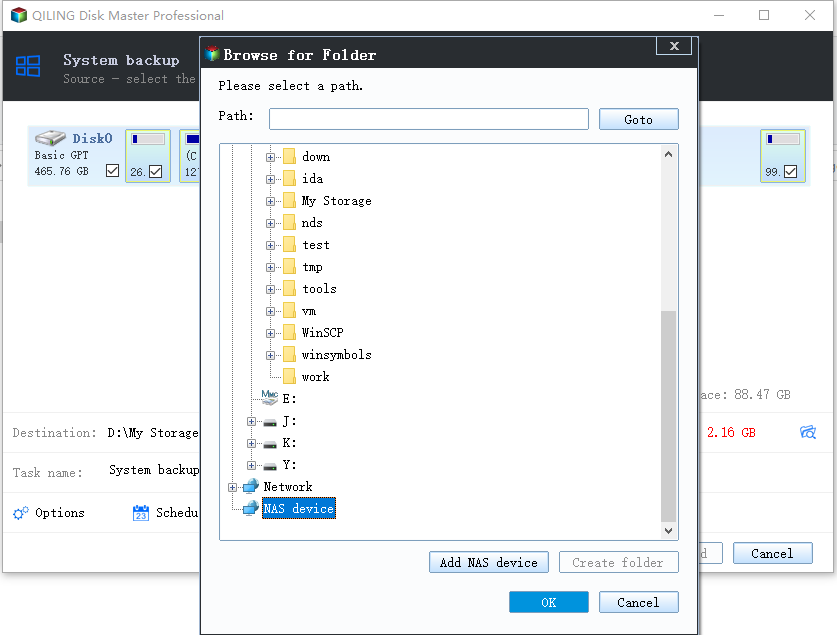
- Click the second box to select a location to save the backup image file. You can backup to external hard drive, internal drive or network location.
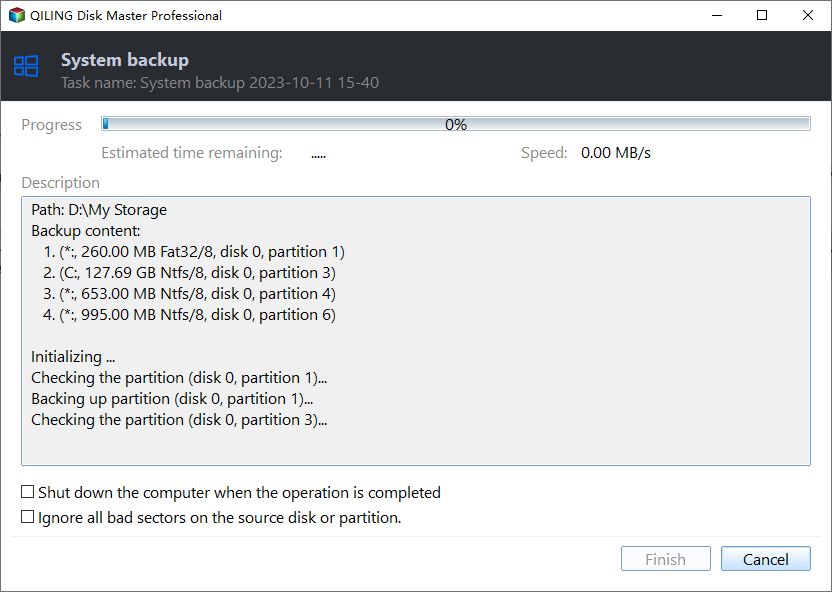
- Click Proceed to start the backup.
✍ Tips:
>> Options: Here, you can write comments, modify the compression level of your backups. And if you want to encrypt your backups, please upgrade to Qiling Disk Master Professional edition.
>> Schedule: You can back up data for you automatically and periodically at a regular basis, such as Daily, Weekly, Monthly, Event triggers and USB plug in.
>> Backup Scheme: You can choose backup methods here. Differential backup is preferable to incremental backup because incremental backup requires all backups to be complete before a backup can be restored. This program will delete old image files automatically to save disk space for you. You need to upgrade to Qiling Disk Master Professional to enjoy this feature.
Final Words
That’s how you can backup data on Windows 10. By comparing the five methods provided in this article, using Qiling to backup data is undoubtedly the best choice. It provides you with the easiest operation and the most reliable data security.
If you do not prefer image backup, you can also choose clone the hard drive or system as a way to backup data in Windows 10 using Qiling Disk Master Professional.
Related Articles
- Backup Specific Folders in Windows 10 Easily | 2 Ways
- Create Schedule Automatic Backup in Windows 10 [3 Ways Included]
- Backup Data Offsite on Windows 10 to Protect Data | 3 Ways
- How to Make Partition in Windows 7/8/10 After Installation?
Making partition can separate your OS from your data. In this post, you'll learn how to make partitions in Windows 7 in 2 ways.
