Backup Disk Full | How to Delete Backup Files in Windows 10
What Happens When the Backup Disk is Full
Windows 10 includes features that allow you to create system image backups and save previous versions of files regularly. These ensure your data security and empower you to recover the computer to an earlier state without data loss, especially in the case of system failures.
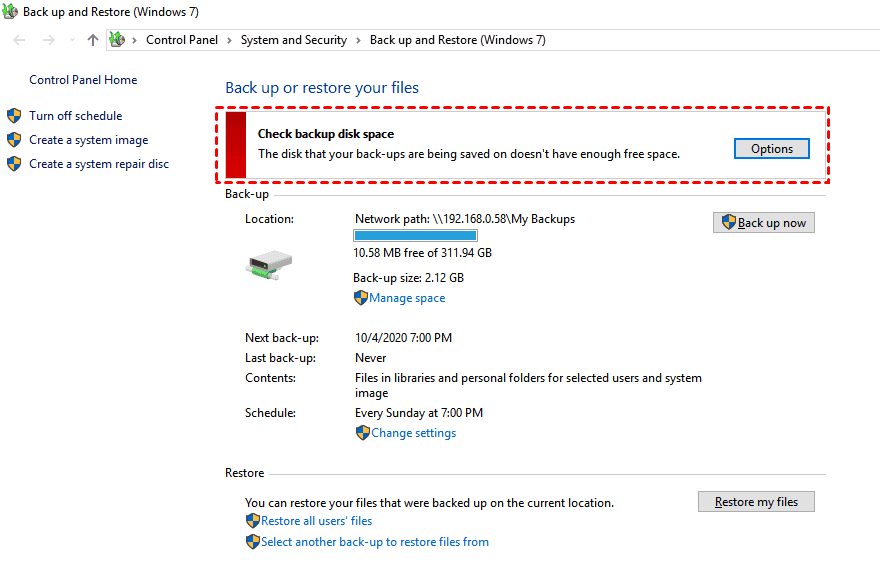
However, if the backup disk is full, then no backups can be created, leaving your files and system at risk. So it is important to manage backup files reasonably and free up some space in Windows 10/11.
How to Delete Backup Files and Free up Disk Space
As mentioned, Windows 10/11 has many backup features to protect your system and files. You may have enabled system protection to create system restore points, set up automatic image backup task with Backup and Restore (Windows 7), or backed up your files using File History.
Each of these backup methods can fill up your disk space. In this case, we can take some measures to delete obsolete files and solve the backup disk full problem.
Protect OS & files better and deleted backup files automatically in Windows 11/10/8/7. More »
How to delete Windows image backup in Windows 10
To delete Windows image backup, use the following steps:
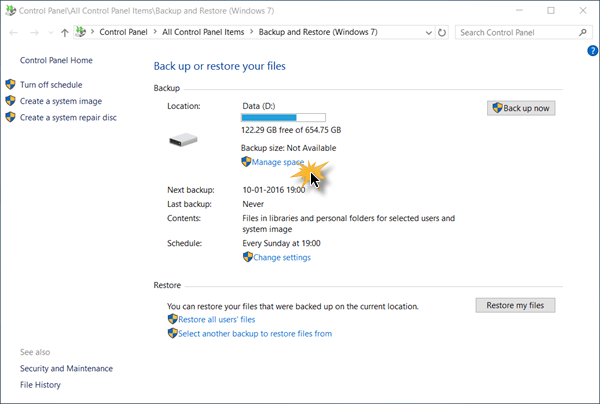
1. Click Start and then select Settings > Update & Security > Backup > Go to Backup and Restore (Windows 7) to open the old image backup tool.
2. Click on Manage Space.
3. In the next screen, click View backups to select any of the image backup files to delete.
After deleting some of the previous image backups, you can also change how Windows manage the previous image backups. Click on Change Settings, and then you have two choices:
- Let Windows manage the space used for backup history
- Keep only the latest system image and minimize space used by backup.
The first 1 is the default option. If your backup disk always gets full, you can change to the second option to only save one system backup in Windows 10.
How to delete system restore points in Windows 10
Windows 10 System Restore Points allow you to undo unwanted system changes and restore protected files to the previous version. If you think this is taking too much space. You can delete all or some of the system restore points.
To delete all restore points:
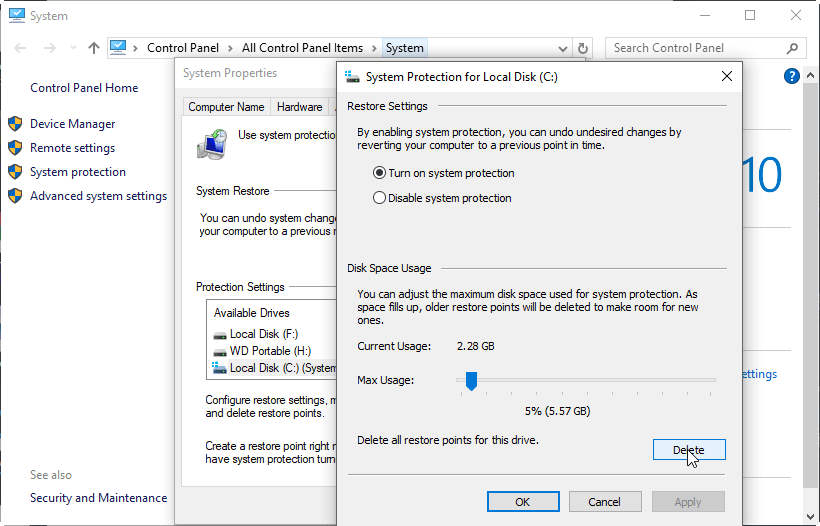
1. Search “system protection” and select the result “Create a restore point”.
2. Click Configure…
3. Click Delete and confirm the option to delete all of the restore points on this drive.
To delete all but the most recent restore point (recommended):
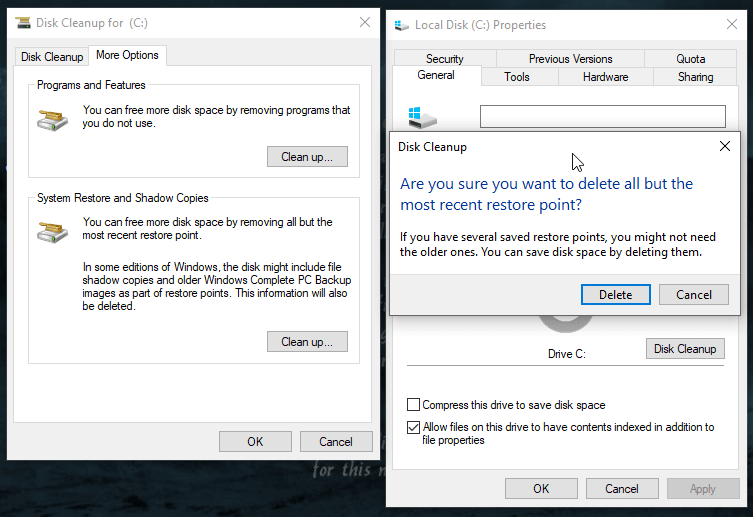
1. Right click on C: drive and select Properties and Disk Cleanup. If you want to delete restore points on other drives, just right click on another drive and do the same.
2. Click Clean up system files and wait for the calculating.
3. Click More Options tab, and click Clean up… under System Restore and Shadow Copies.
4. In a pop-up confirmation window, click Delete to delete all but the most recent restore point.
How to cleanup File History in Windows 10
By default, Windows 10 File History saves all versions forever, so eventually, your Windows 10 backup disk will full. But you can easily change that setting to automatically delete old versions.
Before you trying to delete File History backup versions, you need to make sure the backup drive is connected and File History turned on. Otherwise, you are not allowed to delete File History backups.
To cleanup file history, use the steps below:
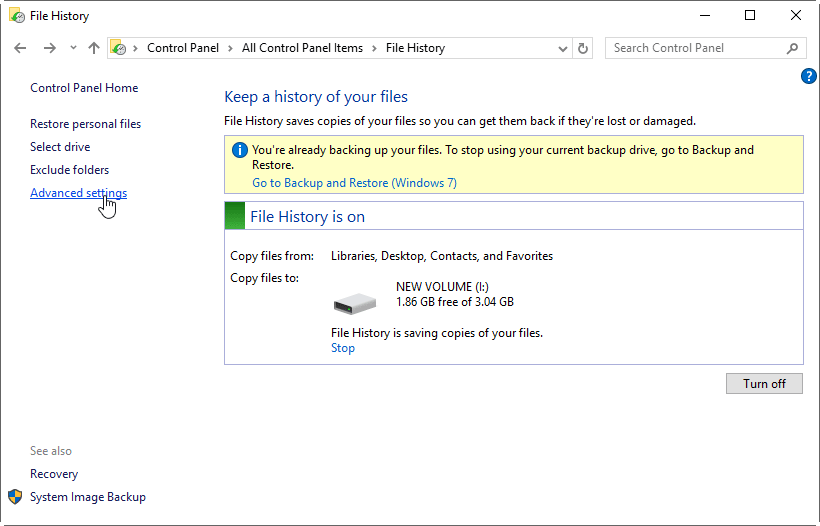
1. Open File History from Control panel. Then click on the Advanced settings.
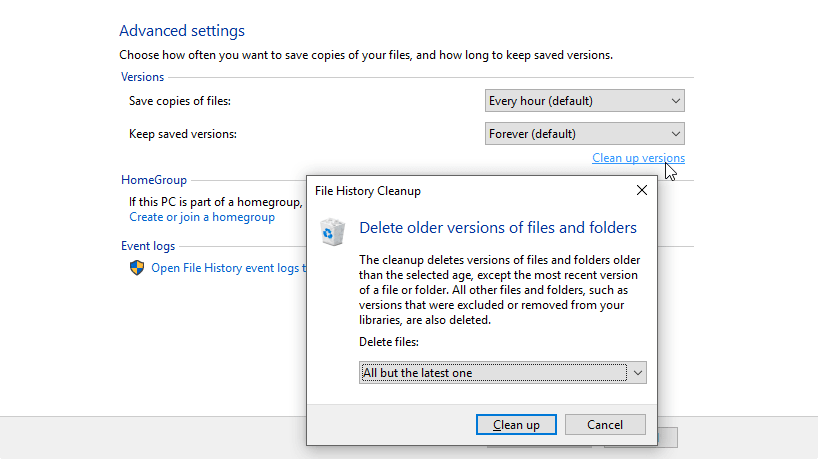
2. In the next screen, you will have the option to change how long the saved versions are stored. You can change Keep saved versions for 3 months or so. You can click the link Clean up versions to delete versions right now.
All these Windows backup features are supposed to free up disk space when needed. If you handle them properly, the backup disk should never run out of space. But if you find it troublesome to delete backup files manually and regularly, you may want to use another backup program with a more flexible way of managing backup disk space.
Better Way to Auto Create and Delete Backup Files
Qiling Disk Master Professional is a comprehensive backup & restore tool for PCs running Windows 11/10/8/7. It provides all the features that are supported by Windows backup utilities, yet brings more advanced options to optimizing your data protection routine.
▪ It includes all necessary backup options, include File Backup, System Backup, Parition Backup and Disk Backup.
▪ Besides conventional full backup, it supports scheduled incremental and differential backup to back up only changed data and save your backup disk space.
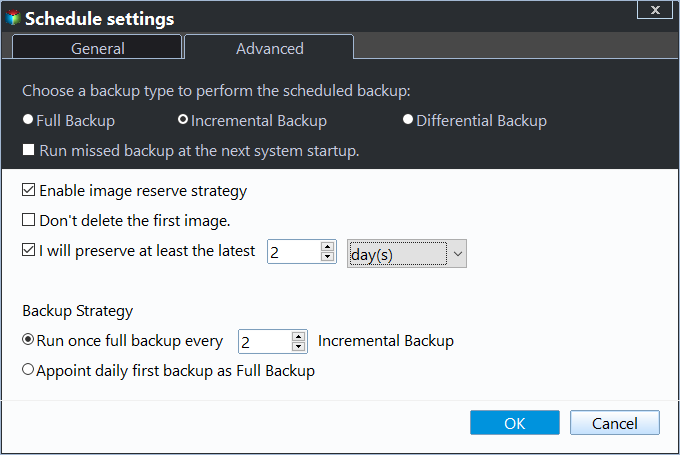
▪ It offers different backup cleanup schemes to automatically delete previous backups files (based on quantity, time, space, etc.), so your backup disk will never run out of space.
▪ When it comes to restoration, you can restore files or operating system to any backup point you want, or even restore system to different computer with the Universal Restore feature.
To create and delete backup files in Windows 10/11, you can choose a backup option at first -> then select a backup schedule and retention scheme -> click Proceed at last. After that, when the backup amount reaches the number you set, it will delete backup files automatically.
🔰Backup Options:
Based on what you want to include in the backup, you can perform system backup, disk backup, partition backup, files and folders backup. And all of the backup types support schedule backup and auto deletion.
⏱Backup Schedule:
When choosing schedule triggers, you can have the backup to run at a specific time daily/weekly/monthly or upon an event. If you want the backup to run when no user is logged on, you need to choose the option runing scheduled backup using Task Scheduler under the Advanced tab.
💾Backup Cleanup:
After configuring a scheduled backup, you can enable Automatic Backup Cleanup to automatically delete old backup files while keeping remaining backup images recoverable. Based on how you set up the scheduled backup, choose the suitable backup scheme to free up disk space.
✍Tips:
- Unlike file-level backup, Qiling Disk Master has the ability to backup files that are currently in use.
- As you may know, incremental backup is based on the previous backup. If you delete an incremental backup, the incremental backups after the one deleted are useless. Therefore, you should create a full backup before deleting incremental backups; Meanwhile, a differential backup is based on the last full backup. You can delete any differential backup. as long as the full backup is intact, your differential backups are valid.
- If you get confused, just use the built-in backup schemes and it will take care of your backups and disk space, so you will not worry about Windows 10 backup disk full. Besides these features, Qiling Disk Master also provides File Sync and Disk Clone feature to protect your data.
Conclusion
To solve the backup disk full problem in Windows 10/11 computers, you can follow the guide to delete backup files created by Windows Backup and Restore, Restore Point and File History respectively. But if you want a more intelligent mechanism to delete obsolete backups, Qiling Disk Master is a wise choice.
If you want to protect unlimited computers within your company, you can also pick Qiling Disk Master Technician. With the inbuilt Qiling Image Deploy tool, you are also allowed to deploy/restore system image file on server-side computer to multiple client-side computers over network.
Related Articles
- Windows 7 Backup Disk Full, How to Manage Backup Disk Space?
- The Solution to Windows Server Backup Disk Full
- Wbadmin Delete Backup for Windows Server 2016/2012/2008
- How to Do Disk Backup for Windows 10?
- How to Backup Windows 10 to External Hard Drive (Fastest)?
