How to: Extend System Partition on Windows 10 [Safely and Quickly]
Why extend system partition on Windows 10/11?
Windows 10/11 System partition (C drive) is an essential partition. If C drive is running out of space, issues such as app slow to respond, Windows update failure may occur. What’s more, you can be disturbed by Low Disk Space warning. To avoid the potential problems, it’s wise to extend system partition before it is almost full.

Two ways to extend system partition on Windows 10
There are two easy and reliable ways about how to increase system partition C capacity presented. Pick up one according to your own need.
Way 1. Allocate free space from one partition to system partition on Windows 10/11
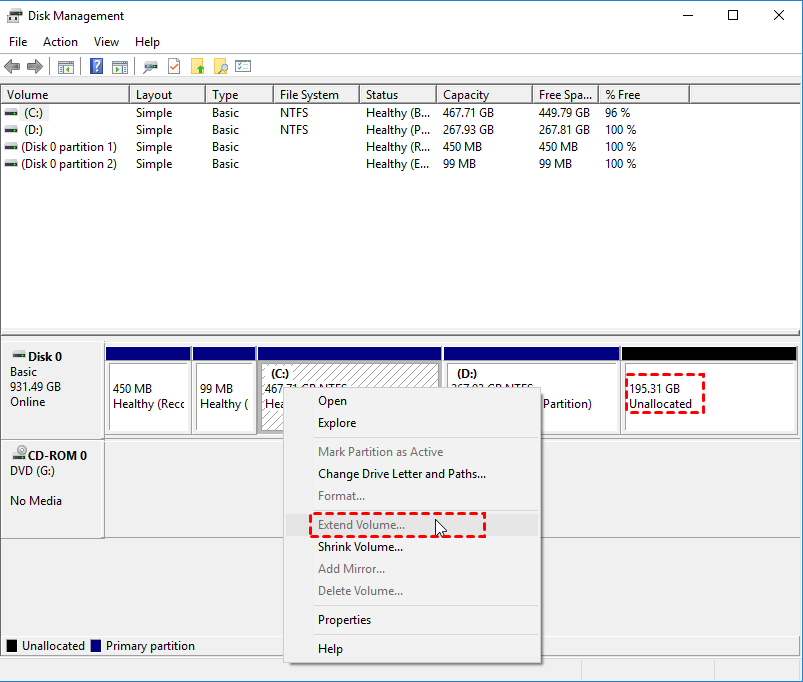
In many cases, the disk has no unallocated space existing for extending system partition. Even you get unallocated space after shrinking partition D (the partition behind system), Windows 10 Disk Management Extend Volume option is still greyed out, as the following screenshot:
Note: You may be interested in: How to Make Unallocated Space Contiguous to Extend Partition Successfully?
Thus, a feature-rich and powerful partition software, Qiling Disk Master Professional is recommended. It can directly reallocate unused space from one partition to another partition (like from D partition to system partition) in Windows 11, 10, 8, 7. Now, let’s see how to use the software to extend system volume.
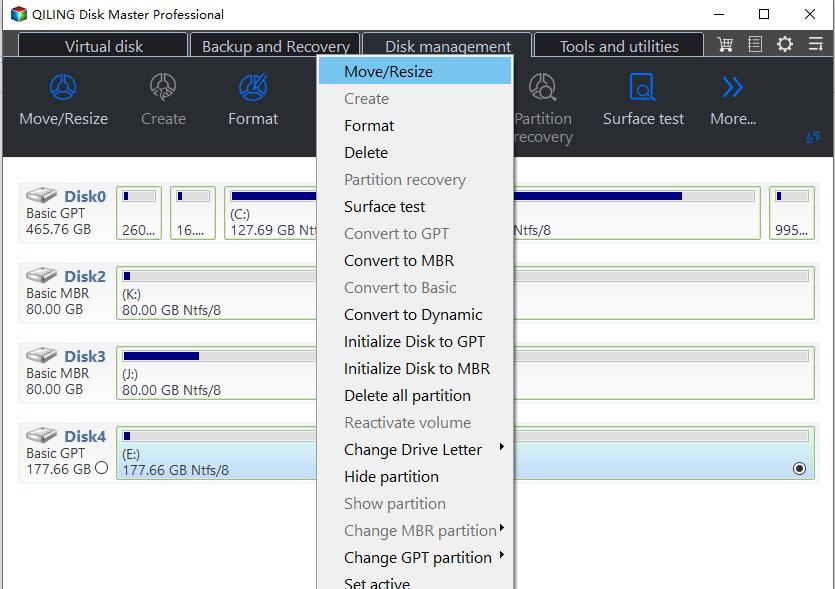
Step 1. Install and run the software. On the home interface, right-click the partition that has enough space and choose “Move/Resize”.
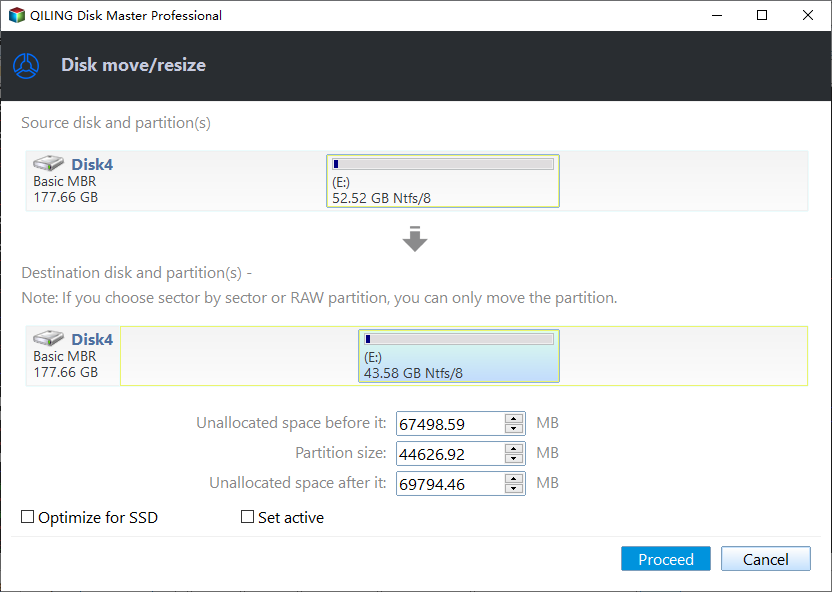
Step 2. In the pop-up window, determine the size of free space that you want to reallocate from partition D and this free space will be added to the target partition. Here I choose C: as the destination partition.
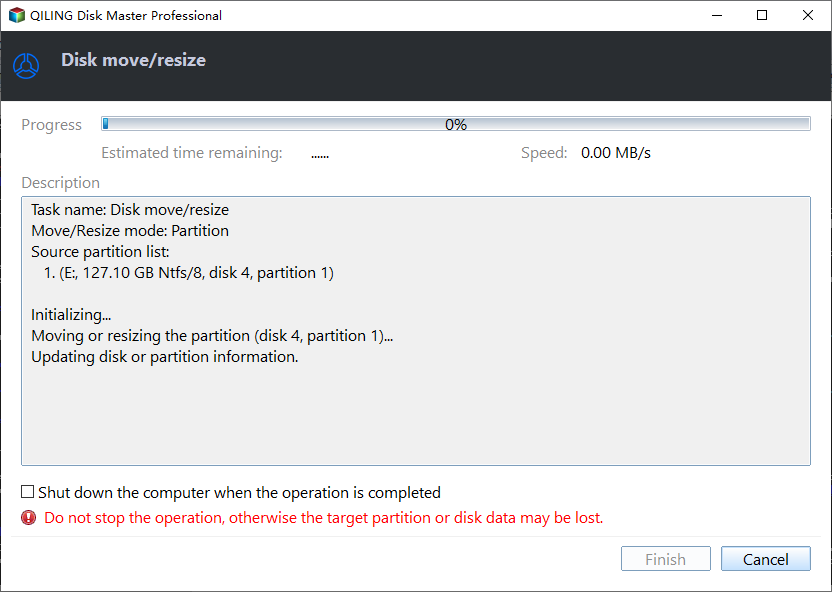
Step 3. Go back to the main interface where you can preview the operation result. In the following screenshot, you can realize that C drive will be extended and D drive will be shrunk. Then, click “Apply” and “Proceed” to commit the operation.
Notes:
- The operation needs to be performed under PreOS mode as it involves system partition.
- You can add non-contiguous unallocated space into system partition via Qiling Disk Master.
- To manage hard drives partition under Windows Server 2019/2016/2012 (R2)/2008 (R2), Qiling Disk Master Server is helpful!
Way 2. Windows 10 merge partition into system C drive
If your goal is to extend system partition and don’t care about data stored on partition D (the partition behind partition C), you can use Windows 10 Disk Management to merge partition D into partition C. Have a look at the step-by-step guide.
Warning: After the operation, partition D (the partition you delete) will disappear and all data saved on it will be removed. If you don’t want to lose data, you can back up them in advance.
The first stage: Delete partition D (the partition adjacently behind C drive)
Step 1. In Windows 10, press Windows + X and choose Disk Management.
Step 2. In Disk Management, right-click partition D and choose “Delete Volume”.
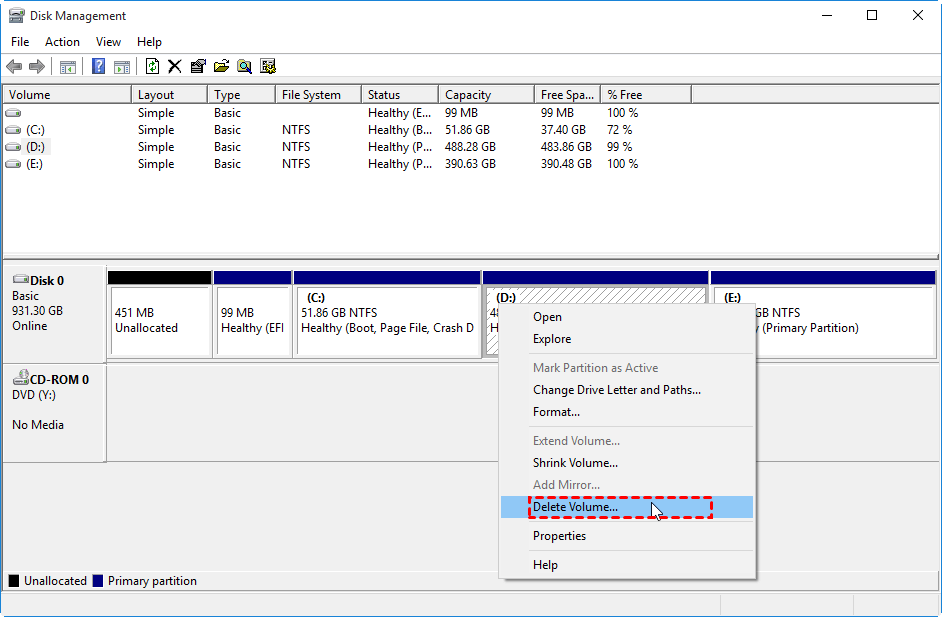
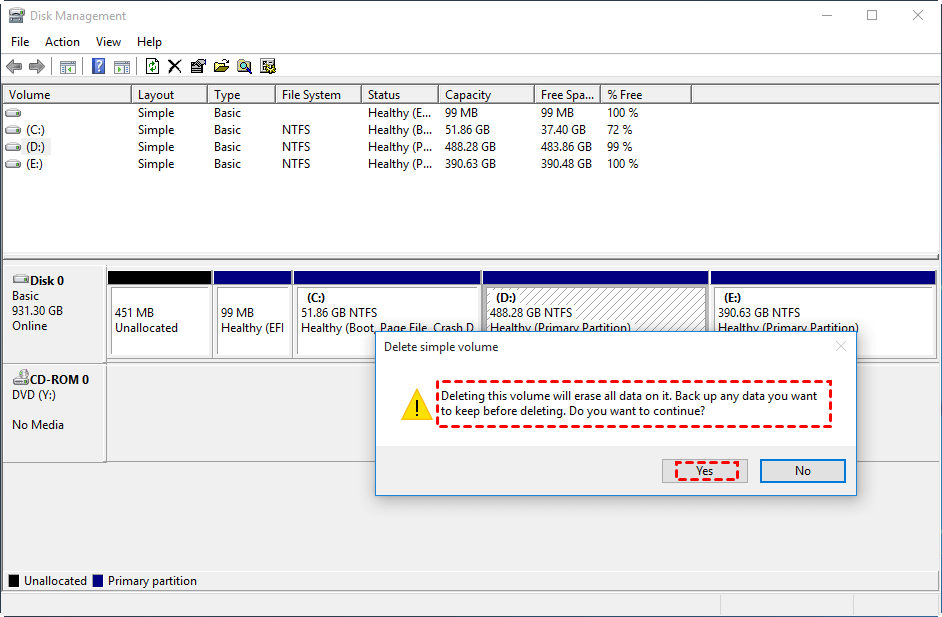
Step 3. You’ll be prompted that the operation will erase all data. Click “Yes” to confirm it.
The second stage: Extend partition C with the unallocated space after deleting partition D
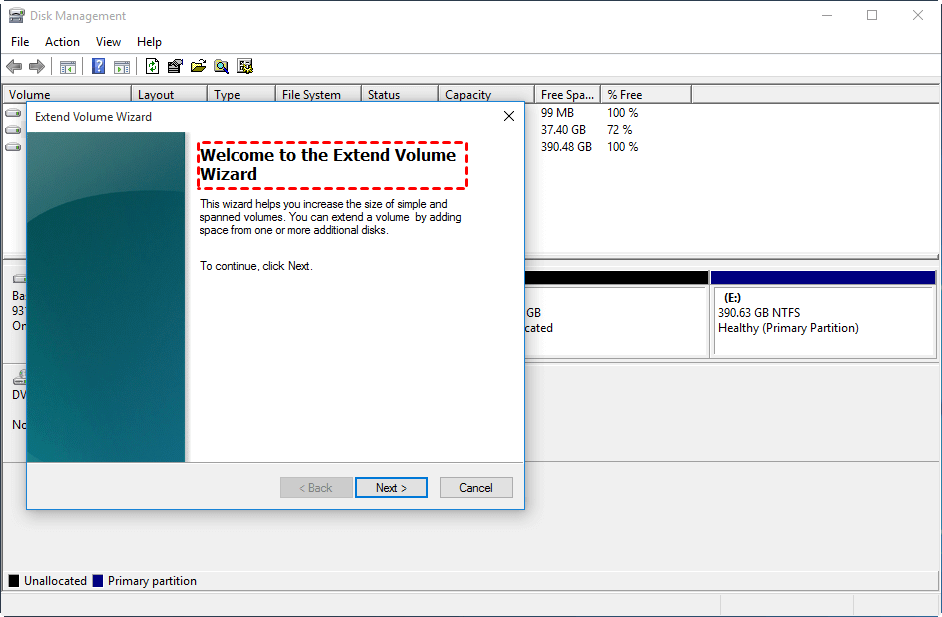
Step 4. After that, you’ll get unallocated space contiguously behind system partition C. Right-click C dive and choose “Extend Volume”. Now, you can see the option is enabled.

Step 5. Extend Volume Wizard is running, click “Next” to continue.
Step 6. Then, specify how much free space that you want to add into or leave it alone. (The whole unallocated space shall be merged into the target drive by default.)
Related Articles
- Solved: Unable to Format External Hard Drive in RAW
Do you feel frustrated because you are unable to format external hard drive in RAW? Read this article patiently and find effective solutions here. - Free WD Quick Formatter Download for Windows 7,8,10
This article tells how to download and use WD Quick Formatter Tool format WD My Passport or Seagate external drive to NTFS or FAT32 step by step. - Solutions to Windows Can't Be Installed to Disk 0 Partition 1
Windows can't be installed to disk 0 partition 1 is an error message you may meet when installing Windows. Here, I'll tell why & how to fix it in several ways. - How to Remove Drive from RAID?
Removing drive from Software RAID 0, 5 array shrinks volume to free up unallocated space and reconfigure dynamic disk structure to optimize PC performance.