How to Delete Shadow Copies in Windows 10 [4 Solutions]
- What is Shadow Copy?
- Why delete shadow copies, is it safe to delete them?
- Method 1. Delete older shadow copies via Disk Cleanup in Windows 10
- Method 2. Delete all restore point (shadow copies) with System Properties
- Method 3. Delete shadow copies with CMD in Windows 10
- Method 4. Easier way to auto delete shadow copies securely
- Conclusion
What is Shadow Copy?
Shadow Copy, also known as VSS or Volume Snapshot Service, is a feature that creates backup copies or snapshots of computer files and volumes, even when they are in use.
Windows has a built-in feature for creating and managing shadow copies, which are snapshots of a volume's state at a particular point in time. This feature is included in various versions of Windows, from Windows 10 to Windows XP, as well as several versions of Windows Server. Two tools, DiskShadow and VssAdmin, are available for managing shadow copies.
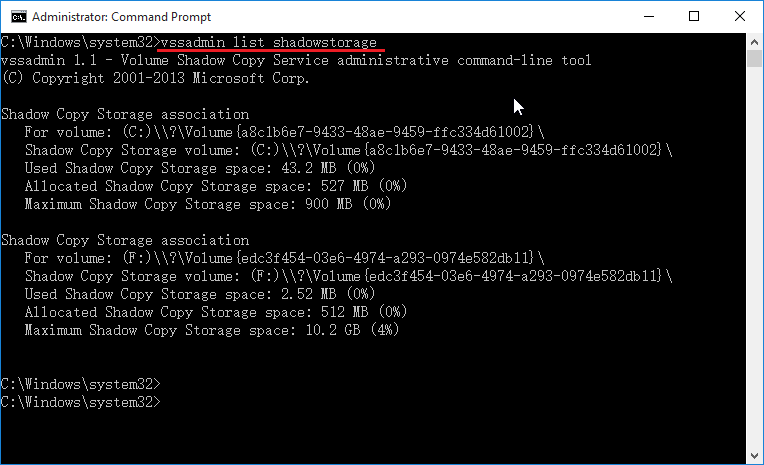
Your shadow copies, also known as System Restore points, are typically stored in the C:/ partition, specifically in the System Volume Information folder, which is hidden by default. To find the exact location, you can run the command "vssadmin list shadowstorage" in the Command Prompt.
Why delete shadow copies, is it safe to delete them?
To free up space on your Windows-based computer, you may need to delete shadow copies (also known as restore points) as they can consume a significant amount of storage space, potentially leading to a low disk space error.
Windows 10's Volume Shadow Copies may pose security risks, including allowing unprivileged users to read the SAM file, which contains user password hashes, potentially enabling attackers to log onto remote servers.
Deleting shadow copies can be a safe solution to remove malware, but it's essential to understand that it may also delete important system files, potentially causing system crashes or other issues. If you're unsure, it's recommended to use Windows 10 antivirus software or seek professional help to avoid any potential harm to your system.
If you're sure your computer is running well and don't need to keep these backups, you can delete them and create backups when needed. To delete shadow copies in Windows 10 securely, you can use methods such as deleting system image backups, file backups, or disk backups.
Method 1. Delete older shadow copies via Disk Cleanup in Windows 10
1. To run Disk Cleanup, type "Disk Cleanup" in the Search box on the taskbar, and hit enter to select Disk Cleanup.
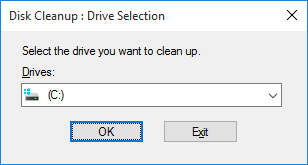
2. Select the drive or partition where you want to delete shadow copies, and click OK.
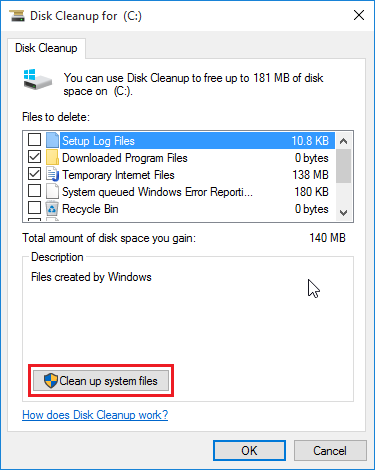
3. Click the "Clean up system files" button, select the partition again, and press "OK".
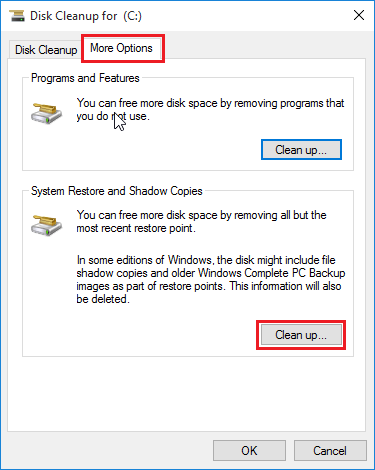
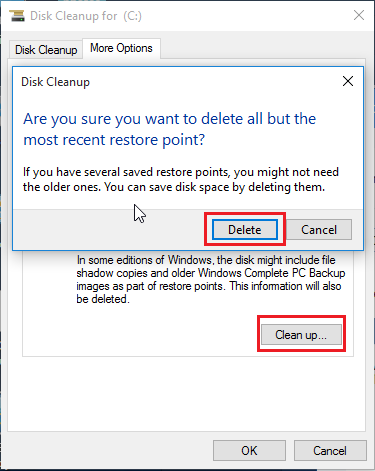
4. Select the "More Options" tab, click on "Clean up..
5. Press the "Delete" button to delete all shadow copies, except for the most recent ones.
Method 2. Delete all restore point (shadow copies) with System Properties
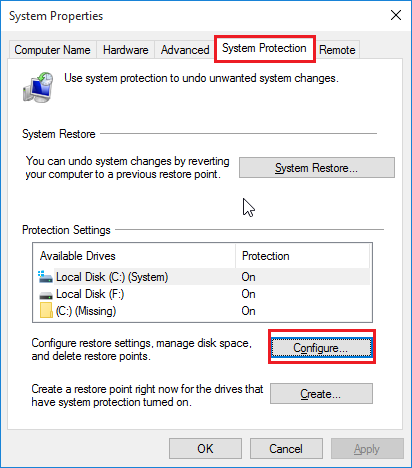
1. Click Win + R key combination to open Run dialog.
2. Input SystemPropertiesProtection and hit enter.
3. Select a drive or partition you would like to delete all these shadow copies from, and then choose Configure.
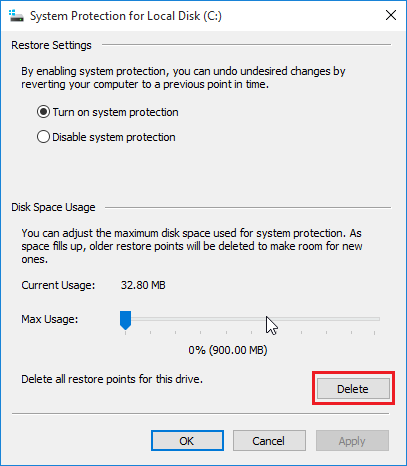
4. To delete all restore points from a drive or partition, press the "Delete" button to confirm the action, and then click the "Apply" button to apply the changes.
To disable system protection, you can simply click on "Disable system protection" in the Restore Settings section. However, please note that this will delete all existing restore points and you won't be able to perform system restore after doing so. It's not recommended to disable system protection, but if you want to enable it again, you can select "Turn on system protection".
Method 3. Delete shadow copies with CMD in Windows 10
Delete shadow Copies Use VssAdmin
To free up space, you can use the VssAdmin command in PowerShell to delete Shadow copies. The syntax for this is as follows: `VssAdmin DeleteShadows /all /quiet` or `VssAdmin DeleteShadows /shadowcopy /all /quiet`.
vssadmin delete shadows /for= [/oldest | /all | /shadow=] [/quiet]
- ForVolumeSpec: specify which volume's shadow copy will be deleted.
- /oldest: Delete the oldest shadow copy.
- /all: Delete all of the specified volume's shadow copies.
- To delete a shadow copy by ShadowID, you can use the command `vssadmin delete shadows /shadow:ShadowID`. This command will remove the specified shadow copy, where ShadowID is the unique identifier for the shadow copy that was obtained from running the `vssadmin list shadows` command.
- /quiet: Specify no messages return after finishing the command.
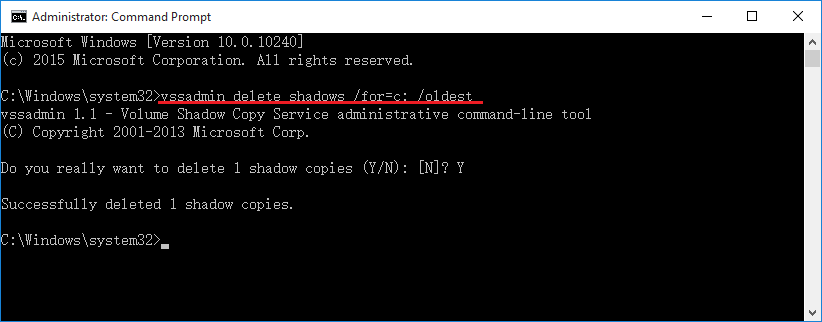
For example: vssadmin delete shadows /for=c: /oldest
Resize Shadow Storage to Delete
Warning: This operation will delete all restore points (shadow copies) on the specified volume.
VssAdmin /query-shadowcopycontainer [/s
vssadmin resize shadowstorage /for= /on= [/maxsize=]
- The VolumeSpec specifies the volume for which the maximum amount of storage space is to be resized.
- OnVolumeSpec: Specifies the volume storage.
- The maxsize parameter should be 1MB or larger and can have the following suffixes: KB, MB, GB, TB, PB, or FB. Alternatively, you can use a percentage with "%" to define it. If no suffix is provided, the value is assumed to be in bytes.
There is how to run this command:
1. Input cmd in Search box.
2. Right click the Command Prompt and choose Run as Administrator.
3. Then input the command for example:
vssadmin Resize ShadowStorage /For=C: /On=C: /Maxsize=900MB
Method 4. Easier way to auto delete shadow copies securely
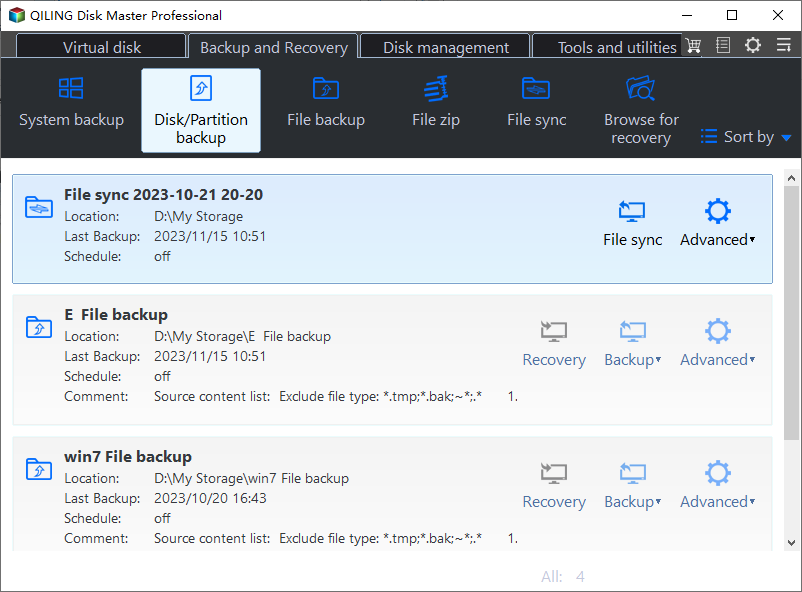
Qiling Disk Master Professional, a paid Windows backup software, can help you configure how many backups to retain when backing up data. To use it, first download the software.
Here is how to configure (take disk backup for example) in one paragraph shortly:
Step 1. Create a new disk backup
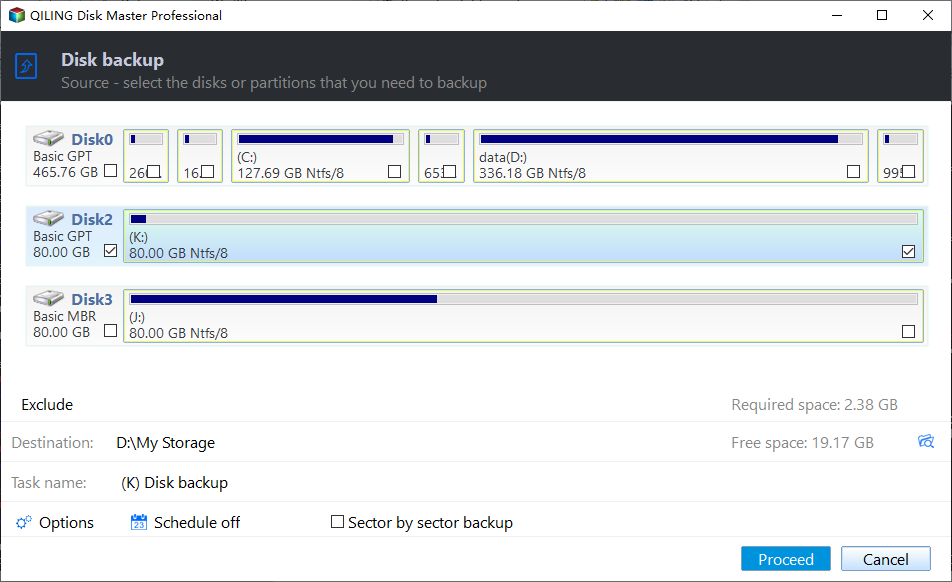
1. Open Qiling Disk Master Professional, select Backup -> Disk Backup.
2. Rename the task name if needed, then click the disks button to choose the hard drive you want to backup.
Step 2. Specify disk backup destination
Choose a destination to save the disk backup image file.
Step 3. Choose backup mode
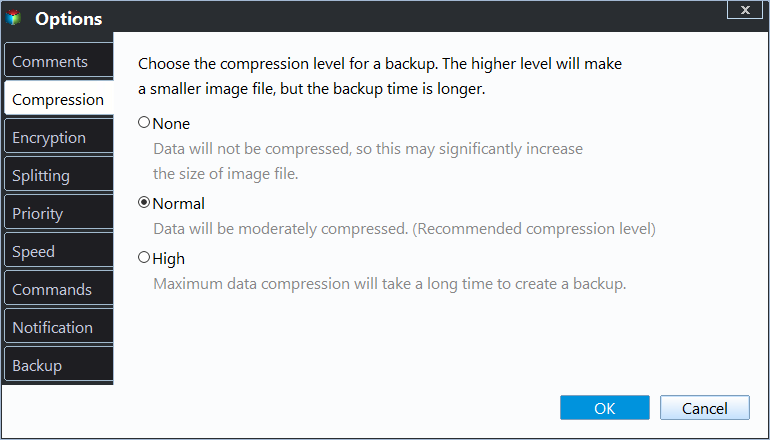
To enable the Microsoft VSS (Volume Shadow Copy Service) for backup, go to Options > Backup Mode, and select Use Microsoft VSS in Backup Service, then click OK.
Step 4. Select shadow copy auto deletion method and Proceed
1. At the bottom of the interface, turn on "Enable Backup Scheme" and choose a cleanup method among "By quantity", "By time", "By daily/weekly/monthly".
★ Tips:
✿ Apart from Differential Backup Scheme, there are four other backup options: Full Backup Scheme, Incremental Backup Scheme, Space Management Scheme, and Other Backup Scheme.
✿ The tool allows for customization of backup tasks, including commenting, splitting, compressing, and encrypting backups, as well as enabling email notifications upon completion. It also enables the selection of backup mode.
✿ You can schedule a backup task to run at various intervals, such as daily, weekly, monthly, or even trigger it via specific events or when a USB device is plugged in.
2. To create a Windows 10 disk backup using Shadow Copy (VSS), proceed by clicking on the "Proceed" button. This will initiate the backup process, which utilizes the Volume Shadow Copy Service (VSS) to create a snapshot of your system at a specific point in time, allowing you to restore your computer to its current state in case of a failure or data loss.
The cost time of creating a disk image depends on the data size on your hard drive. If you schedule backups, you'll have multiple backups, and the oldest ones will be deleted automatically when they exceed the retain number, freeing up space.
Conclusion
To delete shadow copies in Windows 10/8/7, you can use one of the four solutions provided, or use Qiling Disk Master to create backup tasks and delete backups automatically. This allows for automatic backup and deletion, as well as advanced tools like restoring selective files and creating bootable media. For IT technicians, Qiling Disk Master Technician or �echnician Plus are available for PCs and servers.Technician Plus are available for PCs and servers.
Related Articles
- Shadow Copy Windows 10 All You Need to Know
Windows 10 Volume Shadow Copy can help you recover lost files or system while free backup software can protect your computer continuously. Learn more and follow the stepwise guide below. - Volume Shadow Copy Windows 10 vs All-round Backup Software
You will learn how to enable/restore/disable volume shadow copy in Windows 10/8/7 as well as all-round way to backup files and folders. Get details now! - Solved: Volume Shadow Copy Service Error Windows 10, 7, 8
How to fix Volume Shadow Copy Service errors Windows 10, 8, 7 easily? This article will give you 5 solutions for you to solve the error code 0x80042302 and other errors one by one. - How to Delete System Restore Points in Windows 7/8/8.1/10
You may want to delete system restore points to free up disk space on your drive. Here you will find a more powerful way to automatically do this work for you.
