Easily Move User Profile to Another Drive in Windows 10, 11
Why to move user profile to another drive?
A user profile is a record of user-specific data that define the user's working environment. The record can include display settings, application settings, and network connections. Different versions of Windows store user profile information in a specific directory with different names: "Documents and Settings" in Windows XP and "Users" in Windows Vista and later.
Generally, the "Documents and Settings" or "Users" folder is located in C drive. You may find the necessity to move user profile in Windows 10/8/7 on the following occasions:
- The computer has less free space and runs slower: More and more user profiles are generated during the usage of the computer. Thus, the free space of C drive becomes less and the system runs slower. Moving user profile to another drive can release space on C drive.
- Protect your personal data: You may encounter system failure or even need to reinstall Windows 10/8/7 because of virus attack, software issues or human errors. Migrating user profile to a new location can ensure the security of your personal data.
Then, what's the easiest way to change user folder location?
How to move user profile to another drive in Windows 10/11 step by step
To move user profile to another drive, there are two efficient solutions I'm going to show you:
- Solution 1: move users folder to another drive via a powerful freeware
- Solution 2: move user folder from C to D with Windows built-in feature
Solution 1: move users folder to another drive via a powerful freeware
With a file sync tool, you can change the location of user profile effortlessly. Qiling Disk Master Standard, the best free file sync software, comes to help.
- It enables you to synchronize files between two folders, drives, or even two computers.
- You are also allowed to sync local folders to OneDrive, Google Drive, and NAS devices, etc.
- You are able to sync multiple folders simultaneously, thus saving you from tedious work.
There are various folders under the user folder, such as Desktop, Downloads, Documents, Music, and Pictures. I'll show you how to move (My) Documents to another drive in Windows 10 via Qiling Disk Master. If you are a Windows Server user, please turn to Qiling Disk Master Server.
1. Download Qiling Disk Master and follow the wizard to finish installation. It will be installed in a short time.
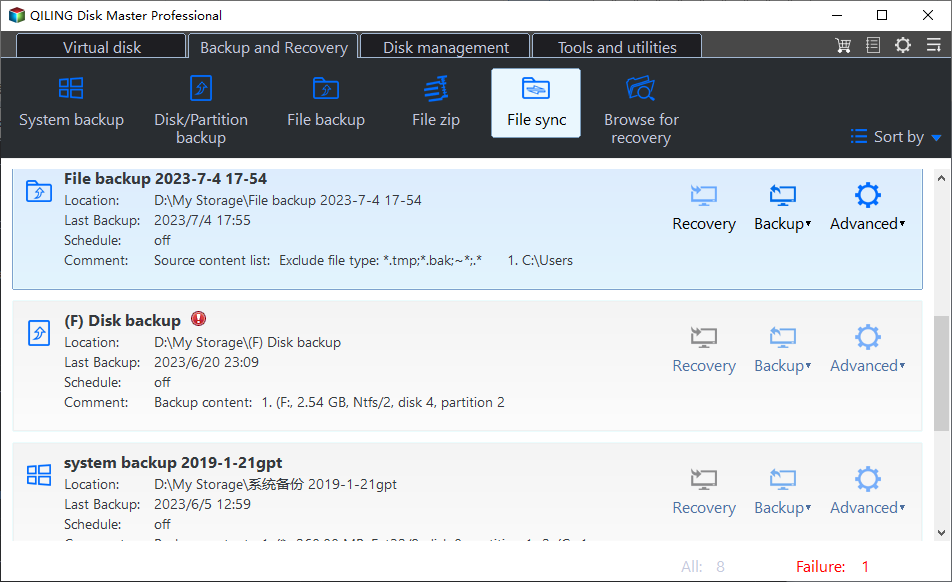
2. Click "Backup and recovery" on the tab page and select "File Sync".
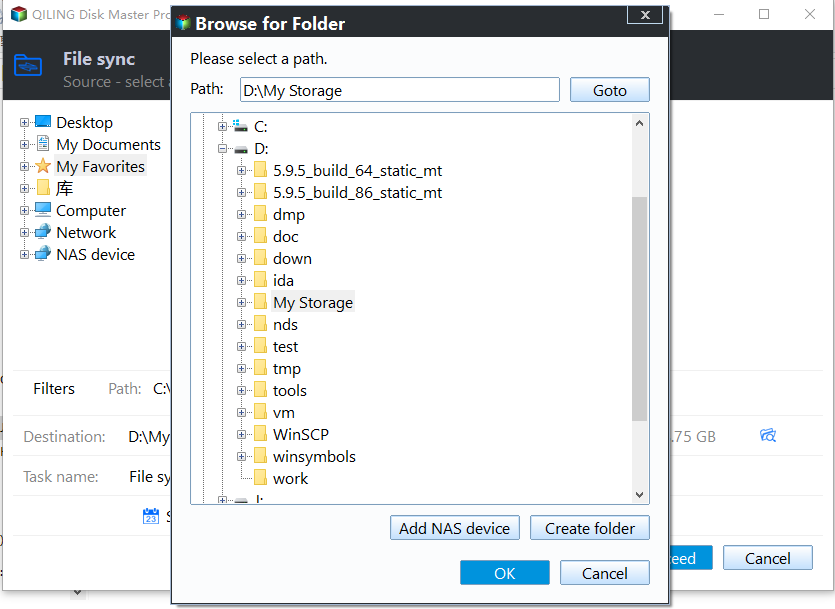
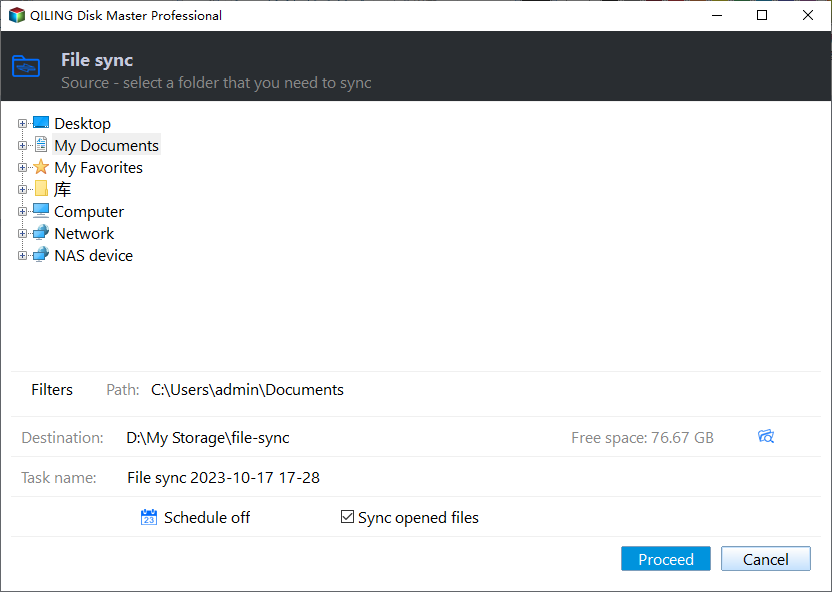
3. Name the task so that you can distinguish it from other sync tasks. Click "Folder" to select the Documents folder to be synchronized.
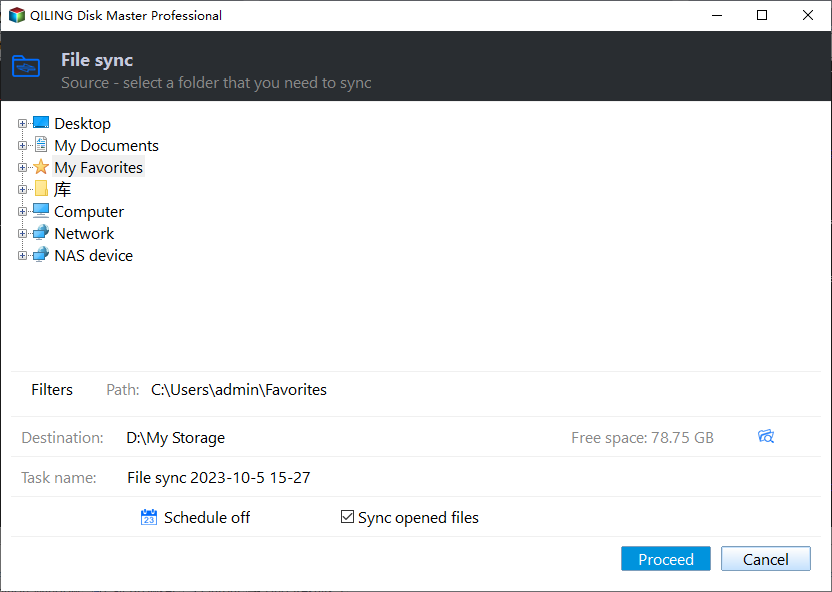
4. Select a destination location to store the folder.
5. Click on "Proceed" button to perform the operation.
>> Options: you can write a comment for your sync task so that you can figure out the specific sync contents. You can also enable email notification here.
>> Schedule Sync: you can set the sync task to run periodically. There are five modes supported: Daily, Weekly, Monthly, Event triggers, and USB plug in.
6. Check the Documents folder in the destination. You can see the size of the folder and the number of files it contains by right clicking it and selecting "Properties". If it's the same as the source, you can delete the source folder to free up space on C drive. Or you can keep the source folder as a backup.
● If you delete the original Documents folder of the C drive, the synchronization task will be invalid. That is, the task can no longer run.
● If you want to sync the Desktop, Downloads, Music and Pictures folders at the same time, repeat clicking "Folder" in Step 3.
Solution 2: move user folder from C to D with Windows built-in feature
Windows built-in feature can also assist you with Windows 10 user profile transfer. Still take the Documents folder as an example:
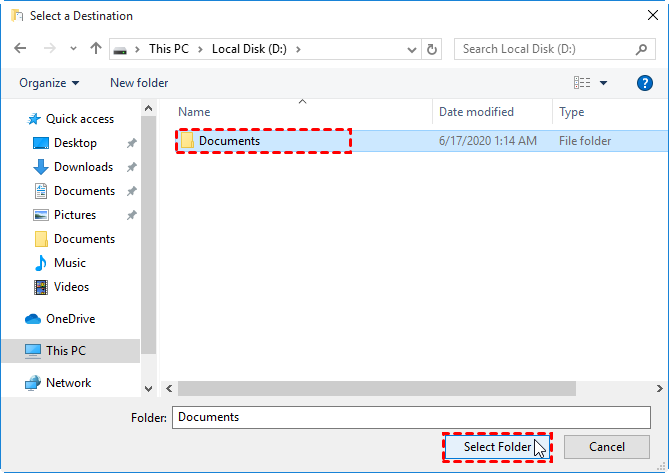
1. Create a new folder named Documents at the target drive.
2. Navigate to This PC > Local Disk (C:) > Users > User Name.
Tips: You can also find the user folder which you want to move at the Quick access section.
3. Right click on the Documents folder and select Properties. Click on the Location tab, and then click Move.
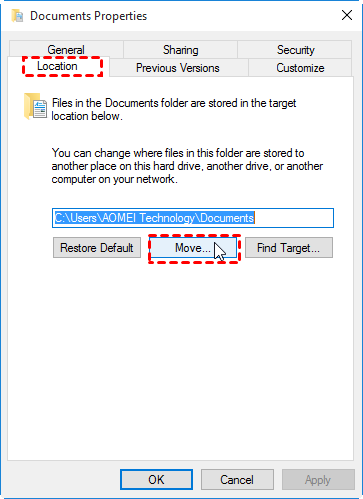
4. Select the newly-created Documents folder on the target drive, and click Select Folder. Then, click OK at the Documents Properties window.
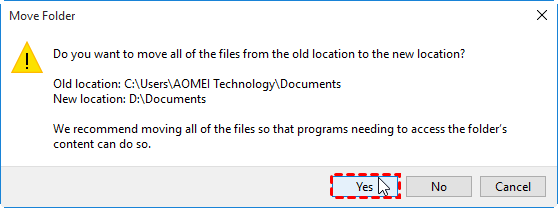
5. Click Yes when prompted. Wait for the files to be moved.
6. Close File Explorer.
Summary
When you want to move user profile to another drive in Windows 10/11, you can resort to the two solutions mentioned above. These solutions apply to changing user folder location in Windows 7 as well.
Other than the file sync feature, Qiling Disk Master owns the backup & recovery function. After you figure out what to backup before reinstalling Windows 10, you can use it to finish the backup task. It also enables you to manage backups in Windows 10 easily. Why not give it a try right now? Share this page with your friends if you think it's helpful.
Related Articles
- Backup User Profile Windows 10 and Move it to Another Computer
You will learn how to backup and restore user profile in Windows 10/11, without spending hours customizing the new computer. - Migrate User Profile to New Computer with Best Software
You will get 3 Windows 10 profile migration tools and stepwise guide to migrating user profile to new computers. - Move Users Folder to Another Drive in Windows Server 2012
Want to move Users folder to another drive in Windows Server 2012 (R2)/2016/2019/2022? The best Windows Server backup software – Qiling Disk Master Server and a Windows built-in feature can give you a hand. - How to Automatically Copy Files from One Folder to Another Easily
This page presents how to auto copy files from one folder to another in Windows 11, 10, 8, 7, XP, Vista and provides you with 2 helpful ways.