P2V Windows 10 | The Simplest Way to Convert Physical to Virtual
- The benefits of P2V Windows 10
- The easiest P2V migration tool in Windows 10
- How to do Windows 10 physical to virtual conversion step by step
- ★ Create bootable ISO file on physical machine:
- ★ Create Windows 10 backup image on physical machine:
- ★ Restore Windows 10 image to virtual machine:
- Bonus tip: Best free VM backup software for protecting VMware
- Conclusion
The benefits of P2V Windows 10
P2V is short for Physical to Virtual, which means to convert physical machine to virtual machine, and involves the process of operating system (OS), applications and data migration.
Doing Windows 10 P2V has many significant benefits, I've listed some of them as below:
- Prevent viruses, malware, spyware
Figures show that lots of people have been attacked by virus, malware and spyware. For example, in 2017, the WannaCry ransomware attack affected more than 200000 organizations in 150 countries, which made a huge loss.
To prevent similar situations, many people choose to install anti-virus software. But actually it's also a good precaution to browse Internet with a virtual machine instead of your regular Windows PC.
- Keep the physical machine safe
Virtual machine is a software running on your Windows PC, acting as a fake computer. After performing Windows 10 P2V, you can use the virtual machine as your physical machine and run your Windows 10 on it. Anything you do to the virtual machine won't affect your host operating system.
- Virtual machine can be reset simply
Another benefit of virtual machine is that you can easily reset it. If there's anything wrong, you can reset the virtual machine to the default state when you first installed it.
- Enhance users' privacy
In a virtual machine, you can simply erase anything you've done, and that would be a good way to protect your privacy information.
With all these advantages, you might understand why there are more and more users choose to P2V Windows 10 as well as Windows 8 and Windows 7. Put away all the abstruse technical knowledges involved, you can complete the job by you own - just with a little help.

The easiest P2V migration tool in Windows 10
To simplify the process of P2V as far as possible, many people would like to pick a migration tool, and there are plenty of options out there - VMware, Parallels, VirtualBox, etc. If you're struggling with the choice, try this easy-to-use P2V migration tool, Qiling Disk Master Professional.
- It is able to create a system image or disk image of your physical computer which can be transferred to a virtual machine later.
- It allows you to make a bootable ISO file to start up your virtual machine.
- It is embedded with the Universal Restore feature to make the migrated OS boot properly.
This great data migration software works well on Windows 11/10/8.1/8/7/XP/Vista. Feel free to download it. Actually, it is also powerful disk cloning software, and you can use it to clone HDD to a smaller SSD, clone SSD to larger SSD, etc.
How to do Windows 10 physical to virtual conversion step by step
To convert physical to virtual (P2V) in Windows 10, the general procedure is like this:
1. Install a virtual machine.
2. Install Qiling Disk Master Professional on your physical machine.
3. Create a bootable ISO file with this tool to boot your virtual machine from it.
4. Create a Windows 10 system image on your physical machine.
5. Restore the earlier created system image to the virtual machine.
After setting up the virtual machine and installing Qiling Bakupper on the physical machine, you can now follow this guide to migrate Windows 10 from physical machine to virtual machine.
★ Create bootable ISO file on physical machine:
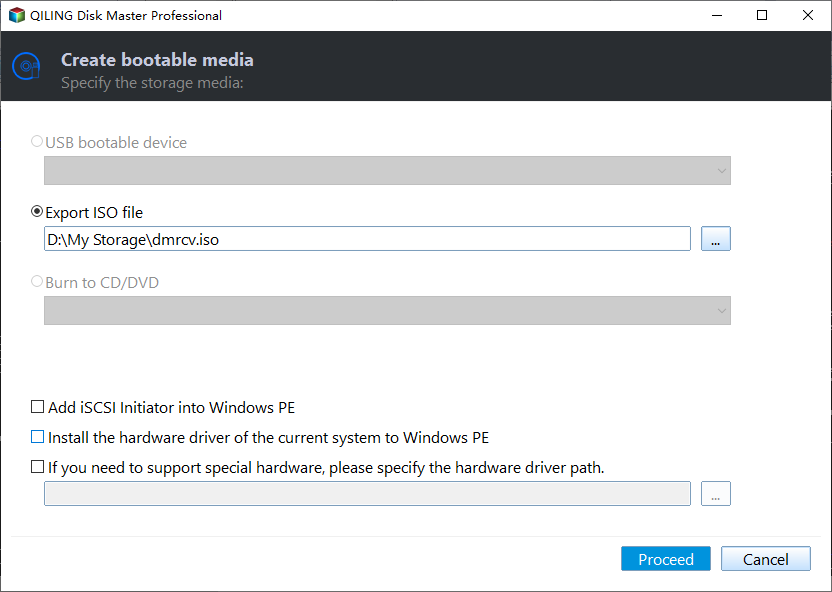
Step 1. Launch the software, go to Tools tab and choose Create Bootable Media.

Step 2. Select Export ISO File and click Proceed to begin making an ISO file. The ISO file will be saved to the Desktop folder by default. You can click Browse to change the path if needed.
★ Create Windows 10 backup image on physical machine:
Step 1. Navigate to Backup tab and choose System Backup.

Step 2. The system partitions will be selected by this software automatically. You just need to specify a destination, and click Proceed.
- In this case, you can backup system to a removable device like external hard drive, or network for later use.
- To select a network location, you can click on the destination box and choose Add Share or NAS Devices.

★ Restore Windows 10 image to virtual machine:
Step 1. Mount the ISO file in the CD/DVD section of the VM console. Select Power On to Firmware to boot VM into BIOS.
- In Legacy BIOS: set CD-ROM Drive as the first boot option and boot.
- In UEFI BIOS: select EFI VMware Virtual SATA CDROM Drive and boot.
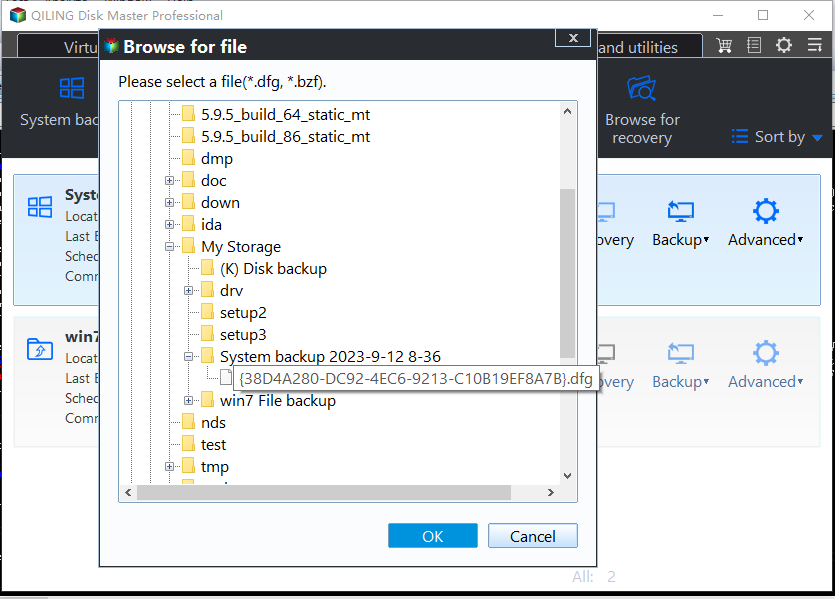
Qiling Bakupper will pop up automatically, then you can go to Restore tab and click Select Image File.
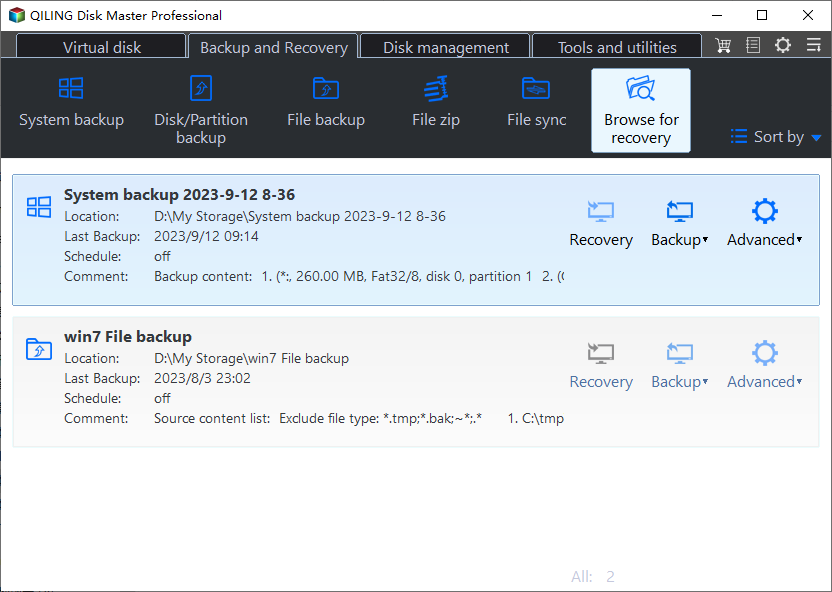
Step 2. Locate and select the Windows 10 backup image you created before.
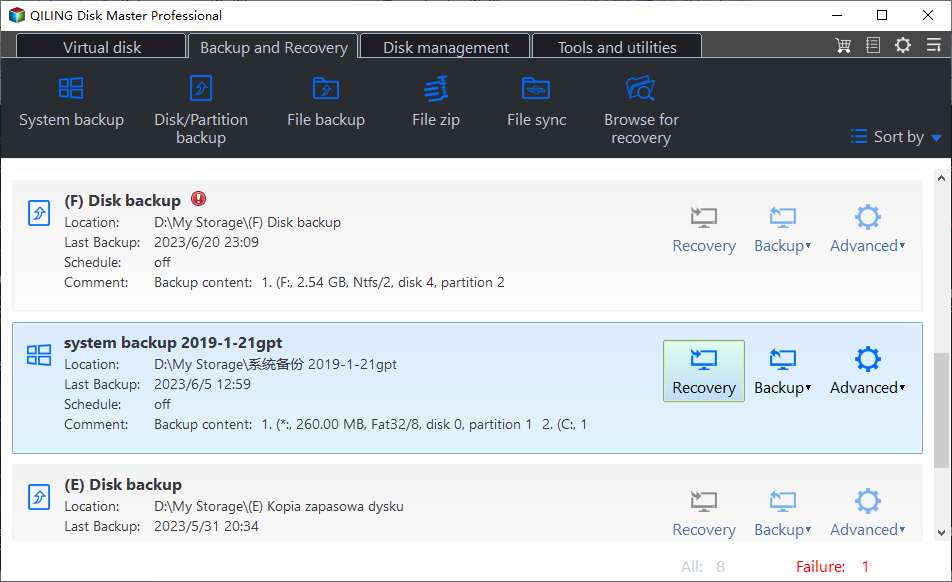
Step 3. Select Restore this system backup and tick Restore system to other location, then click Next.
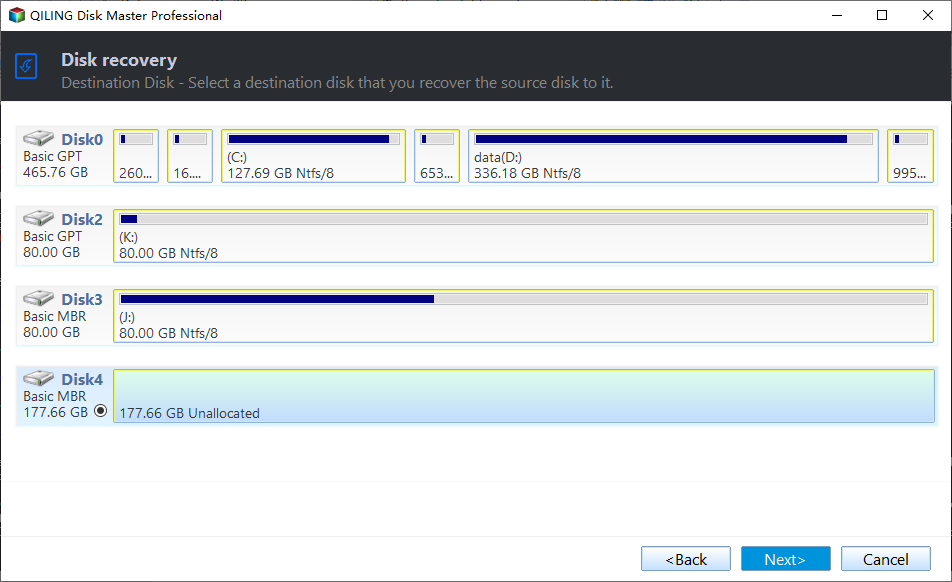
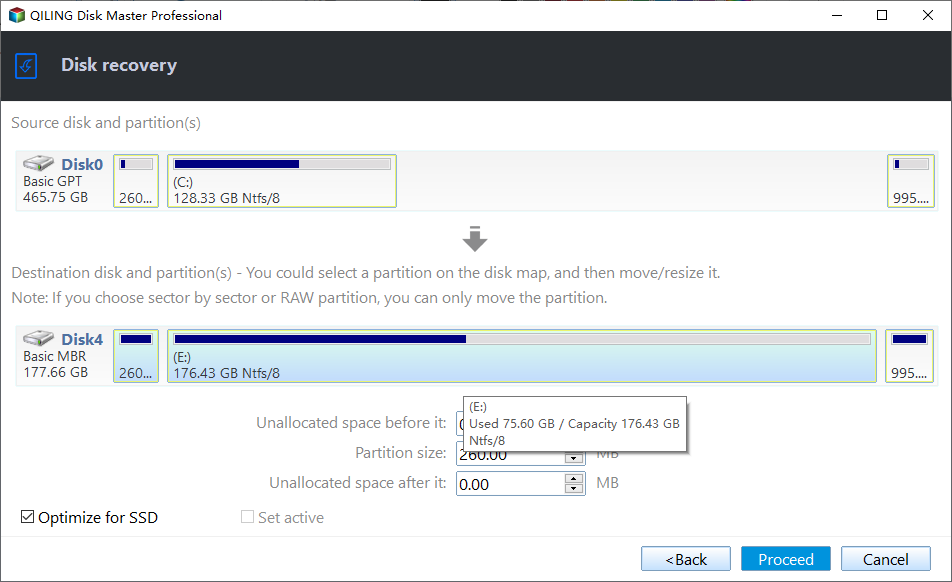
Step 4. Select the destination on the virtual machine, and click Next.
Step 5. Confirm the operation and click Proceed to execute the task. Make sure the Universal Restore option is checked.
Notes:
◆ The option "Universal Restore" should be checked automatically if you are restoring to a different computer.
◆ If you are restoring system backup image to an SSD, you'd better check the option "SSD Alignment" since it will optimize the performance of SSD.
Bonus tip: Best free VM backup software for protecting VMware
Now you have converted the physical disk to the virtual. Virtual machine data are very important, especially for enterprises. However cybercriminals are increasingly targeting data with ransomware, and your VM data is easy to lose without robust backup. After the conversion, it is necessary to create a VM backup to ensure business continuity.
To backup virtual machines easily, here we would like to recommend a free yet powerful VM backup solution called Qiling Backup. It uses an intuitive console allowing you to easily back up all VMware virtual machines.
Agentless Backup: Create complete and independent image-level backup for VMware ESXi VMs.
Backup to all locations: Back up to local storage, external hard drive, network shared folders and NAS shared folders (folders shared via the SMB protocol).
Automated Backup Execution: Setup backup task once, then it can automatically run in the background.
Restore from Any Point: It can keep multiple backup versions, so you can restore the entire VM from any backed-up restore points.
Qiling Backup supports VMware ESXi 6.0 and later versions. Now you can click the following download button to install this software.
Conclusion
Qiling Disk Master is a great P2V migration tool that makes Windows 10 P2V so easy. Even if you are a Windows Server user, you can pick the Server edition to conduct Windows Server P2V.
Beyond that, Qiling Disk Master also provides complete backup & restore solutions to protect your data in daily use. For example, you can set up a schedule to automatically backup Windows 10, thus when any error occurs, you can easily restore the system to a normal state.
Related Articles
- 3 Best Practices for P2V (Physical to Virtual) Migration
Need to migrate Windows system from physical to virtual machine? Learn 3 best practices for P2V migration from this page. - Migrate Windows OS from Physical Computer to Virtual Machine
Want to do some risky operations without damaging the physical computer? Continue to see below and learn to migrate operating system (OS) to virtual machine. - Windows Server Backup Restore to Virtual Machine (2Ways)
Want to let Windows Server Backup restore to virtual machine? Read this guide to learn two ways to restore Windows Server Backup to virtual machine like Hyper-V or VMware. - 2 Ways to Mirror Image Backup in Windows 11/10/8/7
This article illustrates 2 ways to mirror an image backup of Windows 11, 10, 8, 7 to protect your computer from system failures.