P2V Windows 10 | The Simplest Way to Convert Physical to Virtual
- The benefits of P2V Windows 10
- The easiest P2V migration tool in Windows 10
- How to do Windows 10 physical to virtual conversion step by step
- ★ Create bootable ISO file on physical machine:
- ★ Create Windows 10 backup image on physical machine:
- ★ Restore Windows 10 image to virtual machine:
- Bonus tip: Best free VM backup software for protecting VMware
- Conclusion
The benefits of P2V Windows 10
P2V, or Physical-to-Virtual, is the process of migrating a physical machine's operating system, applications, and data to a virtual machine. This guide will walk you through the steps involved in a P2V migration, ensuring a smooth and efficient transition.
Converting a physical machine to a virtual one, or P2V, can be a game-changer for Windows 10 users. This process, also known as virtualization, offers numerous benefits that can enhance the overall performance and efficiency of your system.
- Prevent viruses, malware, spyware
The statistics are alarming, and the consequences are dire. Cyber attacks, fueled by viruses, malware, and spyware, have become a pervasive threat to individuals and organizations worldwide. The WannaCry ransomware attack in 2017 serves as a stark reminder of the devastating impact of these digital assaults.
As the digital landscape continues to evolve, it's essential to adopt a multi-layered approach to online safety. While anti-virus software is a crucial step in protecting against malware, a virtual machine can provide an additional layer of security when browsing the internet.
- Keep the physical machine safe
A virtual machine (VM) is a software program that creates a virtual environment, allowing you to run an operating system (OS) on top of a host OS. In the context of Windows 10, a P2V (Physical-to-Virtual) conversion involves migrating a physical Windows 10 installation to a virtual machine.
- Virtual machine can be reset simply
One of the significant advantages of virtual machines is the ease of resetting them to their original state. If you encounter any issues or problems, you can simply reset the virtual machine to its default configuration, just as it was when you first installed it.
- Enhance users' privacy
One of the significant advantages of virtual machines is the ability to erase any data or settings you've created within them. This feature can be particularly useful for protecting your privacy information.
The trend of P2V (Physical to Virtual) migration is gaining momentum, with an increasing number of users opting to convert their Windows 10, 8, and 7 systems to virtual machines. This shift is driven by the numerous benefits that come with virtualization.
The easiest P2V migration tool in Windows 10
The process of P2V (Physical to Virtual) migration can be complex and time-consuming, but with the right tool, it can be simplified and made more efficient.
- Qiling Disk Master Professional is a powerful tool that allows you to create a system image or disk image of your physical computer. This can be a useful step in the process of P2V (Physical to Virtual) migration, as it allows you to create a virtual machine that is identical to your physical computer.
- It allows you to make a bootable ISO file to start up your virtual machine.
- Acronis True Image is a powerful tool that allows you to create a system image or disk image of your physical computer, which can be transferred to a virtual machine later. One of the key features of Acronis True Image is its ability to create a bootable ISO file that can be used to start up your virtual machine.
Acronis True Image is a powerful data migration software that allows you to create a system image or disk image of your physical computer, which can be transferred to a virtual machine later. One of the key features of Acronis True Image is its ability to create a bootable ISO file that can be used to start up your virtual machine.
How to do Windows 10 physical to virtual conversion step by step
Converting a physical machine to a virtual machine (P2V) in Windows 10 involves several steps. Here's a general procedure to follow:
1. Install a virtual machine.
2. Install Qiling Disk Master Professional on your physical machine.
3. Create a bootable ISO file with this tool to boot your virtual machine from it.
4. PowerISO is a powerful tool for creating, editing, and burning ISO files. Here's how to use it to create a Windows 10 system image:
5. Restore the earlier created system image to the virtual machine.
After setting up the virtual machine and installing Qiling Bakupper on the physical machine, you can now follow this guide to migrate Windows 10 from physical machine to virtual machine.
★ Create bootable ISO file on physical machine:
Step 1. Launch the software, go to Tools tab and choose Create Bootable Media.
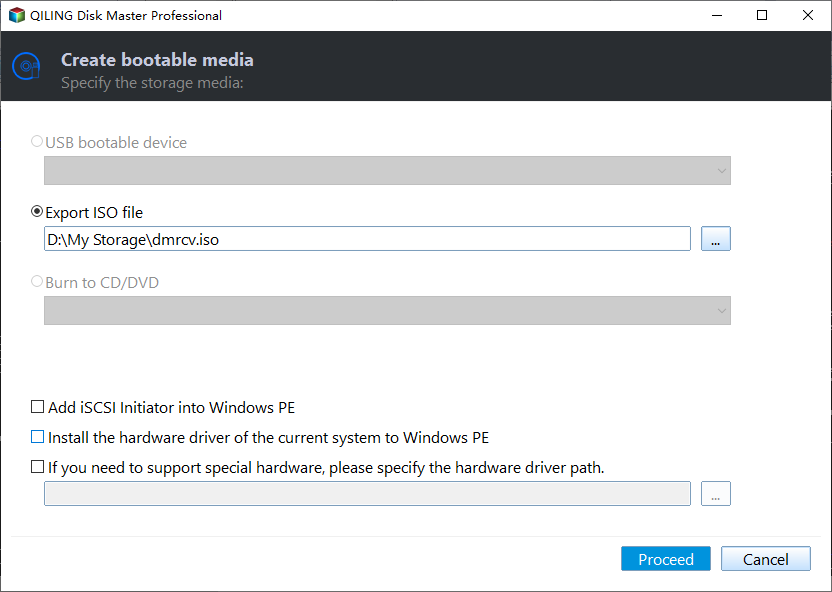
Step 2. Select Export ISO File and click Proceed to begin making an ISO file. The ISO file will be saved to the Desktop folder by default. You can click Browse to change the path if needed.
★ Create Windows 10 backup image on physical machine:
Step 1. Navigate to Backup tab and choose System Backup.
Step 2. The system partitions will be selected by this software automatically. You just need to specify a destination, and click Proceed.
- In this case, you can backup system to a removable device like external hard drive, or network for later use.
- To select a network location, you can click on the destination box and choose Add Share or NAS Devices.
★ Restore Windows 10 image to virtual machine:
Step 1. Mount the ISO file in the CD/DVD section of the VM console. Select Power On to Firmware to boot VM into BIOS.
- In Legacy BIOS: set CD-ROM Drive as the first boot option and boot.
- In UEFI BIOS: select EFI VMware Virtual SATA CDROM Drive and boot.
To restore your VM with Qiling Bakupper, follow these steps:
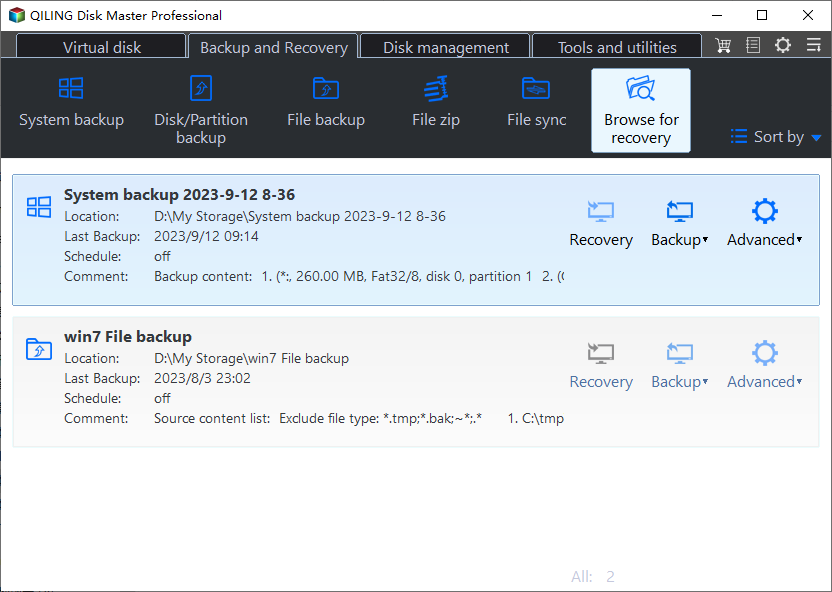
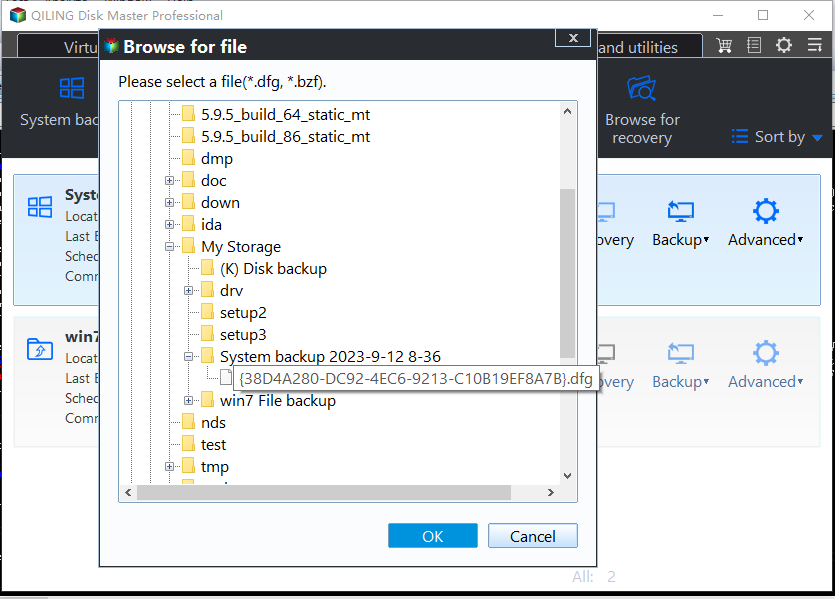
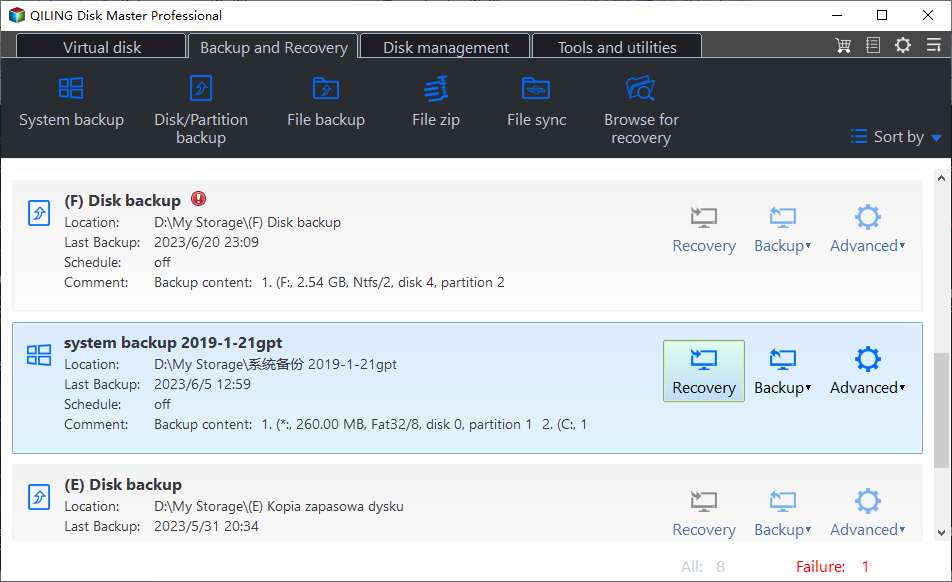
Step 2. Locate and select the Windows 10 backup image you created before.
Step 3. Select Restore this system backup and tick Restore system to other location, then click Next.
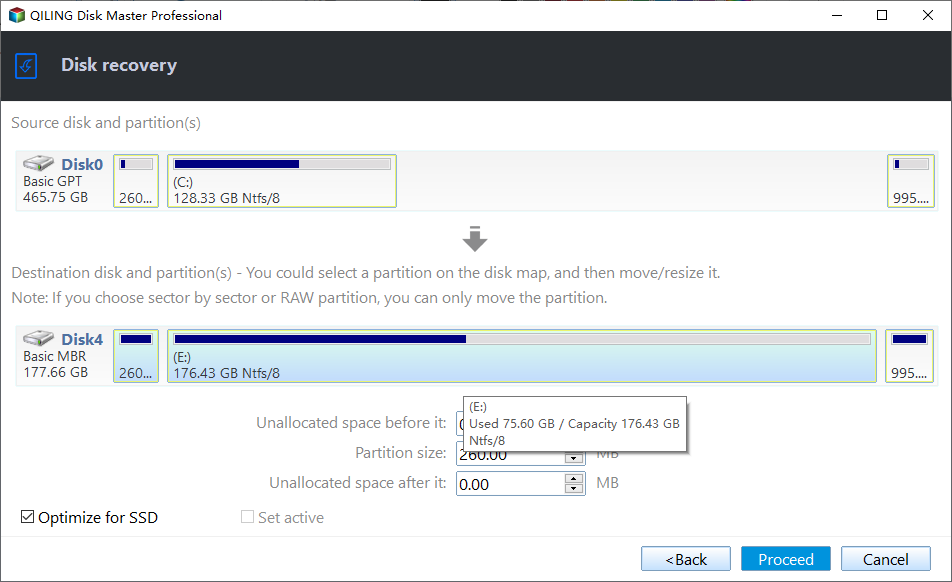
Step 4. Select the destination on the virtual machine, and click Next.
Step 5. Confirm the operation and click Proceed to execute the task. Make sure the Universal Restore option is checked.
Notes:
◆ When restoring a VM with Qiling Bakupper, the "Universal Restore" option is automatically checked if you're restoring to a different computer. This ensures that the VM is properly configured for the new hardware.
◆ When restoring a system backup image to a Solid-State Drive (SSD), it's essential to check the option "SSD Alignment." This feature optimizes the performance of the SSD by properly aligning the storage units, ensuring that the data is written and read efficiently.
Bonus tip: Best free VM backup software for protecting VMware
After converting a physical disk to a virtual machine (VM), it's essential to prioritize data protection. Virtual machine data are valuable assets, especially for enterprises, and can be vulnerable to cyber threats. Ransomware attacks have become increasingly common, and without a robust backup, VM data can be lost forever.
Backing up virtual machines can be a complex and time-consuming process, but with the right tools, it can be streamlined and made more efficient. Qiling Backup is a free and powerful VM backup solution that makes it easy to protect your virtual machines.
Agentless Backup: Create complete and independent image-level backup for VMware ESXi VMs.
Backup to all locations: Back up to local storage, external hard drive, network shared folders and NAS shared folders (folders shared via the SMB protocol).
Automated Backup Execution: Qiling Backup allows you to set up a backup task once, and then it can automatically run in the background, ensuring that your virtual machines are always backed up and easily recoverable.
Restore from Any Point: Qiling Backup's versioned backup feature allows you to keep multiple backup versions of your virtual machines (VMs), enabling you to restore the entire VM from any backed-up restore points. This means you can revert to a previous version of your VM in case of any issues or changes.
Qiling Backup is compatible with VMware ESXi 6.0 and later versions, ensuring seamless integration with your virtualization environment. To install Qiling Backup, simply click the download button provided below.
Conclusion
Qiling Disk Master is a powerful P2V (Physical to Virtual) migration tool that simplifies the process of migrating Windows 10 and Windows Server operating systems to virtual environments. With Qiling Disk Master, you can easily perform a P2V migration, making it an ideal solution for virtualization environments.
Qiling Disk Master is a powerful backup and P2V (Physical to Virtual) migration tool that provides a complete solution for protecting your data and migrating Windows 10 and Windows Server operating systems to virtual environments. With Qiling Disk Master, you can easily perform a P2V migration, create a backup of your system, and restore it to a normal state in case of any errors or issues.
Related Articles
- 3 Best Practices for P2V (Physical to Virtual) Migration
Need to migrate Windows system from physical to virtual machine? Learn 3 best practices for P2V migration from this page. - Migrate Windows OS from Physical Computer to Virtual Machine
Want to do some risky operations without damaging the physical computer? Continue to see below and learn to migrate operating system (OS) to virtual machine. - Windows Server Backup Restore to Virtual Machine (2Ways)
Want to let Windows Server Backup restore to virtual machine? Read this guide to learn two ways to restore Windows Server Backup to virtual machine like Hyper-V or VMware. - 2 Ways to Mirror Image Backup in Windows 11/10/8/7
This article illustrates 2 ways to mirror an image backup of Windows 11, 10, 8, 7 to protect your computer from system failures.
