How to Resize GPT Partition Windows 10 without losing data?
Why need to resize GPT partition in Windows 10?
GPT is the abbreviation of GUID Partition Table. It breaks some restrictions of MBR (Master Boot Record) disks. For example, it can support hard drives larger than 2 TB, allow up to 128 primary partitions and so on. If you are using the GPT partition style, you might need to change partition size on the GPT disk for the following reasons:
●Make the distribution of the GPT partition capacity reasonable: some partitions may be too small and easily to get full due to the daily increasing of data amount while other partitions still has much free space. Move free space from one partition to another one can make the disk space distribution better.
●"Low disk space" warning appears: receive error message from Windows, which says "You are running out of disk space on Windows (C:). " and the C drive bar turns red in File Explorer. However, it is not recommended to delete files on system drive because you may delete some crucial system files and cause system crash. Instead, it's better to extend this partition.

●Only one big partition exists on GPT hard disk: On most new computers, the (GPT) hard drive is divided into only one big partition (usually C: drive). In this case, you can shrink the partition to spare unallocated space, on which you can create a new partition.
How to resize GPT disk partition in Windows 10/8/7?
To resize partition on GPT or MBR disk, you can make use of Disk Windows built-in Disk Management, or third-party partition software.
Method 1. Resize GPT partition via Disk Management
The Disk Management is a Windows built-in utility. It allows you to view disk layout, file system, status, capacity, type, etc. Besides, it allows users to create, delete, format, extend or shrink partition with easy steps. Now we'll show you how to shrink or extend GPT partition via this tool.
▶Shrink GPT partition:
- The "Shrink Volume" only works on NTFS or RAW partition on GPT or MBR basic hard drive.
- The unallocated space from shrinking an existing partition will locate at the right behind of the volume you just shrank, and cannot be moved.
Step 1. Click "Start" -> "Run" -> type "diskmgmt. msc" -> click "OK". Alternatively, right-click on the "My Computer" or "This PC" icon and select 'Manage'. In the console tree, click "Disk Management" under "Storage".
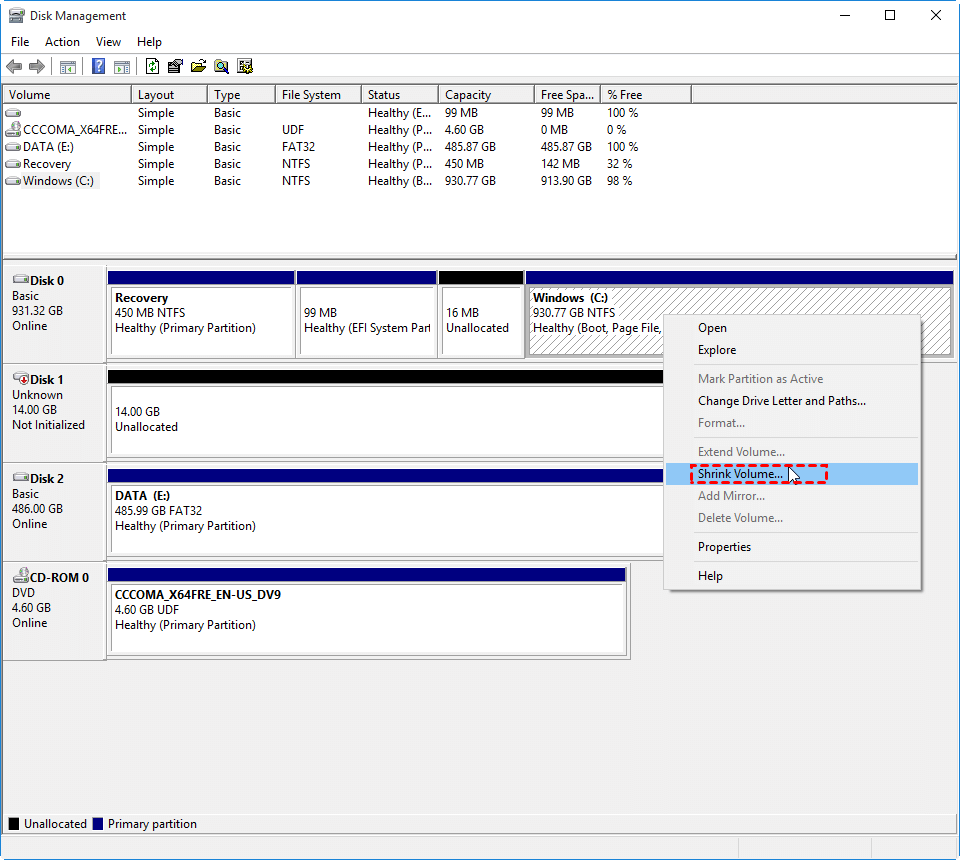
Step 2. Right-click the partition you want to shrink (verify it is of NTFS file system) and choose "Shrink Volume". Windows will examine the volume to see how well it can be shrunk.
Step 3. Then it displays the Shrink dialog box where you can set the size of the new partition. You can use the text box by the item "Enter the Amount of Space to Shrink in MB" to set the new volume size.
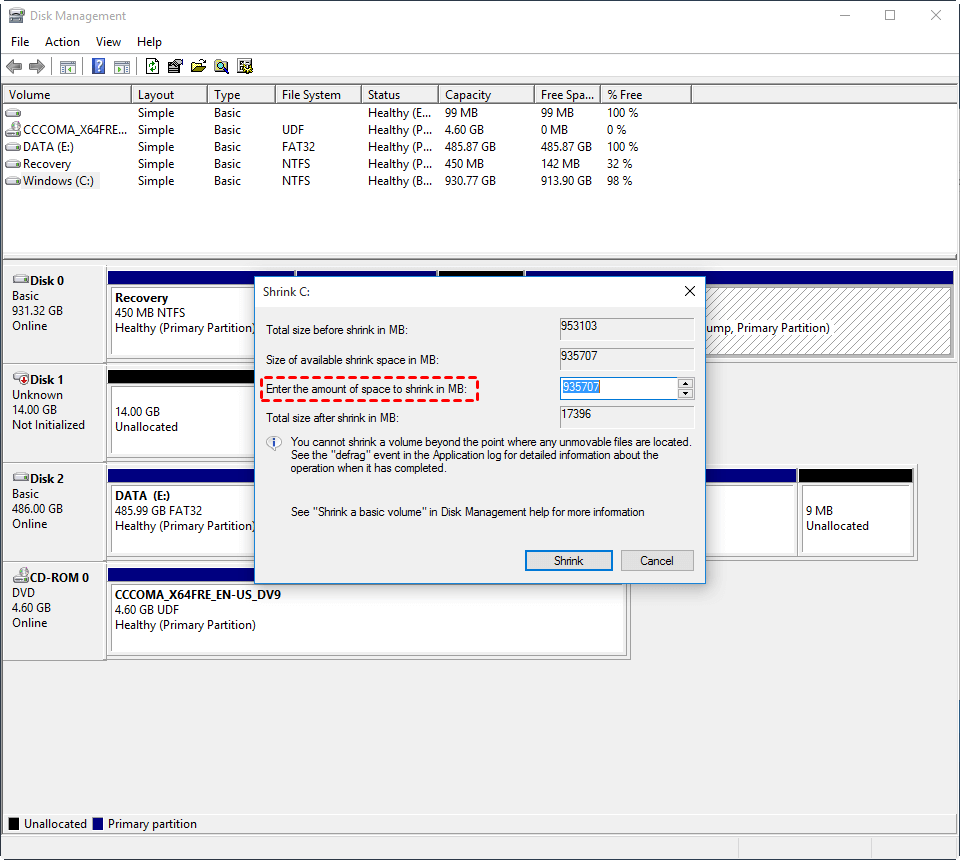
Step 4. Click the "Shrink" button to reduce the GPT disk partition size.
When the operation has been completed, you see the new unallocated space appear in the GPT disk. You can use it to create a new partition via the "New Simple Volume Wizard".

▶Extend GPT partition:
- Same as the "Shrink Volume", the "Extend Volume" function also only work on NTFS or RAW partition. Besides, you can only extend a volume when it is followed by an adjacent unallocated space.
Extending partition via Disk Management is always a headache for many users because the "Extend Volume" is often greyed out due to its limitation (NTFS file system and adjacent unallocated space). In most cases, there is no adjacent unallocated space next to the target volume. Even if you get such space by shrinking another volume, it is still unclickable because they are not adjacent and the unallocated space cannot be moved (mentioned above).
In this case, you need to delete the adjacent partition first. For example, if there are C, D and unallocated space on your GPT disk, first delete D to get adjacent unallocated space and extend C.
Note: deleting D partition will wipe out all data inside, so make a backup beforehand if necessary.
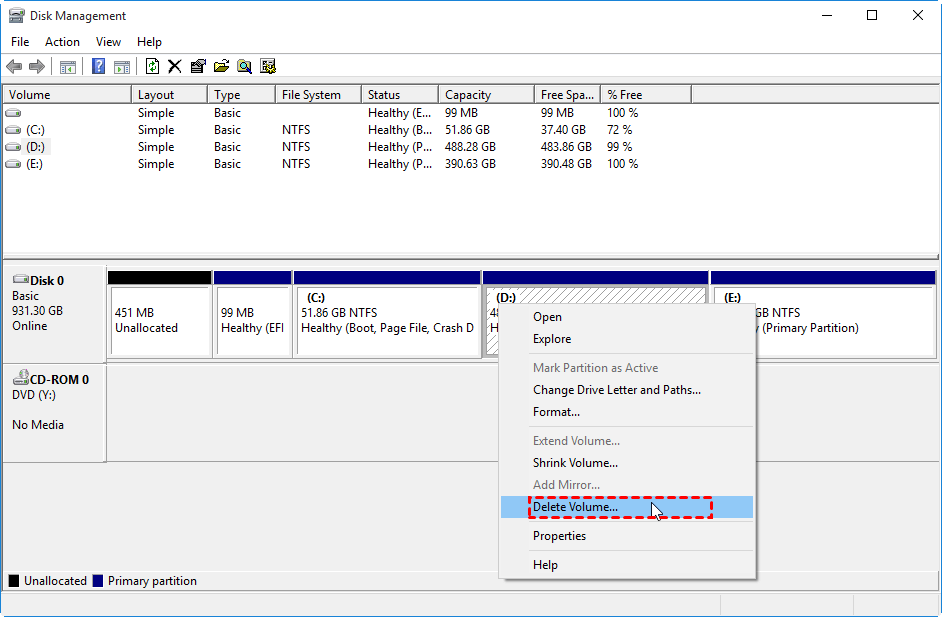
Step 1. Right-click D volume and select "Delete Volume".
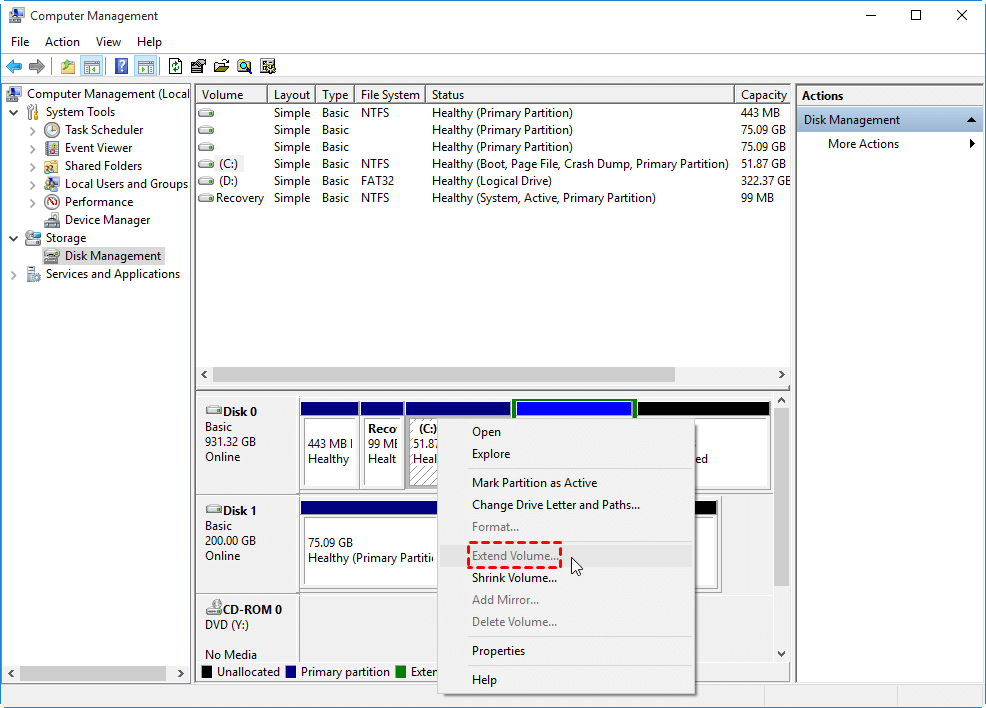
Step 2. Click "OK" to confirm your operation. Once it is done, you can see there is adjacent unallocated space after C drive. Now, right-click C partition and choose "Extend Volume".

Step 3. Follow the wizard to extend system partition on GPT hard drive.
Method 2. Change GPT partition size without data loss via freeware
If the GPT disk partition you will resize matches the requirements listed above, the Disk Managment is really a great choice. What if the GPT partition is not NTFS, or is not adjacent to an unallocated space when you need to extend it? Then we would like to recommend you a free partition manager-Qiling Disk Master Standard. This software breaks out all the limitations of Disk Management, and is able to:
✔Resize NTFS and FAT32 partition;
✔Move partition to make unallocated space contiguous to the to-be-extended partition;
✔Merge two adjacent partitions;
✔Merge unallocated space into another existing partition no matter whether they are adjacent or not.
Here, we will demonstrate how to extend GPT system partition with the non-adjacent unallocated space via the "Merge Partitions" function.
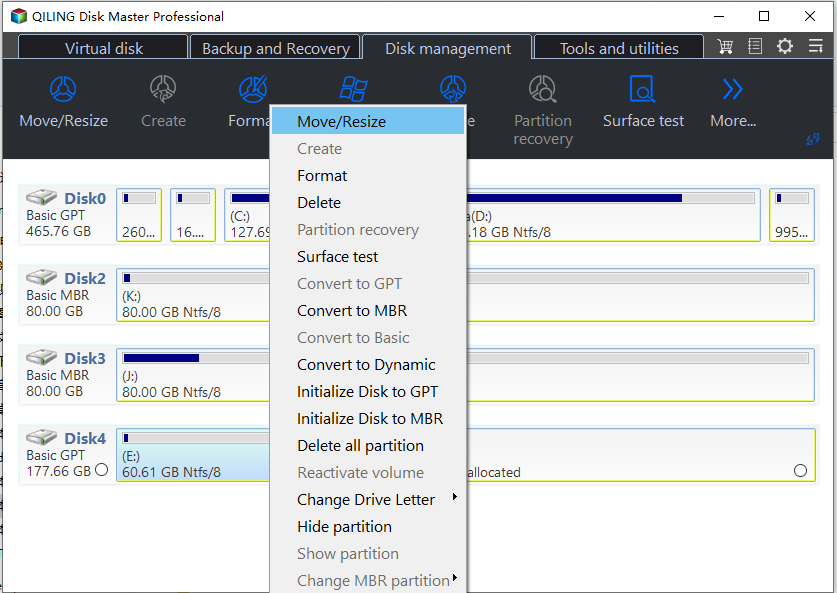
1. Install and run Qiling Disk Master Professional. Right-click the C drive and choose "Move/resize Partitions".
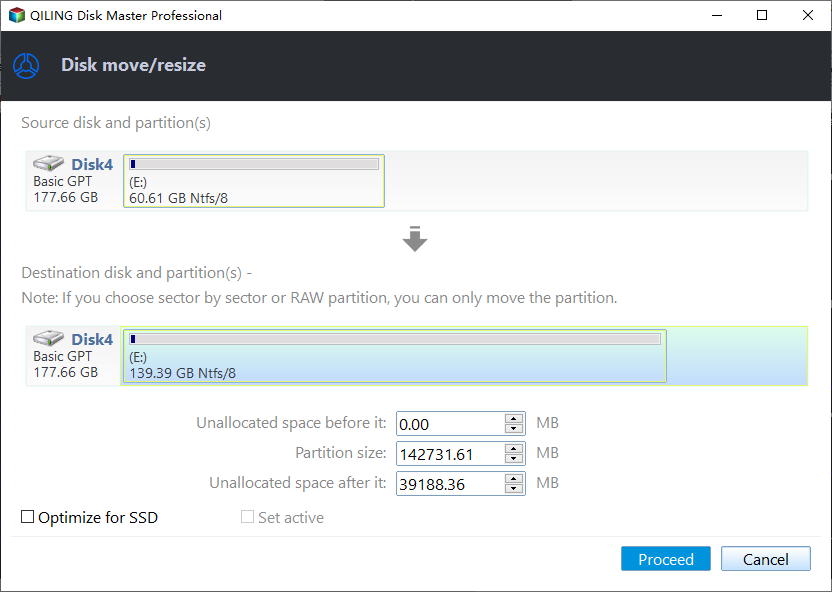
2. Drage to the unallocated space.
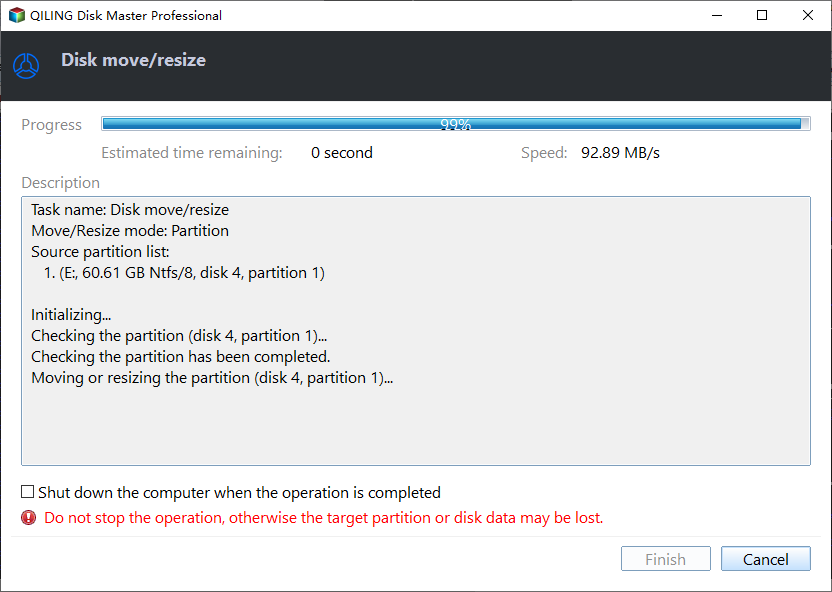
3. Click "Proceed" to commit the pending operation.
Summary
Although the Disk Management can help resize GPT partition in Windows 10, 8, 7, it comes with some restrictions. So, to resize partition on GPT hard drive without losing data, the Qiling Disk Master Standard is a much better choice. Apart from resizing partition, it can also clone partition, clone hard drive, transfer OS to SSD, make a bootable media, etc. For Windows Server users, the Qiling Disk Master also provides the Server edition.
Related Articles
- How to Convert System Boot Disk to GPT without Losing Data?
Need to convert system disk to GPT, but not want to reinstall the OS? Here, you can learn how to convert MBR system disk to GPT without losing data or Windows operating system in Windows step by step. - [Explicit] How to Remove GPT Partition Style without Losing Data?
In this article, you will know how to remove GPT partition style quickly and safely when the system doesn't support UEFI. - Migrate Windows OS from GPT Disk to MBR SSD without Reinstalling
How to migrate Windows OS from GPT disk to MBR SSD and successfully boot Windows from the MBR SSD in Windows 10/8/7? Here comes the best solution.