How to Use Rsync in Windows 10 | Tutorial and Alternative
Can You Use Rsync in Windows 10?
Rsync is a powerful, open-source utility for data backup and synchronization, designed for use on Linux and Unix-based systems. With Rsync, you can easily sync files and directories across different locations, including local directories, disks, and networked computers.
In Windows 10, you may have the need to copy files from one directory to another local directory, sync files from your local machine to a network server, or vice versa. While Rsync is a powerful utility for data backup and synchronization, it is native to Linux and Unix-based systems. However, you can still use Rsync in Windows 10, but with some limitations and workarounds.
While Linux is not hosted by Microsoft, you may still want to run Linux commands on your Windows 10 machine. To do this, you'll need to prepare your system first, which can be a time-consuming process. Alternatively, you could consider using file sync software in Windows 10 or Windows 11 as a Rsync alternative.
How to Run Rsync Command in Windows 10
If you need to run Linux commands in Windows 10, you have several options to consider. One approach is to dual boot Linux and Windows, which allows you to choose which system to boot on startup.
If you need to run Rsync or other Linux utilities in Windows 10, there are a couple of options to consider. While dual booting with Linux is always an option, it's not always the most convenient or necessary solution.
Here's a further explanation to the 2 approaches:
♦ Method 1- Install WSL: To install Windows Subsystem for Linux (WSL) on your Windows 10 computer, follow the step-by-step guide provided by Microsoft. The installation process may vary depending on your system version, so be sure to check the guide for specific instructions.
If you're running Windows 10 version 2004 or higher, or Windows 11, you can leverage the built-in support for running Linux applications, including Rsync, directly on your Windows system, eliminating the need for WSL and a separate Linux setup.: To enable Windows Subsystem for Linux (WSL) on your Windows 10 computer, follow these simple steps:
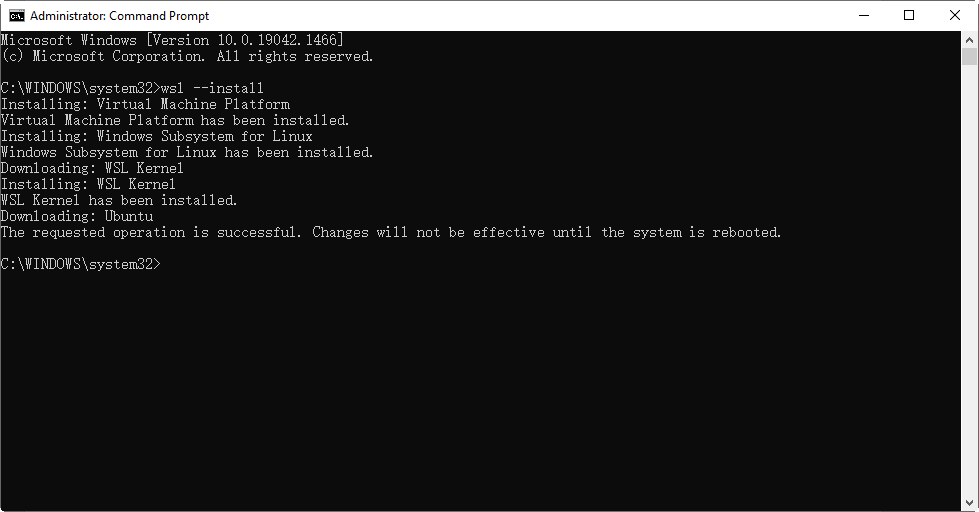
wsl --install
This command will enable the required optional components, download the latest Linux kernel, set WSL 2 as your default, and install the Linux distribution for you. You can use WSL after restarting the computer.
When you enable the Windows Subsystem for Linux (WSL), you can choose to install a Linux distribution. The default distribution is Ubuntu, but you can change it using the command line.
- Want to switch to a different Linux distribution? It's easy!
- Want to see a list of available Linux distributions that can be downloaded from the online store? It's easy!
- Want to install another Linux distribution on top of your existing one? It's easy!
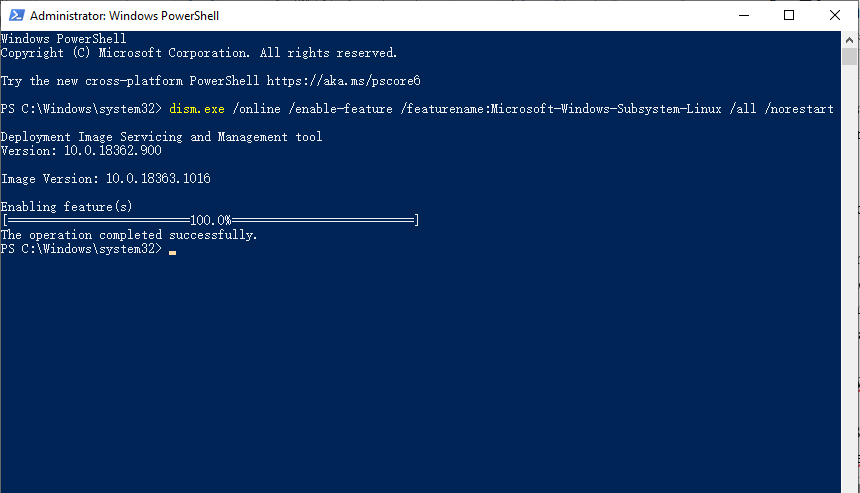
If you are running older versions: To manually install WSL, follow these steps:
dism.exe /online /enable-feature /featurename:Microsoft-Windows-Subsystem-Linux /all /norestart
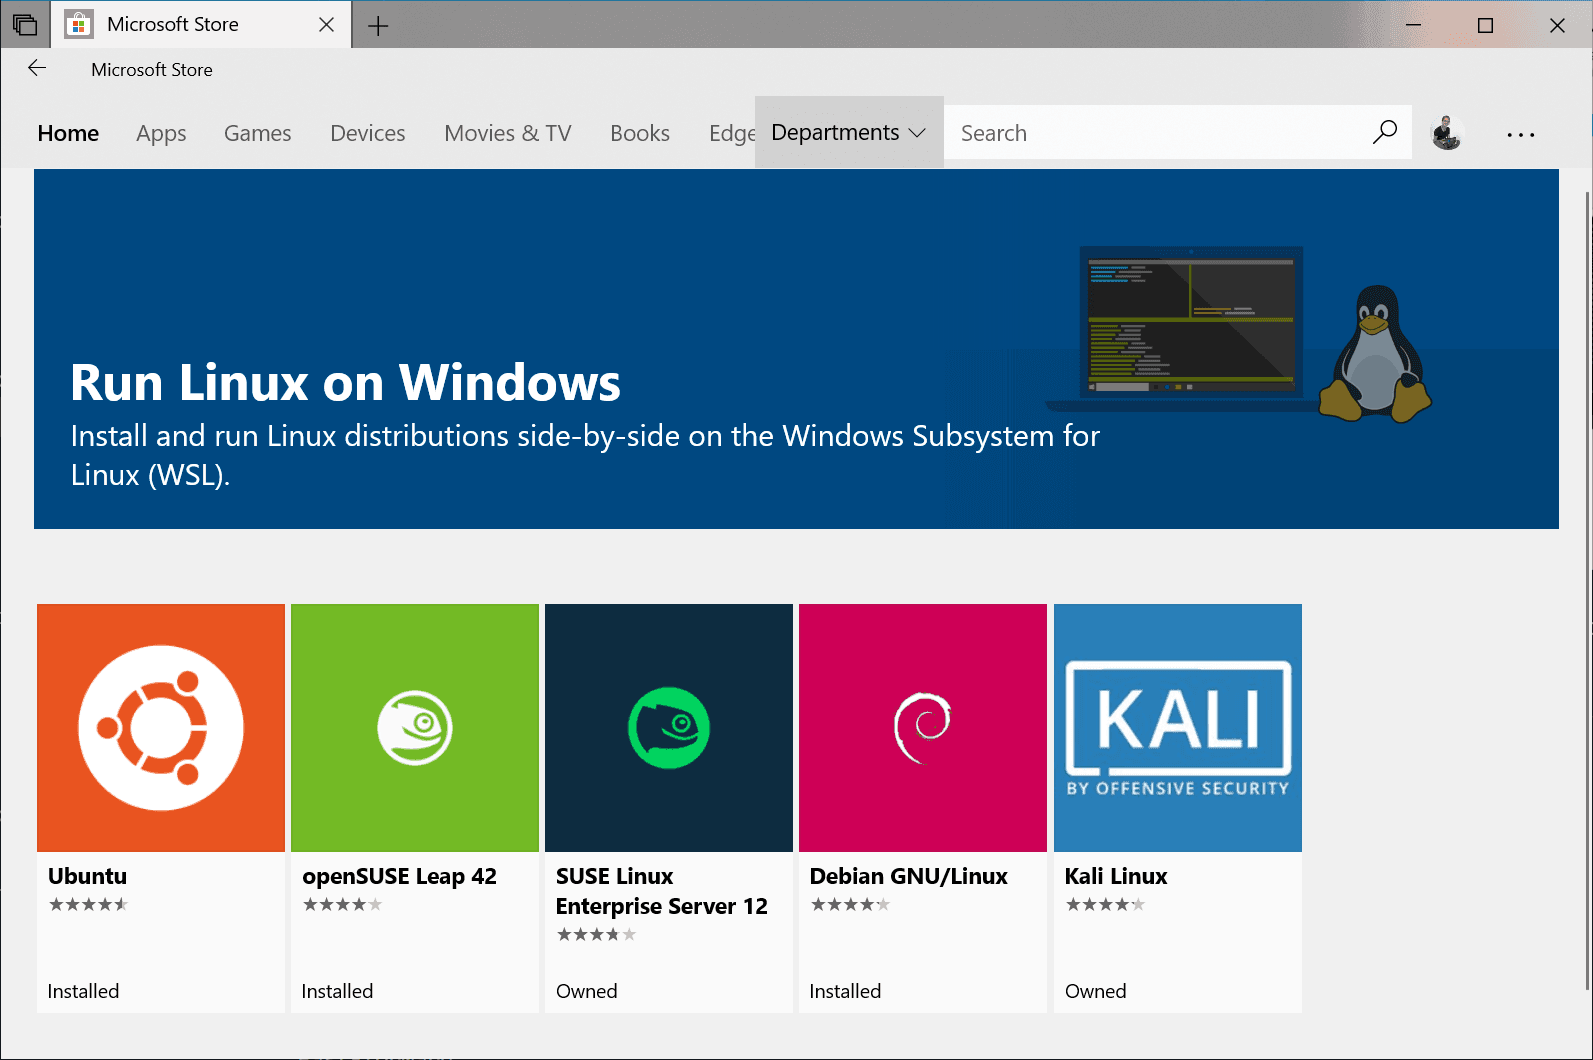
Then you can either update to WSL 2 or continue using WSL 1. For the latter, you can now select a Linux distribution in Microsoft Store. Available options include Ubuntu, SUSE, Debian, Fedora, Pengwin, etc.
When you launch your Linux distribution for the first time, you'll need to wait for a few minutes while the necessary files are stored on your computer. This initial setup process is a one-time step that prepares your Linux environment for use.
♦ Method 2 - Install Git for Winodws: In addition to installing Windows Subsystem for Linux (WSL) and a Linux distribution, you can also explore the capabilities of Rsync in Windows 10. To do this, you'll need to install Git for Windows, which provides a Git Bash environment that allows you to run Rsync commands.
To get started with Rsync, you can click on the provided link to find and download the Rsync executable. Once you've downloaded the file, you can use the `�std` command to extract it. To do this, simply open the Git Bash environment and run the following command:zstd` command to extract it. To do this, simply open the Git Bash environment and run the following command:
After extracting the Rsync executable using `zstd`, the next step is to move the extracted files to their corresponding destination. This is a crucial step in setting up Rsync.
- \rsync-3.2.2-1\usr\bin → C:\Program Files\Git\usr\bin
- \rsync-3.2.2-1\usr\lib → C:\Program Files\Git\usr\lib
- \rsync-3.2.2-1\usr\share → C:\Program Files\Git\usr\share
Now that you have successfully extracted the Rsync executable using `zstd`, the next step is to use the Rsync command in Windows 10 via Git Bash. This will allow you to utilize the powerful features of Rsync for synchronizing and backing up files.
Tip:
In addition to using Rsync in Windows 10 via Git Bash, there's another option available: cwRsync. This is a packaging of Rsync specifically designed for Windows, which allows you to use Rsync for remote file backup and sync in Windows 10.
Rsync Alternative in Windows 10 to Backup and Sync Files
As demonstrated earlier, even with the simplified approach, installing Rsync for Windows 10 can be a challenging task. The process involves installing Git, configuring the environment, and then using the Rsync utility.
Then, what Rsync alternatives do you have in Windows?
| 💻Backup and Restore | The legacy Backup and Restore utility takes a slow and error-prone procedure. It also lacks some options to perform data backup flexibly. |
| 📂File History | With File History, you can auto backup folders with a simple setup, which seems convenient, but the supported storage locations are very limited, and in Windows 11, you are not allowed to add personal folders. |
| 🔰Qiling Disk Master |
It's a handy tool with both Backup and Sync features. You can select source or target path as internal/external hard drive, network/NAS, cloud drive, USB. Thus you can easily sync local drive with network/cloud drive, sync NAS with cloud, sync NAS to NAS, etc. You can also set up a schedule to autorun backup or sync task on regular basis, perform incremental or differential backup to copy only changed files. |
If you're looking for a hassle-free way to sync files from your local drive to the cloud, Qiling Disk Master Standard is a great alternative to Rsync for Windows. This free software is compatible with Windows 11/10/8/7/XP/Vista, and its intuitive GUI makes it easy to use.
If you're interested in trying out Qiling Disk Master Standard, you can download and install the completely free Standard version to get started. This version is perfect for testing the software and experiencing its features firsthand.
In addition to the Standard and Enterprise editions, there's also a specialized Server edition of Qiling Disk Master. This edition is specifically designed for Windows Server users and provides all the features they need to manage their servers effectively.
Syncing Files in Windows 10 to a Cloud Drive:
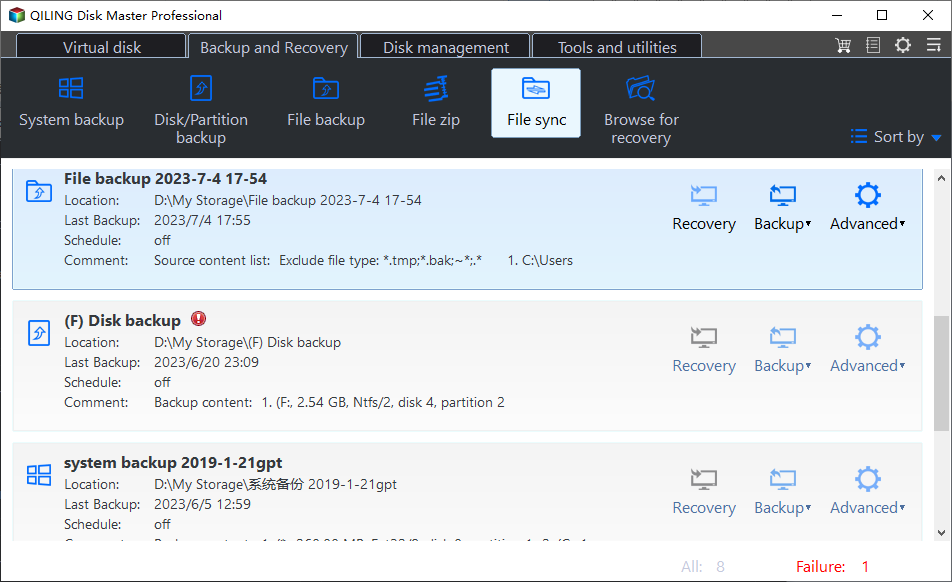
Step 1. To get started with file synchronization, download and launch the Qiling Disk Master Rsync Windows alternative. Once launched, navigate to the **Backup and recovery** tab.
Advanced sync modes are available in Professional+ edition:
☛ The **File Sync** feature in Qiling Disk Master allows you to synchronize changed files from the source directory to the target directory in real-time. This feature enables you to maintain data consistency across multiple locations, ensuring that changes are reflected instantly.
☛ The **�ile Sync** feature in Qiling Disk Master ensures that the files in the source directory are always identical to the files in the target directory. This feature maintains exact file consistency, guaranteeing that any changes made to the files in the source directory are immediately reflected in the target directory.
☛ The **�wo-Way Sync** feature in Qiling Disk Master enables bi-directional file synchronization, ensuring that any changes made to either the source or target directory are instantly reflected on the other side. This feature allows for seamless synchronization of files between two directories, making it ideal for applications where data consistency is crucial.File Sync** feature in Qiling Disk Master ensures that the files in the source directory are always identical to the files in the target directory. This feature maintains exact file consistency, guaranteeing that any changes made to the files in the source directory are immediately reflected in the target directory.
☛ The **�wo-Way Sync** feature in Qiling Disk Master enables bi-directional file synchronization, ensuring that any changes made to either the source or target directory are instantly reflected on the other side. This feature allows for seamless synchronization of files between two directories, making it ideal for applications where data consistency is crucial.Two-Way Sync** feature in Qiling Disk Master enables bi-directional file synchronization, ensuring that any changes made to either the source or target directory are instantly reflected on the other side. This feature allows for seamless synchronization of files between two directories, making it ideal for applications where data consistency is crucial.
Step 2. To create a new sync task, click on the **Edit** button next to **Task Name**. This will allow you to rename the task to something that suits your needs.
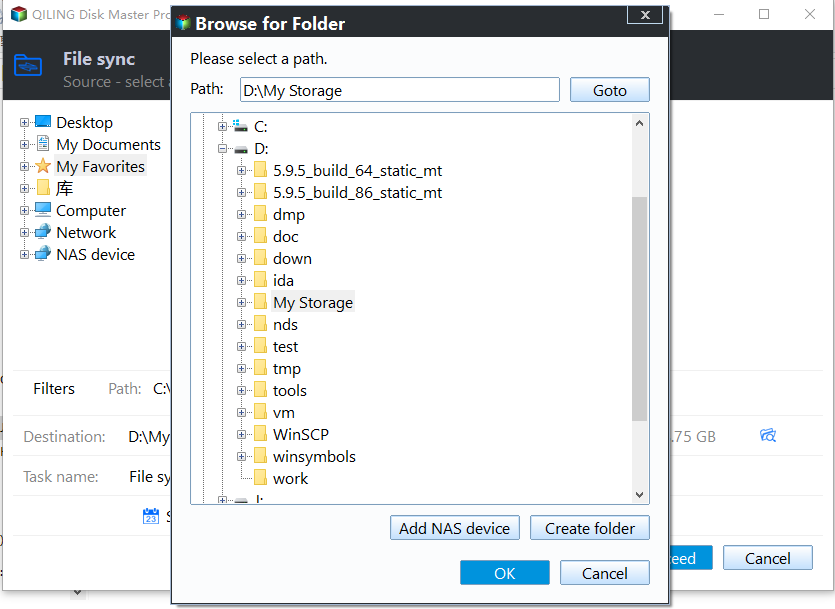
Step 3. To choose a destination path for your sync task, click on the **destination** path selection box. This will allow you to specify the location where you want to sync your data.
Step 4. If you want to automate the sync task, click on **Schedule Sync**. This will allow you to set up a recurring sync task that runs at the frequency you choose.
Step 5. Click Proceed to begin file synchronization.
Once you've created a scheduled sync task, you can rest assured that it will run automatically in the background without any manual intervention. This means you can focus on your work or other tasks without worrying about the sync process.
To better meet your needs, you can also create multiple backup and sync tasks at the same time, and manage them in the Home tab easily.
Verdict
While Rsync is a powerful command in Linux, using it in Windows 10 is a more involved process. However, if you're looking for a straightforward solution to back up and sync files locally and remotely, consider using Qiling Disk Master as a Rsync alternative.
In addition to the above-mentioned features, Qiling Disk Master integrates a Clone module allowing you to clone a disk, and therefore migrate HDD to SSD, move OS to another hard drive without reinstalling, or even clone larger drive to smaller drive, etc.
Related Articles
- How to Sync a Laptop and a Desktop in Windows 10? (2 Cases)
Wanna sync settings or files between a laptop and a desktop in Windows 10/11? Find a complete guide from this article. - How to Sync OneDrive to Computer in Windows 10/8/7 Flexibly?
To sync OneDrive files to computer in Windows 10/8/7, the desktop app of OneDrive may be the most direct way, but it has some limitations in functionality and application range, so you can also try a more flexible solution. - Top Two Ways to Synchronize Files between Windows Servers
You can synchronize files or folders between Windows Servers with DFS replication if you want a free solution. Instead, Qiling Disk Master Server for advanced features and ease of operation. - Do You Know Any SyncToy Portable Alternative in Windows 7/8/10?
I need help to sync files or folders with the SyncToy portable alternative in Windows 7/8/10. Do you know any SyncToy replacement to sync files without losing data?
