How to Set up Automatically Backup in Windows 10
Reasons to Setup Backup in Windows 10
Making regular backups is essential, as it protects against human errors such as mistakenly deleted files and opened emails with viruses. However, most people lack the habit of creating backups, making it crucial to set up scheduled backups on Windows 10, especially given the frequency of data changes.
Taking regular backups of your systems eliminates the risk of data loss. If a file is deleted, you can simply recover it from a previous backup, or if a virus strikes, you can restore to a snapshot taken before the incident. This ensures that your data remains safe and can be easily recovered in case of any disaster.
Setup Backup Windows 10 with File History
Windows 10 offers two backup programs: File History and Windows Backup and Restore. To set up backup using File History, you can utilize both tools to schedule automatic backups.
Step 1: To set up backup on Windows 10, start by clicking the Start button, then navigate to Settings, and scroll down to Update and security.
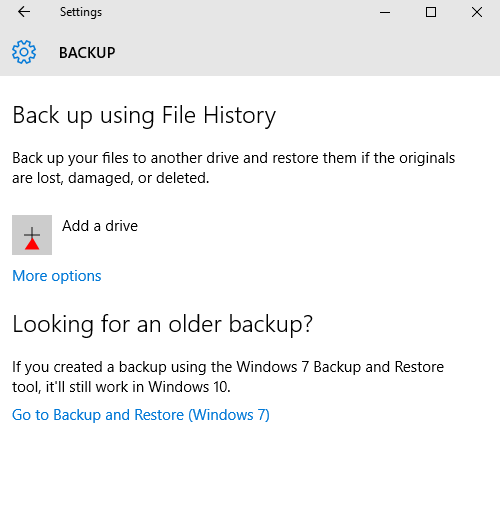
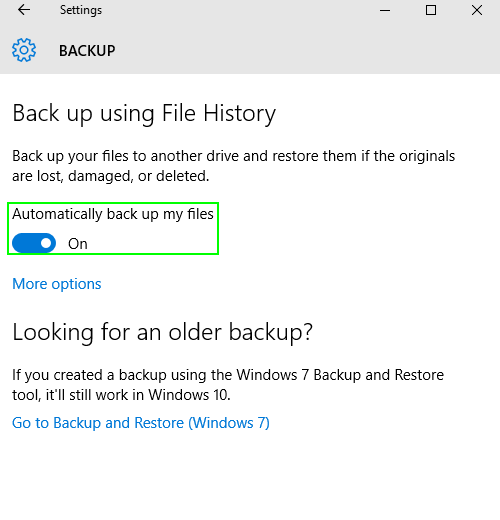
Step 2: Then click "Backup", you can see the picture as follows.
Step 3: "Add a drive", and then choose an external drive or network location for your backups.
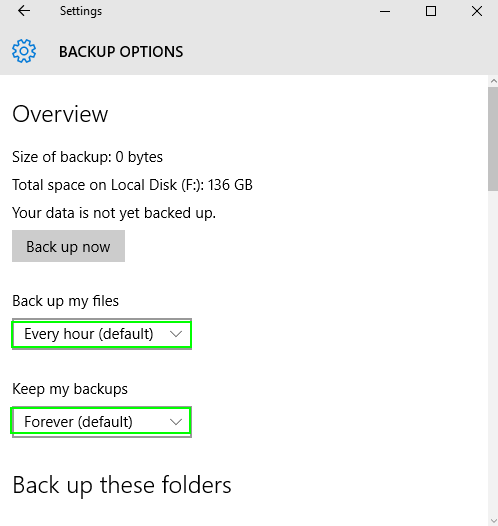
Step 4: You can also click "More options" to setup backup time.
Setup Backup in Windows 10 with Windows Backup and Restore
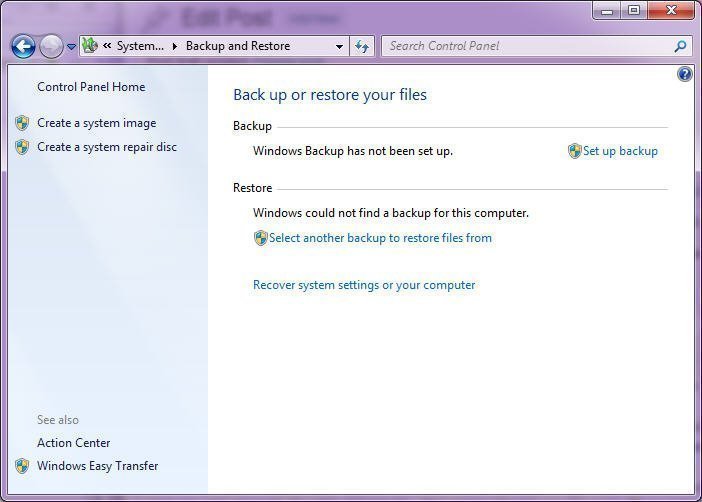
Step 1: click the Windows button and then type in "backup and restore" to find the tool.
Step 2: Click "Set up backup"
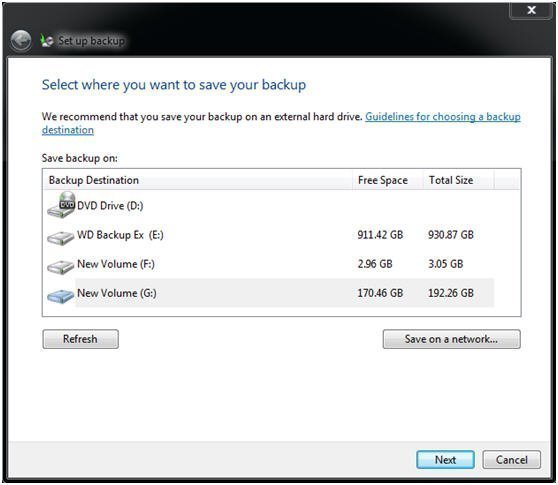
Step 3: Select where do you want to save your backup.
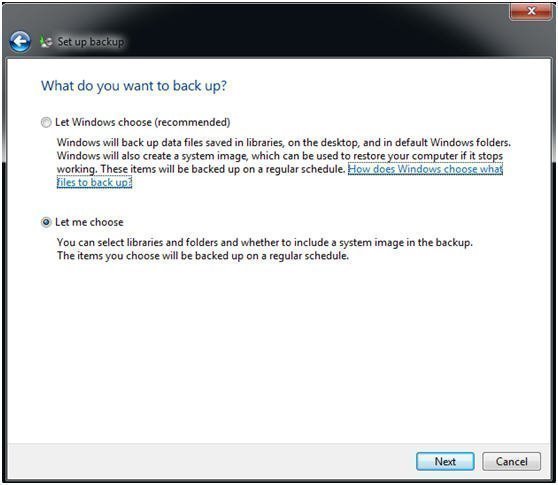
Step 4: You can choose to let Windows decide what to backup or manually select specific items, such as disks, partitions, or files and folders, to include in the backup.
Step 5: Click the "Save settings and run backup" button to run your first backup.
Windows File History and Backup and Restore are useful tools, but they have limitations. Once the backup disk is full, you need to manually delete old backups, which can be time-consuming. A software that can schedule backups and automatically delete old ones would be ideal, providing a more streamlined and efficient backup solution.
Best Way to Setup Backup Windows 10 with Freeware
Qiling Disk Master Standard Qiling Disk Master Standard is a free backup software that automatically and periodically backs up data on a regular basis, requiring users to schedule backups in advance.
This software offers five schedule modes, including Daily, Weekly, Monthly, Event triggers, and syncing with a backup system, allowing users to schedule backups of various types of files, such as pictures and personal files. Additionally, it provides the option to automatically delete old backups, making it a convenient and efficient solution for backup needs.
I'll wait for your instructions.
To schedule a system backup on Windows 10, click on "Backup" and then select "System Backup". From there, you can click on "Schedule Backup" to set up a backup schedule.
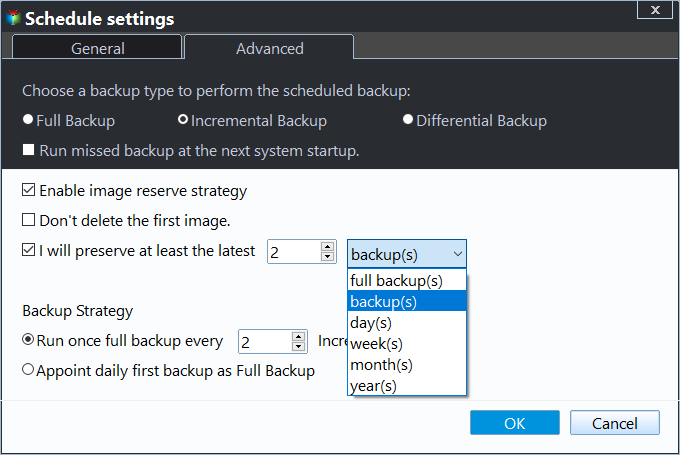
Tips: To set up automatic deletion of old backups and retention of the latest ones, click on the "Scheme" option at the bottom of the main interface.
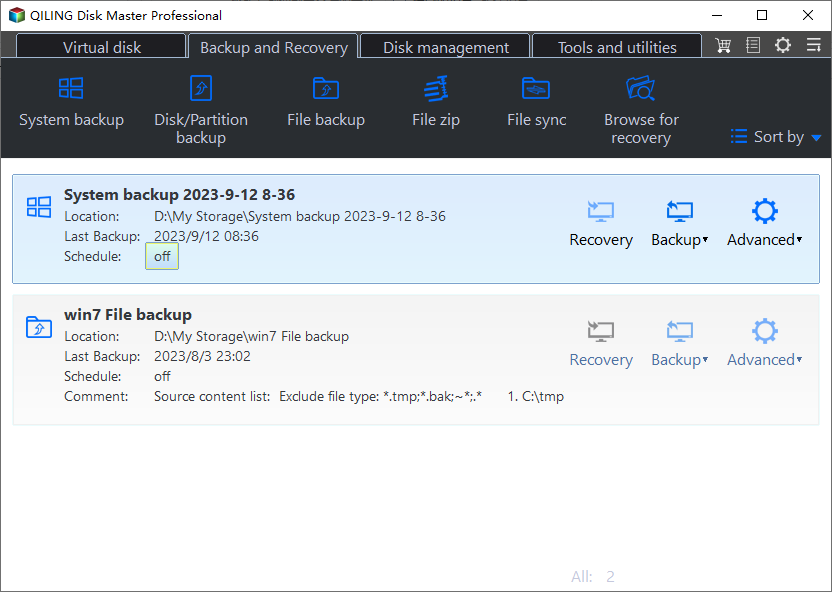
To schedule a backup task, go to the "Home" screen, select a backup task, click "Advanced", and then "Schedule". From there, you can set the backup schedule.
Summary
Setting up a backup on Windows 10 with Qiling Disk Master Standard is much easier and more convenient than using the built-in Windows utility. With Qiling, you don't have to worry about running out of disk space, and it offers many other powerful features at no cost to users.
Qiling Disk Master Standard offers many powerful features for free, including incremental and differential backup, data migration and transfer through cloning, and system restoration. Users can set up backup now to ensure their data's safety.
Related Articles
- Create Schedule Automatic Backup in Windows 10 [3 Ways Included]
You can easily create schedule automatic backup in Windows 10 with the help of Backup and Restore (Windows 7), File History and Qiling Disk Master Standard. - How to Manage Windows 10 Backup Options to Protect Your Data
How to manage File History backup options in Windows 10? How to configure settings of Backup and Restore? In this post, I'll show you the way to do Windows 10 backup settings, and also an alternative with more backup options. - Guide | Automatic Backup Windows 10 to External Hard Drive
This article explains how to auto backup your computer to external hard drive in Windows 10. The importance of backup needs no elaboration, and an automatic schedule can certainly save you a lot of trouble. - Does EFI Partition Have to be First in Windows?
Does EFI partition have to be first on my disk? If you find that the EFI partition might need to be moved, this post will guide you do this job securely.
