Auto Sync Two External Hard Drives in Windows 11/10/8/7
Scenario
How do I sync two external hard drives?
I have accumulated thousands of music CDs and DVDs that I copied to an external hard drive. I wish to back up or move these files to another external drive for safety. How do I move them between two external hard drives?
- Question from Cnet.com
External hard drives are portable devices that are used to store photos, videos, documents and other kinds of data. They can be connected to different computers through USB ports, as a result of that it’s a good choice to transfer files between computers through an external hard drive. What’s more, you can backup computer data to an external drive so as to avoid data loss caused by system crash or other unexpected errors.
There is some time when you want to sync two external hard drives:
- Make an extra backup for important data.
- Transfer files from an old hard drive to a new one or from a smaller drive to a larger drive.
- Share files by syncing files to someone else’s drive.
If you are in one of the above cases, you may read on to find effective solutions to sync files between two external hard drives.
How to sync two external hard drives in Windows 11/10/8/7
Here I’m going to show you how to sync two external hard drives in Windows 11/10/8/7 via xcopy and Qiling Disk Master respectively. If you want more advanced sync options like automatic sync, then Qiling Disk Master is recommended.
Sync two external hard drives via xcopy
The Windows Dos Box xcopy command is an excellent solution for syncing one directory to another. You can run xcopy command from a Command Prompt window directly. Or you can create a batch file to run xcopy command, which can simplify the work of retyping commands. Learn how to sync files between two external hard drives via a batch file of xcopy below:
- Connect the two external drives to your computer and make sure they are detected.
- Search for Notepad from the search box in the taskbar, and click the top result to start the app.
- Type the following lines to create a batch file:
- @echo OFF
- echo XCOPY Batch Process Started
- xcopy g: e: /e /d /c /y (“g:” stands for the source drive and “e:” stands for the destination drive.)
- echo XCOPY Batch Process Complete
- pause (It prevents the console window from closing after executing the command.)
✍ Tips: Here are explanations of the parameters used in xcopy command:
● /e: copy directories and subdirectories, including empty ones.
● /d: copy files whose source time is newer than the destination time. That means to only copy changed or newly added files from the source path to the destination path.
● /c: continue copying even if errors occur. Generally, errors occur with read-only files, or files that have protected permissions.
● /y: suppress prompting to confirm you want to overwrite a file.
- Press Ctrl + S to save the batch file. Name the file with the “.bat” extension, “xcopy_sync.bat” for example. Put the file in a location you can easily find.
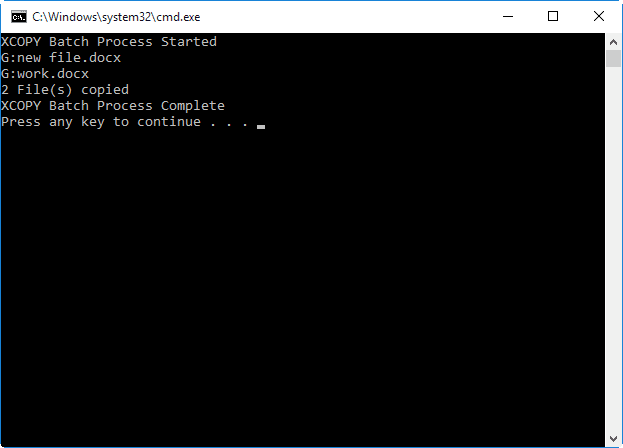
- Double click the “xcopy_sync.bat” file to sync one external hard drive to another. It will bring out a Command Prompt window to show you the sync result. Press any key to close the window.
✎ Note: Just double click the batch file each time you want to sync the two external hard drives. If you want to edit the batch file, right click it and select Edit.
That’s all about syncing two external hard drives via xcopy. The process seems not complex. However, the xcopy command won’t delete files that exist in destination but not in source, so it is not a perfect sync. Furthermore, it can’t perform auto sync without the help of Task Scheduler. Want a comprehensive way? Please refer to the next part.
Sync one external hard drive to another with Qiling Disk Master🔥
Qiling Disk Master Professional is powerful file sync software that can help you sync files from one folder/disk/computer to another one. It supports all editions of Windows 11/10/8.1/8/7/Vista/XP and it offers you four sync modes:
◑ Basic Sync: it will sync files from the source directory to the destination directory.
◑ Real-Time Sync: once files are changed in the source directory, they will be synced to the destination directory almost immediately.
◑ Mirror Sync: it will keep the files in the destination directory exactly the same as the source directory. If there are files that exist in destination but not in source, they will be deleted in the destination directory.
◑ Two-Way Sync: Any changes in the source or destination directory will be synced to the other side.
In addition, Qiling Disk Master supports various NAS devices and cloud drives. For example, you are allowed to sync QNAP to OneDrive. How to keep two external hard drives in sync using Qiling Disk Master? Let’s have a look.
- Connect the two external drives to your computer and make sure they are recognized. Download, install, and open Qiling Disk Master.
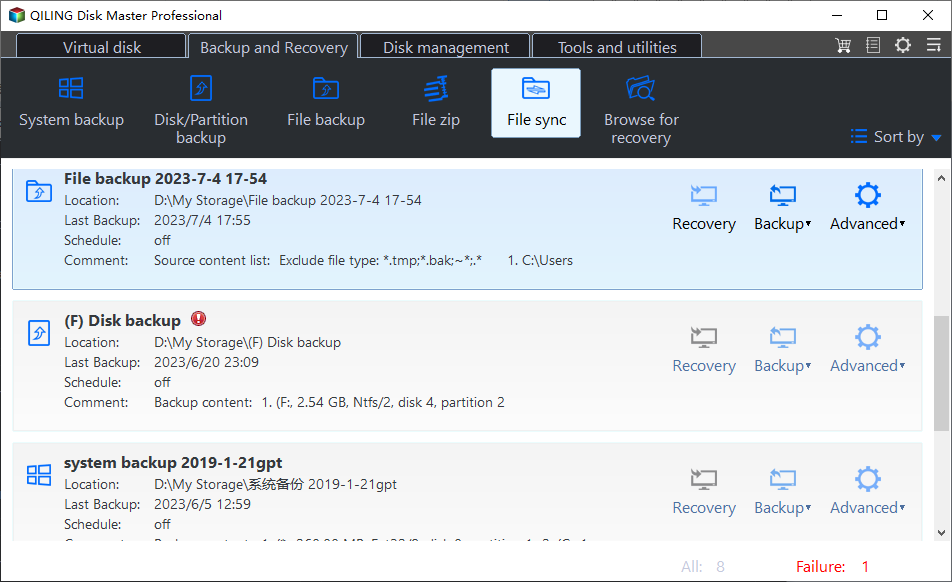
- Click Backup and recovery and select File Sync. It will delete extra files on the destination drive, which makes up the shortage of the xcopy command.
- Edit the task name. Click Add Folder to select the folder(s) you want to sync from the source drive. Then, click the second bar to select the destination drive.
- (Optional) To sync two external hard drives automatically, you can click Schedule Sync to choose an appropriate frequency.
- Confirm the operation and click Proceed to begin.
★ Bonus tip: backup files to Qiling Cloud
If you want to backup files on your external hard drive, Qiling Cloud is a safe backup location. Just click Backup > Cloud Backup to backup files to Qiling Cloud. It offers you 1TB free storage for 15 days after you sign up for an Qiling account.
Conclusion
Both Windows xcopy command and Qiling Disk Master can help to sync two external hard drives in Windows 11/10/8/7. You may prefer Qiling Disk Master for more advanced sync options.You can use this software to set up automatic synchronization tasks so that you never miss any changes to your files.
Besides the sync function, Qiling Disk Master enables you to perform disk clone or system clone. If you want to replace or upgrade your old hard drive, the software can help you transfer the operating system or data without losing data or causing any boot problems. Have a try right now!
Related Articles
- Sync Folders between Drives in Windows 10/8/7 (with Video)
- Best Way to Sync Files to External Hard Drive in Windows 10/8/7
- How to Use Dropbox to Mirror Folders in Windows 10/8/7?
- Install a Second Hard Drive in Windows 10 (One-Stop Wizard)
This is a one-stop wizard for installing a second hard drive in Windows 10, whether it's external or internal, and migrating system or data afterward.


