Windows 10 Backup Error 0x807800C5 – How to Solve It Easily
An error occurs: backup error 0x807800C5
Backup is the most fundamental disaster recovery technology. To make backups on your PC, you may use the built-in tools in Windows 10: Windows File History or Windows Backup. The first tool backs up important folders in your user folder while the second tool is used to backup the entire system as well as everything else on your hard drive.
However, when creating Windows System Image Backup, some users receive the following error message:
"The backup failed.
There was a failure in preparing the backup image of one of the volumes in the backup set. (0x807800C5)"
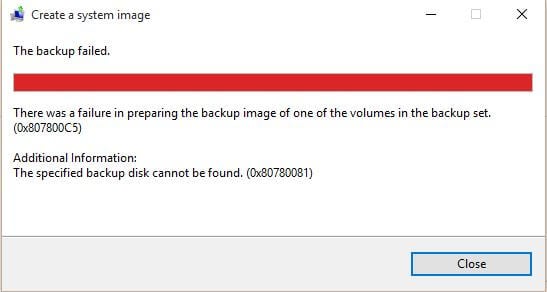
Usually additional information is offered in the error message, such as "the specific backup disk cannot be found (0x80780081)", "the process cannot access the file because it is being used by another process (0x80070020)". How it comes and how to resolve Windows 10 system image backup fails accordingly? Please read on.
How to solve Windows backup 0x807800C5 easily
The key for the backup error 0x807800C5 is that Windows only allows one image backup. If you perform Windows System Image Backup for the second time, there will be a conflict of the identical folders named WindowsImageBackup or a clash of the drive to be backed up. To solve 0x807800C5 in Windows 10, there are two solutions for your reference:
👉 Solution 1: Rename the WindowsImageBackup folder or remove backup files
👉 Solution 2: Disable system protection and delete restore points
👉 Backup Windows 10 via a powerful freeware🔥
Solution 1: Rename the WindowsImageBackup folder or remove backup files
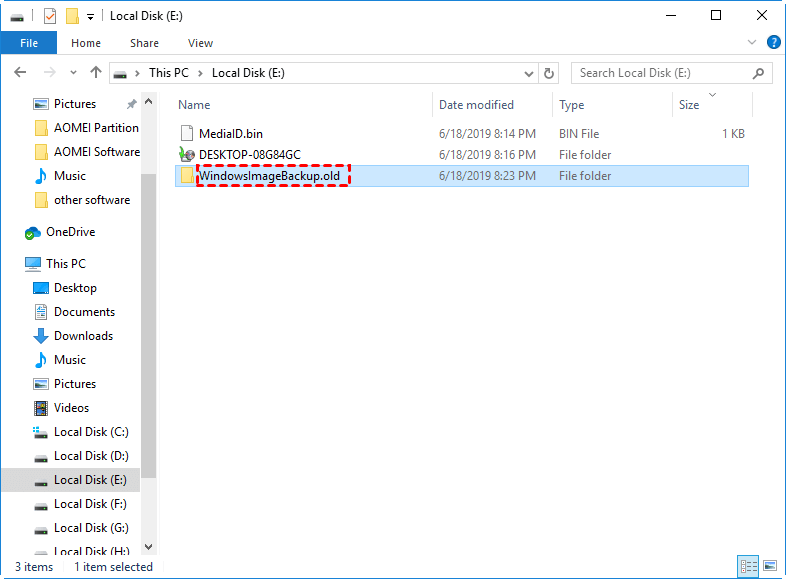
1. Open This PC and navigate to the exact location of Windows Image Backup.
2. Right click on the WindowsImageBackup folder and rename it WindowsImageBackup.old.
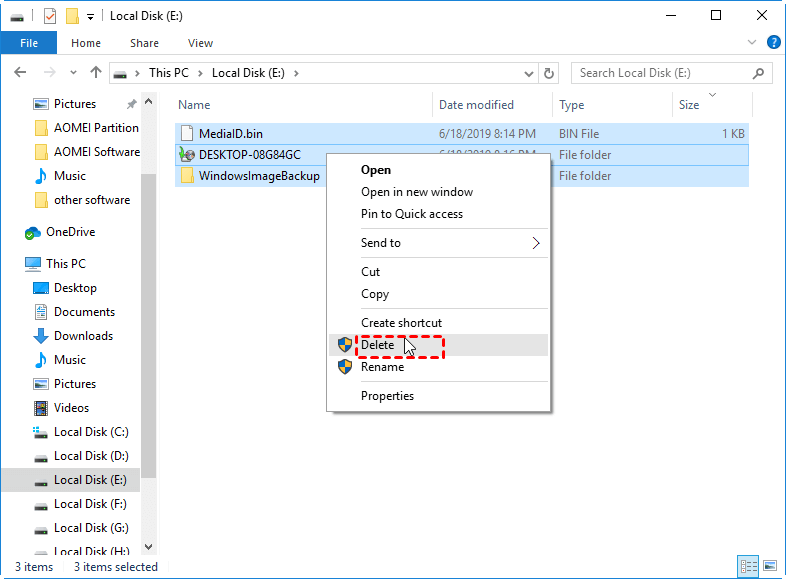
3. Create a Windows backup again to see if it works now. If not, you may delete the files listed below and try again:
- the MediaID.bin file
- the file with your computer name
- the WindowsImageBackup folder
Solution 2: Disable system protection and delete restore points
1. Press Windows Key + S to open the search box. Type "system" and select System from the list.
2. In the pop-up window, click System protection.
3. In the System Properties window, select the drive that has system protection turned on and click Configure.
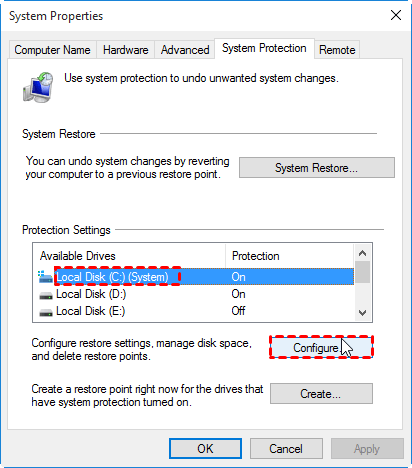
4. In the next window, select Disable system protection and click OK.
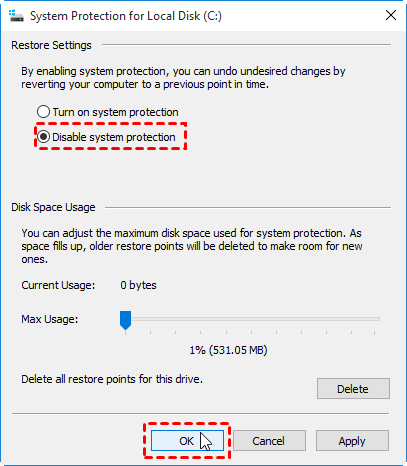
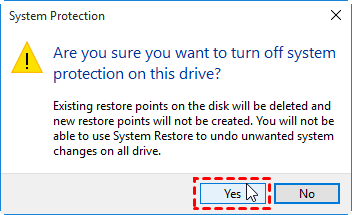
5. You will receive a warning prompting you that existing restore points will be deleted and new restore points will not be created, click Yes to confirm the operation.
6. Repeat Step 3 – Step 5 if there is more than one drive that has system protection turned on.
7. Restart your computer and you shall be able to perform Windows System Image Backup now. Turn on system protection again for specific drives if you need.
Note: Sometimes Windows 10 backup error 0x807800C5 could also be caused by corrupt or missing system files. In this case, you can run sfc/ scannow in Windows 10 to fix the error.
Backup Windows 10 via a powerful freeware
Besides Windows 10 creating system image fails, you may encounter Windows backup freezes at 97%, Windows 10 backup 0 bytes, etc. If you are tired of figuring out corresponding solutions to each error, you may turn to the best free backup software—Qiling Disk Master Standard.
◈ There are five types of backup available in Qiling Disk Master: System/Disk/Partition/File/Cloud Backup, which can meet your different needs.
◈ It is able to set schedule automatic backup in Windows 10 with daily, weekly, monthly frequency, therefore you don't need to worry about data loss due to forgetting backups.
◈ It enables you to do block level incremental backup to improve backup efficiency and greatly reduce disk space.
◈ All Windows PC operating systems like Windows 11/10/8.1/8/7/Vista/XP are supported.
Learn how to backup Windows 10 via Qiling Disk Master in detail. At first, download Qiling Disk Master Standard and install it on your computer. For server users, try Qiling Disk Master Server.
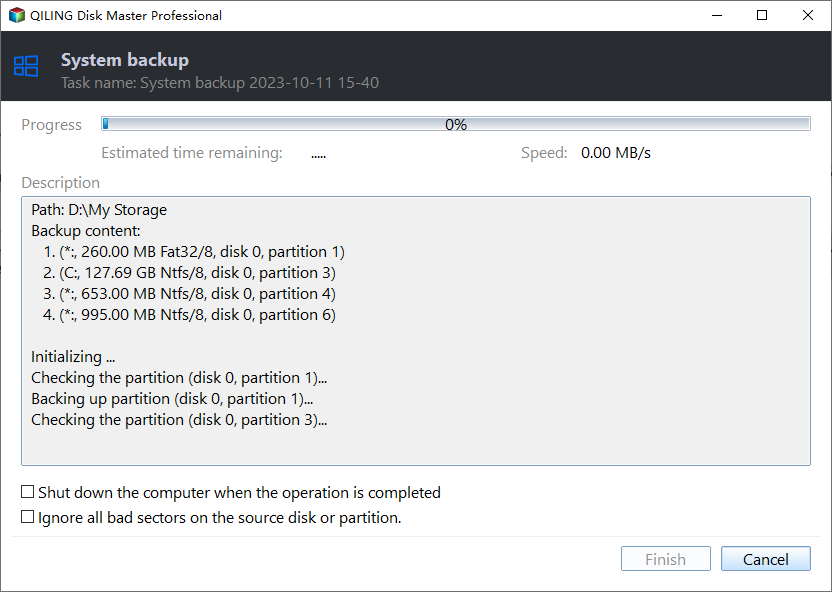
Step 1. Run Qiling Disk Master. Click on "Backup" and select "System Backup".
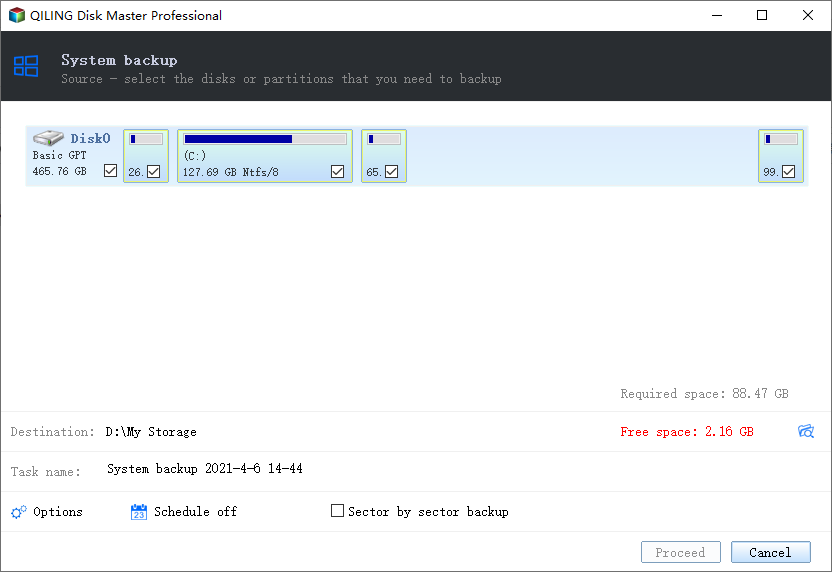
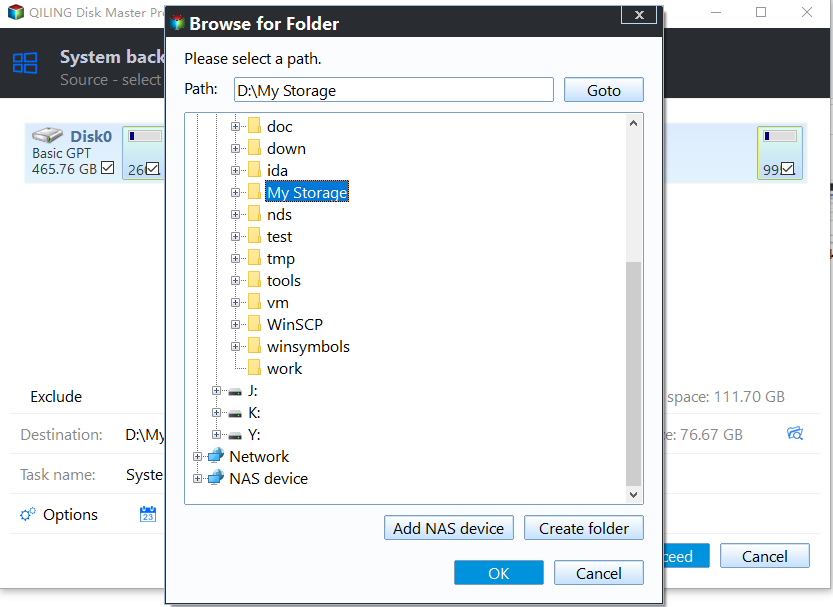
Step 2. The required system partition(s) is (are) selected by default. Choose the destination path to store the backup files. You can backup Windows 10 to external hard drive, USB drive or network location.
Step 3. Confirm the operation and click "Proceed".
✍ Tips:
There are advanced backup settings you can choose as per your need:
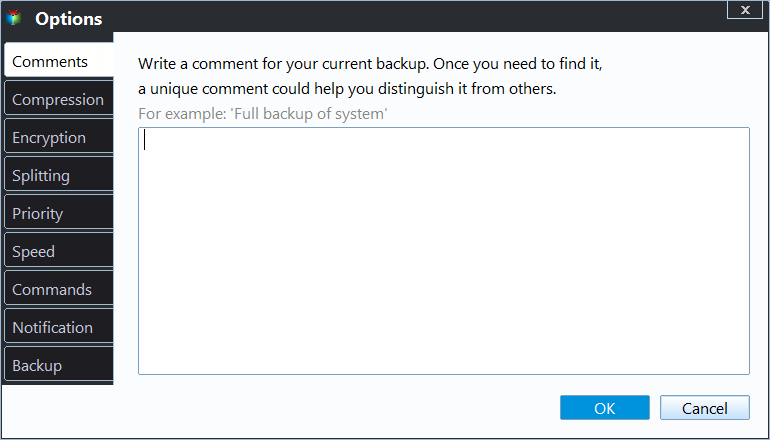
>> Options: you can enable Windows 10 email notification, choose the compression level for the backup image file and select intelligent sector backup or sector-by-sector backup.
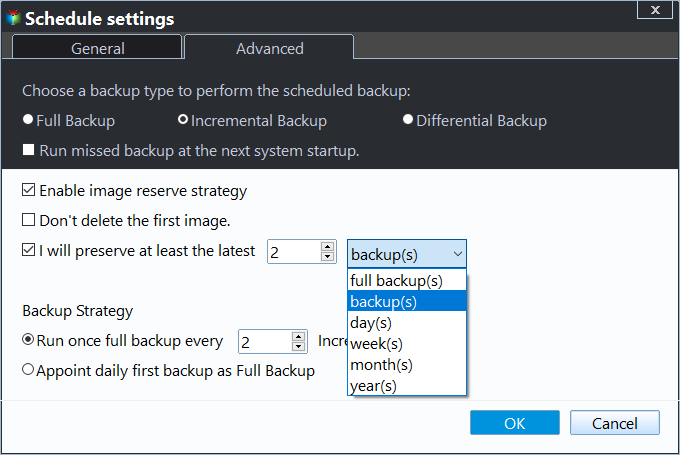
Schedule Backup: you can set the backup task to run automatically at fixed intervals, such as daily, weekly, and monthly.

Backup Scheme: you can choose full, incremental or differential backup as the backup method. Both incremental and differential backup can help you backup only changed files. However, differential backup is a paid feature.
You can also have the program delete old image files automatically to save disk space for you. There are 4 cleanup methods, namely By quantity, By time, By daily/weekly/monthly and By space. All of them are available on the Professional edition, thus you need to upgrade before using this feature.
Prepare for possible boot errors
Some system errors may cause your computer fails to boot. To ensure you can perform system restore from boot, you can do either of the following things in advance.
👉 Create bootable media: you can use a bootable USB, CD or DVD to boot your computer in case of boot failure.
👉 Create a recovery environment: after creating a recovery environment with Qiling Disk Master, you will see an option like Enter into Qiling Disk Master when you boot your computer. Select it and you can use all backup and recovery solutions offered by Qiling Disk Master. This is an advanced feature.
Conclusion
There are two effective solutions offered in this article to fix Windows 10 backup error 0x807800C5. It limits the number of backups to one, so you can only rename the WindowsImageBackup or disable system protection before creating another one.
But if you think it's complicated and want a more flexible way to create multiple backups and always get the latest backups. Only in this case, you can restore computer to an earlier date without losing any data. Also, it provides you multiple features to minimize the backup image size, and among them, automatic backup cleanup method is the most effective one.
And you can enjoy its image deploy tool in the technician or techplus edition if you want to restore system to multiple computers simultaneously. Apart from the backup & restore functions, Qiling Disk Master enables you to transfer data from one hard drive to another with the sync and clone features. Why not give it a try right now?
Related Articles
- Quick Fixes for Windows 10 Backup Failed Error
You will learn how to fix Windows 10 backup failed easily, either directly fixing it or using other powerful backup software. - How to Backup and Restore EFI System Partition in Windows 7/8/10?
You never know when you will need the EFI system partition, for example, mistake deletion, so the best way is to backup EFI system partition ahead of time. - Fix "The Version Does Not Support This Version of the File Format" Error
You will learn how to fix the backup error "The version does not support this version of the file format" in Windows Server 2012 with given solutions. Also, you could try a different backup software to backup system. - Backup Windows 7 to Network Drive with 2 Free Methods
This page shows you how to backup Windows 7 to network drive in two free ways and demonstrates the advantages of backing up to network drive.