How to Manage Windows 10 Backup Options to Protect Your Data
Case: how to manage Windows backup options?
To manage Windows 10 backup options, you can follow these steps: Go to Settings > Update & Security > Backup > Add a drive, then select the drive you want to back up. You can also choose which folders to back up by selecting the "Let Windows choose what to backup" option and then clicking on "More options" to customize your backup settings. This way, you can choose which partitions or folders to include in your full backup.
Many people have come to realize the importance of backup, making it a routine to avoid unexpected data loss and system failures. However, with the changing OS versions, some users get confused about the backup mechanism in Windows 10, and are unsure how to configure the settings to get what they really want.
To set up Windows 10 backup options, you can use File History and Backup and Restore for better data protection.
How to configure Windows 10 backup options
Windows 10 offers various backup methods, each with distinct backup options. To set them up, you can use File History, which backs up your files to an external drive or network location, or System Image Backup, which creates a complete image of your system. You can also use the built-in Backup and Restore feature, which allows you to create a system image and back up your files to a network location or external drive.
- 1. Backup options in Windows 10 File History
- 2. Backup settings of Backup and Restore
- 3. Alternative to backup Windows 10 with more options
1. Backup options in Windows 10 File History
Windows 10's File History is a built-in backup utility that focuses on backing up personal files in the User folder to an external hard drive, first introduced in Windows 8.
How to manage backup options in File History:
To access the Backup settings, click on the Start button, then select Settings from the list of available options. Next, click on the Update & Security option, followed by the Backup option.
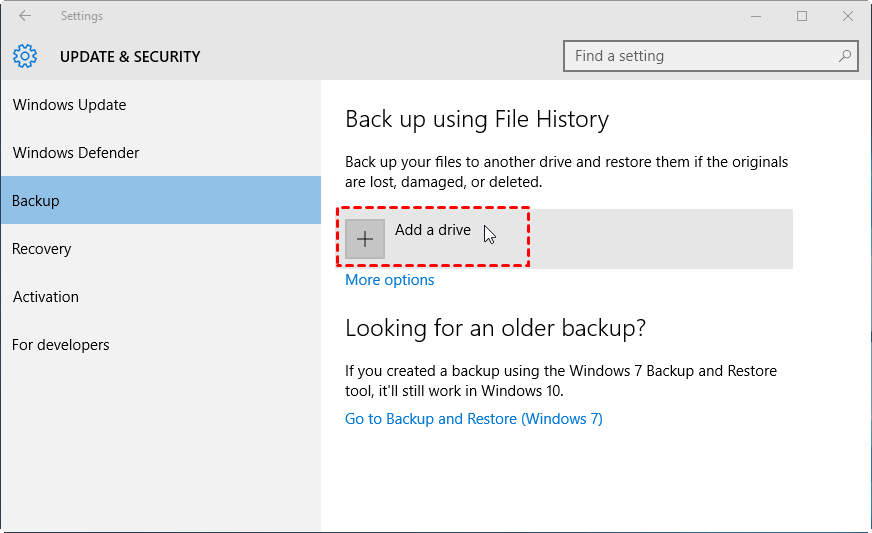
Step 1. Connect your external hard drive, click the + button to choose it.
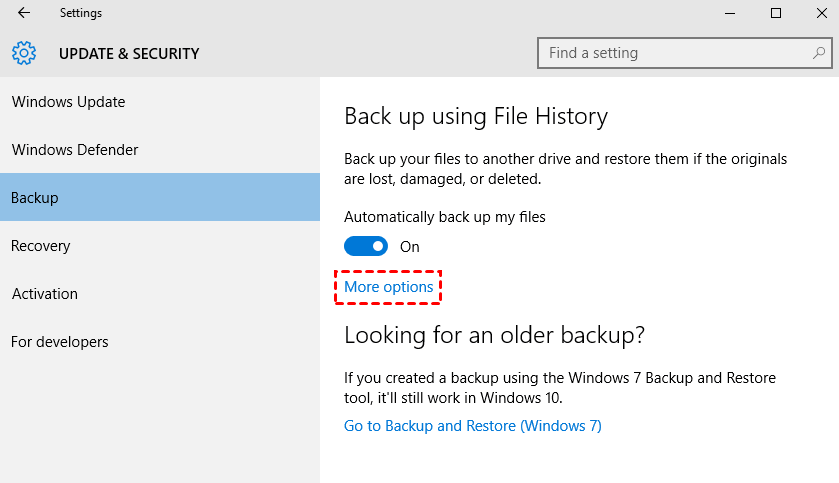
Step 2. To automatically back up your files, toggle on the "Automatically back up my files" option, and then click "More options" to configure further backup settings for Windows 10 File History.
Step 3. In the BACKUP OPTIONS, you can set up how often File History backs up your files, how long your backups will be saved, and which additional folders you want to back up.
◆ File History automatically backs up files in the User folder every hour, keeping versions forever, but can be adjusted to suit individual preferences.
◆ If you're prepared to make a backup immediately, click the "Back up now" option under the Overview section.
◆ To specify additional folders to backup, click "Add a folder" under "Back up these folders". To exclude certain folders from the backup, click "Add a folder" under "Exclude these folders".
◆ You can choose to stop using Google Drive for backups and instead use another drive. This will not delete your previous backup, but you can only have one drive active at a time.
◆ To recover a file from a backup, click "Restore files from a current backup" under Related settings, locate the file you want to recover, select the desired version, and then click the restore button.
You can also click "See advanced settings" to view your backup status intuitively, and manage all the related options. Additionally, you can add a network location for your backups.
Supplement: how to fix Windows 10 Backup options crash problem?
Users experiencing the Windows 10 Backup options crash issue, where clicking "More options" causes the settings window to close, can try resolving it by following a series of troubleshooting steps.
Fix 1. Restart your computer.
Fix 2. Switch the Automatically backup my files from Off to On.
Fix 3. The Windows 10 Backup options may crash due to corrupt system files, which can be resolved by performing a system maintenance troubleshoot or running the System File Checker.
- To perform the system maintenance troubleshoot: To troubleshoot, go to the search box, type "Troubleshooting", and click on it when it appears. Then, click on "System and Security", followed by "System Maintenance".
- To perform System File Checker: To run the System File Checker (SFC) tool in Windows, right-click the Start menu, select "Command Prompt (Admin)", type "sfc /scannow" (with a space between the two words), and press Enter. This will scan and replace any corrupted system files.
2. Backup settings of Backup and Restore
Windows 10 retains the Backup and Restore feature from Windows 7, allowing you to backup libraries and folders or create a Windows 10 system image.
When Windows 10 isn't working normally, you can enable system restore to recover your Windows, programs, and configurations without having to reinstall the system. This saves time and effort.
How to configure backup settings in Backup and Restore:
To access the Backup and Restore feature in Windows 7, navigate to the Control Panel, then click on "System and Security," followed by "Backup and Restore (Windows 7)". Alternatively, you can search for "backup and restore" on the taskbar to quickly access this feature.
When setting up a backup, you have two main options: Set up backup and Create a system image. These two choices allow you to customize your backup approach to suit your specific needs.
- If you want to create an image of everything on your drive, including the Windows 10 installation, settings, programs and personal files, choose Create a system image.
- To backup Windows default libraries and folders, go to the "Set up backup" option, which will display the existing task and allow you to modify its settings by clicking "Change settings".
To set up backup:
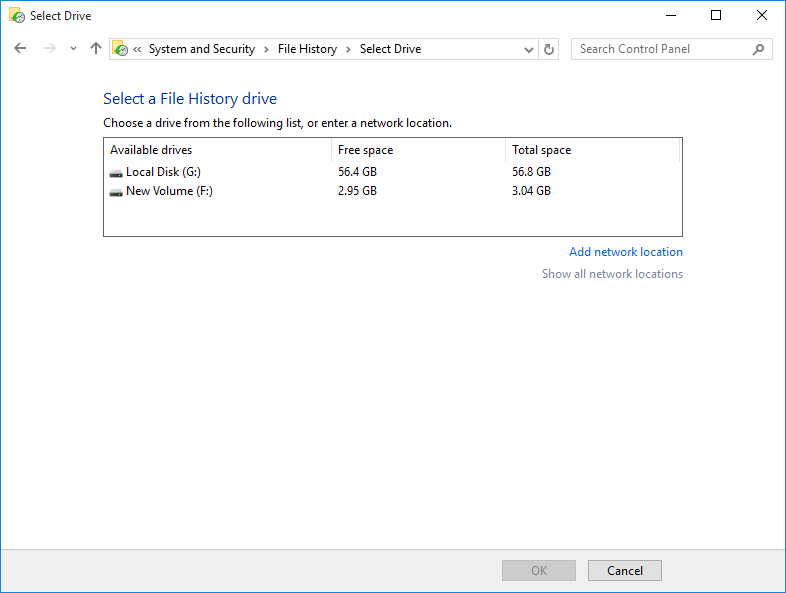
Step 1. Click on the desired location to select it, then click Next to proceed.
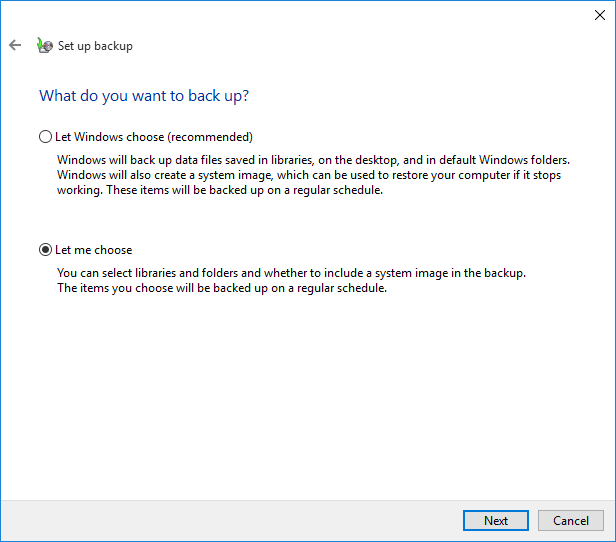
Step 2. After choosing to backup either the default Windows folders or manually selected folders, proceed by clicking the "Next" button. If the option "Let me choose" is selected, the next step will involve ticking the drives or folders that are to be backed up.
Step 3. To set up an automatic backup, click "Change schedule", select "Run backup on a schedule", configure the frequency settings, then click "OK" and "Save settings and run backup".
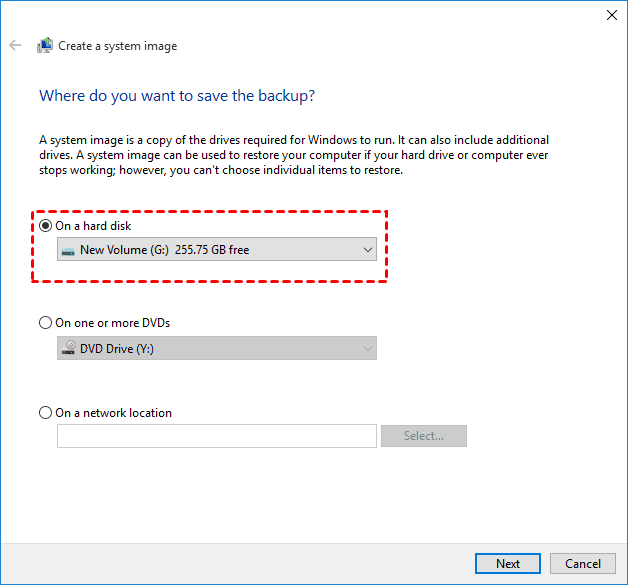
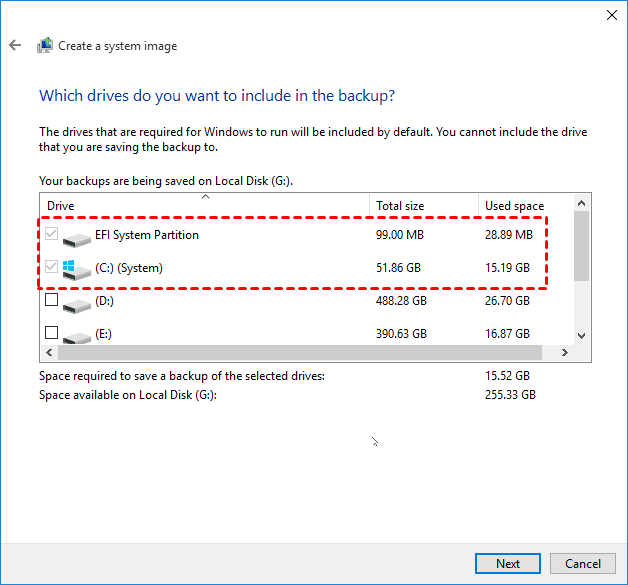
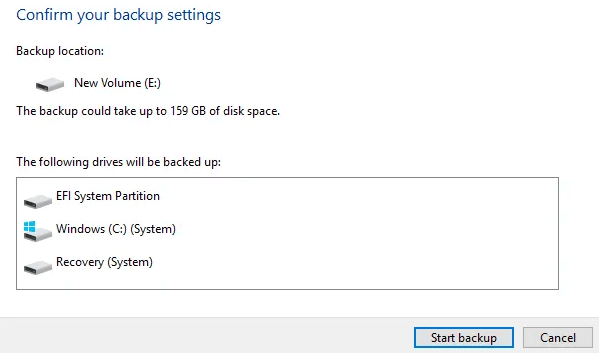
To create a system image:
Step 1. To save the backup, choose a destination such as a hard disk, one or more DVDs, or a network location, and click the "Next" button.
Step 2. Windows drives will be included by default, and you can select other drives to backup, then click Next to continue.
Step 3. Check the backup settings and click Proceed to confirm.
The backup process may take some time to complete, but you can continue working while it's running.
When the progress completes, you will be asked if you want to create a system repair disc that can help you to boot the computer. Make the decision according to your needs.
Note: In Windows 10, you can create a restore point, which is not a backup but a snapshot of system configuration and settings in the Windows Registry, for system recovery.
3. Alternative to backup Windows 10 with more options
Windows 10's built-in backup utilities have limitations and are somewhat cumbersome, making them less suitable for cloning or syncing data.
For a more powerful data-protect solution in Windows 10, you can consider the backup and restore freeware Qiling Disk Master Standard, which offers complete and flexible backup options to keep your data safe.
★ The software provides four backup options: system backup, disk backup, partition backup, and file backup, catering to various needs for different levels of data backup.
★ It supports scheduled backup, allowing you to set automatic tasks on a daily, weekly, monthly, etc. basis, freeing up your fingers.
★ You can backup your data to various destinations, such as your local drive, external hard drive, USB flash drive, or a network share.
★ Qiling Disk Master offers various backup modes, including full, incremental, and differential backup, allowing users to choose the most suitable option based on their specific needs and storage space requirements.
Next, I will show you how to backup Windows 10 system with Qiling Disk Master.
Step 1. Free download Qiling Disk Master, install and launch it.
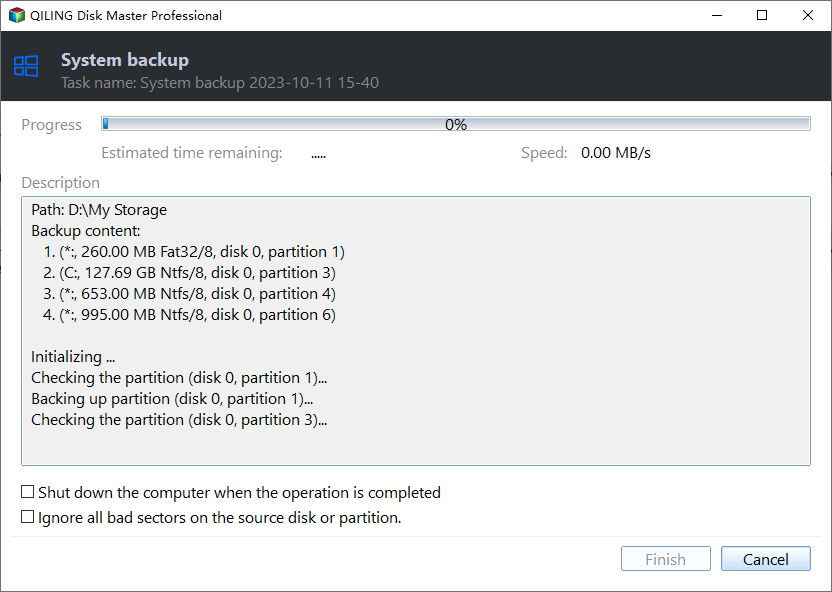
Step 2. To create a system backup, click the "Backup" button, then select the desired backup option, such as "System Backup", which can backup Windows and create an image of the system partition.
Step 3. System Partitions will be selected automatically, so you just need to select the backup path and click Proceed to start the progress.
◆ To set the compression level, choose backup mode, enable email notification, etc., click Options.
◆ To set up an automatic backup task, click on "Schedule" to select the frequency of backups you prefer, such as Daily, Weekly, or Monthly. Additionally, you can upgrade to the Professional edition to have access to more advanced options, including Event triggers and USB plug in.
◆ Scheme The option to automatically delete old backup images to free up storage space is available in the Pro and higher editions.
After completing the backup, click on the backup task in the Home page or go to the Restore tab to restore it.
If you want to create an exact copy of selected data, try using Clone or Sync features.
Conclusion
Configuring Windows 10 backup options properly, whether through File History or Backup and Restore, can help protect important data. However, for a more flexible backup and restore solution, a powerful tool like Qiling Disk Master may be a better choice.
This comprehensive software offers complete backup options, allowing you to easily retrieve important files and restore a crashed system. In addition to backup, it also provides rich functionality to migrate Windows 10 to another hard drive, clone an HDD to an SSD, or �ync files between computers.sync files between computers.
Related Articles
- Windows 10 Backup and Restore 2020 Guide | 2 Ways Included
- Create Windows 10 System Image Backup with 2 Free Ways
- Top 3 Ways to Backup Windows 10 to Network Drive/NAS
- Backup and Restore with Windows 10 Backup Utility (3 Ways)
