Backup Installed Programs in Windows 11 to Avoid Reinstallation
Need to backup installed programs in Windows 11
If you have ever installed Windows from scratch, you may know this process is tedious and time consuming, and all the programs and data will be deleted during the process, only leaving a fresh version of Windows eventually. To make it work like it used to, you need to spend much time in reinstalling and configuring the programs you will use, and the more program you install, the more time it will take.
To avoid this situation, you'd better backup installed programs in Windows 11 and the best way is to backup system or disk with installed programs. It will includes everything on the system partition or disk, not only the installed program, but also operating system, documents, videos, pictures, etc. And then when your computer crashes and become unbootable, you can get everything back easily.
How to backup installed programs in Windows 11 effortlessly
To backup installed programs in Windows 11 effortlessly, you have two ways, namely using built-in Backup and Restore and third-party tool. Both of them can backup everything is the system partition. If you want more advanced feature, you can directly go to the Method 2.
Method 1: Backup installed software in PC with built-in Backup and Restore
Backup and Restore is a free Windows backup utility that comes along with Windows 7 and inherited in later version, such as, Windows 8/10/11. It's used to backup files or backup system per your needs. Also, it allows you to create a system repair disc to repair or troubleshoot your computer with several recovery tools in the Windows recovery environment.
Then, let's backup the installed program by creating an exact copy of the system. And it also allows you to include additional drives. Below are the steps:
Step 1. Open Backup and Restore (Windows 7).
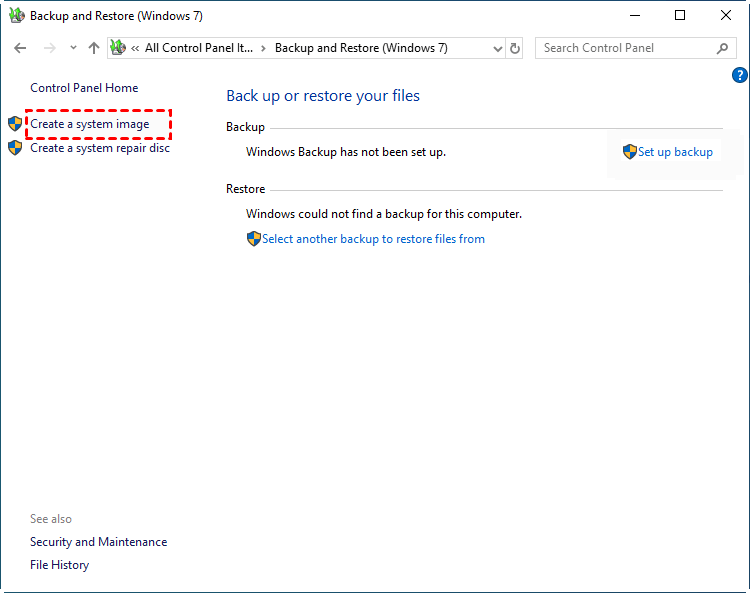
Way 1: Go to Control Panel > System and Security > Backup and Restore (Windows 7) and click it.
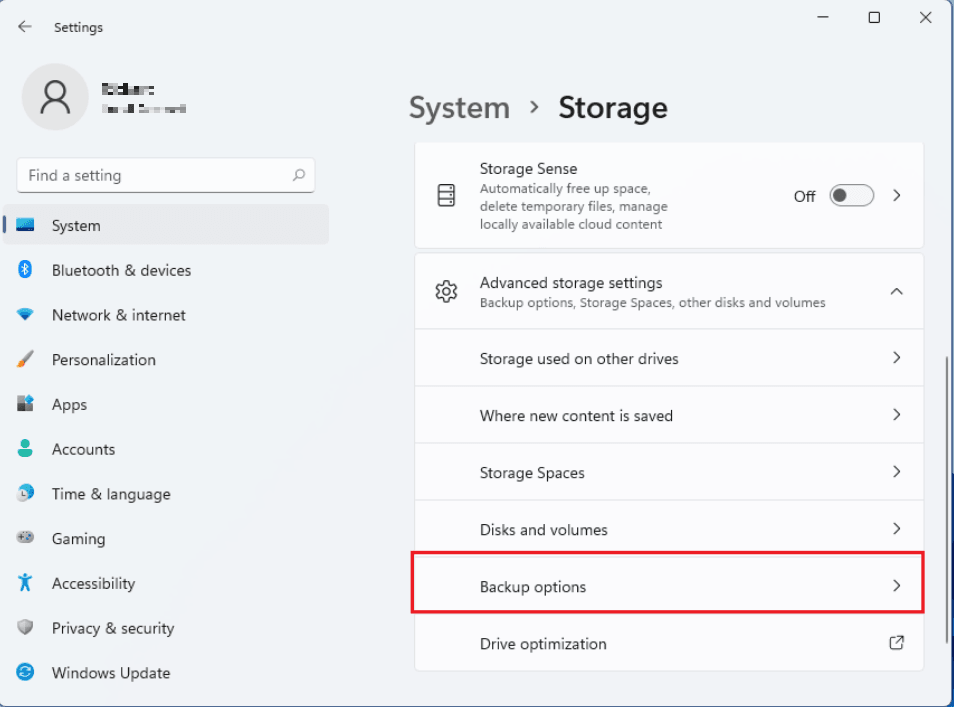
Way 2: Go to Settings -> System -> Storage -> Advanced Storage options > Backup options, then scroll down to Looking for an older backup and select Go to Backup and Restore (Windows 7).
Step 2. In the popping up window, click Create a system image at the left side.
Step 3. Learn the system image definition and select a destination location to store the backup image. Then, click Next.
Note: You can backup system to internal or external hard drive, USB flash drive, CD/DVD, network location. If you want to use an external hard drive as destination path, please connect it first.
Step 4. Confirm the backup settings and click Proceed to backup installed program in Windows 11.
That's the entire process of backing up installed program using Backup and Restore (Windows 7). With a backup in hand, you can easily restore it to previous status as well as the operating system if your computer has any issue.
But this software is error-prone, throwing you error messages like "system image backup failed", "Windows Backup failed while trying to read from the shadow copy on one of the volumes being backed up", "backup error 0x807800C5", etc. If you want a worry-free way, it's suggested to use a third-party reliable backup software.
Method 2: Backup installed programs in Windows 11 with third-party tool
Except for built-in tool, you can still use a third-party reliable backup software to backup installed software in PC. Qiling Disk Master Standard is a great option to make it. It supports 4 backup solutions, among them, System Backup and Disk Backup will include the installed programs during the backup process.
If you don't want to lose any programs, you'd better schedule backup system or disk to include the newly installed programs and other data. You can backup them in daily, weekly, monthly and the default backup method is incremental backup. It only backup the changed data, thereby saving backup time and disk space. And it supports multiple storage devices (internal or external hard drive, USB drive, network drive, NAS, cloud drive etc) and operating system (Windows 11/10/8/7/XP/Vista).
And more, it still allows you to create Windows 11 bootable USB or CD/DVD in case your computer is not bootable. With this media, you can restore system image to new hard drive or restore disk image at any time.
Then, let's learn how to make a copy of installed software in Windows 11 with the System Backup feature. If you want to backup entire disk, please switch to Disk Backup feature. Please connect the backup drive if it's an external storage device.
Step 1. Download free backup software - Qiling Disk Master Standard and installed it on your computer. Then, open it and select Backup > System Backup.
Step 2. This software will select all the drives required for Windows to run, just confirm it and select the prepared backup drive to receive the system image.
Step 3. Click Options, Schedule, Scheme to customize backup settings. Then, click Proceed to backup the installed programs in Windows 11.
Backup settings you may need to use:
Options: You can set normal or high compression level for backup image, but it requires more backup time. Also, you can enable password for backup, set pre/post-command, etc.
Schedule: You can set daily/weekly/monthly incremental backup to include all the items on the system partition when first create a system image backup in Windows 11 and newly installed program and added data later. And you can enjoy advanced feature in the professional version, such as, Even trigger, USB plug in, Differential Backup.
Scheme (advanced version): To greatly reduce low disk space issue due to increasing created backups, you can choose to delete old backup images regularly with this feature to free up disk space.
Tip on how to extract installed software from PC:
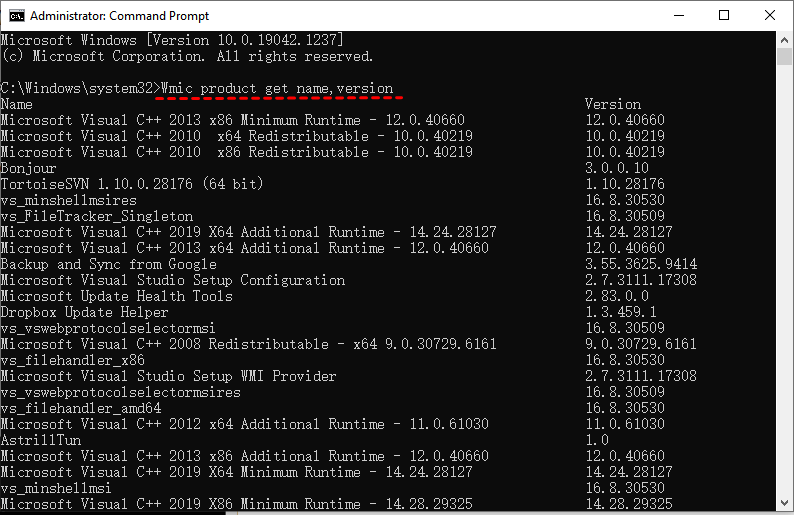
If you want to clearly know which programs you were previously having, you can extract installed software from PC and save a list of copy of them.
1. To extract installed software with the command line, follow these steps:
2. Type wmic to access the wmic:root\cli entry.
3. Copy and paste /output:C:/InstallList.txt product get name, version command to export all the installed program to InstallList in the C: drive.
4. Go to C: drive and check if there is a txt documents named InstallList.
How to roll back Windows 11 to Windows 10
Windows 11 currently is a pre-releases and it may not work as users expect, you may run into unknown bugs or compatibility issues. And the unfinished features negatively affect the computer performance. Thus, some users may want to roll back Windows 11 to Windows 10 and then reinstall Windows 11 after it's officially released.
There are two situations to consider when rolling back Windows 11 to Windows 10:
Situation 1: If the installed Windows 11 is still within 10 days, you can use the "Go back to previous version of Windows" feature to roll back to Windows 10. This process will keep your files, but it's still recommended to create a file backup to ensure security.
Situation 2: If the installed Windows 11 is over 10 days, you can choose to clean install Windows 10 from scratch. This process will erase all files, apps, and settings from the previous Windows 11 installation.
Roll back Windows 11 within 10 days
Here you will use the Go back to previous version of Windows in the Recovery settings, please refers to the following steps.
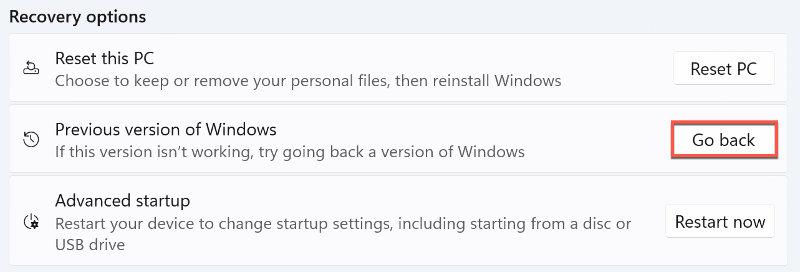
Step 1. Go to Settings > System > Recovery.
Step 2. Then, you will see all the recovery options, scroll down to Previous version of Windows and click Go back.
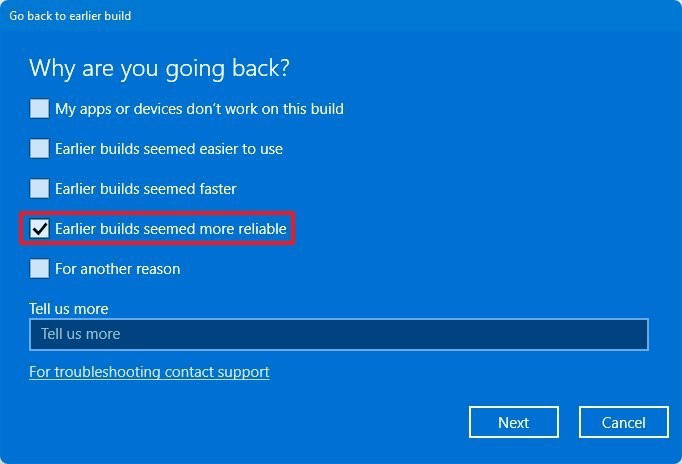
Step 3. Then, you will access the Windows recovery environment. Select a reason why you want to roll back > Check for updates > confirm what you need to know and you remember the password to sign in to your previous build. After that, click Go back to earlier build to start the operation.
Roll back Windows 11 to Windows 10 after 10 days
Here you will use Media Creation Tool to clean install Windows 10, please follow the steps below.
Step 1. Download Media Creation Tool on the Microsoft official site and run its .exe file. Then, click Accept if you are asked to agree with its license terms.
Step 2. In the first Windows 10 Setup window, select Upgrade this PC now option.
Step 3. Click the Accept button again.
Step 4. Select the Nothing option and then click the Install button in the Ready to install window.
How to reinstall Windows 11 without losing data
As mentioned earlier, Windows 11 is not stable enough so far, thus, you may need to reinstall Windows 11 sometimes, for example, your computer run slowly or hang randomly, the hard disk is corrupted, you want to reverse a fault update, driver update, or security update, etc. If you don't want to lose any data, please backup files to external hard drive in Windows 11 before reinstalling.
To reinstall Windows 11, the most common way is to clean install Windows 11 using an installation disc. Also, you can choose to use Reset this PC feature in Windows 11. In addition, if you create a system image in Windows 11 with free backup software Qiling Disk Master Standard ahead of time, you can restore Windows 11 to new hard drive. Then, which one should you choose? It depends on your needs.
- If you're looking for a fresh start with Windows 11, a clean install is the way to go. This method involves creating a new installation media and using it to install Windows 11 from scratch.
- If you want to reset this PC while keep your files, you could consider using Reset this PC feature. It allows you to keep your files or clean the entire drive.
- The third method is to keep everything as it was. This means that you will not change any settings, apps, or files. You will simply keep your computer as it is, with all its current settings and data.
Step 1. Connect the disk containing system image and bootable media created by Qiling Disk Master Standard. Then, boot your computer from the bootable media.
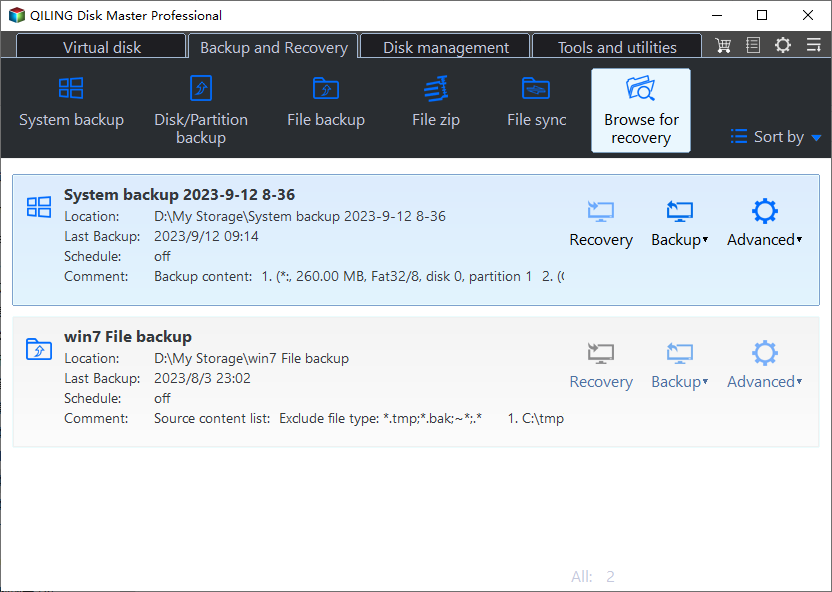
Step 2. After loading, you will see the main page of Qiling Disk Master Standard. Click Restore and Select Image File to manually navigate to your backup image.
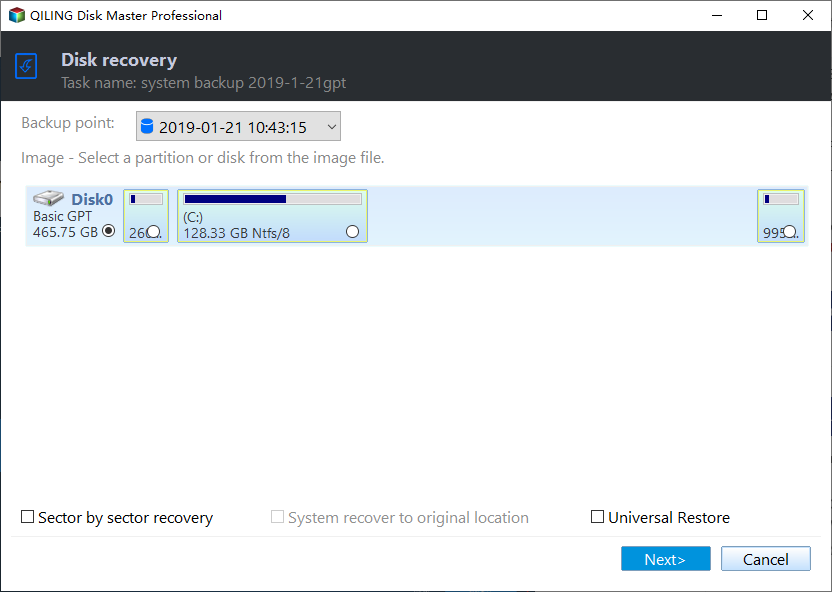
Step 3. Tick Restore this system backup and Restore system to other location. Then, click Next.
Note: If you have multiple backup images, you can click the inverted triangle and select a restore point by its created time.
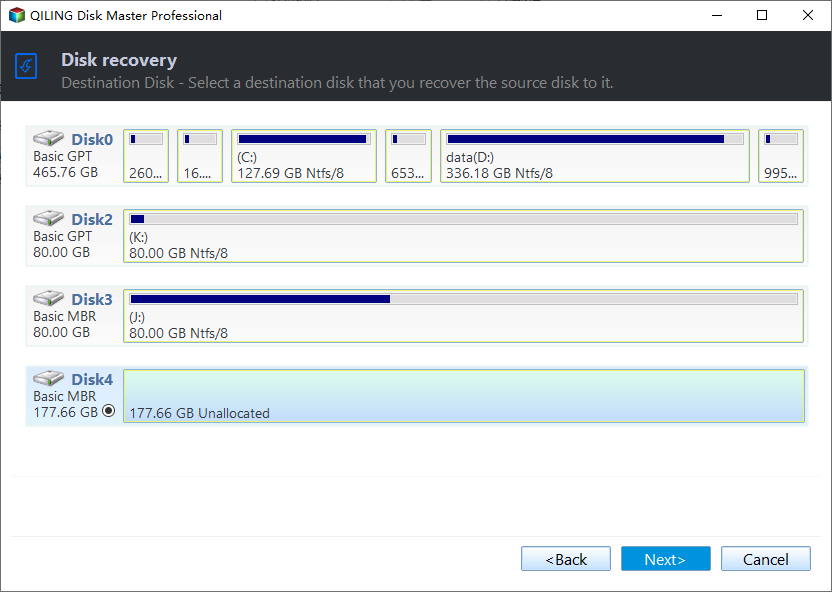
Step 4. Select your current system disk as a destination to receive the image. Then, click Next.
Note: Please select the first partition on the target disk as destination, otherwise the system could not boot from the target disk.
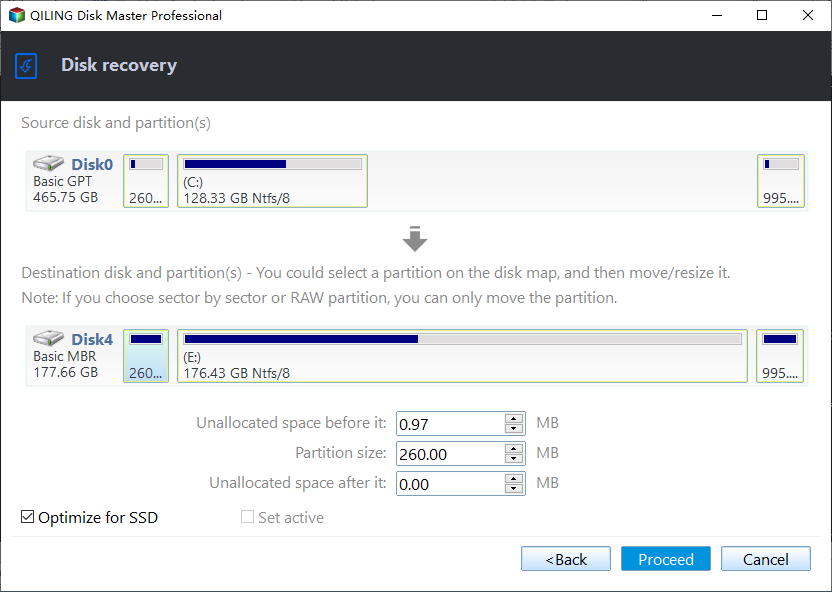
Step 5. Confirm the disk info and click Proceed to reinstall Windows 10. Tick SSD Alignment if the current system disk is an SSD to accelerate its writing and reading speed.
Tip: If you don't have any system image, you can still can create one on another Windows 11 computer and restore system image back to the current computer. You need to use the Universal Restore feature to resolve drive incompatibility issue. Please upgrade to the professional version of Qiling Disk Master to enjoy it.
Wrapping things up
That's all for how to backup installed programs in Windows 11, you can use built-in backup and restore software - Backup and Restore (Windows 7) or Qiling Disk Master Standard. Different from other Windows app backup software, both of them not only make a copy of installed software, but also include other data, such as, the operating system, documents, pictures, etc.
If you're experiencing issues with Windows 11, here are some solutions to consider:
Related Articles
- How to Backup Windows 10 Before Upgrading to Windows 11
It's important to backup Windows 10 before upgrading to Windows 11. If there is a problem after the upgrade, or if you don't like the functions of the new system, you can easily restore to the previous state through a backup. You can learn three ways to backup Windows 10 in this page. - Best Free Backup Software Windows 11 to Protect PC and Data
You will learn the best Windows 11 free backup software and how to use it for system and data protection. - How to Make a Bootable Backup on Windows 11 (2 Free Ways)
A bootable backup allows you to restore a bootable system image when your computer falls into serious system errors. Scroll down to learn how to make Windows 11 bootable backup easily in 2 free ways. - Error Loading Operating System in Windows 7 – How to Fix It Easily
This article introduces you the causes and solutions to “Error Loading Operating System” issue. And how to prevent data loss from it again?
