How to Backup Windows 11 Files & OS to Network Drive
Why Backup Windows 11 to Network Drive
For Windows users who frequently use computers, backing up data to a local disk can be risky, as a system crash or corrupted hard disk can render boot-up impossible and data or system recovery.
To enhance data protection, you can back up your Windows 11 OS and files to a network location like a NAS or mapped drive, making it easy for other users on the LAN to access the data. This also allows you to access the backup files through the network even if your computer breaks down. The following article will guide you through three methods to back up Windows 11 to a network drive.
How to Create Shared Folder and Network Drive in Windows 11
If you're using a network drive as a backup storage, such as a NAS, you're good to go. However, if you're not familiar with network shares, you can follow this guide to learn more about how to use them.
☛ How to share a folder in Windows 11:
1. To share a folder, navigate to the folder you want to share, right-click it and choose "Properties".
2. To share a folder, go to the Sharing tab, click Share…, and select who you want to share the folder with by choosing from the dropdown menu. If you want anyone on the network to access the folder, select Everyone and click Add > Share.
3. Click Advanced Sharing, tick Share this folder, give it a name and edit permissions.

When backing up to a network share, consider mapping it as a network drive to assign a local drive letter, making it easier to access shared files. This can help prevent backup failures and improve overall accessibility.
☛ How to create a network drive in Windows 11:
1. First, open File Explorer, and find "This PC" on the left pane.
2. Right-click on the folder, choose "Show more options" and then select "Map network drive..

3. To access a shared folder on a network, you need to choose a drive letter and input the path of the shared folder in the text box. This involves selecting a drive letter from the available options, usually represented by letters such as A, B, C, etc.

4. To map a network drive, go to This PC, right-click on This PC, and select Map network drive. Then, choose a drive letter and enter the UNC path of the network location you want to map. Click Finish to execute it.
To backup Windows 11 to a network drive, you can try the following methods.
How to Backup Data to Network Drive in Windows 11
Windows 11 primarily adds the option to back up files to OneDrive, whereas Windows 10 had alternative features like File History and Backup and Restore (Windows 7) that allowed backing up to a network location, albeit with some changes in approach.
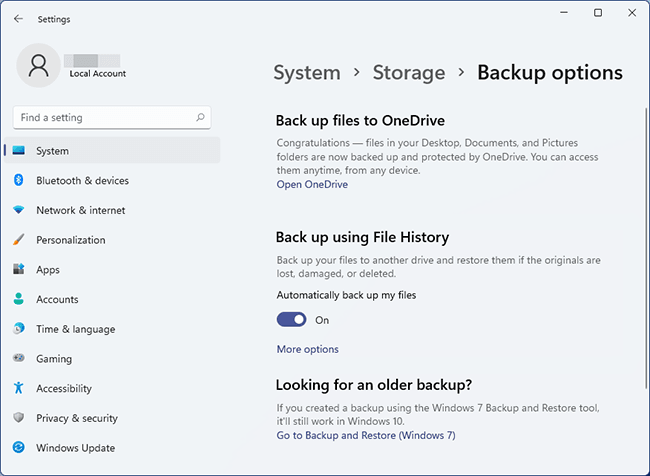
Launch System Settings through Start > Settings or Win + i shortcut.
To access the backup options, go to System > Storage > Advanced storage settings > Backup options.
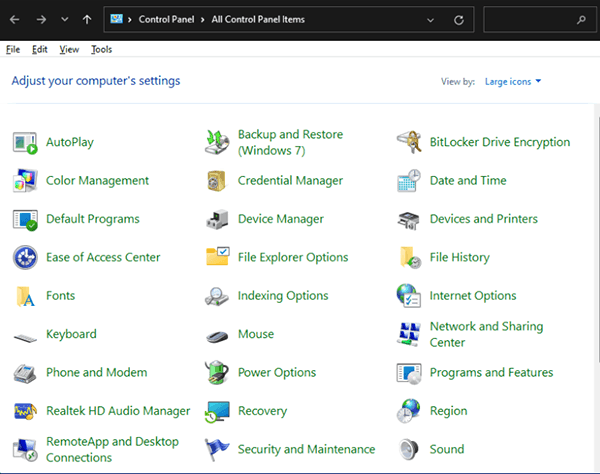
You can search for them directly, or find them in the Control Panel under Large icons/small icons.
▶ If you want to auto-backup your user folder to a network drive, then choose File History.
▶ If you want to backup specific libraries or system image to a network drive, then choose Backup and Restore.
▶ If you're looking for a more efficient Windows backup solution, consider using Method 3, which can handle file, partition, disk, and OS backups.
Method 1. Windows 11 File History
1. You can start File History from the Control Panel, and click "Select drive" on the left side to add a network location.
2. To specify a network location, open a pop-up window and choose a network location by selecting "This PC" on the top left corner. Then find the drive under "Network locations" and click "OK" to confirm.
3. Once you've chosen a drive, you can activate the File History service.
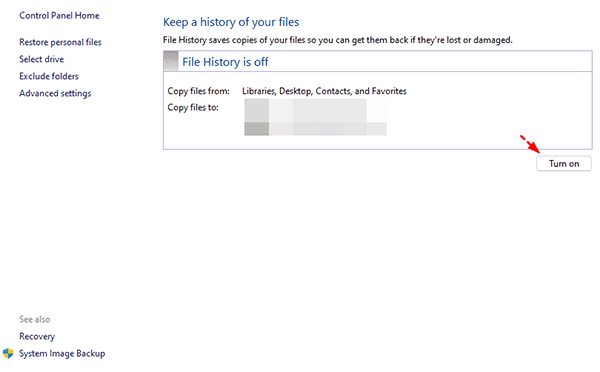
4. The user folders will automatically be backed up to the selected network drive, and you can also exclude specific folders you don't want to back up.

To configure backup frequency and retention policy, go to Advanced settings.

Method 2. Windows 11 Backup and Restore
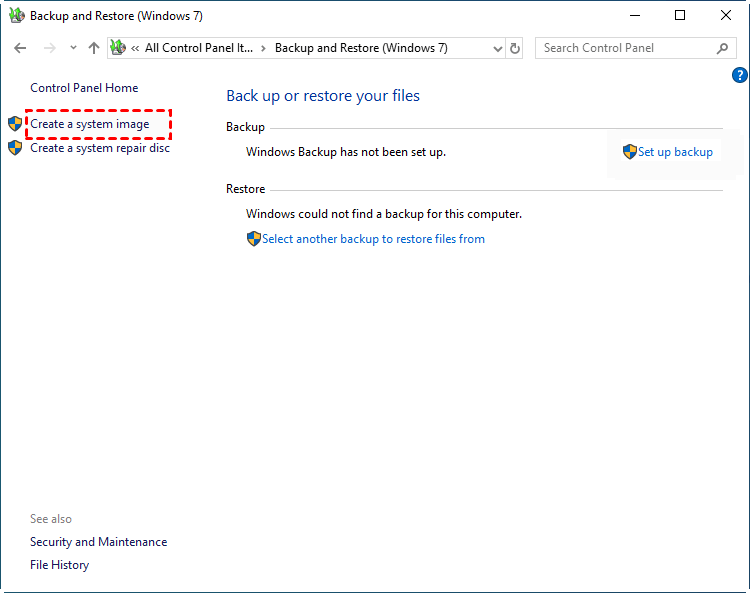
1. To launch the Backup and Restore (Windows 7) tool, go to the Backup options or Control Panel, and select it from the available choices.
2. The Backup and Restore window appears, allowing you to either set up a backup of selected libraries and folders by clicking "Set up backup" or create a full system backup by clicking "Create a system image".
3. To create a system image, click on the top-left corner and select "Create a system image".
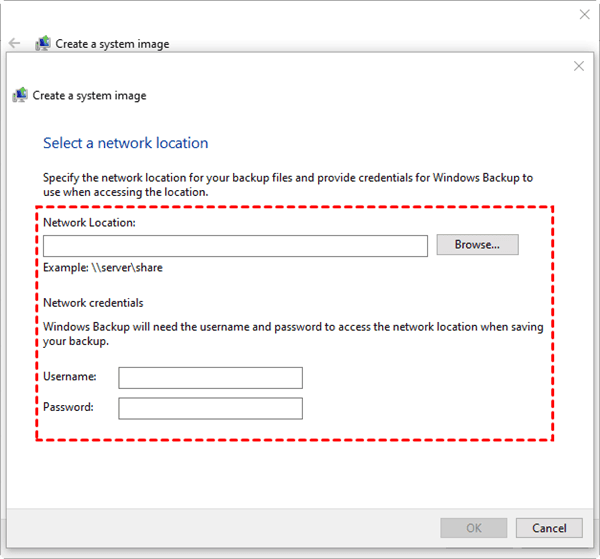
4. In the popping out window, select "On a network destination" and click "Select" > "Browse" to specify a NAS or shared folder, then click "OK".
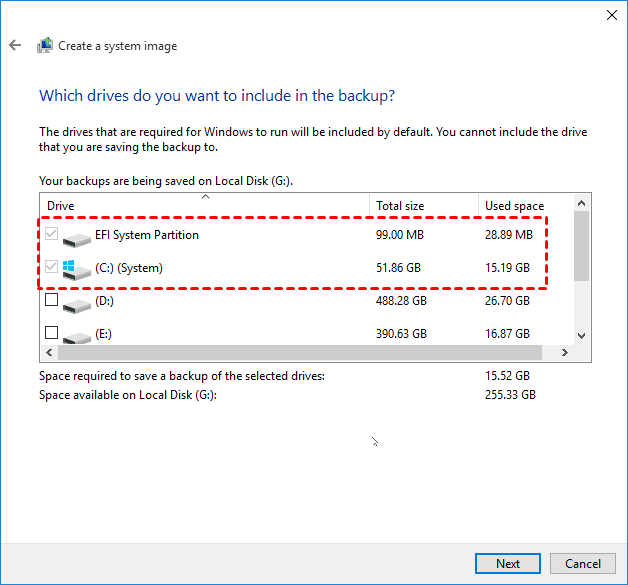
5. This setup allows for the inclusion of additional drives, allowing users to customize their system setup according to their needs. The required drives for Windows to run can be supplemented with extra drives, providing flexibility and personalization in the system configuration.
6. Confirm the operation and click Proceed to execute it.

Method 3. Easier Tool to Backup Windows 11 to Network Location
You can easily back up your Windows 11 files or operating system to a network folder or mapped drive using Qiling Disk Master Standard, a free backup software that supports all Windows OS versions (11, 10, 8.1, 8, 7, etc.) and allows you to back up files, partitions, disk, or OS with simple clicks.
You can choose the backup destination from various options, including internal/external hard drive, network share, NAS, USB flash drive, or cloud service. Additionally, you can set up automatic backups by scheduling them to run regularly, ensuring your data is safely backed up at predetermined intervals.
Download the freeware to have a try:
How to backup Windows 11 to network drive:
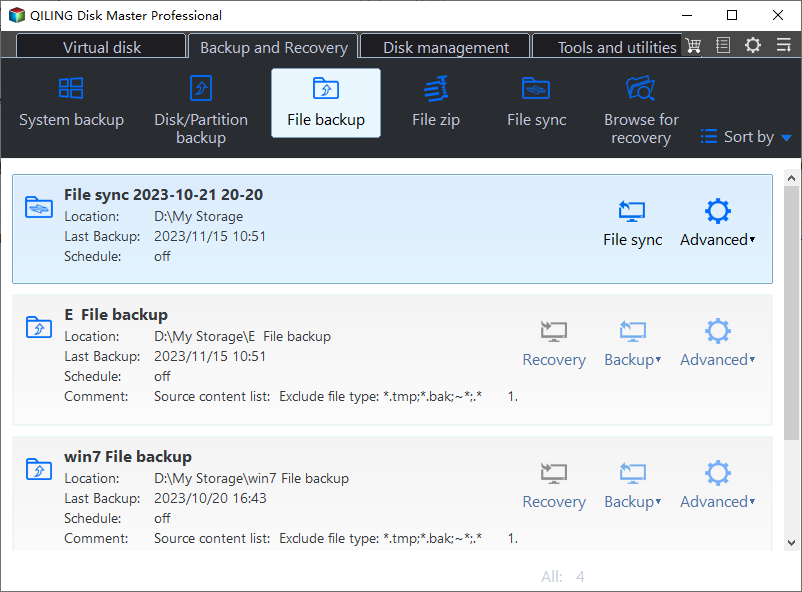
1. Install the software and launch it. Navigate to the Backup tab, where you'll find options for System Backup, Partition Backup, Disk Backup, and File Backup.
To backup files to a network drive in Windows 11, go to Settings > Accounts > Sync your settings, and toggle on "File Backup" to enable it. Then, go to File Explorer, right-click on the file or folder you want to backup, and select "Backup" > "Add a network location".
2. To specify the data you want to backup, click on either the "Folder" or "Files" option, allowing you to add multiple items as needed.

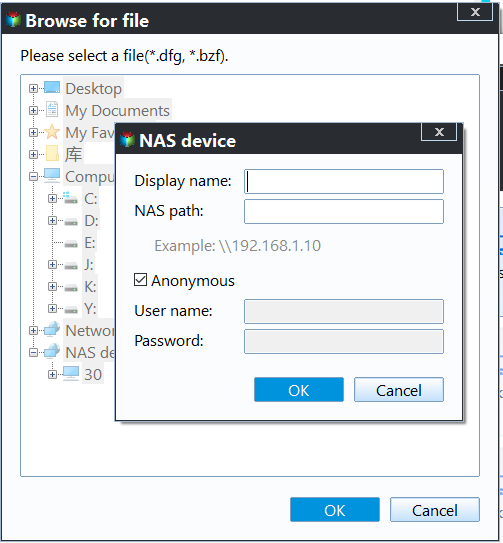
3. To select a network location, click on the small browse icon beside the destination select box and choose Select a network location.
If you want to backup Windows 11 to a cloud drive, select "Select a cloud drive."
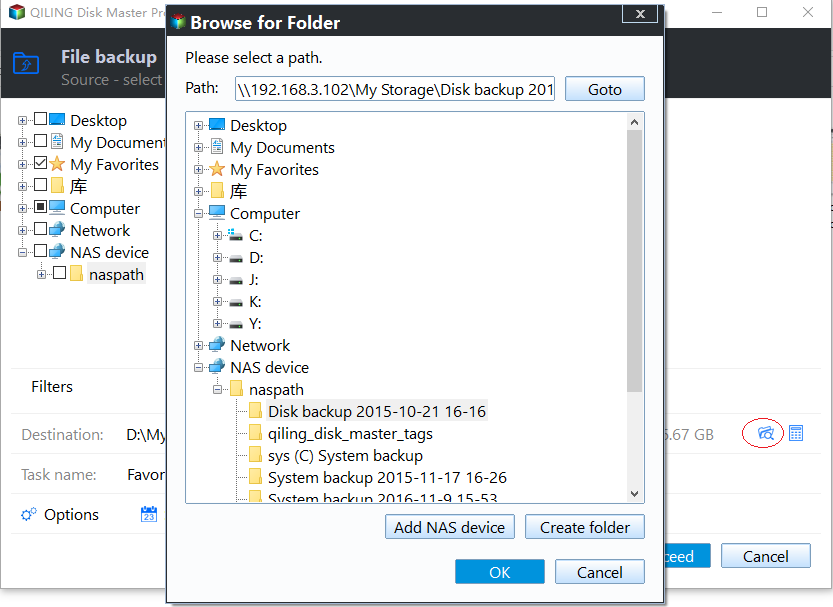
To add a network drive, click on "Add Share or NAS Devices" at the bottom left corner of the popping out window, and then enter the path of your network drive. This will allow you to use the added path directly the next time.
4. Now you can further configure the backup, e.g. create a schedule on basis of daily, weekly, or monthly, or click options to comment, compress, or split the backup. Then, click Proceed to execute it.
More advanced features can be found in Professional edition:
- To specify the file suffixes you want to include or exclude from the source folder, you can simply type the file extensions you're interested in, separated by commas, in the filter settings field. For example, if you want to include only text files and exclude all others, you would type ".
- Set up a rule to automatically delete older backups to save storage space.
- Universal Restore allows you to restore a system from one computer to another with different hardware, while also ensuring secure boot functionality.
- File Sync: Syncs changed files from a source folder to a target folder in real time, keeping them up to date.
Conclusion
Backing up Windows 11 to a network drive provides better data protection than a local disk backup and allows access to backup files from other computers in the LAN. Three methods are available to backup important files or OS to a network location in Windows 11, with Qiling Disk Master being the simplest and most comprehensive option.
This software provides data protection and is capable of cloning operating systems, allowing users to transfer their Windows 11 installation to a new SSD without reinstalling the OS.
Related Articles
- How to Make a Bootable Backup on Windows 11 (2 Free Ways)
A bootable backup allows you to restore a bootable system image when your computer falls into serious system errors. Scroll down to learn how to make Windows 11 bootable backup easily in 2 free ways. - 2 Easy Methods for Creating System Image in Windows 11
You can learn 2 simple methods to create system image in Windows 11. Both Windows built-in tool and free backup software can help you. You can read on for more details. - How to Backup Windows 10 Before Upgrading to Windows 11
It's important to backup Windows 10 before upgrading to Windows 11. If there is a problem after the upgrade, or if you don't like the functions of the new system, you can easily restore to the previous state through a backup. You can learn three ways to backup Windows 10 in this page. - How to Move Hard Drive to New Computer in Windows 11
If you want to find a way to move hard drive to new computer in Windows 11, this article can help you a lot. You can find a professional migration tool that can help you transfer data and OS on hard drive to new computer without losing secure boot.