Clone to New Computer Windows 7 Won't Boot? Solved Now!
Quick Navigation:
- The error: Windows 7 won’t boot after cloning to new computer
- How to solve cloned to new computer Windows 7 won’t boot easily
- More reliable way to clone Windows 7 to dissimilar hardware
- Summary
The error: Windows 7 won’t boot after cloning to new computer
After getting a new computer, many users choose to transfer data from old computer to new computer by cloning the hard drive. However, this process may sometimes result in the new computer failing to boot, due to various reasons such as incompatibility issues between the old and new hardware, corrupted system files, or incorrect settings during the cloning process.
If Windows 7 won't boot after cloning to a new computer, it may be due to different boot modes on the two computers or corrupted boot records. To resolve this, check the boot mode of the new computer and ensure it matches the original computer. Also, verify that the boot records are intact and not corrupted. This can be done by checking the boot order in the BIOS settings and ensuring that the correct boot device is selected.
How to solve cloned to new computer Windows 7 won’t boot easily
Cloning Windows 7 to a new computer can be achieved efficiently using two methods. Firstly, you can use a cloning software such as Acronis True Image to create an exact copy of your old computer's hard drive, including the operating system, programs, and data.
Solution 1: Reconcile boot modes
1. Confirm the boot mode on the old computer. If it's set to UEFI, you'll need to create a UEFI bootable USB drive.
1. Right-click the "Computer" icon on the desktop, then select the "Manage" option from the context menu.
2. To determine if an old computer is in UEFI or Legacy BIOS boot mode, open Windows Disk Management, right click on Disk 0, and check if the option "Convert to MBR Disk" is available in the pop-up menu. If it is, the computer is in UEFI boot mode; if not, it's in Legacy BIOS mode.
After figuring out the boot mode on the old computer, check the new computer's boot mode by looking for a key or button that, when pressed during boot, allows access to the UEFI or BIOS settings, and then follow the same steps as before to configure the new computer's boot mode.
1. Start the new computer and tap Del to enter BIOS interface.
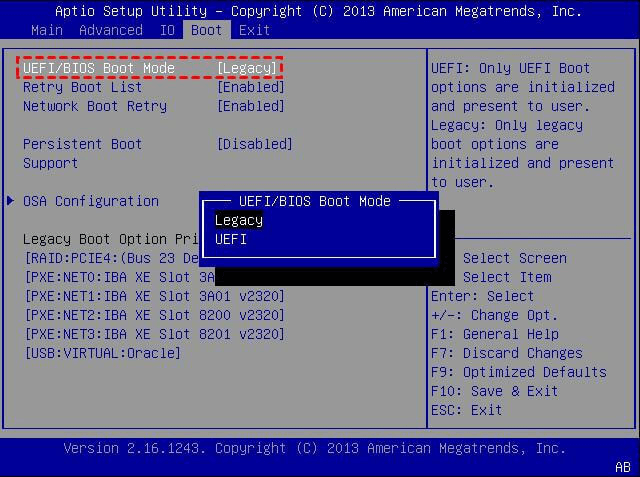
2. In the BIOS Utility dialog, select Boot > UEFI/BIOS Boot Mode to see if Legacy or UEFI is chosen under the option.
3. If the boot modes on the two computers are the same, you don't need to do anything. If they're different, change the boot mode on the new computer to match the old one.
If your new computer is not booting, try reconciling the boot modes on the old and new computer to see if it becomes bootable. If the error still persists, try the second solution.
Solution 2: Repair boot records
If your Windows 7 installation won't boot on a new computer after cloning, it's likely due to corrupted boot records. To resolve this, you can try repairing the boot records using the built-in System File Checker (SFC) tool or by using a third-party tool like EaseUS Todo Backup. The SFC tool can scan and replace corrupted system files, including boot records, while EaseUS Todo Backup offers more advanced features for data recovery and disk management.
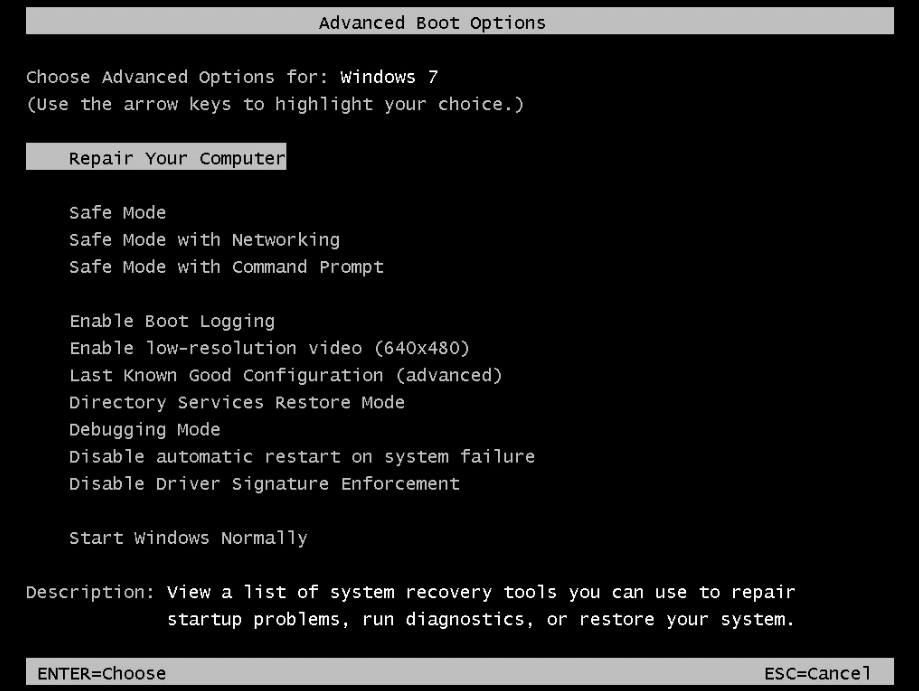
1. To access the Advanced Boot Options menu on your new computer, simply restart it and immediately start tapping the F8 key. This will allow you to navigate the menu and potentially resolve any issues with your computer's startup.
2. To boot in Safe Mode with Command Prompt, select the option "Safe Mode with Command Prompt" using the arrow keys and press Enter. This will start the computer in a minimal environment with only the most basic drivers and services, and will open a command prompt window where you can type commands.
3. 1. `cd /d C:\` 2.
▪ bootrec /fixmbr
▪ bootrec /fixboot
▪ bootrec /scanos
▪ bootrec /rebuildbcd
4. Exit Command Prompt and restart your computer.
More reliable way to clone Windows 7 to dissimilar hardware
Some users are frustrated with the boot issue after cloning Windows 7 to dissimilar hardware. However, a more stable way to achieve the task is to restore a Windows 7 image to different hardware, and Qiling Disk Master Professional can assist with this process.
- There are four types of backup available: System/Disk/Partition/File Backup, which allow you to restore from a backup image whenever it's needed.
- The software offers the Universal Restore option, ensuring a secure boot after restoring to different hardware.
- To recover your computer in case of boot failure, you can create bootable media using Qiling Disk Master, which allows you to boot your computer from an external device.
👉 Preparations:
1. Download and install Qiling Disk Master on your old computer.
2. Create a bootable USB drive.
3. Backup Windows 7 to bootable USB.
👉 Steps to restore Windows 7 to different hardware:
Step 1. Connect a bootable USB flash drive with a Windows 7 backup image to your new computer. Then, change the boot order in the BIOS to boot from the USB, which will allow you to restore your Windows 7 system from the backup image.
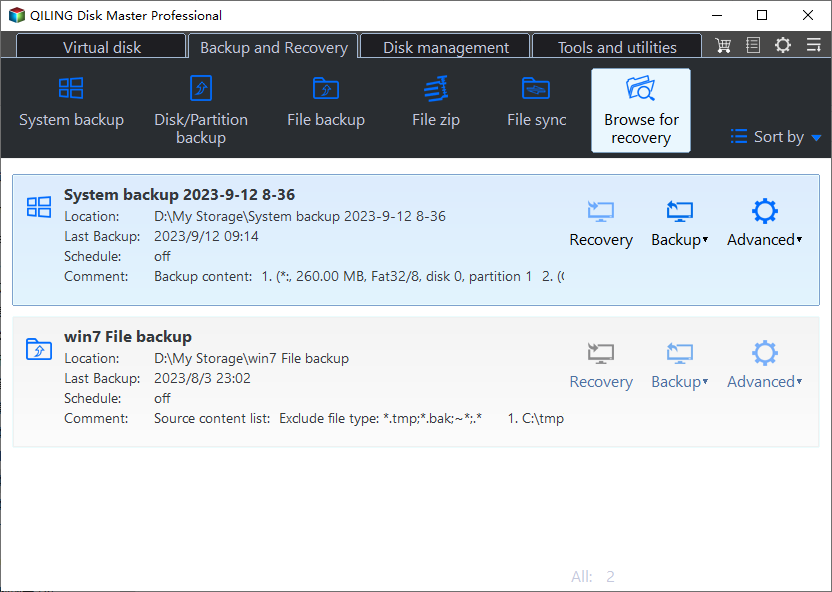
Step 2. After logging in, you'll see the Qiling Disk Master interface. On the left pane, select the "Restore" option and then click on "Select image file" to proceed.
Step 3. Locate the system image file on the bootable USB drive and click "Open".
Step 4. Select "Restore this system backup" and tick "Restore system to other location". Then, click "Next".
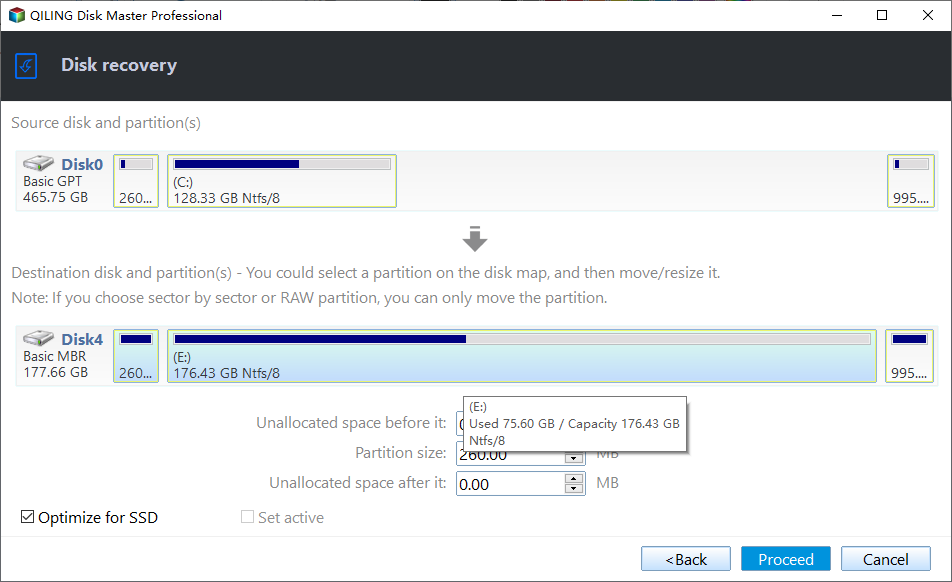
Step 5. Select the hard drive on the new computer as the destination path and click "Next".
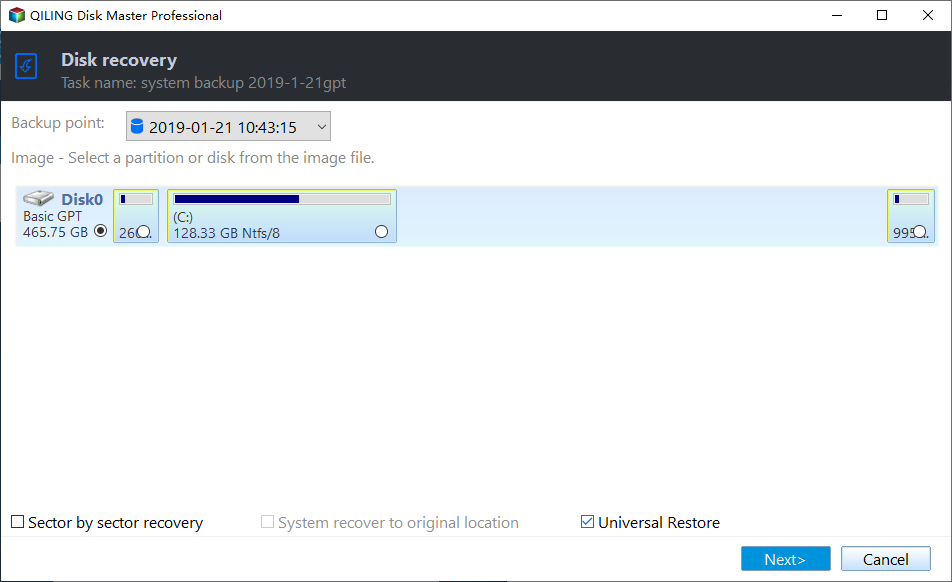
Step 6. In the Operation Summary page, the "Universal Restore" option is checked by default to ensure the system is bootable after recovery. Make sure not to uncheck it, then click "Proceed" and wait for the process to be completed.
Summary
To resolve the issue of Windows 7 not booting on a cloned computer, you can reconcile boot modes and repair boot records. This can be achieved using Qiling Disk Master, which can restore a Windows 7 image to different hardware, thereby resolving the problem.
You'll find more useful features in Qiling Disk Master, including syncing a laptop and desktop, upgrading a hard drive to an SSD, and more. Download it now to explore all the features for yourself!
Related Articles
- How to Do a System Restore When the Computer Won't Boot?
- Cloned SSD Won’t Boot in Windows 10/8/7 - How to Solve?
- Quick Fix to Computer Won't Start after Windows Update
- How to Clone System in Windows 10/11 without Reinstalling
System clone in Windows 10 allows you to make an exact copy of operating system, so you can easily upgrade or replace disk without reinstalling.
