Solved: No System Restore Points in Windows 7
- No system restore points have been created in Windows 7
- Why system restore points missing?
- How to solve no system restore points in Windows 7
- Solution 1: Find out the corrupted files and repair it
- Solution 2: Change triggers in SR properties
- Solution 3: Recreate Page File on your computer
- How to restore Windows 7 if there is no system restore point
- Summary
No system restore points have been created in Windows 7
In Windows 7, you're unable to restore system or create a restore point due to two separate issues. Firstly, when trying to restore system, System Restore indicates that no restore points have been created, and the "Next" button is greyed out. Secondly, attempting to create a restore point results in an error message stating that the "Volume Shadow Copy Service component encountered an expected error." To resolve these issues, you may want to check the Volume Shadow Copy Service (VSS) and System Restore settings, ensure that the service is running and set to start automatically, and also consider checking for any disk errors or issues that might be affecting the restore points creation process. Additionally, verifying that the System Restore and VSS logs are not full and that there are no issues with the disk space might also be helpful.
Why system restore points missing?
System restore points are not created automatically in Windows 7 if the system disk is full or nearly full. If the disk is full, Windows 7 won't create system restore points. You should free up some space on the disk to enable system restore points.
See below and I'll some possible reasons and solutions for this problem.
- You manually turn off system restore. In Windows 7, disabling system restore does not automatically delete system points, but you still need to verify that "Turn off System Restore on all drives" is unchecked in the System Restore window.
- The disk space to save restore points is very low. You should increase the max usage in the system protection window.
- The restore points could only be saved for up to 90 days. When the time is up, the object will be removed as well.
- Upgrading or reinstalling system remove the system restore points. You have to enable system restore again manually.
- Your computer may have any kind of USB turbo-boosters like ASRock XFast USB.
- The Volume Shadow Service is not running. You could go to the services.msc and start it manually.
- System Restore has corrupted files. You can use the System File Checker (SFC) tool to identify corrupted system files and then repair them. This tool scans and replaces corrupted system files with a cached copy, helping to restore your system to a healthy state.
- The page file is defragmented, you need to recreate one.
How to solve no system restore points in Windows 7
There are several solutions to recover lost system restore points, including enabling system restore, adjusting disk space usage, starting the volume shadow copy service, and checking for USB turbo-boosters. If these common solutions don't work, there are additional options available.
- Solution 1: Find out the corrupted files and repair it
- Solution 2: Change triggers in SR properties
- Solution 3: Recreate Page File on your computer
Solution 1: Find out the corrupted files and repair it
Step 1. Type cmd in the search box, right-click it and select "Run as administrator".
Step 2. Type sfc/scannow at the Command Prompt, wait for the scan to complete, and then type the command prompt when you receive a message saying "Windows Resource Protection found corrupt files but was unable to fix some of them".
findstr/c:"[SR]" %windir%\logs\cbs\cbs.log >sfcdetails.txt
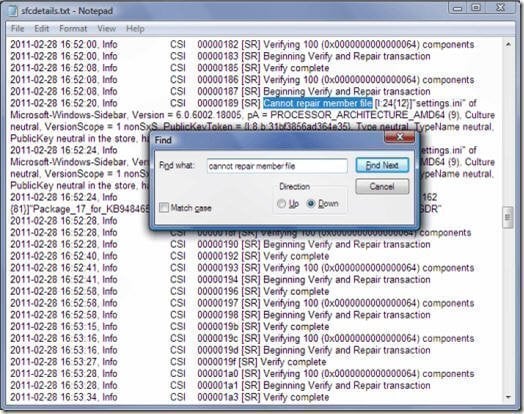
Step 3. Navigate to Windows/system 32 and open afcdetails.txt in Notepad. Click Edit and Find, type cannot repair member files to see the problems. At last, open afcdetails.
You can try to find the solutions based on the corrupted file and repair it, and then see if you can create system restore points. This might help you recover from the issue.
Solution 2: Change triggers in SR properties
The Task Scheduler's SR files being rewritten can prevent system restore points from being created. To resolve this, you need to modify the triggers in the System Restore properties. This should help restore the functionality of creating system restore points.
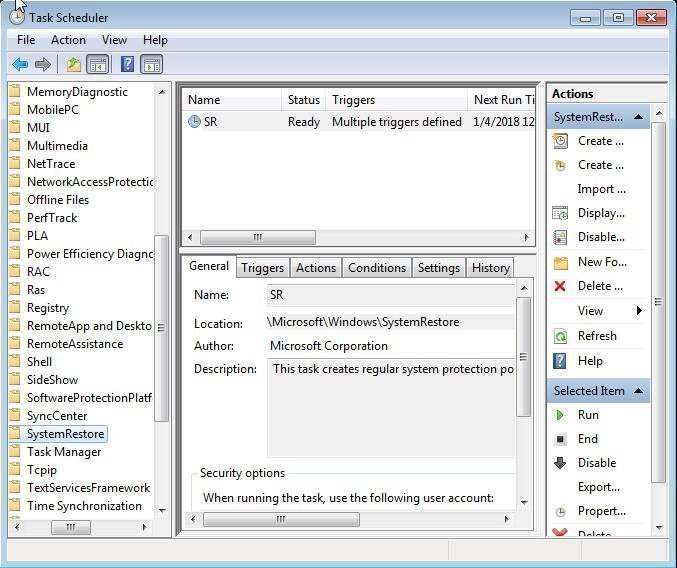
Step 1. Type Task Scheduler in the search box and select it from the context menu.
Step 2. Expand the Task Scheduler Library, then select Microsoft > Windows > SystemRestore .
Step 3. Click the entry named SR in the top pane.
Step 4. Click the History tab in the bottom pane and see system restore tasks, warnings and errors recorded.
Step 5. Double-click SR file, click Triggers and Edit, then change the time to create a restore point.
Step 6. Click on "Conditions" and then uncheck the boxes next to "Start the task only if the computer is idle for" and "Start the task only if the computer is on AC power".
Solution 3: Recreate Page File on your computer
To recreate a page file, you need to first delete the existing page file, and then recreate it. This process involves two parts: deleting the page file and then recreating it.
Part 1: Delete page file
Step 1. Type View advanced system settings in the search box and select it from the context menu.
Step 2. Click Settings under Performance.
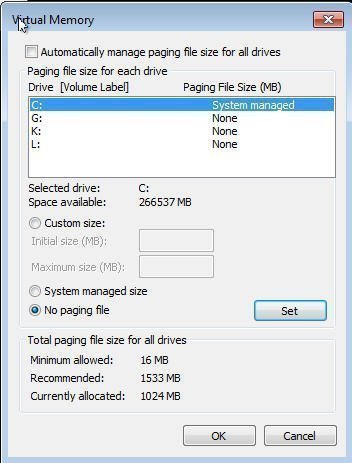
Step 3. Then, click Advanced and Change under Virtual memory.
Step 4. To disable the automatic management of the paging file size for all drives, select a drive, and choose not to have a paging file, follow these steps: Uncheck "Automatically manage paging file size for all drives", select a drive, and tick "No paging file", then click "Set" and "OK" to apply these changes.
Step 5. Restart your computer and delete pagefile.sys from C drive.
✎To access pagefile.sys, you need to first show hidden files or folders on your computer. You can do this by going to Computer > Tools > Folder Options > View, then ticking the box that says "Show hidden files, folders, and drives". Once you've done this, you should be able to see the pagefile.sys file, which is usually located in the root directory of your computer's drive.
Part 2: Recreate page file
Step 1. Run cmd as administror and type defrag /h c: in the command prompt window.
Step 2. Enable the page files by step 1-4 in part 1. At last, click Ok (three times) to exit.
Step 3. Restart your computer and check if System Restore or Volume Shadow Copy is running correctly.
Windows 10, like Windows 7, has a similar issue where system restore points are missing. If you're experiencing this problem, you can refer to the article "System Restore Points Gone in Windows 10" for solutions to fix the issue.
How to restore Windows 7 if there is no system restore point
System backup can also help restore a computer to a previous good state, including all installed programs and files, in addition to restore points.
To create a system image backup, a reliable software like Qiling Disk Master Standard is needed, which can help create a system image and restore it with secure boot. This software has a clear interface and user-friendly design, making it easy to use.
Preparation work:
☞ Download Qiling Disk Master Standard and install it.
☞ Create a system image backup using Qiling Disk Master Standard, a crucial step in system restoration. This backup serves as a premise for successfully restoring the system.
Detailed steps:
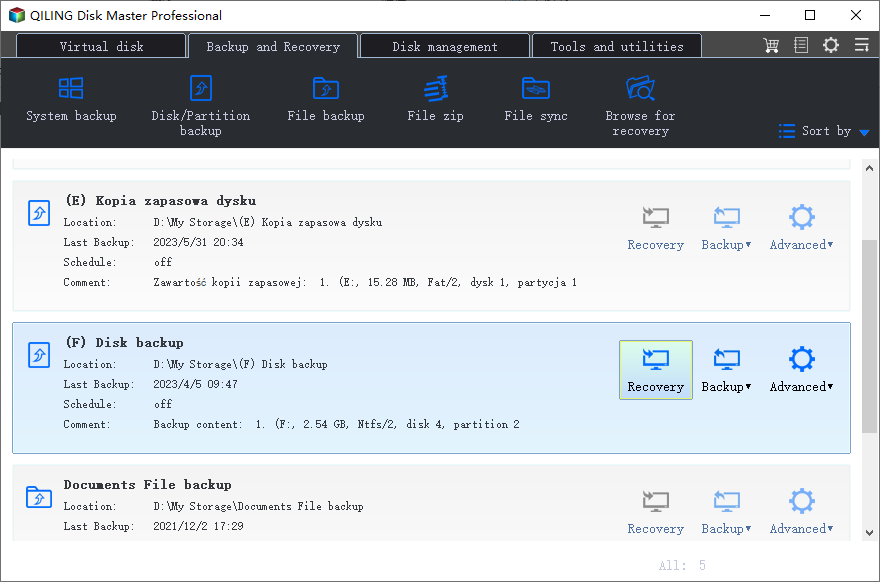
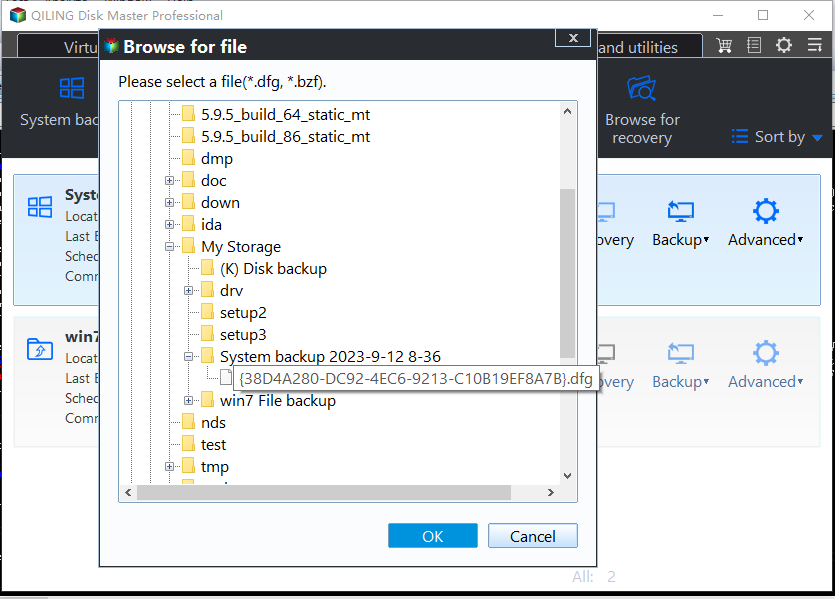
Step 1. Open Qiling Disk Master Standard and click Restore and Select Task.
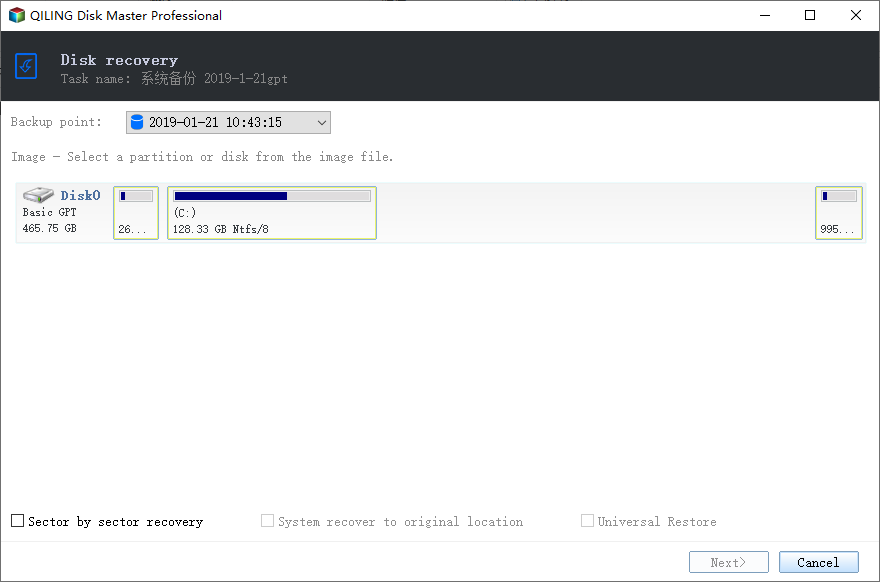
Step 2. Then select the backup image you want to restore and click Next.
Step 3. Tick " Restore this system backup" and click Next.
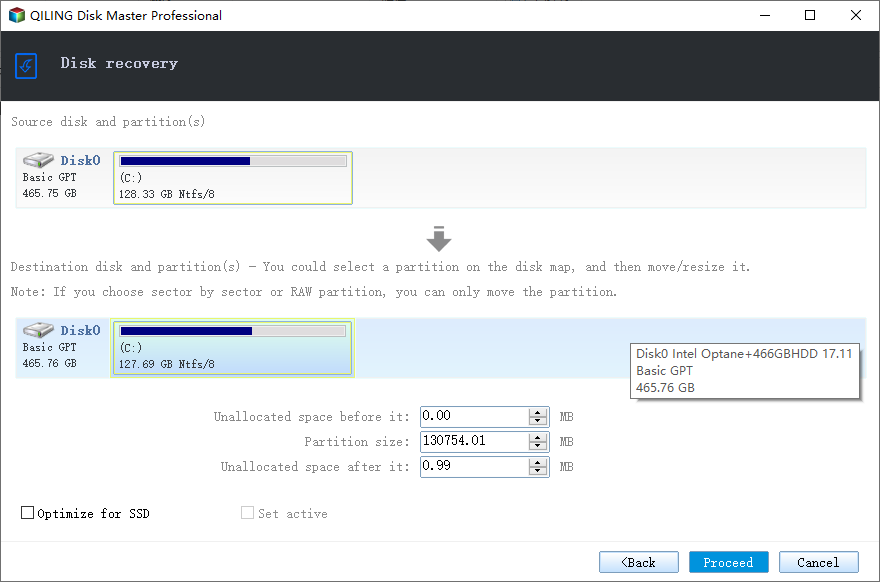
Step 4. Preview the following operation and click Proceed. Wait until the process is 100% completed.
✎Notes:
- If your computer won't boot, you can create a system image backup and bootable media on a working computer, then restore the system in the recovery environment.
- If a system image is created on a computer with different hardware, you need to enable Universal Restore in Qiling Disk Master Professional to avoid system failure after restoration.
- This version only supports Windows 7/8/10/11/XP/Vista, but users of Server 2008/2012/2016/2019/2022 or its R2 version may consider using Qiling Disk Master Server.
Summary
The solutions provided can resolve the issue of "no system restore points in Windows 7", but there may be other situations that cannot be fixed, such as a restore point reaching an age of 90 days or the volume used to store restore points becoming corrupted. In such cases, creating a system image backup and using it to restore the computer is a recommended course of action.
Use the 3-2-1 backup strategy to ensure security: 3 copies of your data, kept at different devices, 1 copy offline.
Related Articles
- How to Restore Windows 7 without Restore Point
When system restore points is missing, you may have the concern that how to restore Windows 7 without restore point? You can find solutions here. - How to Solve System Restore Points Gone in Windows 10
You will learn how to fix Windows 10 system restore points gone error with 5 given solutions in this article. For better protect, it's wise to backup system to external hard drive. - How to Repair Corrupted or Missing System Files in Windows 7/8/10
You will learn 4 helpful ways to repair system files in Windows 7, 8, 10, 11 and how to effectively prevent this error and data loss due to it. - How to Do System Restore in Safe Mode Windows 10 Easily
System Restore is a useful tool to help you recover from system malfunctions. Sometimes you may need to run System Restore from Safe Mode. Learn how to perform it from this page.
