How to Restore Files from Backup in Windows 7 Easily
Quick Navigation:
- What does Windows 7 backup actually backup?
- How to restore files from backup on Windows 7 - 2 Ways
- Better way to restore files from backup in Windows 7
- Final words
What does Windows 7 backup actually backup?
You may not always need the Windows 7 backup utility, but it can be helpful in certain situations. For instance, if you've accidentally deleted or damaged files, or if you're upgrading to Windows 10 and want to restore files from your Windows 7 backup. You might wonder what exactly the Windows 7 backup utility backs up and whether you can restore individual files from the backup.
Windows 7's Backup and Restore feature creates a system image that includes the drives needed for Windows to start, as well as other drives and data files. This allows for restoring a non-functioning computer and also restoring individual files and folders from the system image backup, making it possible to recover files from a Windows 7 backup on Windows 8 or 10.
How to restore files from backup on Windows 7
To restore files from a backup in Windows 7, you'll need to use the Backup and Restore utility, which is a built-in tool. First, create a backup using the same utility, as detailed in the article "�reate a System Image Using Windows 7 Backup and Restore". Once you have a backup, you can use the Backup and Restore utility to select the files or system image you want to restore, and follow the prompts to complete the restoration process.Create a System Image Using Windows 7 Backup and Restore". Once you have a backup, you can use the Backup and Restore utility to select the files or system image you want to restore, and follow the prompts to complete the restoration process.
Method 1: Restore files from backup in Windows 7
Step 1. Click Start, then select Control Panel -> System and Security -> Backup and Restore to access the backup or restore your files window.
Step 2. Then, scroll down to the Restore tab and click Restore my files.
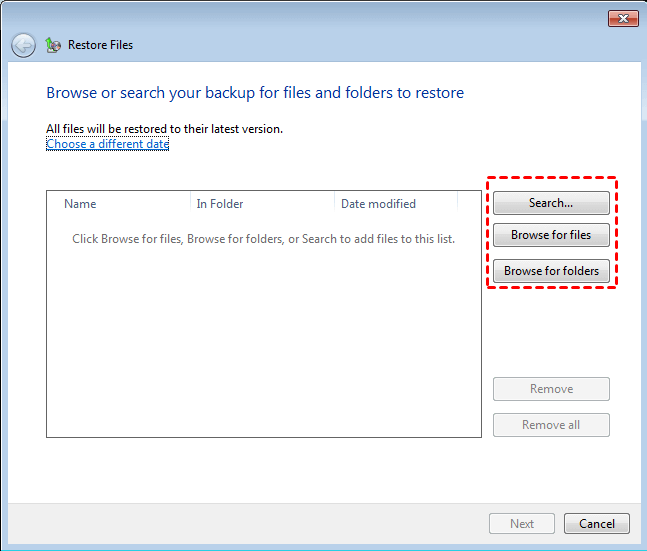
Step 3. Click Search, Browse for files, Browse for folders to select files and folders you want to restore.
Search: To restore files, simply type in part of the file name and click on the found file or select all to restore.
Browse for Files: To add files to a backup, click on the backup name, then click on the folder that follows, and finally locate the file within the folder and click "Add Files".
Browse for Folders: To restore files, click the "Restore Files" button, which will open a dialog box of folders. Select the folder containing the files you want to restore and click "Add Folder".
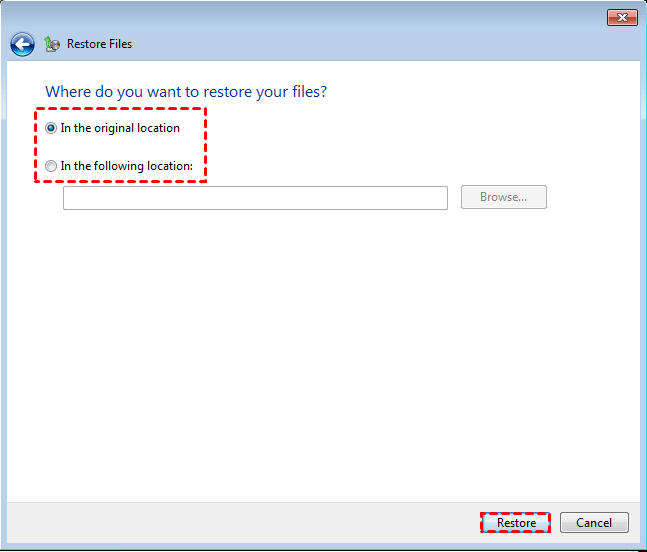
Step 4. To restore backed up files, select the desired location and choose whether to restore them to their original location or a specified location, then click "Restore" to initiate the process.
Method 2: Restore files from Windows 7 backup to Windows 10
Restoring files from a Windows 7 backup to Windows 8/10 involves a similar process, but with some slight differences. To do so, you'll need a backup image created on an external storage device, such as a hard drive or USB drive.
Step 1. Connect the external drive containing backed up files to Windows 10 and be sure it can be detected.
Step 2. To access the backup or restore your files window, start by navigating to the Start menu, then select Settings, followed by Update & Security, and finally Backup. From there, click on Go to Backup and Restore (Windows 7).
Step 3. Scroll down to the Restore tab and choose Select another backup to restore files from.
Step 4. To select the Windows 7 backup on an external drive, you can use the "Search", "Browse for files", or "Browse for folders" option.
Step 5. To restore files from an external hard drive, select the destination location where the restored files will be stored, either the original location or a new one, and then click the "Restore" button to recover the backup files.
Better way to restore files from backup in Windows 7
You can include data files in Backup and Restore, but it doesn't directly allow you to �reate a file backup. However, you can use create a file backup. However, you can use Qiling Disk Master Standard, a free file backup software, to overcome this limitation. With Qiling Disk Master Standard, you can create a file backup in just 5 steps and store it on multiple locations, such as external hard drives, network drives, Google Drive, OneDrive, USB flash drives, and more.
The software still supports many useful features, including scheduling backup files at daily/weekly/monthly intervals, backing up only changes with incremental/differential backup, and normal or high compression levels. It also offers email notification and other benefits. To access all features, such as event triggers and USB plug-in, users can upgrade to �iling Disk Master Professional or an advanced version.Qiling Disk Master Professional or an advanced version.
If you don't have a file backup, consider using one of the best free file backup software to create a backup. Once you have a backup, you can follow the steps below to learn how to restore files from backup in Windows 7, as well as in Windows 8/8.1/10/11 and previous versions, including Windows XP/Vista.
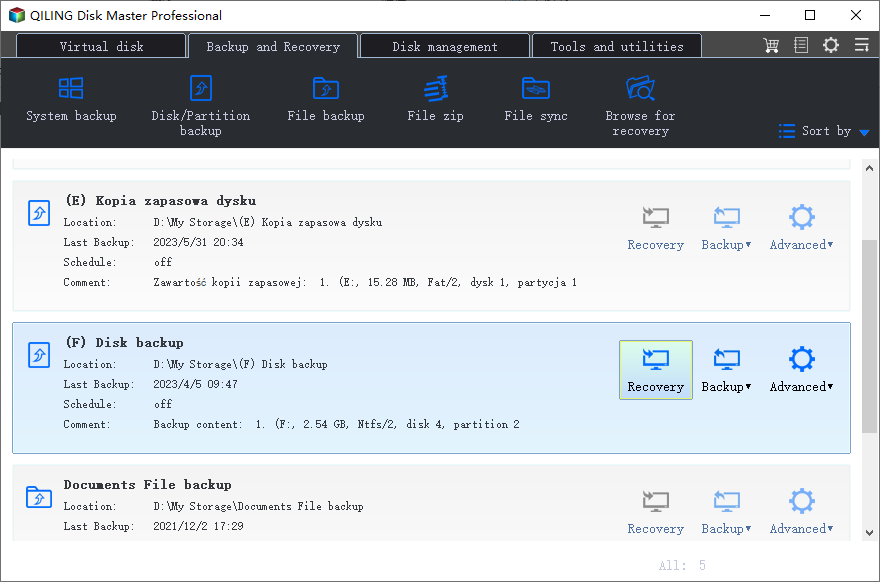
Step 1. Open Qiling Disk Master Standard, click Restore and Select Task. If the file backup isn't detected, click Select Image File to find it. If the file backup is detected, click Select Task and proceed with the restore process. If the file backup is not detected, click Select Image File to find it and then proceed with the restore process.
Step 2. Select a file backup in the list and click Next.
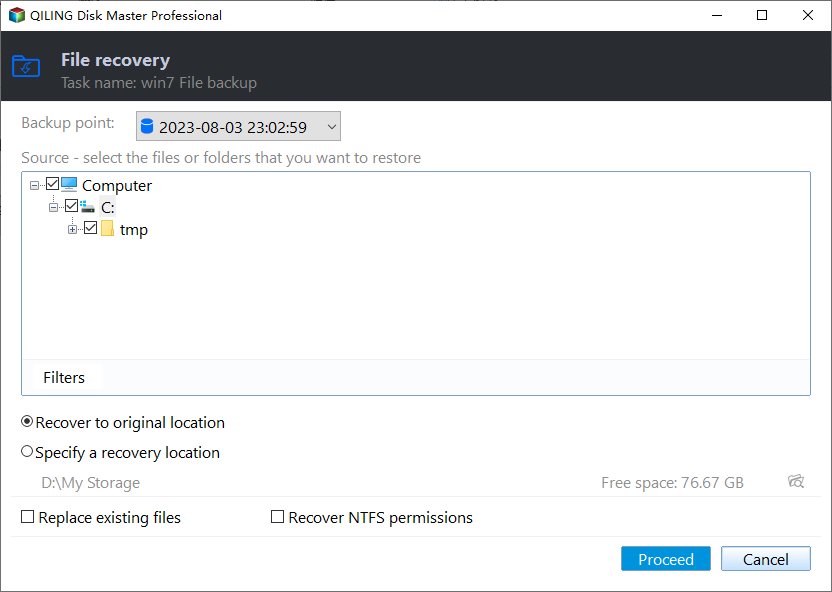
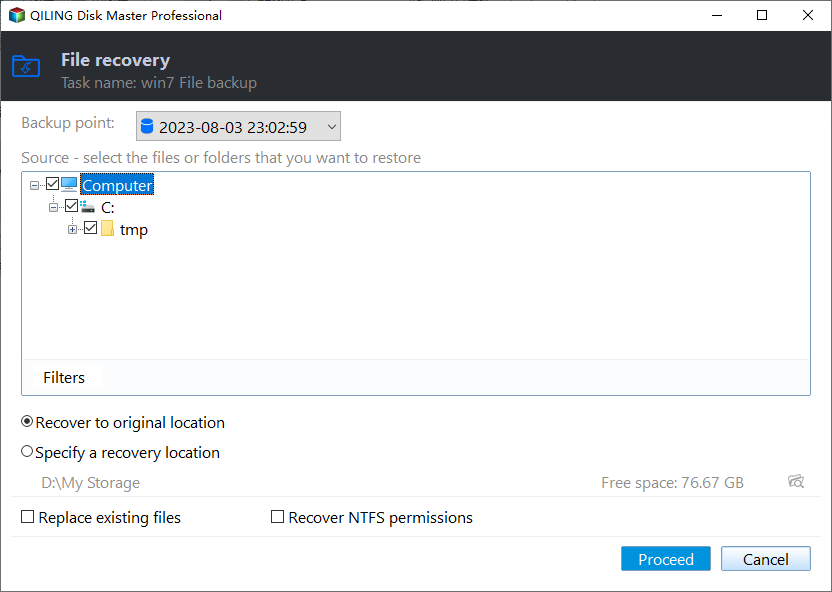
Step 3. Select the folders and files from image backup in the list tree and click Next.
Step 4. To restore files from a backup, select a location where you want to place the restored files, choose whether to restore them to their original location or a new one, and then click Proceed to initiate the restoration process.
Notes:
This software supports system, disk, and partition backups, allowing you to restore Windows 10/8/7 system images to different computers or entire disk images on dissimilar hardware.
To ensure you can restore files even if your computer becomes unbootable, it's recommended to �reate a bootable disc. This allows you to access your files and potentially recover them, even if your computer is no longer able to boot up normally.create a bootable disc. This allows you to access your files and potentially recover them, even if your computer is no longer able to boot up normally.
You can also restore files from other backup solutions, such as system backup, disk backup, and partition backup, in addition to directly restoring files from backup.
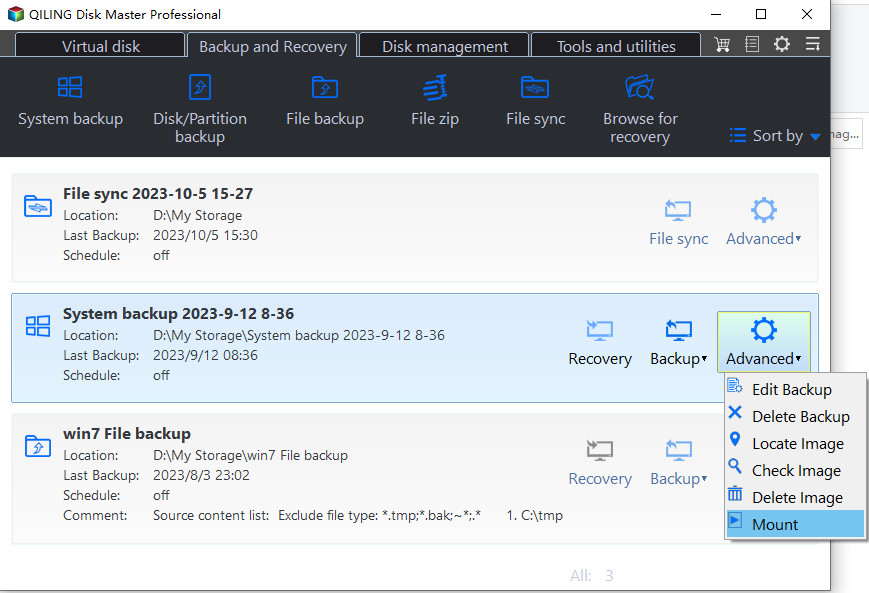
To access the Explore image feature, you can use the command line to mount all partitions to a virtual disk in Windows Explorer. This allows you to copy files from the image to another location.
Final words
You can restore files from backup in Windows 7 using the built-in Backup and Restore utility, but keep in mind that it doesn't support creating separate file backups. For a more straightforward approach, consider using Qiling Disk Master Standard, a free file backup software that allows you to backup and restore files directly.
This software offers a range of features to simplify and streamline the backup process, including daily incremental backup, weekly schedule backup, differential backup, USB plug-in functionality, email notifications, and customizable pre/post-command options. Users can download and try it out to experience its capabilities firsthand.
Related Articles
- How to Restore Files from Backup in Windows 10/8/7
- Easier Way to Automatic Backup Windows 7 to Network Drive
- How to Create a System Image Backup in Windows 7 Easily
- Restore Windows Backup to New Computer (Different Hardware Supported)
- Create Schedule Automatic Backup in Windows 10 [3 Ways Included]

