How to Do System Restore in Safe Mode Windows 7
Quick Navigation:
- What is system restore?
- Can I do system restore in safe mode Windows 7?
- How to do system restore in safe mode Windows 7
- What if you can't boot into safe mode Windows 7?
- How to system restore with bootable media and system backup
- Written in the end
What is system restore?
System restore is a recovery tool to create a record of changes related to system or software event (called a restore point) and allow you to restore your computer to previous good state. During the process, you can restore important Windows files and settings - like drivers, registry keys, system files, installed programs, and more.
The process can be automatic or manual. In general, Windows will create a system restore point before any change is made to your computer, such as, program installation or uninstallation, driver update, etc. Please note that system restore does not affect your documents, pictures, or other personal data, so please feel free to restore your computer when something goes wrong.
Can I do system restore in safe mode Windows 7?
We cannot predict the unexpected things, but we can prevent it by creating a system restore point. With it, you can undo the harmful change via System Restore. But if you cannot boot your computer?
System restore in safe mode may be a great idea. It helps when you cannot boot the Windows. Also, it works when your computer is infected by malware, or the system keep crashing or blue-screening owing to updated drivers.
To restore computer in safe mode, you need to ensure that there is an available restore point. It's the premise to restore computer in safe mode. But some users report that they can't boot into safe mode in Windows 7. You could consider jump to the last part.
How to do system restore in safe mode Windows 7
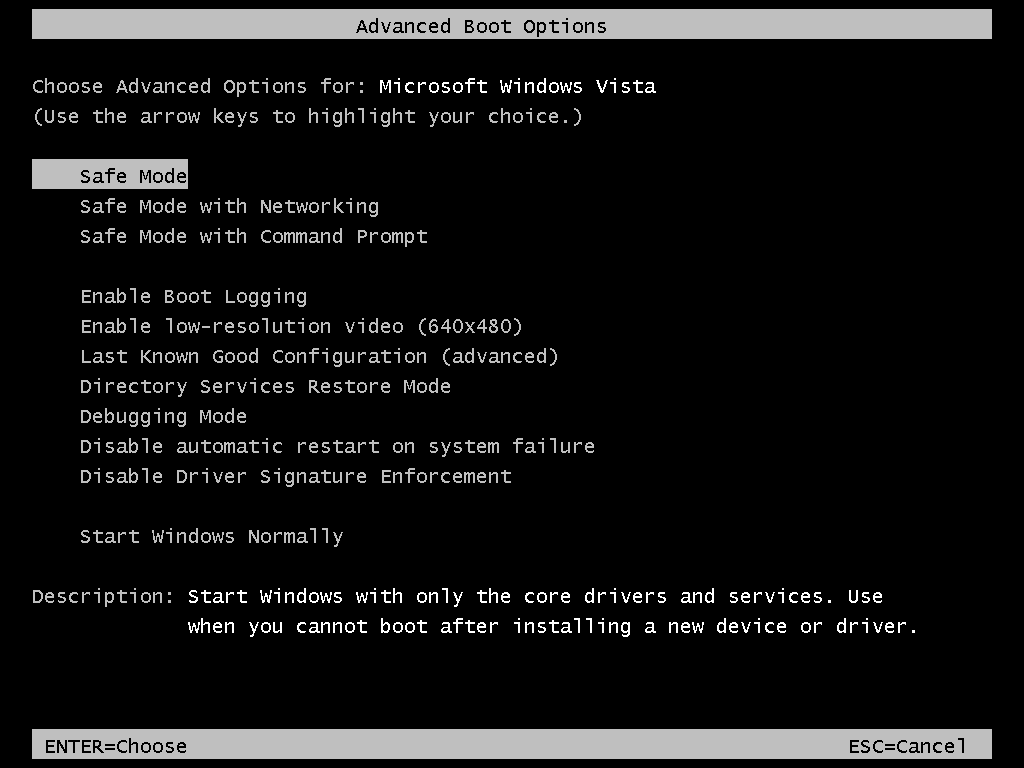
Step 1. Start your computer, and press the F8 key repeatedly before showing the Windows logo. Then, you will see the Advanced Boot Options.
Step 2. Select Safe Mode under the Advanced Boot Options. Then, choose your account to log in when the safe mode loads and click X to close the pop-up box What Is Safe Mode.
Step 3. Click Start menu > All Programs > Accessories > System Tools > System Restore to summon the next window. Or you can directly type System Restore in the search box, then select it.
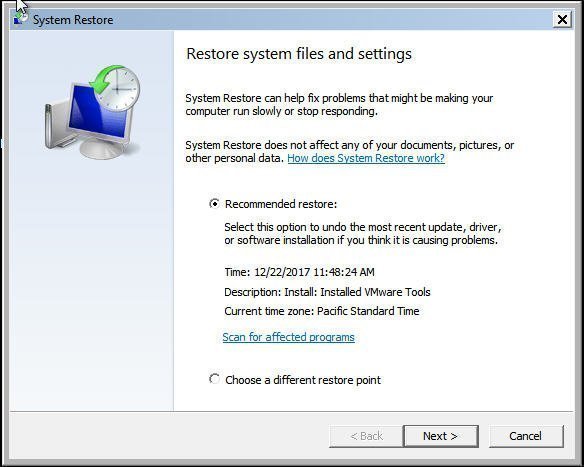
Step 4. In this window, you need to make sure if the recommended system restore point is working properly at that time. If yes, click Next. If not, tick Choose a different restore point.
Step 5. Confirm the settings are correct and click Finish to restore Windows 7 to a previous date.
What if you can't boot into safe mode Windows 7?
Sometimes, the Safe Mode may fail to load. That's to say, your computer has deep Operating System issues. In this case, you can try Windows 7 system repair disc or create a bootable media with third-party software. Both can help you restore computer to a previos date.
The repair disc contains the necessary system recovery tools that can troubleshoot your computer and recover it from a serious error or directly restore from a system image. But you probably don't have a CD/DVD disc or fail to create the system repair disc. The most common error is "System repair disc could not be created (0x80070057)" which is often caused by the incapability with other software, or other errors.
Third-party software like Qiling Disk Master Porfessional can help you create a bootable media and system backup as well. The bootable media can be an ISO image files or using CD/DVD or USB device, and start any Windows computer (both 32-bit and 64-bit). For example, if you create a bootable media in Windows 7 via Qiling Disk Master, you can use it to start Windows 7 as well as Windows 8/8.1/10/11 without any obstacle.
How to system restore with bootable media and system backup
As mentioned earlier, system repair disc is error-prone, so here I just take Qiling Disk Master Professional as an example and show you the entire process, including create bootable media and restore from system image. Then. let's have a closer look.
Create a bootable media with Qiling Disk Master Professional
To create a bootable media, you need a working computer running Windows 7/8/10/11 and a writable removable drive. Also, free download Qiling Disk Master Professional is required.
Step 1. Launch Qiling Disk Master Professional. Then, click Tools and Create Bootable Media in turn.
Note: If you don't have USB or CD/DVD, you can choose to create a recovery environment with Qiling Disk Master. Then, you can directly backup & restore or clone without booting Windows.
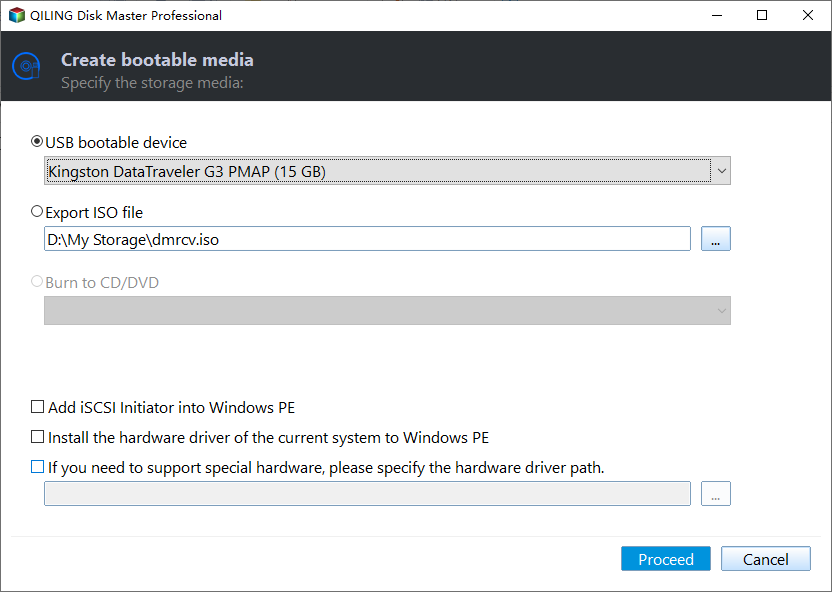
Step 2. Select storage device for your bootable media. Here, I will take USB Boot Device as an example. After that, click Next and wait for the final result.
Boot your computer and system restore from backup image
Step 1. Plug your USB bootable media into your computer via USB port and set boot priority for it. Then, restart your computer to access the Windows PE environment. At the same time, you need to connect the removable drive with system image backup.
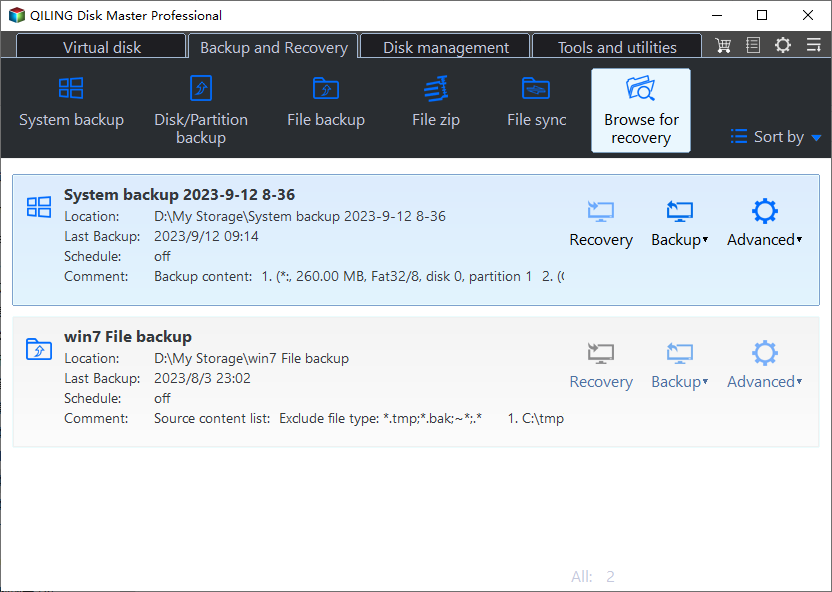
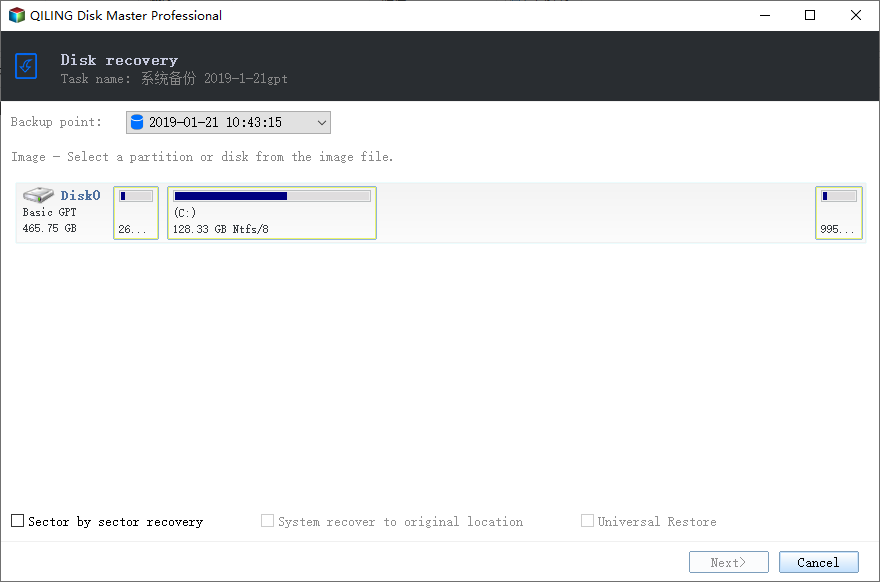
Step 2. Click Restore and Select Image File to find the system image you made before.
Step 3. Tick Restore this system backup and click Next.
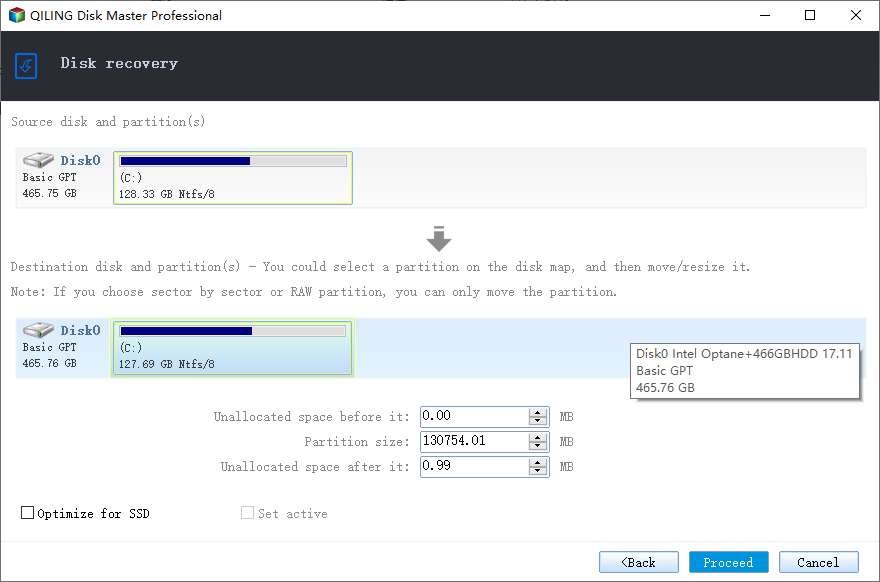
Step 4. Preview the operation summary and tick Universal Restore if your image is created on a different computer. Then, click Proceed.
Note: If the system image is created on the original computer before it crashes, you can uncheck "Universal Restore".
Step 5. Change the boot sequence in BIOS and set the system disk as the first option. Then, restart your computer and see if you restore Windows 7 back successfully.
Written in the end
In general, if you create a system restore point in advance, you can do system restore in safe mode Windows 7. If not, you can try to repair your computer with Windows 7 system repair disc. But it requires a CD/DVD and the creation may fail. Therefore, it's suggested to use Qiling Disk Master to restore your computer.
With it, you can create bootable media to boot any computer, whether Windows 7, 8, 8.1 or 10/11. Also, it supports restoring system image backup created on different computer without boot issues. This is what Universal Restore does for you.
But this version can only protect several computers. If you want to protect unlimited computers within your company, you can pick Qiling Disk Master Technician. With the inbuilt Qiling Image Deploy tool, you are also allowed to deploy/restore system image file on server-side computer to multiple client-side computers over network.
Related Articles
- How to Restore Windows 7 without Restore Point
- How to Run System Restore from Command Prompt Windows 7
- How to Do System Restore in Safe Mode Windows 10 Easily
- How to Backup Files in Safe Mode Windows 7/8/10
