Windows 7 Startup Issues Troubleshooting (7 Effective Ways)
- What is startup repair and when could you use it?
- Windows 7 startup issues troubleshooting- how to do
- Method 1: Removing recently attached devices or external hardware
- Method 2: Using Safe Mode
- Method 3: Run msconfig
- Method 4: Running CHKDSK and SFC command prompt
- Method 5: Using Last Known Good Configuration
- Method 6: Manually run startup repair
- Method 7: Using System Restore in Safe Mode
- How to protect your computer to avoid mess-up in startup issues
What is startup repair and when could you use it?
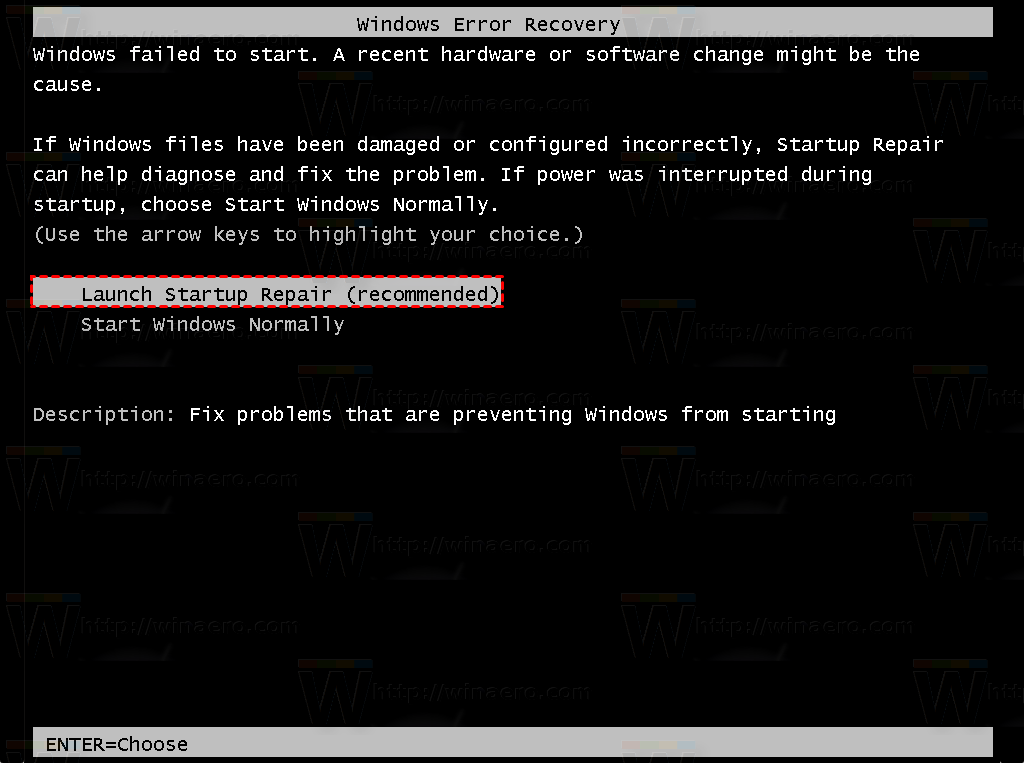
Startup Repair is one of the recovery tools in the System Recovery Options menu. It is designed to fix certain problems such as missing or damaged system files used to load the operating system. When your computer fails to start, you can see the following window and ask you to launch startup repair. However, if you do not see the following window after your computer unsuccessfully boot, you need to manually run Startup Repair tool.
Although Startup Repair can fix certain system problems that prevent your computer from booting successfully, it cannot fix all problems, such as, problems related to malfunctioning firmware and other hardware components, clean Windows installation or Windows updates (e.g. from Windows XP to Windows 7), Windows logon errors, viruses and malicious software as well as hardware failures (e.g. failing hard disk, incompatible memory).
Windows 7 startup issues troubleshooting- how to do
Below you will learn 7 methods to fix Window 7 startup issues. Just try them one by one until the problem is solved.
Method 1: Removing recently attached devices or external hardware
If you have recently attached a device to your computer, such as a camera, you need to remove it and restart your computer. If it’s the cause, your will boot as normal.
Besides, you still can try to remove all the external hardware from your computer, except for the mouse and keyboard. Then, restart your computer and ensure if your computer boot correctly.
Method 2: Using Safe Mode
In Safe Mode, Windows only load the most basic components, but you may find that a simple restart from safe mode will solve your problems.
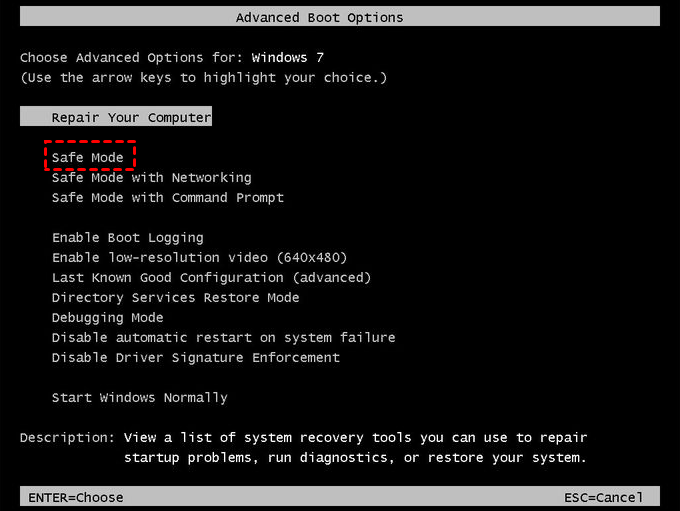
Step 1. Restart your computer. Then, press F8 key repeatedly until you see the Advanced Boot Options.
Step 2. Select Safe Mode and hit Enter to start the operation.
Besides, in safe mode, you still can try to disable services in msconfig, run anti-virus software to remove viruses on your computer.
Method 3: Run msconfig
Recently added software running at startup may lead to the Windows 7 boot problems. You can try to disable startup services on msconfig.
Step 1. Boot your computer into Safe Mode. Click Start, type msconfig in the search box and select it.
Step 2. Go to the Startup or Services tab and click Disable all.
Step 3. Now, click Apply > OK >Restart to apply these changes on your computer.
Method 4: Running CHKDSK and SFC command prompt
Step 1. Go to Advanced Boot Options and select Safe Mode with Command Prompt.
Step 2. Type the following commands and hit Enter.
- chkdsk C: /r (C: refers the installation location of Windows operating system)
- sfc /scannow /offbootdir=c:\ /offwindir=c:\windows
Method 5: Using Last Known Good Configuration
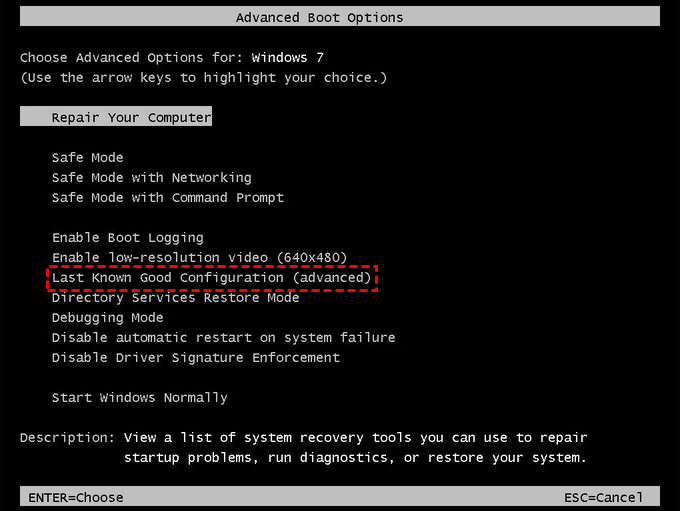
To Windows 7 startup issues troubleshooting, you can use last known good configuration. It can load the drivers and registry data that worked well last time.
Step 1. Go to Advanced Boot Options.
Step 2. Select Last Known Good Configuration (advanced) and hit Enter to run the pending operation.
Method 6: Manually run startup repair
Step 1. Turn on your computer and press F8 key to see Windows Error Recovery menu.
Step 2. Select Launch Startup Repair (recommended) and hit Enter to run the recovery tool.
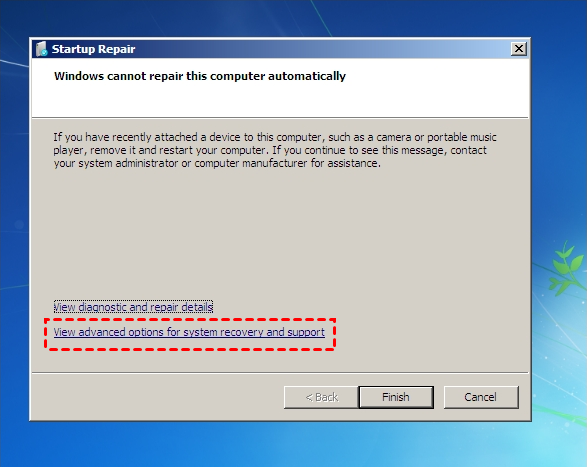
Step 3. Now, it will try to find the problems and fix it. If it cannot resolve it, you will see the following window and provide you some detailed information. You can do what is says. Or, you can click View advanced options for system recovery and supportand try other recovery tools.
Besides, you can also run startup repair with Windows installation media. If you do not know how to do, you can see Windows 7 boot repair via command prompt. This article will walk you through detailed steps.
Method 7: Using System Restore in Safe Mode
If Windows 7 startup problems after Update, you can try System Restore.
Step 1. Restart your computer. Then, pressF8key repeatedly as soon as your computer boots, but before the Windows logo appears.
Step 2. In the Advanced Boot Options window, select Safe Mode and hit Enter.
Step 3. Type system restore in the search box and select it.
Step 4. Tick Recommended restore option and click Next. The Recommended restore contains the most recent restore point, which can minimize your loses. If the restore point is corrupted or damaged, you can tick Choose a different restore point and follow the instructions to finish the rest of steps
Step 5. Check the settings and click Finish to start the restore process.
How to protect your computer to avoid mess-up in startup issues
To be honest, backup can ensure data security. Without it, there is a risk of losing data if your computer crashed. Now, create a backup for your computer and save it to external storage device, such as, USB flash drive. It’s very portable to carry.
In the beginning, I'll introduce you a free backup and restore software Qiling Disk Master Standard. It allows you to create all kinds of backup, including, system backup, file backup, partition backup, disk backup. In any backup, you can create a schedule backup, compress and encrypt backup, manage disk space.
More importantly, this software is very easy to use, even for beginner. You just need to open it and follow steps given below.
Step 1. Plug your USB flash drive into your computer and make sure it's recognized by your computer.
Step 2. Download Qiling Disk Master Standard, install and launch it.
Step 3. Click Backup and System Backup in order.You can also click File Backup, Partition Backup, Disk Backup.
Step 4. Modify the Task Name, click where the arrow point and select your USB drive as destination.
Step 5. Set up settings for your backup. At the bottom, you can see 3 options, includingBackup Options, Schedule, Scheme. You click them respectively and select what you need.
Notes:
1. Encryption is essential for personal files. But this is a paid function, you need to upgrade to Qiling Disk Master Professional.
2. Backing up at a regular time can make sure your data is up-to-date. There is a new feature called USB plug in, which allows you to backup data with a recognized USB drive. It will be much more convenient.
3. Differential Backup and Incremental Backup can save your disk space. And you can also try to delete old backups with Backup Scheme.
Step 6. Click Proceed to start the pending operation.
Troubleshooting Windows 7 startup issues with recovery tools is difficult for beginner. But you can use free Qiling Disk Master. It's very easy to use, even for beginner. You can follow steps above to create a system backup and then restore system image backup from USB when needed.
Related Articles
- Quick Fix to Startup Repair in Windows 7 not Working
Have you ever suffered from Startup Repair Windows 7 not working or are you suffering from it now? Go ahead and see this article, it will offer you good solutions. - Windows 7 Boot Repair via Command Prompt (5 Ways and 2 Tips included)
You can run Startup Repair or Command Prompt Windows 7 boot repair to fix Windows 7 boot problems easily. And the best way to prevent this is to create a system image. - 2 Free Ways to Schedule Hourly Backup in Windows 10/8/7
For particularly important data, you can schedule hourly backup to protect it tightly. Here's how you can set up it in Windows 10, 8, 7, and the related info you need to know. - Free USB Image Tool Bootable for Windows 10
To prevent boot files on USB from being lost, users usually back them up with a free USB image tool bootable. Qiling Disk Master can help you backup your USB easily.


