[Top 2 Ways] to Backup Windows Server 2019 Files
Overview of Windows Server 2019
Windows Server 2019 is the ninth version of Microsoft's server operating system, built on the foundation of Windows Server 2016 and featuring innovations in hybrid cloud, security, application platform, and hyper-converged infrastructure.
Windows Server 2019 introduces several new features, including [list the features, e.g.
- System Insights:
- Storage Migration Service: This tool provides a graphical interface to inventory data on servers, making it easier to migrate to new servers.
Upgrading to Windows Server 2019 has become a popular choice for many companies and organizations due to its powerful functions, and if you've recently made the switch, you may be wondering how to backup your new server operating system. Fortunately, there are two top ways to do so, which will be outlined in this page.
👉 Way 1: Backup files with Windows Server Backup 2019
👉 Way 2: Backup files via powerful server backup software👍
Way 1: Backup files with Windows Server Backup 2019
Windows Server Backup 2019 is similar to Windows Server Backup 2016, but with a limitation: you can only backup the entire volume, not individual folders. To use it, you'll first need to install it as a Windows Feature using Server Manager or PowerShell. Once installed, you can proceed with the backup process.
1. Open Server Manager, click Tools in the upper-right column and select Windows Server Backup.
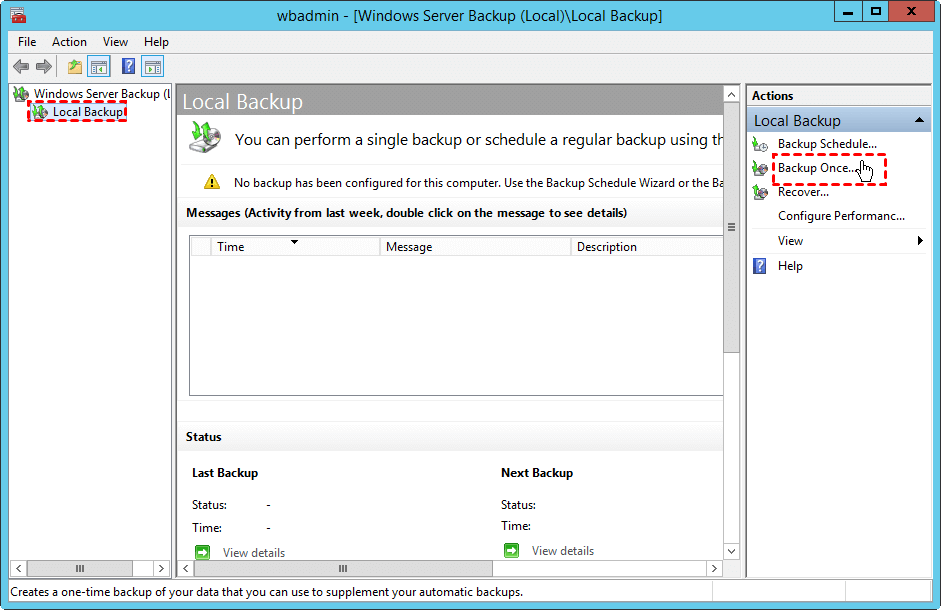
2. Click Local Backup. On the Action menu, click Backup once.
3. In the Backup Once Wizard, on the Backup options page, click Different options, then click Next.
4. On the "Select backup configuration" page, click "Custom" and then click "Next".
5. On the Select Items for Backup page, click Add Items to select the volume(s) to be backed up, and then click Next.
Note: To perform a backup or restore of an application, you should select the entire volume that contains the application's data and files, rather than individual folders. This ensures that all relevant data and files are included in the backup or restore process.
6. On the Specify destination type page, click Local drives or Remote shared folder, then click Next.
- Choose Local drives and select an option from the Backup destination dropdown, then click Next.
- If you choose Remote shared folder, you'll need to specify a UNC path for the backup files and configure access control settings on the Specify remote folder page.
7. After confirming, click Backup and once completed, click Close to exit the Backup Once Wizard.
8. Close Windows Server Backup.
Windows Server Backup has some limitations, such as not being able to back up individual files, but it can back up selective files or folders using the command-line interface, which is not user-friendly.
Way 2: Backup files via powerful server backup software
Qiling Disk Master Server is a specialized backup software for servers, including Windows Server 2019, and also supports file backup in Windows 11/10/8.1/8/7/Vista/XP and various server versions, offering features such as file backup, disk imaging, and system restore.
◈ The software offers various backup types, including System, Disk, Partition, and File Backup, allowing users to not only backup files in Windows Server 2019 but also create a Windows Server 2019 system image backup and other types of backups.
◈ Support multiple backup features: Schedule backup files with various modes, including daily, weekly, or monthly, to ensure consistent data preservation. Additionally, implement incremental or differential backup to only save changed files, reducing storage space and backup time. To maintain a clean and organized backup system, consider deleting old backup images using methods such as by quantity, by time, or by daily/weekly/monthly cleanup, thereby freeing up space and minimizing clutter.
◈ The software enables you to backup your data to various locations, including local disks, external hard drives, USB flash drives, NAS devices, and network locations.
◈ The tool provides various features such as creating bootable media, helping users create a �indows Server 2019 bootable USB, and booting multiple computers from a network using the Qiling PXE Boot Tool.Windows Server 2019 bootable USB, and booting multiple computers from a network using the Qiling PXE Boot Tool.
Create Windows Server 2019 backup for individual folders via Qiling Disk Master:
Step 1. Download Windows Server 2019 backup software and follow the installation wizard, which will complete the installation process in a short time.
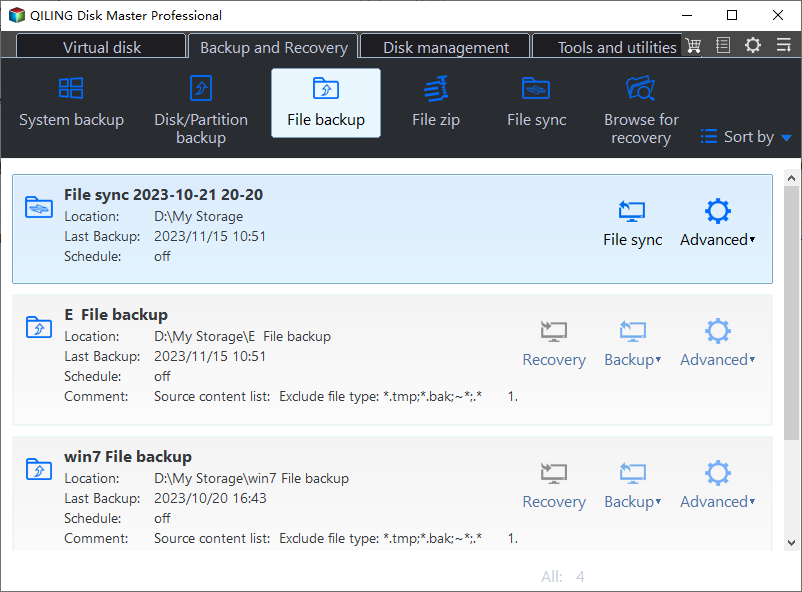
Step 2. Click on "Backup" and select "File Backup".
Step 3. To create a unique backup task, name it, and then select the files or folders you want to back up by clicking on the "Files" or "Folder" option.
Step 4. Select a destination location To store the image file, you can save it to an external hard drive, USB flash drive, network drive, or NAS.
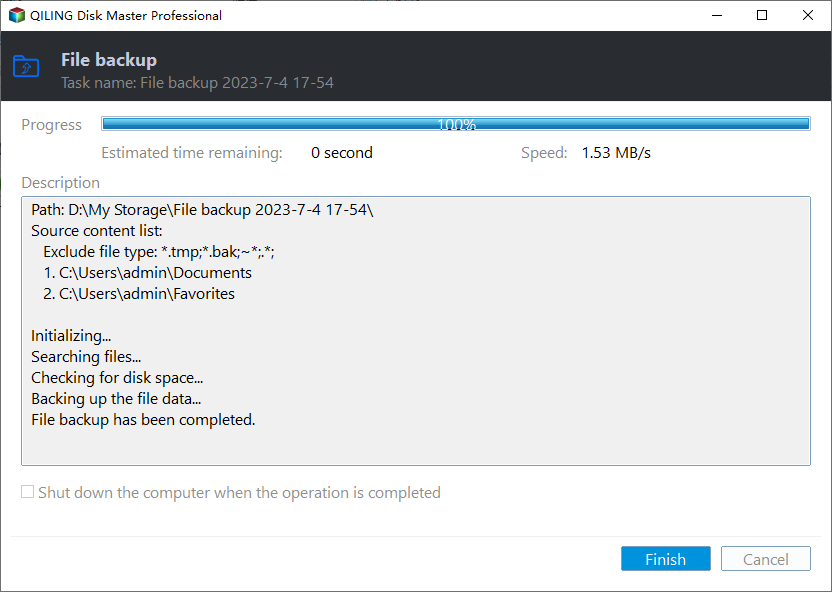
Step 5. To confirm the operation, click "Proceed" to begin backing up files in Server 2019.
★ How to make a hassle-free backup task
For a hassle-free file backup experience, consider using features that allow you to schedule backups without missing any changes. This way, you can ensure that your files are always up-to-date and protected.
>> Options: You can customize your backups by setting email notifications, encryption, compression, and splitting them based on your specific needs.
>> Schedule Backup: You can set the backup task to run automatically at fixed intervals, with five schedule modes available: "Daily", "Weekly", "Monthly", "Event triggers", and "USB plug in".
>> Backup Scheme: You can use the default backup method - incremental backup, or switch to differential backup, and also set up automatic deletion of old image files to free up disk space for new backups.
To sum up
The page has provided top two ways to backup files in Windows Server 2019, with Qiling Disk Master being superior to Windows Server Backup for individual files or folders backup. Qiling Disk Master offers multiple backup features, including automatic scheduling and backup scheme, eliminating the issue of Windows Server Backup not deleting old backups. This makes Qiling Disk Master a more efficient and reliable option for backup needs.
You can protect unlimited PCs and servers within your company using Qiling Disk Master Technician Plus, which also enables you to copy the installation directory for portable version creation.
Related Articles
- Windows Server 2019 Backup | How to Make It Easily
It has been almost three years since Windows Server 2019 first released. If you are using this server system, it is strongly recommended to backup Windows Server 2019 for security, including system state and important settings. - How to Clone Hard Drive in Windows Server 2019 Easily
How to clone hard disk drive in Windows Server 2019? One professional tool Qiling Disk Master Server can help you clone whole hard disk, individual partition or only system partition as per your needs. - Reset Windows Server Backup with Step-by-Step Guide
How to reset Windows Server Backup to go back to default settings and therefore fix some problems? Here's a guide to access the built-in reset option. Or you can use a powerful alternative to get better server backup experience - 2 Ways to Sync Network Folder to OneDrive in Windows 7/8/10
Here you will find the two ways to sync network folder to OneDrive in Windows 7/8/10/11. Both are free of charge, and the latter is simpler.


