How to Create Bootable USB Windows Server 2008 R2 from ISO
Need to create bootable USB Windows Server 2008 R2
If your Windows Server 2008 R2 computer crashes and won't boot normally, you can create a bootable USB drive using an ISO file, which can serve as a recovery disk to help you restore your operating system and get your computer up and running again.
To create a bootable USB for Windows Server 2008 R2 using an ISO file, you can use either the Windows USB/DVD download tool or an advanced tool.
Two ways to create Windows Server bootable USB drive
To create a Windows Server 2008 R2 bootable USB drive for system recovery, or to create a bootable USB in Windows Server 2012 from ISO, follow these steps. The process applies to both versions. A step-by-step guide will be provided.
- Way 1. With Windows USB/DVD Download Tool
- With an advanced bootable media tool - Qiling Disk Master Server, you can easily create a bootable media that can boot up your computer and access the system even if the operating system is corrupted or missing. This tool allows you to create a bootable USB drive or CD/DVD that can boot up your computer and provide a working environment for troubleshooting and repair. This is particularly useful for recovering data or repairing a system that is no longer booting up properly.
Way 1. With Windows USB/DVD Download Tool
To create a bootable USB for Windows Server 2008 R2 from ISO files, you can use the Windows USB/DVD Tool provided by Microsoft. Simply follow these steps: [insert steps here].
Warning: All data on the USB drive will be erased when copying ISO files to it, so please make a backup if necessary.
Step 1. Download the Windows USB/DVD Download Tool and .NET framework 2.0 from Microsoft's website onto a working computer, as it may not boot on your current computer.
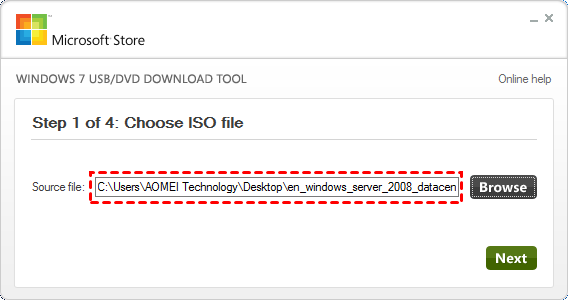
Step 2. Launch this tool. Click Browse and select (Windows Server 2008 R2) ISO files. Then, click "Next".
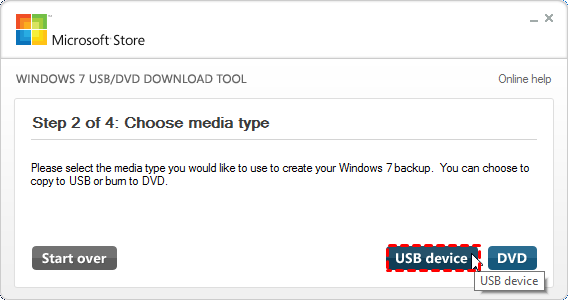
Step 3. Choose media type, USB device or DVD. Here we select "USB device".
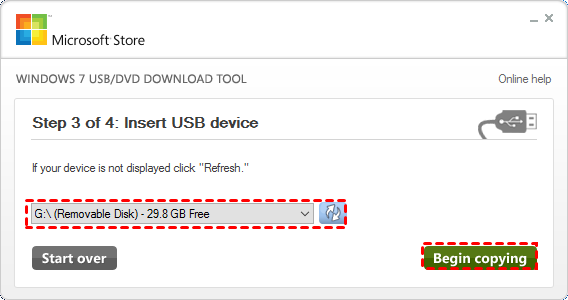
Step 4. Select the USB drive you plan to use for creating Windows Server 2008 R2 bootable drive, then click "Begin copying".
To restore Windows Server 2008 R2 from a backup on the machine, insert the bootable USB drive, boot from it, and follow the on-screen instructions to restore the system from a backup.
Step 1. Boot the Server computer from the created bootable USB drive and press any key when prompted.
Step 2. Choose the proper language options, time and currency format, and keyboard layout and click "Next".
Step 3. Click "Repair your computer" on the "Install Windows" screen.
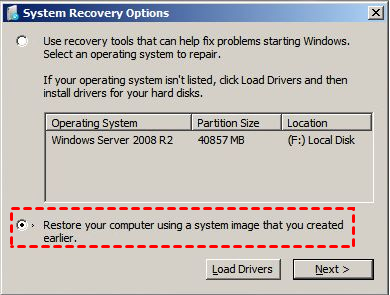
Step 4. Select "Restore your computer using a system image that you created earlier". And click "Next".
Step 5. Select a system image backup and follow the on-screen instructions to complete the restoration.
To restore your computer to an earlier state and resolve boot issues, start by selecting the most recent system image by default. However, if you prefer to choose a different one, click "Select a system image" and follow the on-screen instructions to complete the process. This will help you revert your computer to a previous state and resolve any boot-related problems.
The Windows Server 2008 R2 bootable recovery disk and system image created by the Windows USB/DVD Download Tool are only compatible with restoring Windows Server 2008 R2.
The recovery disk for Windows Server is not compatible across different versions of Windows Server. This means that a recovery disk created for Windows Server 2008 cannot be used to restore or repair Windows Server 2012, and vice versa. Similarly, a 32-bit recovery disk cannot be used to repair a 64-bit computer, and a 64-bit recovery disk cannot be used to repair a 32-bit computer.
Way 2. With an advanced bootable media tool - Qiling Disk Master Server
To overcome the limitations of Windows USB/DVD Download Tool, we recommend using Qiling Disk Master Server, an advanced tool that can handle more complex tasks.
This software helps create a versatile bootable USB drive that can be used to restore all Windows Servers, including 2003, 2008 (R2), 2011, 2012 (R2), 2016, 2019 and 2022, on both 32-bit and 64-bit systems. Unlike other tools, it doesn't require an ISO file to be prepared in advance, as it takes care of the bootable media creation process itself.
To successfully recover your system, you need a Windows Server system image backup, which can be created using Qiling Disk Master. If you don't have one and your current system is corrupted, you can create one on another working computer with the same OS, and then restore it to a new computer with dissimilar hardware.
Steps to create bootable USB Windows Server 2008 R2:
Step 1. Connect an empty USB drive to a working computer, download Qiling Disk Master Server Free Trial onto the computer.
Step 2. Install and run Qiling Disk Master Server, select "Tools" and then "Create Bootable Media".
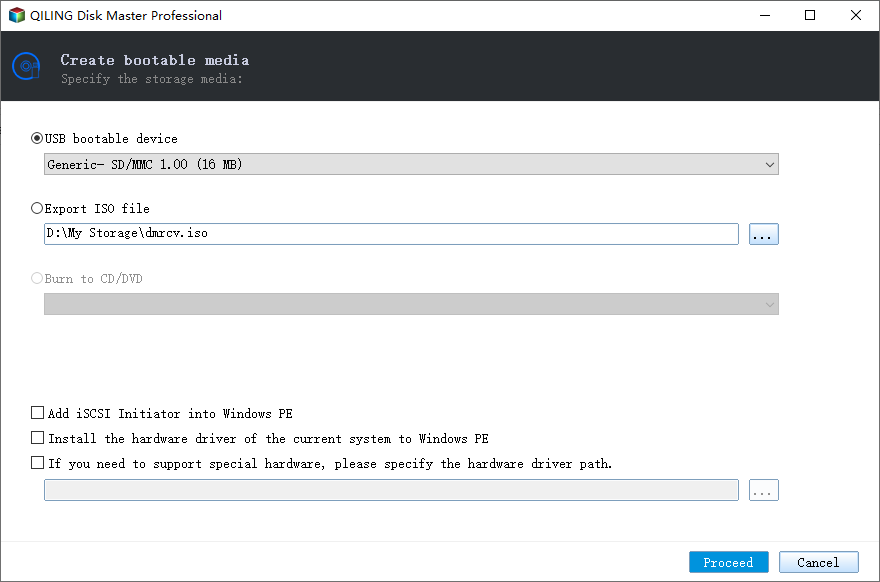
Step 3. Now select bootable media. Here we choose "USB Boot Device" and click Next.
▸If you want to create a bootable USB Windows Server 2008 R2 from an ISO, you can export the ISO files, but then you'll need to burn them to a CD or DVD using a burning tool, which can be a bit complicated.
▸If you need to start multiple computers for deployment, you can use a script or a tool like PowerShell or a batch file to automate the process. This can save time and reduce the risk of human error.Qiling PXE Boot Tool.
After creating the bootable Windows Server recovery disk, plug it into the computer with the failing Windows Server and boot from it. Also, connect the disk containing the system backup you want to restore.
To restore your Windows Server 2008 (R2), do as follow:
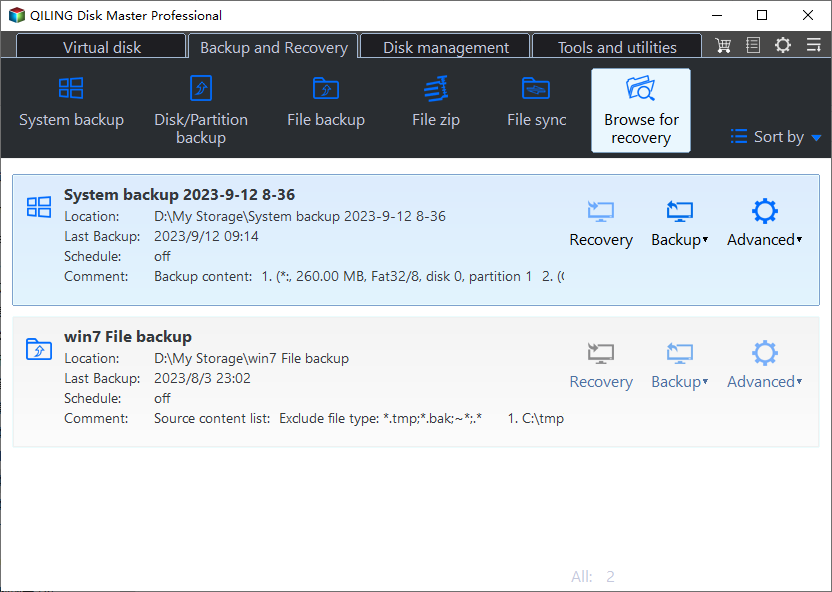
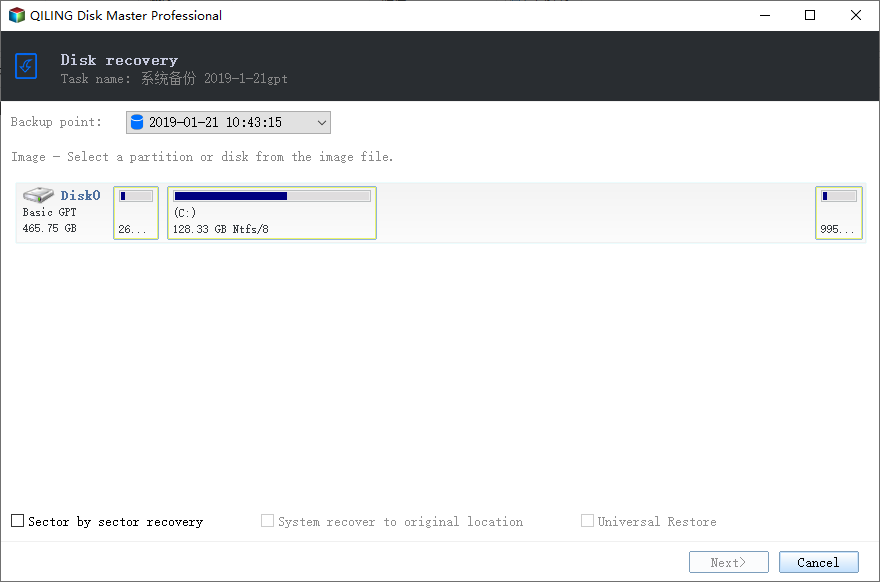
Step 1. After booting from the bootable USB created by Qiling Disk Master, you can access the main console. From there, click "Restore" and "Select Image File" to locate your system image.
Step 2. In this screen, tick "Restore this system backup" and click "Next".
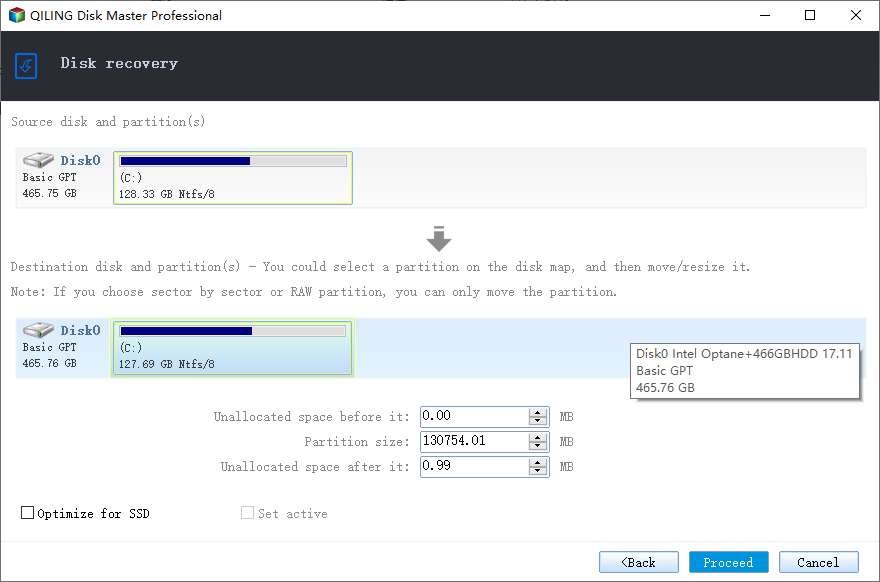
Step 3. Preview the pending operation and click "Proceed" if there is no mistake.
▸If the system image created on a computer with different hardware to the one you are currently restoring to, you may encounter issues with drivers and hardware compatibility. This can lead to problems during the restore process, such as the system not being able to recognize or use certain hardware components.Universal RestoreThe "Restore Point" feature will be checked by default to ensure your computer can boot successfully after restoring.
▸If the destination disk is an SSD drive, you can tick the box to enable TRIM, which helps maintain the drive's performance and longevity.SSD Alignment" to boost its reading and writing performance.
▸ If the target disk is larger, click "Edit Partitions" to resize the destination disk.
During a system restore, the program will prompt you to restart the computer, and then the restore operation will be completed under Restart mode. Please wait patiently until the process is completed 100%.
Conclusion
The Windows USB/DVD Download Tool is useful for creating a bootable USB Windows Server 2008 R2 from an ISO, but Qiling Disk Master Server is more flexible and can create a bootable USB directly without needing to download the ISO first. This makes it a more universal tool that can be used on various systems, including Windows Server 2008 R2 and other server and PC systems, such as Windows Server 2012/2016/2019/2022, Windows 11/10/8/7/XP/Vista, and others.
The system recovery process is convenient, allowing you to restore Windows Server backup images to a computer with dissimilar hardware even without a system backup for the failing computer.
For IT technicians or small companies, Qiling Disk Master TechPlus offers advanced features to protect unlimited computers from one computer, and allows simultaneous system image restoration to multiple computers, eliminating the need for repetitive processes.
Related Articles
- Fastest Way to Clone Bootable USB Drive in Windows 7/8/10
Cloning USB bootable drive to another drive or USB in Windows 11/10/8/7 with "Disk Clone" feature in Qiling Disk Master is the fastest and easiest way. Scroll down to learn the detailed steps. - Step-by-Step Guide to Create Server 2019 Bootable USB
Do you want to create a bootable USB in Windows Server 2019 so as to recover from a system crash? Follow this article to find the easiest way. - How to Make Lenovo Boot from USB in Windows 10
Create bootable USB drive with the best free Windows 10 media creation tool - Qiling Disk Master and then let Lenovo boot from USB in Windows 10 to troubleshoot problems. - Fixed: Windows 7 Blue Screen after SSD Install
Have you encountered Windows 7 blue screen after SSD install? Don't worry! Get quick fixes to the problem in this article.
