Easily Migrate Old Server to a New Server (Different Hardware)
The case: migrate server to new hardware
A Windows Server machine that has been in use for years may eventually develop hardware issues, prompting the need to migrate to a new server with updated hardware. A real-world example from a forum highlights this scenario.
"Hello, I'm experiencing an issue with a small Windows Server 2003 machine at my workplace. The server's functionality is straightforward, with shared documents and critical accounting software running on it. Unfortunately, the software may not be compatible with newer versions of Windows. The server does not have an Active Directory, firewall, or any complex setup."
I need to migrate the server to a new physical machine with minimal changes. Cloning the disk isn't an option due to driver compatibility issues. What's the best approach to achieve this with the least amount of disruption? I'd appreciate any advice on how to proceed.
To ensure seamless application compatibility on the new server, consider migrating the OS along with the data. When it comes to choosing the right tools for this process, what are the best Windows Server migration tools to consider? Let's take a closer look.
Top 2 ways to migrate to a new server with different hardware
I'll demonstrate a step-by-step guide on how to migrate a server to new hardware using two effective Windows Server migration tools. Let's explore these tools individually:
Move server to new hardware with Windows Server Backup
Windows Server Backup (WSB) is a backup and recovery tool for Windows Servers which was first introduced in Windows Server 2008. Since it is not installed by default, you need to install it by yourself. Go Server Manager > Add roles and features and follow the Add Roles and Features Wizard to finish the installation.
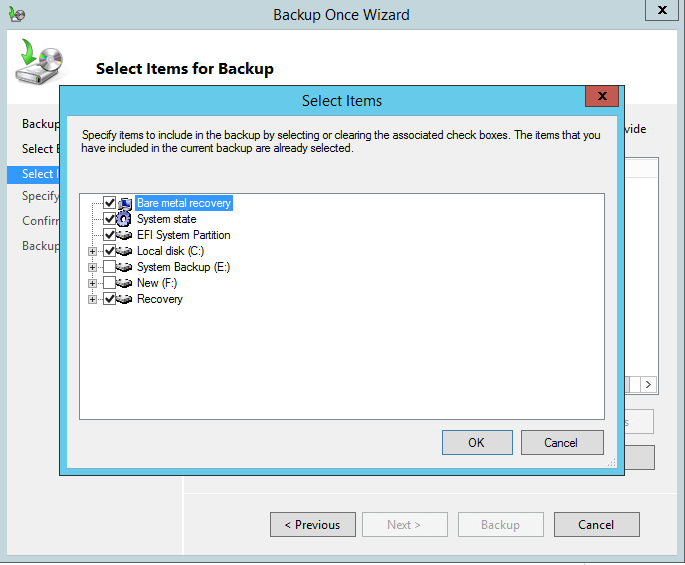
Moving a server to new hardware requires a process called bare metal recovery, which can be facilitated by using Windows Server Backup (WSB). Below are the detailed steps for server migration, using Windows Server 2012 as an example:
1. To prepare for bare metal recovery, run Windows Server Backup on the original server machine to create a backup of the operating system, applications, and data. It is highly recommended to store this backup on an external hard drive or network location, as this will allow for easy access and transfer of the backup to the new server machine during the migration process. This will ensure that the backup is readily available and can be used to restore the system on the new hardware.
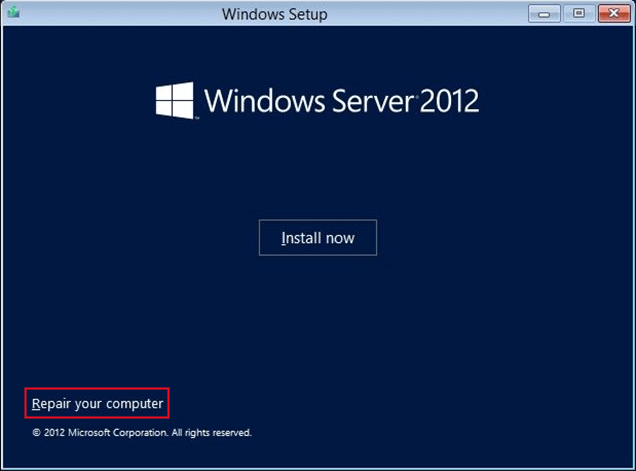
2. To begin the installation process on the new server, boot the machine from the Windows Server 2012 installation media. Follow the prompts to select the desired language, time and currency preferences. Once complete, click on the option to Repair your computer, which will allow you to access the recovery environment and prepare the system for the bare metal recovery process.
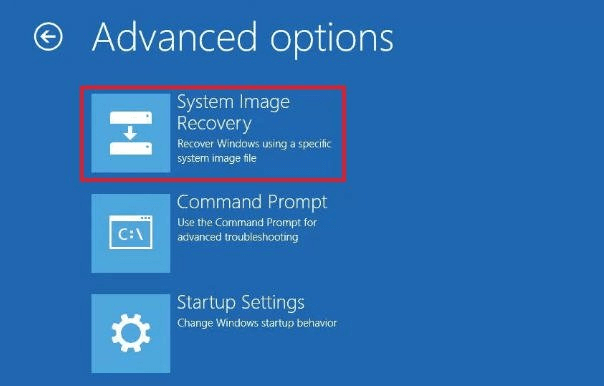
3. Next, navigate to the Troubleshoot section and select Advanced options. From there, choose System Image Recovery, which will enable you to restore the operating system. Finally, select the specific operating system you wish to recover.
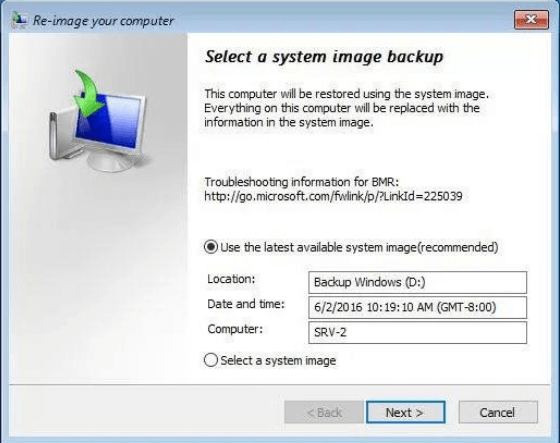
4. To proceed with the re-imaging process, select the system image you wish to restore from the "Re-image your computer" screen and click Next.
✍ Tips:
By default, the most recent system image is selected. If you'd like to choose a different one, click Select a system image. You'll then be taken to a screen where you can either select from the list of available images or click the Advanced button to search for an image on the network.
If the system image is stored on an external drive, connect it to the new server and click Refresh to update the available image list.
5. "At the 'Choose additional restore options' page, if you've encountered no issues with the disk format or partition, you can proceed by clicking Next."
6. "Next, click Finish and then confirm the reimaging process by clicking Yes. The restore process will commence, potentially taking anywhere from a few minutes to a few hours to complete."
✎ Note: "Your new server may experience issues with booting the operating system due to hardware differences, such as a mismatched CPU, motherboard, or HDD controller. To resolve this, you can install the necessary drivers for the new server's hardware configuration."
Transfer server to new hardware via Qiling Disk Master Server
"The process of performing bare metal recovery with WSB can be complex and prone to errors. Furthermore, you may experience boot issues after restoring to a new server. Fortunately, there is a more efficient solution: Qiling Disk Master Server."
◈ Wide compatibility
"Qiling Disk Master Server supports a wide range of server systems, including Windows Server 2003 to 2022, as well as various Windows operating systems from XP to Windows 11."
◈ All-around data protection
"Four types of backup are supported: System, Disk, Partition, and File backup. This allows for flexibility in choosing what to backup, from the entire server to specific folders."
◈ Away from boot issues
"With the Universal Restore feature, you can restore image files to different hardware without worrying about boot issues, such as migrating Windows Server 2012 (R2) to new hardware."
Discover how to perform a Windows Server 2012 backup and restore to dissimilar hardware using Qiling Disk Master Server below:
1. Connect a USB drive to the old server machine and install Qiling Disk Master Server. Run the software to create bootable media with it.
2. Click on the 'Backup' option and select 'System Backup' to create a backup of the old operating system. It's recommended to choose a network location to save the backup image for convenience and easy access.
3. Insert the bootable USB flash drive into the new server machine. Then, enter the BIOS settings and adjust the boot order to prioritize the USB drive. Finally, reboot the machine to initiate the boot process from the USB drive.
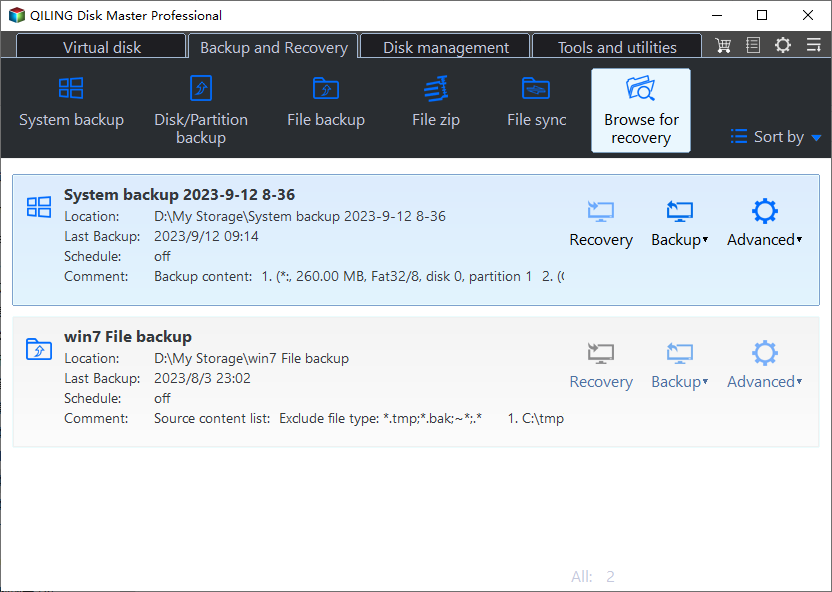
4. After logging in, you will see the Qiling Disk Master Server loaded. Click on the "Restore" button, followed by selecting the image file.
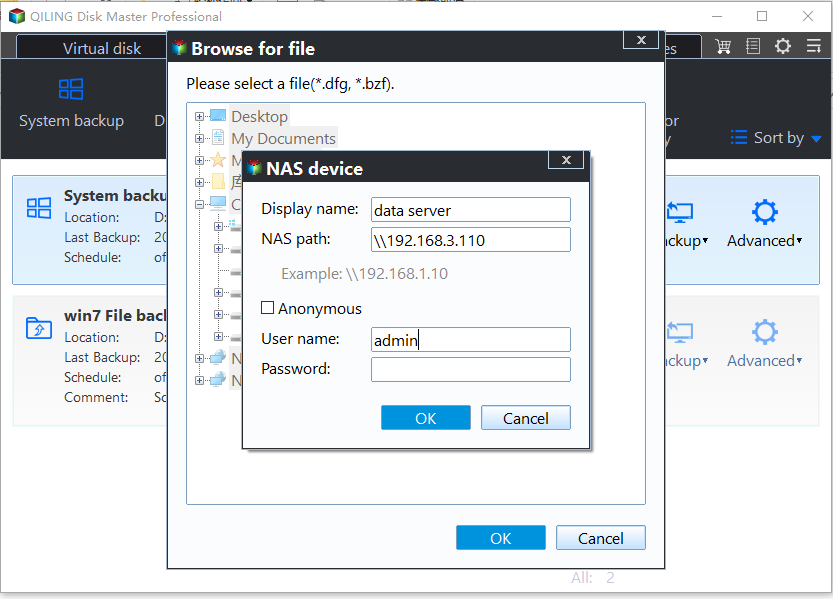
5. To add a network location, go to "Share/NAS" and click on "Add Network Location". Enter the network path for the system image and click "OK". If required, enter the username and password.
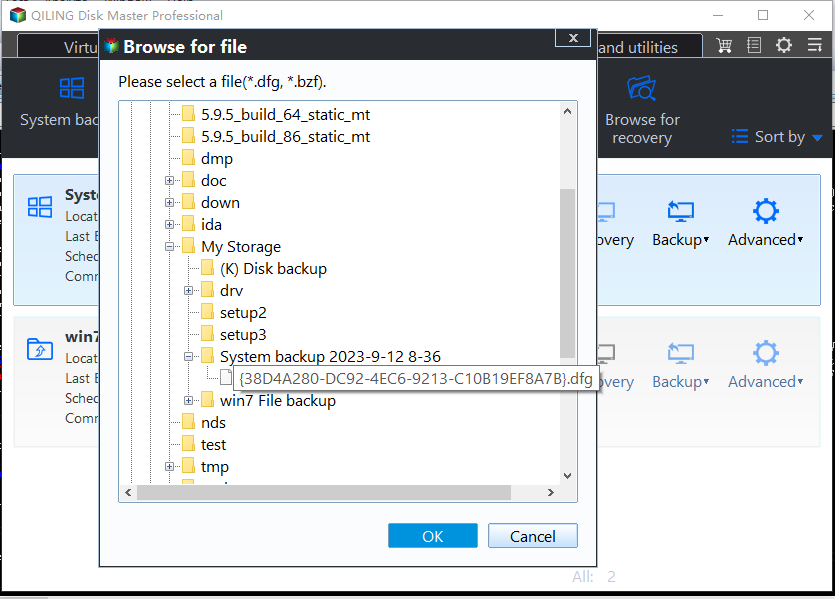
6. Locate the image file, select the desired image, and click "OK" to proceed.
7. Choose 'Restore this system backup' and enable 'Universal Restore' to ensure secure boot functionality is maintained during the restoration process.
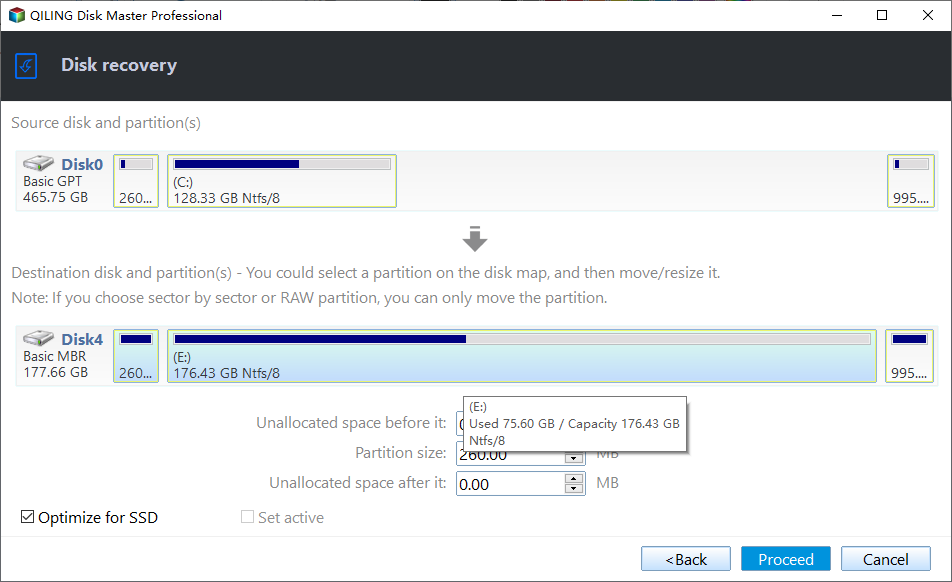
8. Select the drive on the new server as the destination for the restoration and click 'Next' to proceed.
9. Review the operation details on the 'Operation Summary' page to ensure accuracy. Once satisfied, click 'Proceed' to initiate the task.
✎ Notes:
If your new server utilizes an SSD, consider enabling 'SSD Alignment' to maximize its performance potential.
After restoring, you may need to install drivers on the new server, including graphics card drivers, audio drivers, and NIC drivers. Once installed, the target computer should be fully functional.
Qiling Disk Master is a professional Windows Server cloning software. If you want to upgrade your machine's HDD to an SSD, navigate to Clone > Disk Clone.
Summary
Two efficient solutions for migrating to a new server with different hardware have been introduced. You can choose between Windows Server Backup and Qiling Disk Master Server for assistance. However, Qiling Disk Master Server offers more practical features, including System/Disk/Partition Clone and file synchronization between Windows Servers. Consider trying it out now.
Related Articles
- How to Migrate Windows Server 2016 to New Hardware Effortlessly
- How to Use Windows Server Backup for Active Directory Backup?
- Windows Server Backup Not Deleting Old Backups-Fixed
- Your Best SuperDuper Equivalent for Windows 10/7
Looking for bootable backup solution for Windows 11, 10, 8, 7 like SuperDuper! for Mac? Qiling Disk Master is the exact SuperDuper equivalent for Windows clone and backup.
