Quick Start Guide to Sysprep in Windows Server 2012 (R2)
What is Sysprep used for?
To install same operating system on many computers simultaneously, Microsoft releases many practical tools such as Windows Deployment Services (WDS), Microsoft Deployment Toolkit (MDT) and so on. Typically, users should first create system image backup for Windows Server 2012. Then take these tools to deploy the image to other computers over the same network.
However, after deployment, issues like WSUS incompatibility, Volume License key activation errors often happen to Microsoft Office products. Besides, other non Microsoft products such as Citrix may not work correctly. These problems owe largely to duplicate SIDs (Security Identifiers).
When users install Windows, the OS allocates the computer with a unique SID. Each time you copy the system image, the SID will be also copied. Duplicate SID will appear on the same network, which is not allowed. Thus, you need to clear the SID information before deploying.
Luckily, Sysprep (Microsoft system preparation tool) can be used to complete this task. Built into Server 2012, Sysprep works well to clean out SID information and generalize a new SID for every server image copied from the original image. Note that, all the security identification and boot information will be wiped out at the same time.

👉 How to run Sysprep in Server 2012 (R2)
👉 Advanced way to deploy Server 2012 (R2) to multiple computers
How to run Sysprep in Server 2012 (R2)
Follow the steps below to use Sysprep in Windows Server 2012.
1. Press Windows logo key + X at the same time. Then choose Command Prompt (Admin) from the menu.
2. Type cd \Windows\System32\Sysprep and then press Enter.
3. Sysprep can be run in 2 modes, the GUI mode and the command line. GUI mode is highly recommended. Please type sysprep and then press Enter.
* If you want to explore the command line, type sysprep /h and then press Enter.
4. Choose Enter System Out-of-Box Experience (OOBE) and check the Generalize checkbox. Select Shutdown in Shutdown Options. Then click OK.
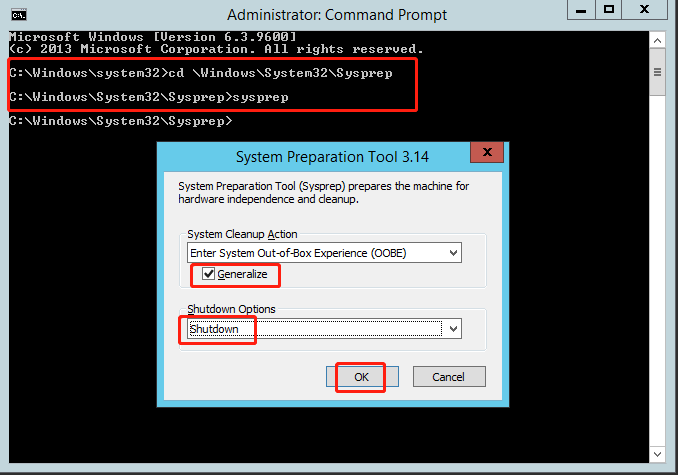
* Enter System Out-of-Box Experience (OOBE): have the system mimic the first boot screens.
* Generalize: remove system specific information from the computer.
* Shutdown: shutdown the computer when done.
*The above instructions also work with Sysprep in Server 2016.
5. Once the computer is shut down, you can use any available technique to deploy the server image to multiple computers.
The procedure of running Sysprep is not complicated. However, some users find Sysprep not working when Generalize is checked. That is to say, the original SID information can’t be deleted, so the server image can’t be deployed remotely.
What’s more, you are limited to run the Sysprep command up to 8 times on a single Windows image. After 8 times, you must recreate your Windows image. Is there an advanced way to deploy Windows Server to multiple computers? The answer is yes if you read on.
Advanced way to deploy Server 2012 (R2) to multiple computers
One such method is using Qiling Disk Master Technician Plus. In addition to the powerful backup, restore and clone features, it is embedded with an image deployment tool named Qiling Image Deploy (AID).
- With the inbuilt Qiling Image Deploy tool, you can deploy (restore or clone) system image to unlimited computers over network.
- Compared to Windows built-in tools, this program is relatively simple to use.
- More pleasing, it supports deploying image to different hardware while ensuring secure boot.
- Client computers using both Legacy and UEFI boot are supported.
- Windows 11/10/8.1/8/7/Vista/XP and Server 2022/2019/2016/2012/2008/2003 (including 32/64-bit, R2/SBS system) are supported.
First, download and install Qiling Disk Master Technician Plus on your server computer. Then, see how it works as follows.
Preparations before deployment
- Confirm that the server computer and all the client computers are in the same segment.
- Make sure that all the target computers support PXE boot.
- The disk sequence numbers for installing system in client computers must be the same. Move out other disks and only keep the destination disk for image deployment.
Detailed steps of OS deployment
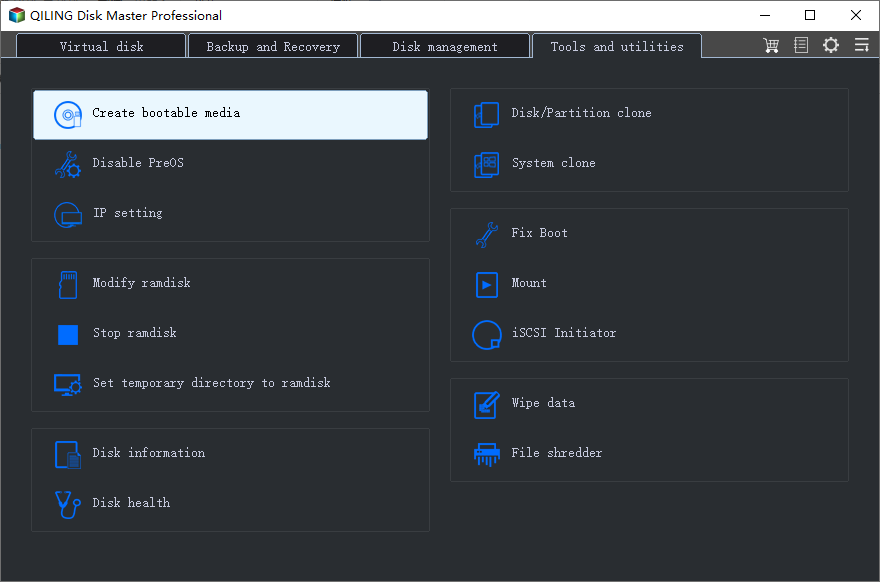
1. Launch Qiling Disk Master. Click Tools > Create Bootable Media to make a bootable disk.
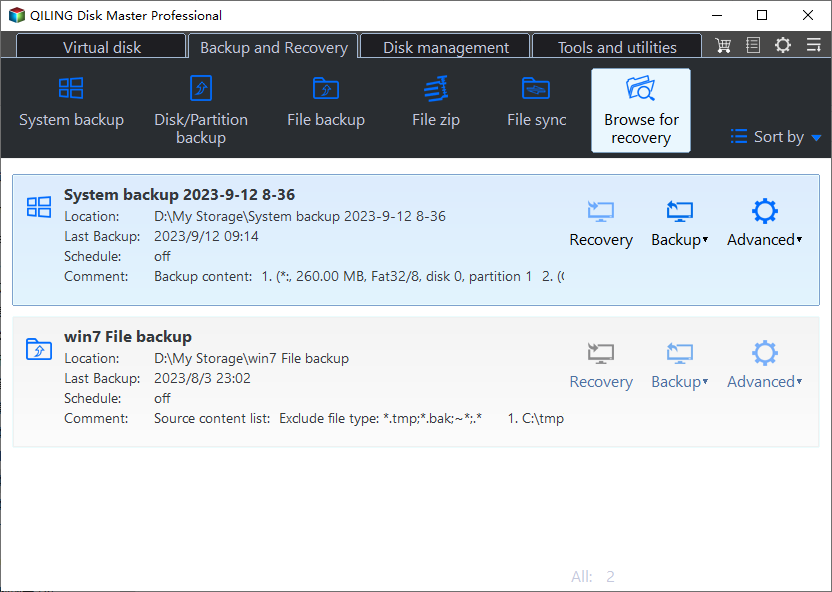
2. Boot into WinPE from the bootable disk. When Qiling Disk Master loads up, click Backup > System Backup to create a system image without SID (Sysprep command should be run before). Choose a network shared folder or NAS path to save the system image.

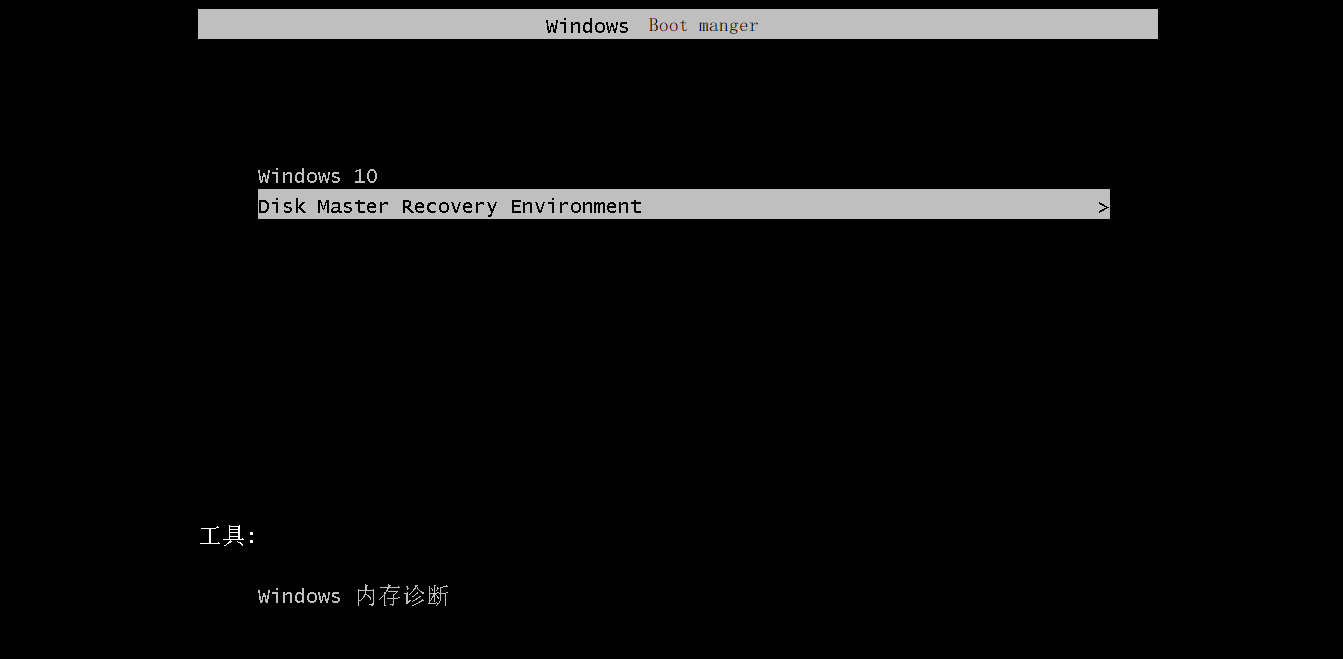
3. After WinPE is created, start all the client computers from network boot.
4. Specify backup image file and client computers for OS deployment.
Click Browse > Add Network Location > enter the network path to select your system image file.
- Universal Restore: choose it to deploy system to computers with different hardware.
5. Confirm your operations and then click Proceed. Moreover, you can choose whether to shut down or restart the client computers after OS deployment is completed.
Conclusion
SID cleanup can be performed by running Sysprep in Windows Server 2012 before deploying an operating system to multiple devices. To make the system image deployment process easy and safe, you may use the Qiling Image Deploy tool in Qiling Disk Master Technician Plus. It applies to deploying image to multiple virtual machines as well.
What's more, you are allowed to Create bootable media of Qiling Disk Master so that you can run the backup, restore and clone operations on any computer you want. Why not give it a shot?
Related Articles
- How to Use Sysprep in Windows 10 Step by Step?
To deploy OS to different computers, you can run Sysprep in Windows 10 to prepare a system image. This article provides a detailed tutorial and also an easier alternative. - Best Free Microsoft Deployment Toolkit (MDT) Alternative
Want to find a Microsoft Deployment Toolkit alternative to create a Windows 10 image for deployment? How to deploy Windows 10 image to multiple computers simultaneously? Just see the step-by-step guide. - 3 Best Practices for P2V (Physical to Virtual) Migration
Need to migrate Windows system from physical to virtual machine? Learn 3 best practices for P2V migration from this page. - QILING Fast Cache Tutorials
QILING Fast Cache can improve overall system performance.