Create Windows Server 2012 Recovery Disk for Disaster Recovery
- What Is Windows Server 2012 Recovery Disk?
- Why Create Windows Server 2012 Repair Disk?
- How to Create Windows Server 2012 Recovery Disk Easily
- How to Use Windows Server 2012 Repair Disk for Disaster Recovery
- Conclusion
What Is Windows Server 2012 Recovery Disk?
Windows Server recovery disk, also known as Windows Server 2012 repair disk, is a recovery tool that can troubleshoot your server computer in trouble. And it can be any bootable media (eg: USB flash drive, CD/DVD, a floppy drive).
In general, if there is an installation disc coming with your computer, you can use it as a recovery disk. If not, you can download Windows Server 2012 recovery disk ISO file from Microsoft store and burn Window Server ISO to USB drive or CD/DVD.
Why Create Windows Server 2012 Repair Disk?
As a business owner or IT professional, you understand the importance of having a reliable and efficient computer system. However, despite your best efforts, unexpected events can still occur. A Windows Server 2012 repair disk can be a lifesaver in case of a disaster, such as a system crash, hard drive failure, virus attack, or other unexpected events that can bring your business to a standstill.
Once your server 2012 runs into issues and becomes unbootable, you may need a Windows Server 2012 repair disk or installation disc. It is essential to start and repair your computer. The same is true for other operating systems, such as, Windows Server 2008, Windows Server 2012 R2, Windows Server 2016, Windows Server 2019 etc.
How to Create Windows Server 2012 Recovery Disk Easily
If your Windows Server 2012 computer is not bootable, you may need to create a recovery disk to restore it to a previous state. In this article, we will show you how to create a Windows Server 2012 recovery disk using two simple methods.
- If you just want to create Windows Server 2012 repair disk for the current computer, select Method 1.
- If you have multiple computers, you'd better create a univesal bootable USB, select Method 2 instead.
After selecting the methods, please follow the corresponding steps below.
Method 1: Create Windows Server 2012 Recovery Disk with ISO Image File
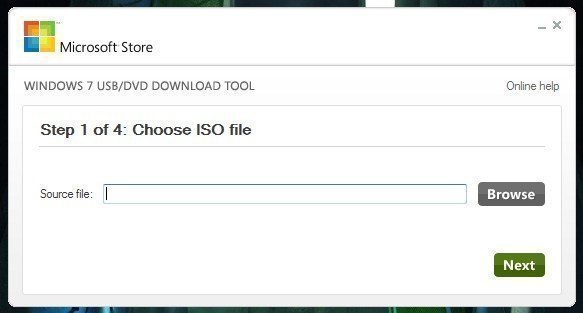
Here you will use Windows 7 USB DVD download tool, which also works perfectly for Windows Server 2012 largely, because the installation system used by Windows hasn't really changed since Windows 7 and Windows Server 2008 R2.
Step 1. Perform Windows Server 2012 recovery disk ISO download and open it.
Step 2. Click "Browse" to find the downloaded ISO file.
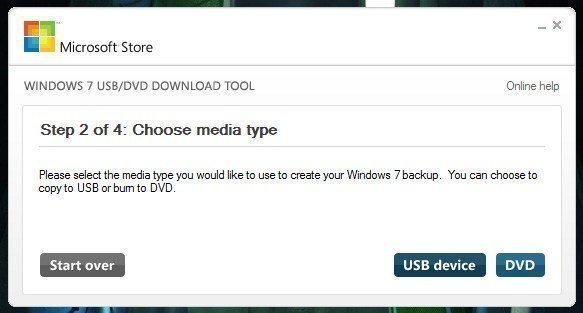
Step 3. Select USB device as media type and click "Next" .
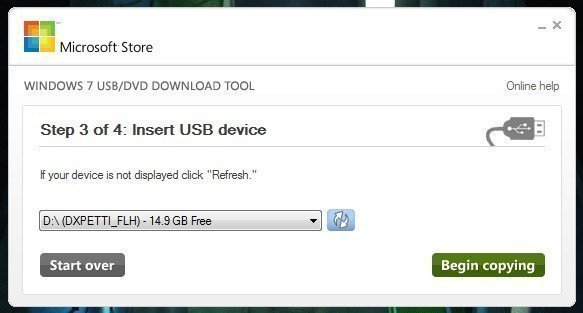
Step 4. Plug the USB drive into your computer and select it, then click Begin Copying. Then, this tool will format your USB device first, copy ISO files to your USB device and make it bootable.
When the process ends, you will have a Windows Server 2012 recovery disk. Please remember to check if the content of the recovery disk are exactly the same as the downloaded ISO file.
Method 2: Create Windows Server 2012 Recovery Disk with Qiling Disk Master Server
Here you will bootable USB media creator - Qiling Disk Master Server to create recovery disk once and for all and you can use it for Windows Server 2003, 2008(R2), 2012(R2), 2016, 2019, 2022 as well as Windows 7/8/8.1/10/11/XP/Vista. And it supports 3 media types including USB, CD/DVD ot USB and the created media booting not only legacy BIOS but also UEFI.
In addition to the basic features of Qiling Disk Master, the TechPlus edition offers advanced disaster recovery capabilities. One of the key features of Qiling Disk Master TechPlus edition is Qiling Image Deploy, an easy-to-use tool for booting multiple computers over a network and restoring system images.
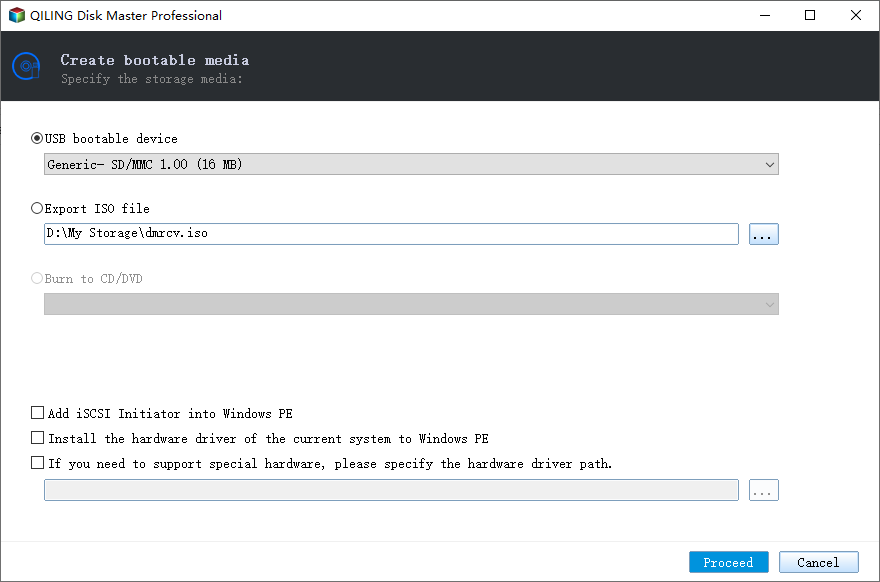
Step 1. Download Qiling Disk Master Server, install and launch it. Then, click Tools > Create Bootable Media in order.
Step 2. Select bootable media among CD/DVD, USB Boot Device, Expert ISO file, and click "Proceed" to start the task.
Besides, here are another two ways to boot your computer.
① Boot from Qiling PXE tool.
② Boot into Windows 10 ecovery environment (you need to add an entry to Qiling Disk Master recovery environment first).recovery environment (you need to add an entry to Qiling Disk Master recovery environment first).
How to Use Windows Server 2012 Repair Disk for Disaster Recovery
If your computer is experiencing issues such as a black screen of death or failure to boot, you can use a Windows Server 2012 recovery USB to repair the operating system. Here's a step-by-step guide to help you through the process:
- Be sure you have a valid full system image backup, or a bare metal backup to allows you to perform system recovery or bare metal restore to dissimilar hardware.
- If you use the built-in recovery drive, please be sure the backup image is created by Windows Server Backup or Wbadmin.
- If you use recovery drive created by Qiling Disk Master, the backup also needs to be created by Qiling Disk Master.
Then, sroll down to corresponding methods and folow the steps to use recovery disk (USB, CD/DVD or ISO).
Method 1: Restore Windows Server 2012 with Built-in Recovery Drive
Step 1. To restore Windows Server 2012 from a backup, follow these steps:
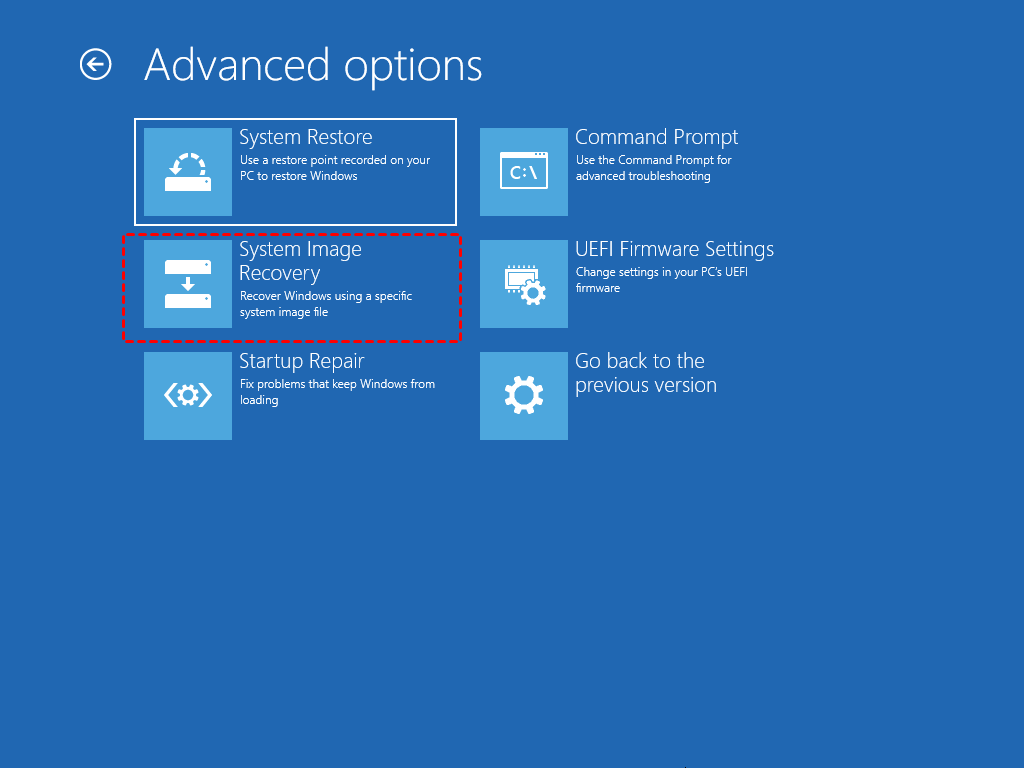
Step 2. Set boot priority for installation disc or recovery USB and make Windows server 2012 boot to system recovery options.
Step 3. To restore Windows Server 2012 from a backup, follow these steps:
Step 4. Select the operating system - Windows Server 2012.
Step 5. At the Re-image your computer screen, select the image created by Windows Server Backup. Then, click Next and follow the instructions until the last step.
Notes:
① Before you reinstall Windows Server 2012(R2), it's essential to back up your important files and folders to prevent data loss. Here's a step-by-step guide to help you achieve this:
② If your computer can still boot, you can restore the system state to repair your computer. Here's a step-by-step guide to help you achieve this:
Method 2: Restore Server 2012 from Backup with Qiling Disk Master Repair Disk
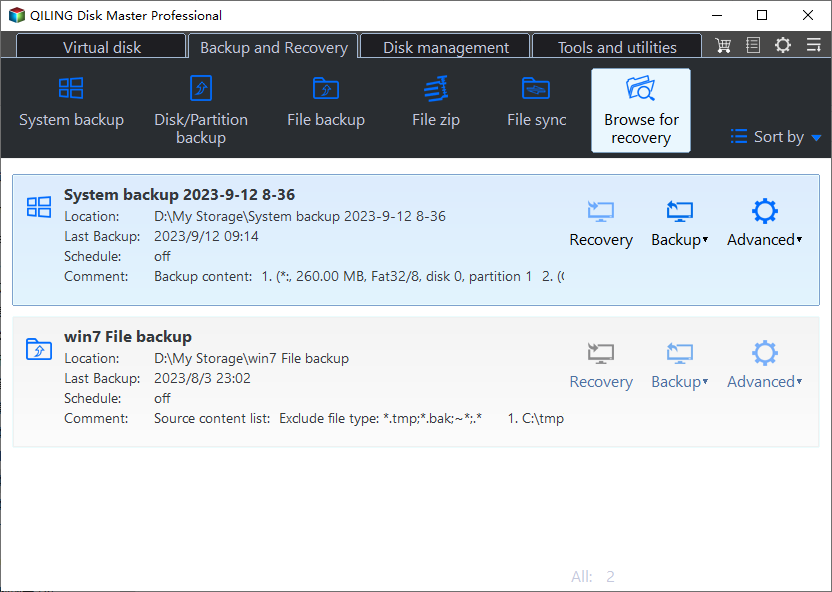
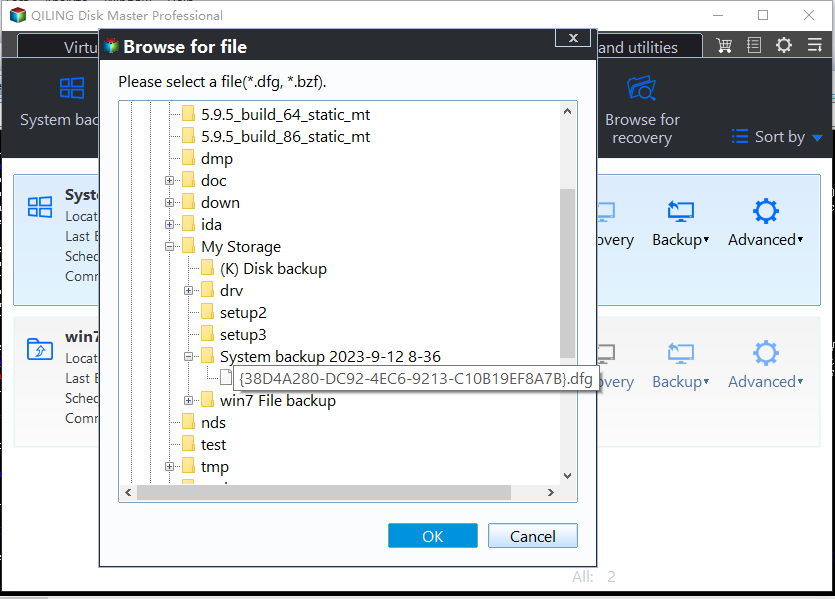
Step 1. Connect the storage media to your computer and be sure it can be detected. Boot your computer from Windows Server 2012 recovery disk, and click Restore and Select Image File to find the backup image.
Step 2. To restore the system state using a Windows Server 2012 recovery disk, follow these steps:
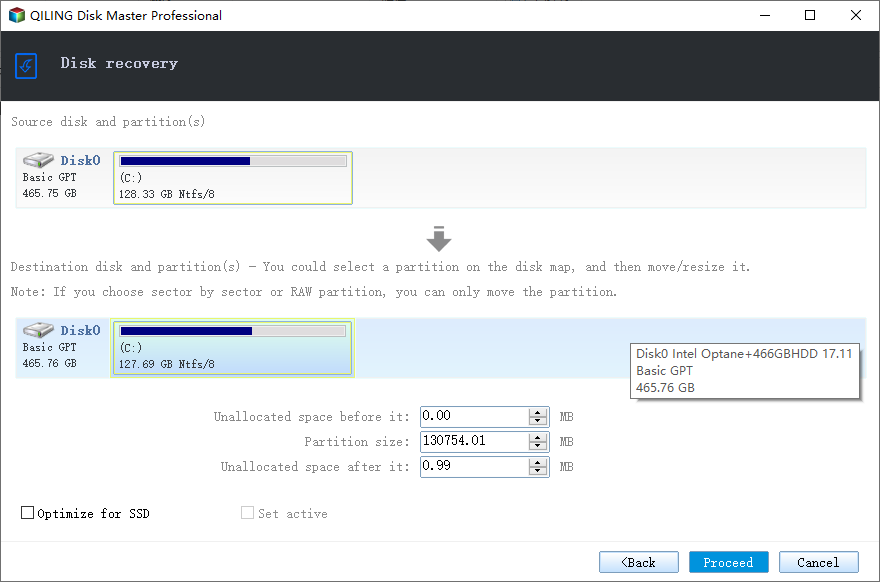
Step 3. To restore a system image using a Windows Server 2012 recovery disk, follow these steps:
Notes:
① Qiling Disk Master Server only restore system image or disk image created by Qiling Backuper. Please don't use this software to restore system image created by Windows Server Backup.
② Are you looking for a streamlined way to boot computers over a network and restore system images to multiple machines? Look no further than Qiling Disk Master Technician Plus. This powerful tool offers the easiest methods for achieving these tasks, making it an ideal solution for IT professionals and system administrators.
Conclusion
A recovery disk for Windows Server 2012 and its successors is a crucial tool for system administrators and IT professionals. In the event of a system failure or boot issues, a recovery disk can be used to troubleshoot or repair the computer. Among the various methods, restoring from a backup is the most effective way to get your computer up and running quickly.
In addition, this software is still a Windows Server backup software to help users protect their server by its complete backup solutions, including system backup, disk backup, partition backup, file backup, daily/weekly/monthly scheduled backukp, ncremental/differential backup, event triggers, USB plug in, etc. Please download the free trial version to enjoy these features right now.incremental/differential backup, event triggers, USB plug in, etc. Please download the free trial version to enjoy these features right now.
Related Articles
- How to Repair Windows Server 2008 (R2)/2012 (R2)/2016 Using Command Prompt
You will learn x ways to repair Windows Server 2008 R2 using command prompt and get your computer back normally. Also works for server 2012 R2/2016 R2/2019/2022. - Create Windows Server 2012 Restore Point with 2 Alternative Ways
A restore point allows you to restore system to the previous state. This article will show you how to create Windows Server 2012 restore point with two ways. - How to Perform Windows Server 2012 System Restore Using Command Line
If you don't know how to perform Windows Server 2012 system restore command line, please read on and learn 2 practical methods as well as from easy graphics. - 3 Useful Methods to Restore Windows Server 2008 R2 to Previous Date
How to restore Windows Server 2008 R2 to previous date? If you are looking for a way to do it, pleas continue to see below and this article will introduce you to 3 effective methods. - Easiest |Windows Server 2012/2008 Backup Restore to Different Computer
Looking for a way to make Windows Server Backup restore to a different computer that may be with different hardware configurations in Server 2012/2008? You can learn the detail steps from this page.

