How to Perform Windows Server Backup Restore (Stepwise Guide)
- System Restore in Windows Server
- How to Perform Windows Server Restore from Backup
- Backup and Restore Windows Servers with Powerful Software
System Restore in Windows Server
If anything unexpected happens, you can restore Windows Server 2008/2012/2016/2019/2022 to an earlier date by following a specific process. For system state, which contains settings and boot files, you can typically restore it within Windows. However, for a complete restore from Windows Server Backup, you need to perform the recovery in the Windows Recovery Environment (WinRE).
In severe cases where you're unable to access the Windows Recovery Environment (WinRE) from within Windows, you can use a Windows Server installation disc or recovery disk to boot the machine into the recovery environment. Before proceeding with the full server restoration, ensure that the hard drive you're restoring to has the same or larger capacity than the disk being backed up, as insufficient disk space may cause the backup to fail.
This guide provides a step-by-step process for restoring a Windows Server backup. If you're looking to restore the backup to a different or new computer, please refer to the linked articles for specific instructions on that process.
- Windows Server Backup Restore to Different Computer >>
- Restore Windows Server Backup to Virtual Machine >>
- Windows Server Backup Bare Metal Recovery >>
How to Perform Windows Server Restore from Backup
While the specific steps for Windows Server backup and restore may differ slightly depending on the version of Windows Server you're using, the overall process can be summarized as follows:
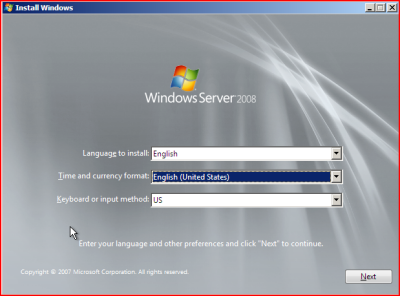
Step 1. To initiate the Windows Server backup and restore process, you may need to boot the server into the Windows Recovery Environment (WinRE) using the installation disc, if required. Once in WinRE, you can select the appropriate settings and proceed by clicking "Next".
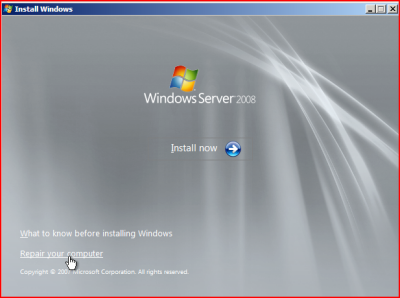
Step 2. In the subsequent window, click on the option to "Repair your computer", followed by "Troubleshooting", and then select "System Recovery Options" to proceed with the Windows Server recovery process.
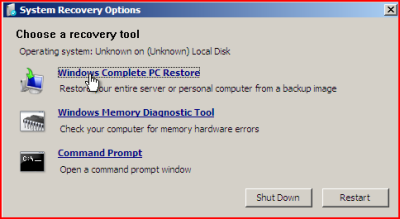
Step 3. To initiate the recovery process, select the option for "Windows Complete PC Restore", which will launch the Windows Recovery Environment. In Server 2012 and later versions, this option is displayed as "System Image Recovery".
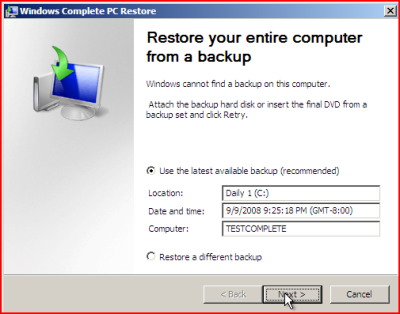
Step 4. The program will now scan your server for image backups. By default, it will select the latest available backup. If you prefer to choose a different backup version, you can select the "Restore a different backup" option.
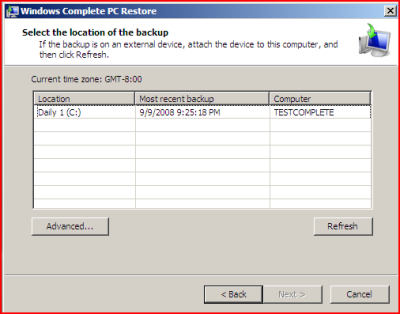
Step 5. Ensure the storage device containing the image backup is properly connected to the server to be restored. If the backup is stored on a network shared folder, you may need to manually specify the backup location path. Locate the desired backup version and click "Next" to proceed.
Step 6. Once you have selected the desired backup version, a confirmation screen will appear. Click "Finish" to initiate the restoration process.
The server will then begin the recovery process. This may take a significant amount of time if the image backup is large. Once complete, the server will reboot and load the system.
If the server's hard disk to be recovered is less than 160GB, the server recovery will fail, resulting in an error message stating that the server restore could not be completed. Furthermore, other unknown issues may also cause the system recovery to fail.
If you're not happy with Windows Server Backup or encounter issues with restoring from it, consider using server backup software as a convenient alternative to safeguard your server.
Backup and Restore Windows Servers with Powerful Software
Qiling Disk Master Server is a backup and restore tool designed for Windows Server 2008/2012/2016/2019/2022, offering improved performance compared to Windows Server Backup for tasks such as Windows Server backup and restore.
- Qiling Disk Master Server supports a range of backup types, including system state, disk/partition, and file/folder backups.
- Qiling Disk Master Server allows users to save image backups to a variety of storage devices, including NTFS/FAT32 drives, NAS devices, and CD/DVD media.
- Qiling Disk Master Server offers advanced backup capabilities, including scheduled backups, incremental backups, and differential backups. Users can choose from five schedule modes: Daily, Weekly, Monthly, Event triggers, and USB plug-in, allowing them to tailor their backup routine to their specific needs.
- Qiling Disk Master Server also features an automatic backup deletion function, which helps to free up storage space by removing old backups. This ensures that your backup storage remains organized and efficient.
- It brings you offline system restore and dissimilar hardware restore.
To recover your server when it becomes unbootable, it's essential to create a full backup of your server and a bootable rescue media beforehand. This will enable you to restore your server and get back up and running quickly.
To restore Windows Server:
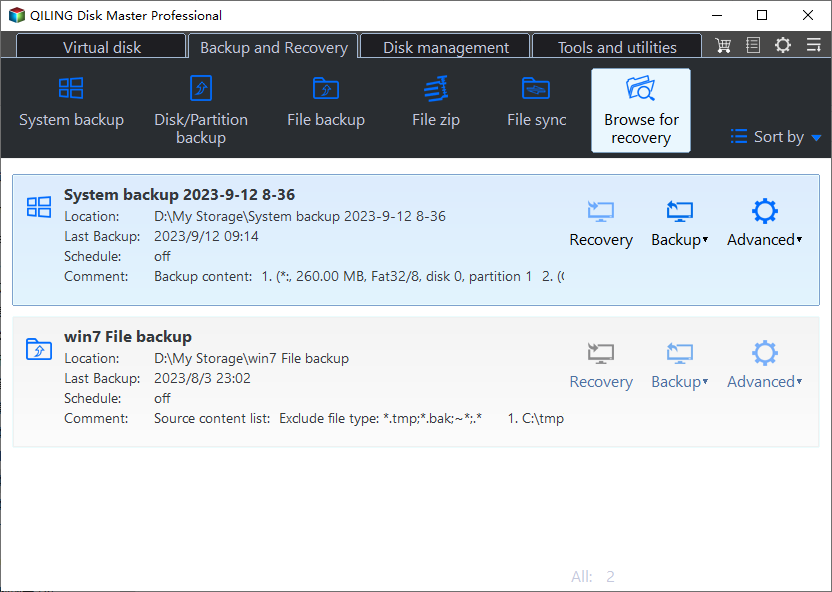
Step 1. If your Windows Server fails to load, open Qiling Disk Master or boot from the bootable media created by Qiling Disk Master. In the main interface, click the "Restore" option and then select "Select Task" to proceed with the recovery process.
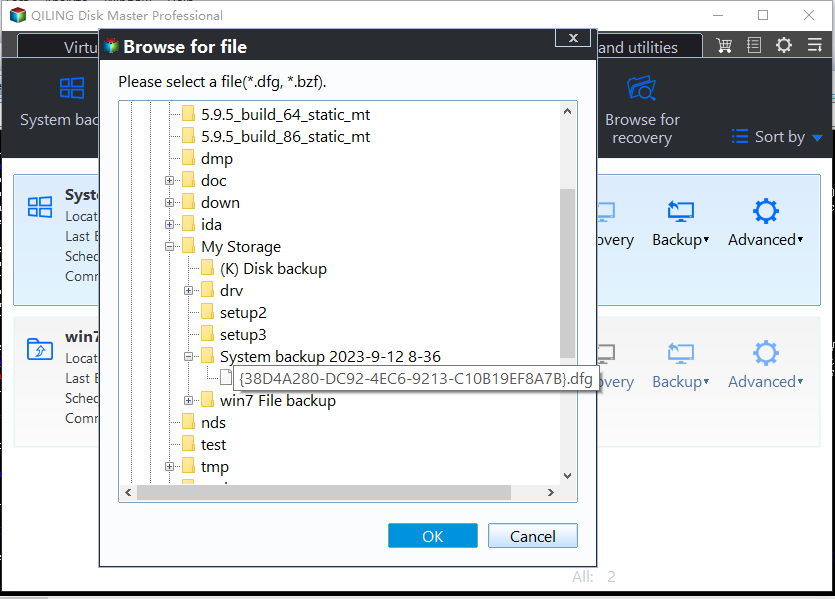
Step 2. After selecting the task, you will see a list of available backup versions. If the desired backup is not shown, you can click "Select Image File" to manually locate and select the image backup file.
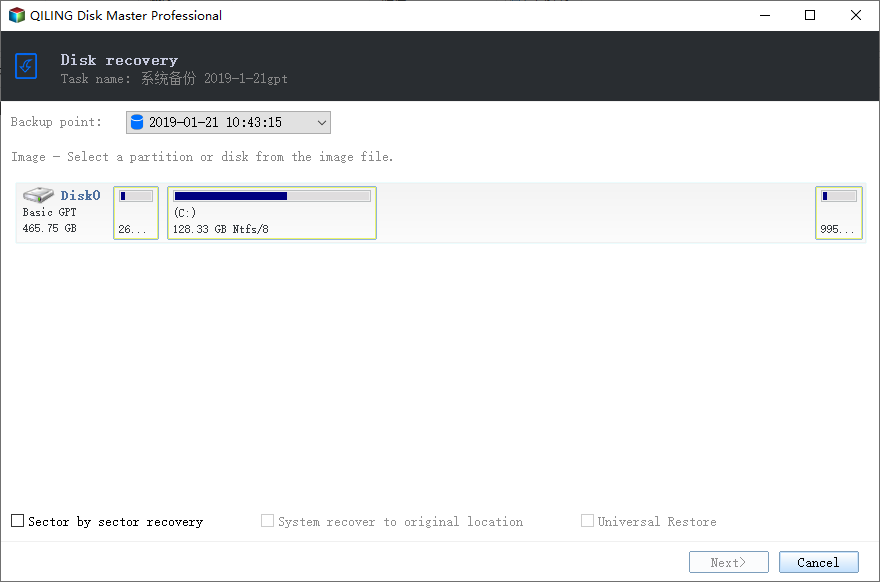
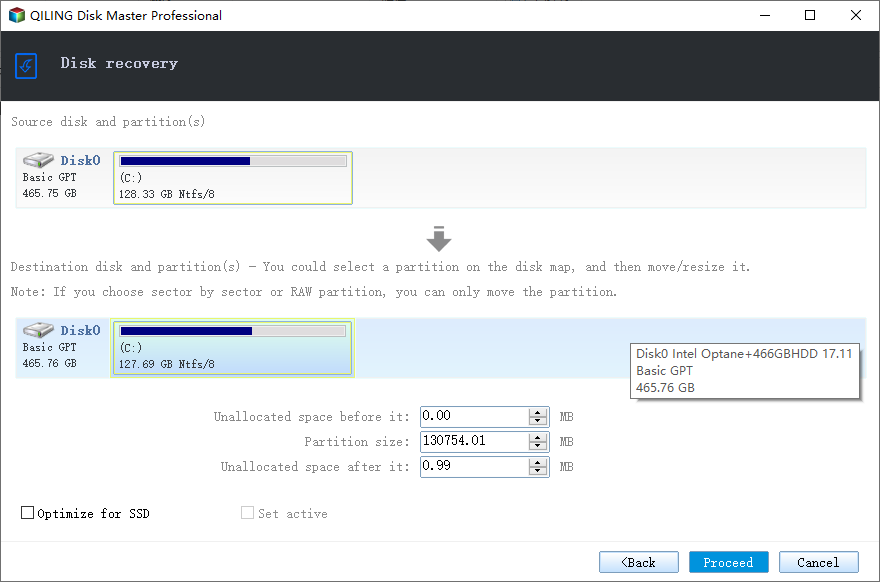
Step 3. Once the backup file is selected, click "Restore this system backup" and then "Next" to proceed.
Step 4. After confirming the operation, click "Proceed" to initiate the restoration process.
Tip: To restore a computer with different hardware, select the "Universal Restore" option to ensure secure boot functionality after the restoration process is complete.
Conclusion
Restoring a Windows Server backup is a straightforward process. However, if you're looking for a more convenient and flexible backup solution than the built-in utility, Qiling Disk Master Server is a viable alternative. This software offers a range of advanced features, including the ability to create multiple scheduled backup tasks, and the capability to restore backups to different hardware, making it a more powerful tool than the standard Windows Server Backup utility.
If you're looking to clone your server for hard drive replacement, Qiling Disk Master is the tool for the job. Its Disk Clone feature makes it easy to create an exact duplicate of your server, allowing you to swap out your old hard drive with a new one without losing any data or settings. Try it out now and discover the benefits for yourself!
For companies that need to protect an unlimited number of PCs and servers, Qiling Disk Master Technician Plus is a great option. This version offers unlimited billable technical services, allowing you to provide support to clients without worrying about usage limits. Additionally, it enables you to create a portable version of your software by copying the installation directory, giving you even more flexibility and control. Try it out now and discover the benefits for yourself!
Related Articles
- Fix System Image Restore Fails Because of EFI/BIOS
How to solve the problem that system image restore fails because of EFI/BIOS? Qiling Disk Master can restore system to a computer that uses different firmware. - Why and How to Restore Windows Server 2008 R2 to Previous Date?
How to restore Windows Server 2008 R2 to previous date? If you are looking for a way to do it, pleas continue to see below and this article will introduce you to 3 effective methods. - Alternative Way to Create Restore Point in Windows Server 2008 (R2)
If you are looking for a quick way to capture a snapshot of your computer, please continue to read this article and learn 2 effective ways to create restore point in Windows Server 2008 R2. - How to Backup Outlook PST Files [2022 Complete Tutorial]
Do you know what is Outlook PST file and how to back up it? Read this complete 2022 tutorial. We'll explain the definition of Outlook, and show you three methods to backup Outlook PST files step-by-step with ease.
