How to Schedule Windows Server Backup Once a Week
Need to schedule Windows Server Backup once a week
Windows Server Backup (WSB), a backup solution for Server users, was first introduced in Windows Server 2008. It replaced the NTbackup feature in earlier Server operating systems. By using this built-in tool, administrators can not only backup various data, but also configure a scheduled backup.
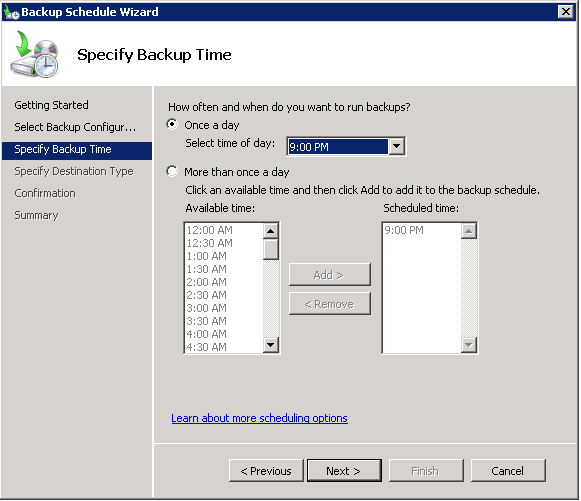
However, you may find that the scheduling options are limited. You can either set daily backups, or more frequent backups, but not less frequent backups, like weekly scheduled backups. You must disappoint with this, as the data is already protected by a Database Availability Group and your backup disk may be quickly filled with frequent backups. Thus, you would rather reduce backups to run weekly.
How to perform Windows Server Backup weekly
Fortunately, Task Scheduler comes to the rescue. This is a management application provided in Windows operating system that enables users to schedule any task to run any time you like. Let's learn how to create Windows Server 2012 backup schedule weekly. You also need to use Windows Server 2012 Wbadmin in the process of operation.
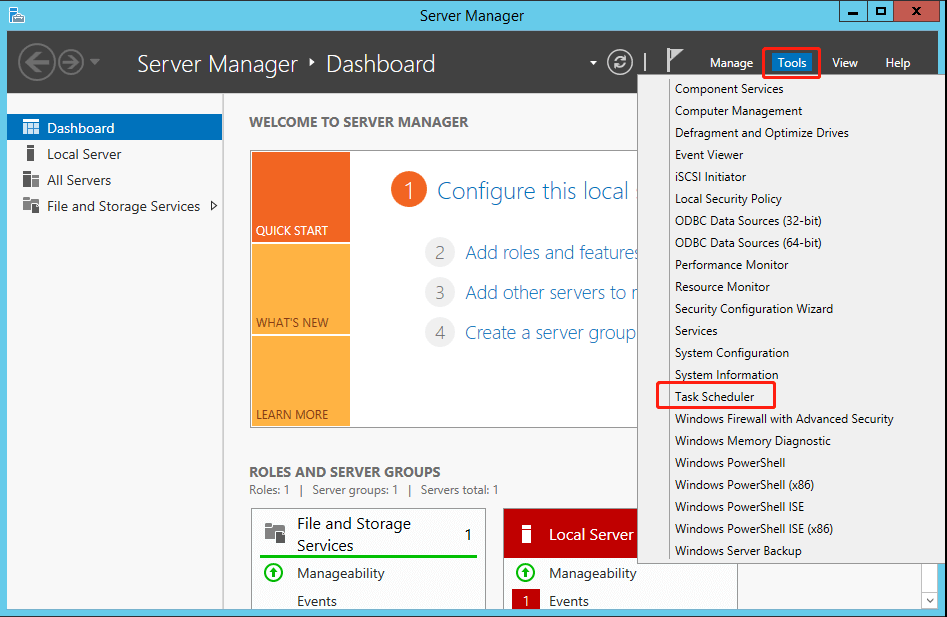
- Launch Server Manager by searching for it in the Start menu. Click Task Scheduler under Tools tab.
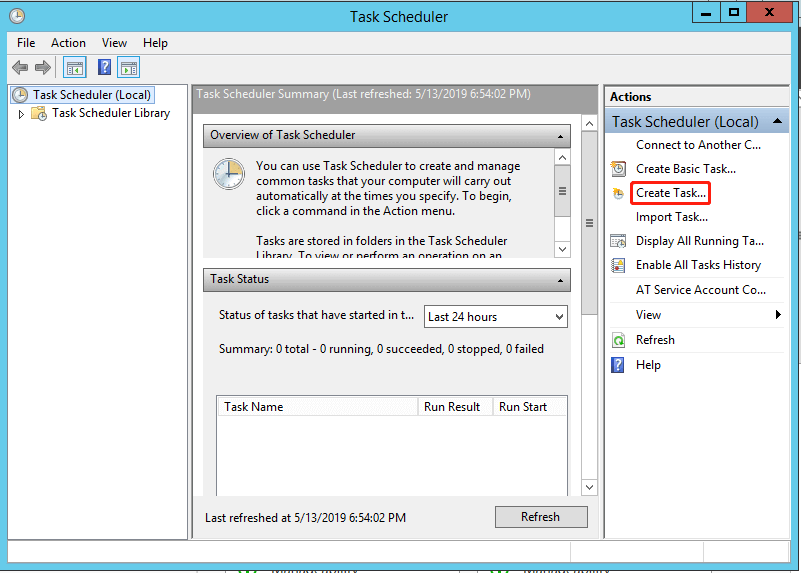
- Click Create Task in the Actions pane.
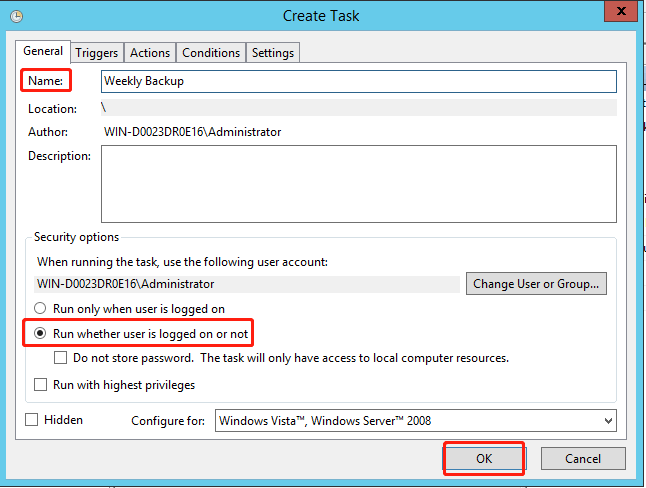
- Give the task a name. Configure it to run whether the user is logged on or not. Then click OK.
- Choose New under the Triggers tab.
- Select On a schedule from the pull-down menu. Choose Weekly and specify the day in a week to run the backup. Then click OK.

- Choose New under Actions tab.
- Type wbadmin in the Program/script box. Put the following wbadmin command in the pane next to Add arguments (optional). Then click OK.
▶ Proceed –backupTarget:H: -include:C: -allCritical –quiet
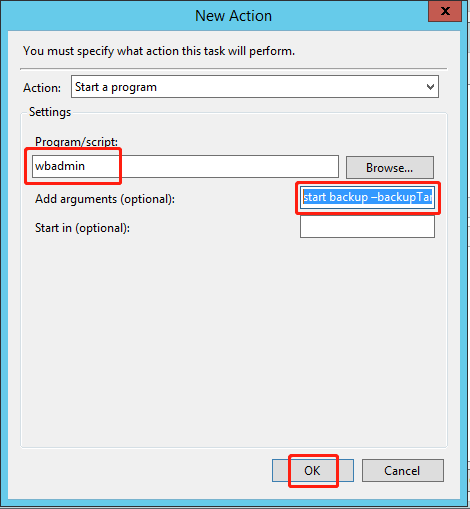
- Notes: The parameters you will use in the backup process.
- Proceed: tells wbadmin.exe to start a backup.
- -backupTarget: the target volume to store the backups.
- -include: volume(s) included in the backup job. To backup more than one volume, separate them with a comma.
- -allCritical: set the program to also include any other volumes or data that are required for a full server restore.
- -quiet: runs the command silently with no visual interaction.
- Click OK. You will be prompted for the password for the user account. Then click OK to schedule backup Windows Server once a week and you will see this task in the Task Schedulers.
As you see, these steps might look a little complex, especially for some non-technical users. And this task may not work if you specify any parameters wrong in the wbadmin command. Note that only the partitions formatted with NTFS can be included in the backup, and critical volumes cannot be used as the target location.
In addition, you can't share incremental and differential backups over the internet, if you choose a network as the target location. This is because multiple versions on the network share are not supported.
Thus, if you want to ensure that all the scheduled tasks always work or break these limitations in the Task Scheduler, you'd better turn to a professional server backup software.
Easier way to run Windows Server Backup schedule weekly
Qiling Disk Master Server
Qiling Disk Master Server is a great server backup software to help you create Windows Server 2003/2008/2012/2016/2019/2022 etc. Backup weekly instead of daily as well as schedule multiple backups to network share with Incremental or differential backup. Other scheduling options like daily, monthly, event triggers, USB plug in are also supported.
And there is no limit to the file system and backup target location, you can backup any partition formatted with NTFS, FAT32/16, EXT2/3/4, etc. and save it to to network, internal/external hard drives, cloud drives, and NAS devices, etc. In addition, this program comes with an easy-to-use interface that makes your operations effortless.
Take system backup as an example, you can follow the steps below to create Windows Server Backup once a week. Please download this software first.
Step 1. Open this program, click Backup and then choose System Backup.
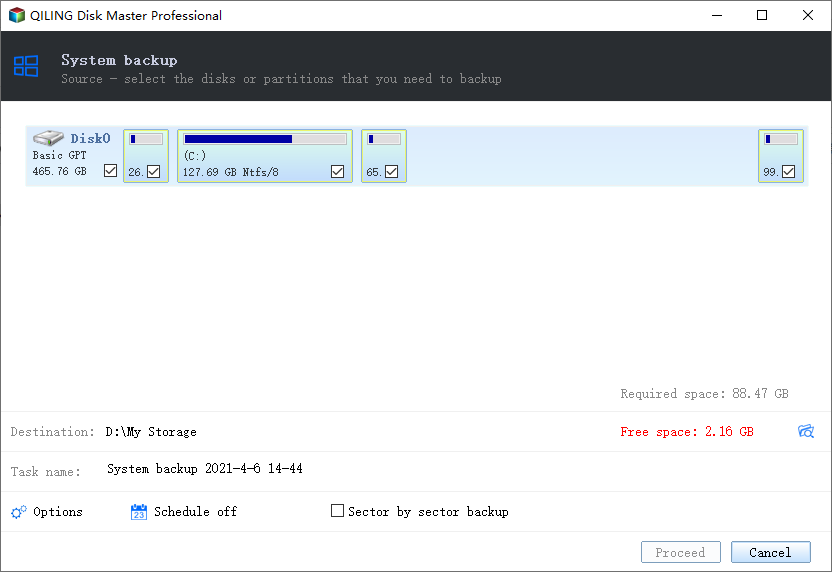
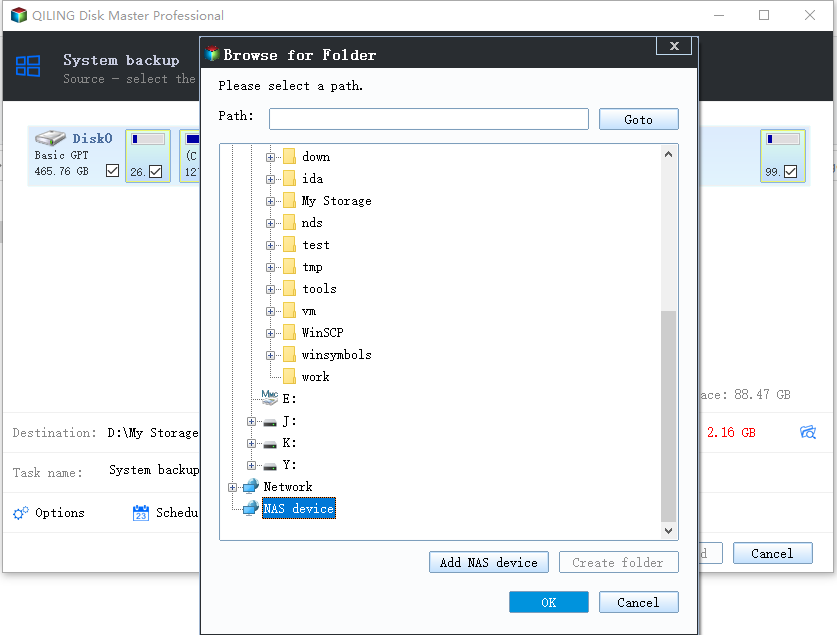
Step 2. Give this backup task a name. The required system partitions are selected by default. Click the folder-shaped button to select a destination path (here is E:\).
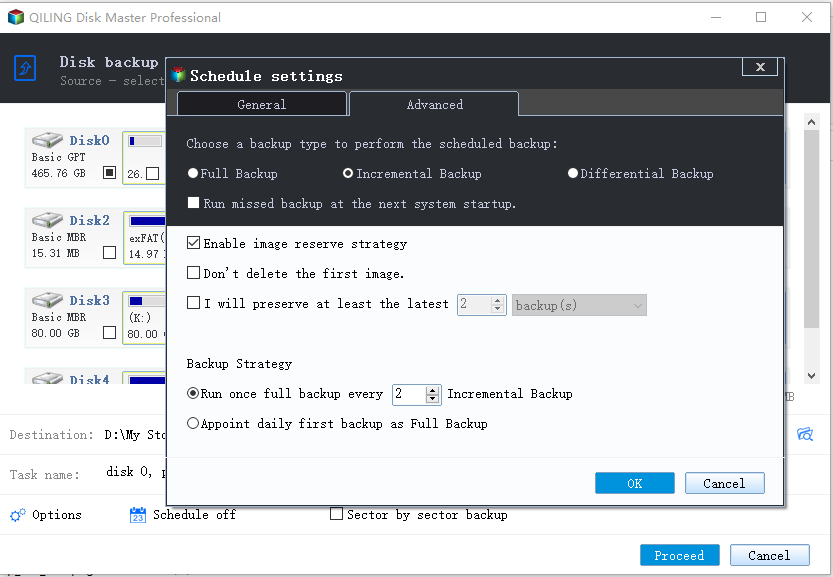
Step 3. Click Schedule Backup -> Enable Schedule Backup and then choose Weekly from the drop-down menu. You can also specify the day and time to schedule backup.

Step 4. Click Scheme and select Full/Incremental/Differential Backup under the Backup Method tab. Then click Enable Automatic Backups Cleanup and select a way to delete old backup, you have three options, By quantity, By time, By daily/weekly/monthly. Learn about backup scheme here.
Step 5. Review your operation and then click Proceed to schedule Windows Server backup once a week.
Tips✍:
- Options: click it to comment this task, enable Windows Server backup encryption, set email notification, pre/post command, etc.
- You can restore system by visiting Home > the system backup task and clicking Restore.
Summary
When you intend to take backups at a lesser frequency, you can use Task Scheduler to run Windows Server Backup once a week. However, some certain restrictions must be followed. And the wbadmin command line is not easy for many users to learn and use. If there is any parameter goes wrong, the scheduled task will not work.
To make it easily, you can create Windows Server backup schedule weekly with a professional server backup software - Qiling Disk Master Server. It still allows you to perform incremental/differential backup to network share. With its help, you can create a Windows Server recovery disk to help you restore your system in the event of system failure.
Related Articles
- Set Windows Server 2012 Backup Schedule Weekly Step by Step
How to create Windows Server 2012 (R2) backup scheduled weekly? There are 4 solutions for you offered in this article to backup Windows Server 2012 (R2) once a week easily. - Windows Server Backup Schedule Less Than Once a Day
Learn the simple trick to use Windows Server Backup to schedule less than once a day backup job. Besides, an easier way to create multiple daily/weekly/monthly backup schedules is also included in this article. - Create Windows Server 2008 R2 Backup Schedule Weekly
Although Windows Server Backup can either schedule a daily backup, or more frequent backup, it's not enough. Read this guide to get two ways to configure Windows Server 2008 backup schedule weekly task. - Cloned SSD Won't Boot? Make Cloned SSD Bootable [5 Ways]
Don't worry if the cloned SSD won't boot on Windows10/8/7. On this page, you'll learn the symptoms of cloned SSD won't boot, reasons of why is SSD not booting, and how to make SSD bootable in 5 powerful ways.