Schedule Windows Server Backup to Remote Shared Folder
About Scheduled backup of Windows Server Backup
Since Windows Server 2008, Microsoft has replaced NTBackup with Windows Server Backup that provides block level backup instead of file level. Windows Server Backup has many advantages over NTBackup. However, in some aspects, Windows Server Backup is not as practical as NTBackup.
- Windows Server Backup, introduced in Windows Server 2008, provides a powerful backup solution for Windows Server operating systems. However, there are some limitations to using Windows Server Backup to schedule backups to a remote shared folder directly.
- When using Windows Server Backup, it's essential to understand how the backup process works, especially when it comes to overwriting previous backups.
- When using Windows Server Backup to back up data to a network share folder, it's essential to understand the risks associated with incomplete backups.
Windows Server Backup can be a reliable tool for backing up data, but it has limitations, especially when it comes to backing up to a network share folder. Fortunately, there is a workaround to overcome these limitations.
Configure a schedule backup to remote share folder
Windows Server Backup is a built-in tool that allows you to schedule backups of your server data to a network location. This feature is useful for ensuring that your data is regularly backed up and can be recovered in case of a disaster.
1. Install and open Windows Server Backup in Server Manager if you have not done it.
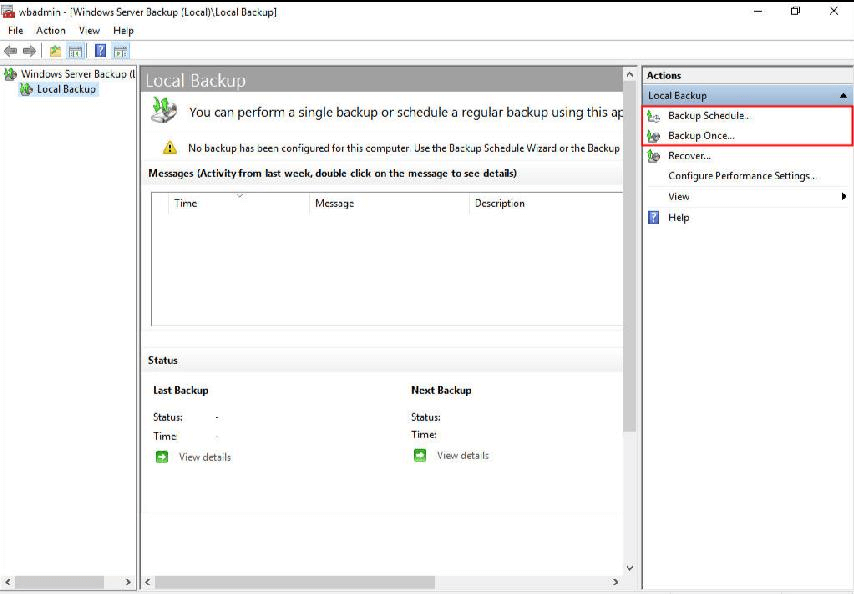
2. In the main interface of Windows Server backup, click "Backup Schedule...".
3. It will pop out the Backup Schedule Wizard window. From there, click on the "Next" button to continue.
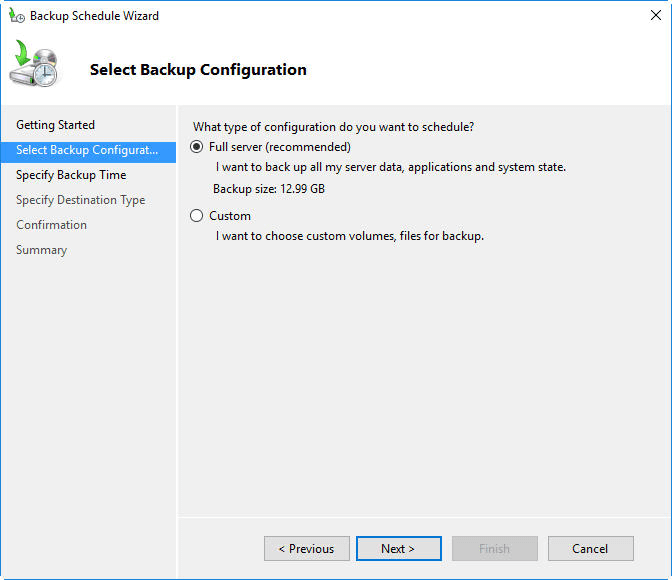
4. At the Select Backup Configuration screen, select "Full server" to backup all data on the server or "Custom" to specify certain files that need backing up.
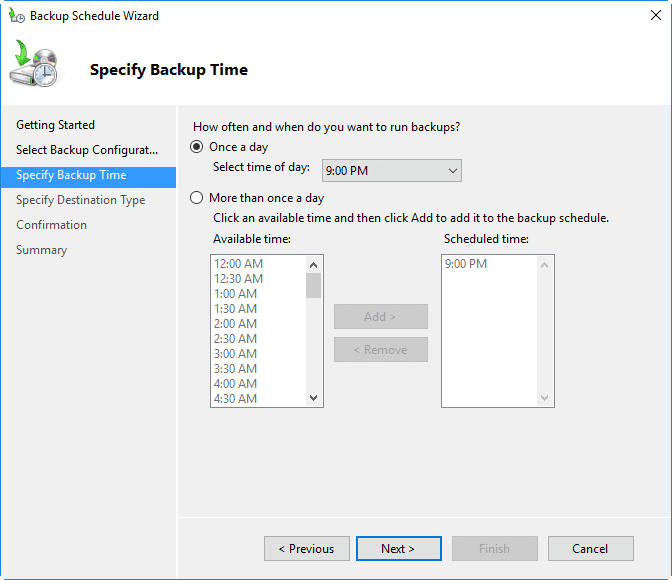
5. At the next screen, decide when you want the backup to run by choosing one or more times in a day and click "Next" to continue.
6. Then check the "Back up to a shared network folder" option and click "Next" in the Specify destination type screen.
7. At the next screen, type the network path where you want to save the backup to.
8. Finally, confirm the scheduled backup and click "Finish" to add this scheduled backup.
As mentioned, Windows Server 2008 is unable to access the remote shared folder, and you will get an error that no disks are available for use a backup destination. To run schedule backup on Windows Server 2008, you can write a WBadmin backup command and use Task Scheduler to run it regularly.
If you want to run an incremental backup to network share location, you can create a virtual hard disk(VHD) using Disk Management on the shared folder. This VHD will be regarded as a local disk that Windows Server Backup can create volume shadow copies, so you can create incremental backup to this VHD without worrying about losing backups.
If you're not satisfied with the VHD workaround or prefer a more straightforward approach, consider using third-party backup software for your networked environment. These solutions can simplify the backup process and provide more features than the built-in Windows Server Backup utility.
Windows Server scheduled backup to network share easily
Instead of relying on workarounds, consider using a dedicated backup software solution like Qiling Disk Master Server to create scheduled backups to a network drive. This approach can simplify the backup process and provide more features than the built-in Windows Server Backup utility.
① Backup types and locations
It offers you System/Disk/Partition/File Backup, which can meet your different needs. You are allowed to backup to any locations that are detected in File Explorer besides network share folder.
② Backup schedule
Qiling Disk Master Server allows you to schedule and configure backup tasks to meet your specific needs. With this feature, you can set backup tasks to run at various intervals, including:
③ Backup scheme
Qiling Disk Master Server offers an automatic old backup cleanup feature that helps prevent the "backup disk is full" issue. This feature allows you to set a retention period for your backups, ensuring that only the most recent backups are stored, and older ones are automatically deleted.
Qiling Disk Master Server offers a range of advanced backup features, including:
To set up a scheduled backup over a network share using Qiling Disk Master, follow these steps:
1. Download and run Qiling Disk Master on your server.
2. In its main interface, choose System Backup under Backup tab.
3. To set up a system restore backup with Qiling Disk Master, follow these steps:
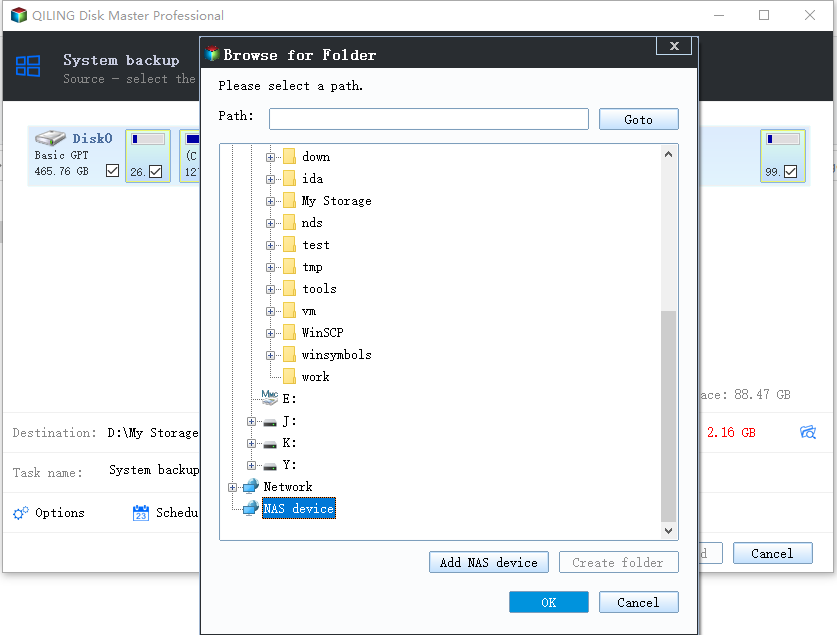
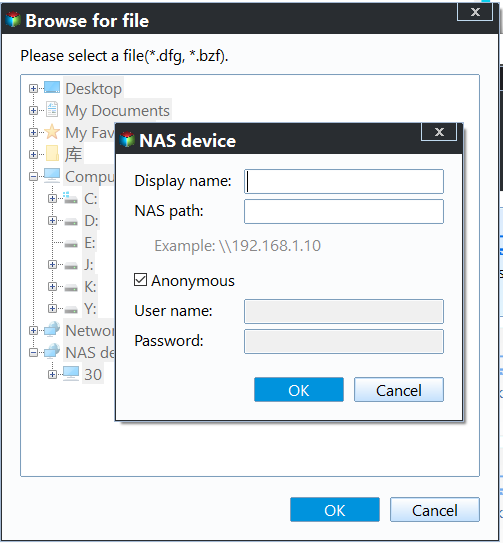
4. In the pop-up window, click Add Share or NAS Devices. Type in the address of the shared folder and fill in other boxes.
5. After specifying the backup target location, click Schedule Backup to choose a specific time to perform the backup.
The incremental backup is set as default. If you want to change, just click Backup Scheme and choose full or differential backup from the drop-down menu of "Backup Method".
6. Confirm the backup job, and click Proceed to add this backup schedule.
After the backup finishes, you can easily locate the image backup in File Explorer. Moreover, you can mount the backup to see what was backed up or restore it. If you do not like the way of Windows Server Backup schedule to remote shared folder, Qiling Disk Master Server is your choice.
Tips: The Qiling Centralized Disk Master is a powerful tool for centralized disk management. It allows you to backup multiple computers over a network on a single management console.
Related Articles
- Create Windows Server Backup Incremental to Network Share with Ease
Want to perform Windows Server Backup incremental to network share? This guide will show you 2 methods to make it. Applied to Windows Server 2003, 2008, 2012, 2016, 2019 and 2022. - Windows Server 2008/2012/2016 Backup: Restore from Network Location
If you have trouble performing Windows Server Backup 2012 restore from network location, please read this article patiently to get the way to restore system sucessfully. - How to Backup Files in Windows Server 2019 Easily? (2 Ways)
Wanna backup files in Windows Server 2019 to prevent data from losing? Both Windows Server Backup 2019 and the powerful backup software - Qiling Disk Master can help you make it. - How to Create a Mirror Image of My Computer on Windows? Best Solutions
The aim of creating a mirror image of my computer is to create a system image to backup everything on the computer, including all the operational data and personal files. There exist several methods to tell you how to create a mirror image of your computer. And this text will introduce two quick and easy ways.
