Copy Only Newer Files: XCopy or Robocopy or Easier Ways (2023)
The need: XCopy copy only new or modified files
Xcopy is a command line utility for copying multiple files or entire directory trees from one directory to another and for copying files across a network. Also, you are allowed to copy only new or changed files with it. And it is used in Windows 7/8/10/11/XP/Vista and Windows Server 2003/2008/2012/2016/2019/2022.
Copying only changed files with XCopy saves much time and disk space, thus many users are willing to only copy updated files. Below is an example from it. In addition, many users use Robocopy to copy only new or modified files as it has more options.
The answer provided is a rewritten version of the original question, with some modifications to make it more concise and clear. The original question was a bit lengthy and had some formatting issues, which were addressed in the rewritten version. The answer provided is a response to the rewritten question, and it provides a clear and concise solution to the problem. – Reddit user
Copy only new or changed files with or without XCopy or Robocopy
To copy only newer files in Windows 10, XCopy or Robocopy is a good choice for high-level users to perform batch operations. And It is able to backup only changed files instead of all files, even without booting into Windows.
But the problem is you need to execute this operation manually every time, which may make you feel tired and time-consuming. And it's not user-friendly to most users for its high requirement. Thus, in this article, except for XCopy or Robocopy, I'll introduce you to two easier ways to copy only new or changed files.
Are you tired of manually copying new or changed files? Look no further! Qiling Disk Master Server is an all-in-one backup software that makes the process a breeze. With its user-friendly interface, you can easily achieve your goal without any technical expertise.
Use XCopy to copy only newer files
Before diving into using XCopy to copy only changed files, it's essential to understand the syntax and parameters involved. This will ensure a smooth and efficient copying process.
The Xcopy command is a powerful tool for copying files and directories. To use it efficiently, you need to understand its syntax and various parameters.
- /S Copies directories and subdirectories, unless they are empty. If you omit/s,xcopyworks within a single directory.
- /YSuppresses prompting to confirm that you want to overwrite an existing destination file.
- /I If in doubt always assume the destination is a folder. e.g. when the destination does not exist.
- /E Copy folders and subfolders, including Empty folders.
- /D:mm-dd-yyyy The Xcopy command is a powerful tool for copying files and directories. To use it efficiently, you need to understand its syntax and various parameters. Here's a breakdown of the Xcopy syntax and parameters to help you copy files and directories with ease.
- The Xcopy command is a powerful tool for copying files and directories. To use it efficiently, you need to understand its syntax and various parameters. Here's a breakdown of the Xcopy syntax and parameters to help you copy files and directories with ease.
- This first option The Xcopy command is a powerful tool for copying files and directories. To use it efficiently, you need to understand its syntax and various parameters. Here's a breakdown of the Xcopy syntax and parameters to help you copy files and directories with ease.
- The second option The Xcopy command is a powerful tool for copying files and directories. To use it efficiently, you need to understand its syntax and various parameters. Here's a breakdown of the Xcopy syntax and parameters to help you copy files and directories with ease.
The Xcopy command is a powerful tool for copying files and directories. To use it efficiently, you need to understand its syntax and various parameters. Here's a step-by-step guide to help you copy files and directories with ease.
Step 1. Type cmd in the search box and select it.
Step 2. To copy only new or changed files using Xcopy, you can use the following commands:
Example 1: Copy only updated files that are not in the destination folder.
- set SourceDir=D:\Source
- set TargetDir=K:\Target
- xcopy %SourceDir% %TargetDir% /s /d
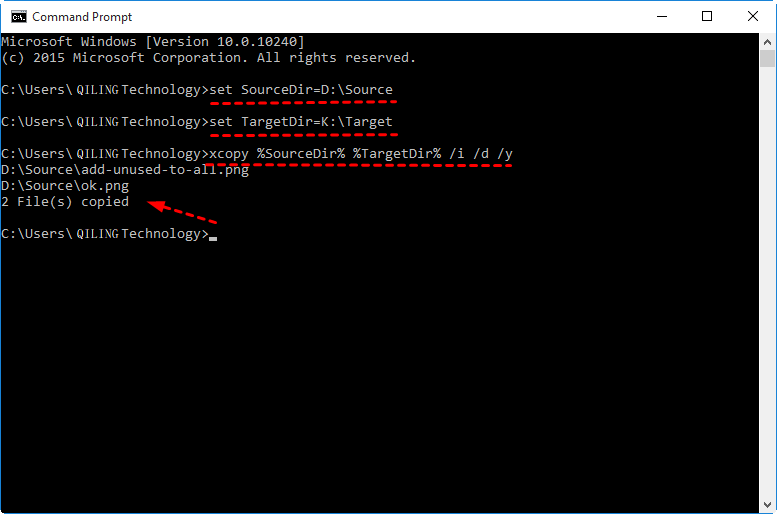
Example 2: Copy only changed files without new directories.
- set SourceDir=D:\Source
- set TargetDir=K:\Target
- xcopy %SourceDir% %TargetDir% /i /d /y
Example 3: Copy changed files already exists in the destination path.
- set SourceDir=D:\Source
- set TargetDir=K:\Target
- xcopy %SourceDir% %TargetDir% /s /d /u
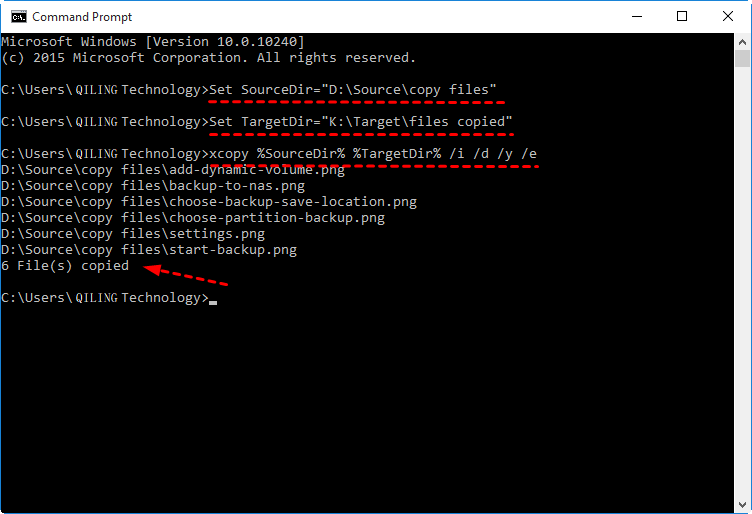
Example 4: Copy everything including the new directory.
- Set SourceDir="D:\Source\copy files"
- Set TargetDir="K:\Target\files copied"
- xcopy %SourceDir% %TargetDir% /i /d /y /e
Step 3. Type exit and hit Enter to leave this window.
Use Robocopy to copy only new files
Robocopy is a powerful command-line utility that can help you copy only new files, and it's considered a good alternative to Xcopy. Before you use it, it's essential to learn the syntax and options you may use.
robocopy [source][destination][[file][ ...]] [options]
- /XO: Robocopy is a powerful command-line utility that can help you copy only new files, and is often used in conjunction with the `/maxage` parameter to exclude older files.
- /maxage: n: The `/maxage` parameter in Robocopy is used to exclude files that are older than a specified date or time.
- /XC: Exlude changed files.
- /XN: Exlude newer files.
- /XN: Exlude newer files.
- /XD dirs [dirs]: Exlude directories matching given names and paths.
- /S: Copy subdirectories, excluding empty ones
- /Z: Restartable mode
- /fft: Make the modify time comparison more tolerant(2 seconds granularity)
- /Mir: Mirrora directory tree
- To get more information on Robocopy options, you can type `robocopy /?` in the command prompt. This will display a list of all available options and their descriptions.
- To copy only files that have changed since a certain date with Robocopy, you can use the `/maxage:n` option, which is also available with the `/XO` option.
- If you want to copy only changed files with Robocopy and exclude empty folders, you can use the `/S` option in combination with `/maxage:n` or `/XO/maxage:n`.
To copy only new files using Robocopy, follow these steps:
Step 1. Open the command prompt with administrator priority.
Step 2. To copy only new or changed files using Robocopy, follow these steps:
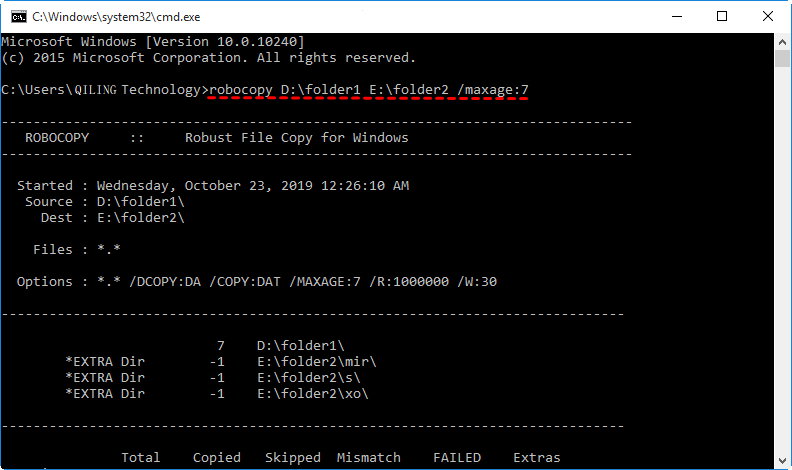
Example 1: Copy only newer or added files.
- robocopy D:\folder1 E:\folder2 / maxage:7
or
- robocopy D:\folder1 E:\folder2 /XO /maxage:7
Example 1: Copy new files while excluding an empty folder.
- robocopy D:\folder1 E:\folder2 /s /maxage:7
or
- robocopy D:\folder1 E:\folder2 /XO /s /maxage:7
Easier Ways to copy only newer files in Windows 10
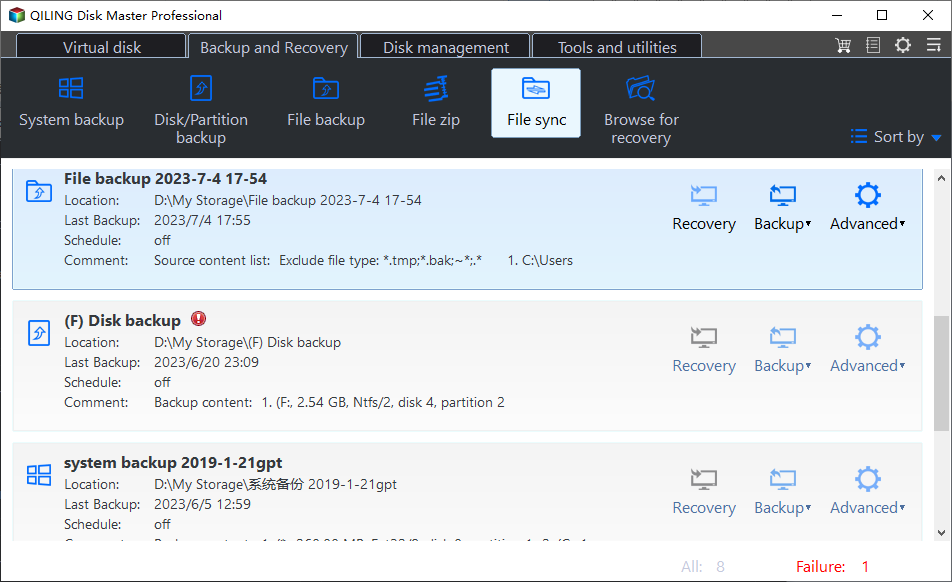
Here you will use professional file sync or backup software - Qiling Disk Master Server to copy only newer files automatically and easily. And It provides you with 2 easier ways to complete this task in Windows 7/8/8.1/10/11/XP/Vista, namely using Basic Sync or File Backup features.
Basic Sync:
🥇best for file accessibility - It allows you to keep files just as in the original folder, and you can easily access or use them after syncing.
- Sync deleted files: To configure Basic Sync to sync deleted files from the source folder to the destination folder, follow these steps:
- Multiple sync modes: basic sync, real-time sync, mirror sync, and two-way sync.
- Schedule sync: daily, weekly, monthly, event trigger, and USB plug in.
File Backup:
👍best for data security - It will compress all the files into an image file and you need to restore files from backup before using it. This greatly reduces data loss due to any unwanted access and the risk of files being corrupted or modified.
- Diversified choices: When it comes to backing up your data, you have the flexibility to choose the scope of the backup. This means you can decide whether to backup individual files or an entire folder.
- Flexible options: When it comes to backing up images, you have the option to compress or split them to make them more manageable. This feature is useful for several reasons:
- Schedule backup: daily, weekly, monthly, event trigger, and USB plug in.
- Incremental backup: When it comes to backing up your data, it's essential to have a smart backup system in place. One of the key features of a well-designed backup system is the ability to automatically detect and backup only new or changed files.
Sync only new or modified files just as it was
Syncing only changed files is a smart way to manage your data. The Sync feature allows you to sync only the files that have been modified since the last sync. This approach is more efficient, faster, and requires less storage space.
| Basic Sync | Real-Time Sync | Mirror Sync | Two-Way Sync | |
| Sync newly added or changed files. | Yes | Yes | Yes | Yes |
| Sync deleted files from source folder to destination folder automatically. | No | Yes | Yes | Yes |
| Sync changed files in real time. | No | Yes | No | No |
| Deleted newly added files or undo changes made in the destination folder. | No | No | Yes | No |
| Sync changes from source folder to destination folder, and vice versa. | No | No | No | Yes |
| Support schedule sync: daily, weekly, monthly, event triggers, USB plug in. | Yes | No | Yes | Yes |
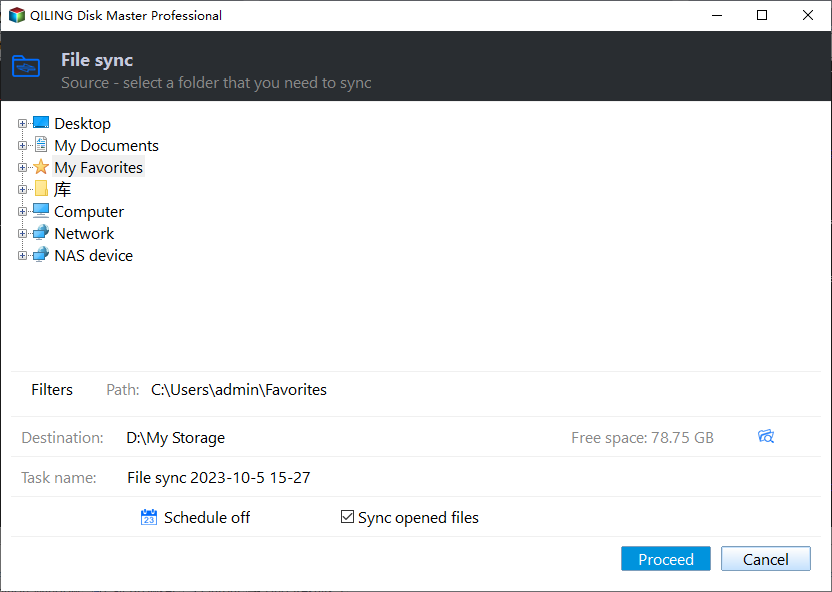
To sync only newer files with Basic Sync, follow these steps:
Step 1. Download Qiling Disk Master Professional, install and launch it. Then, prepare an external hard drive or other storage as sync destination and connect it to your computer.
To continuously protect your data, you can upgrade the free trial version of Qiling Disk Master Professional. Here's how:
Step 2. Go to the Sync tab and select Basic Sync.
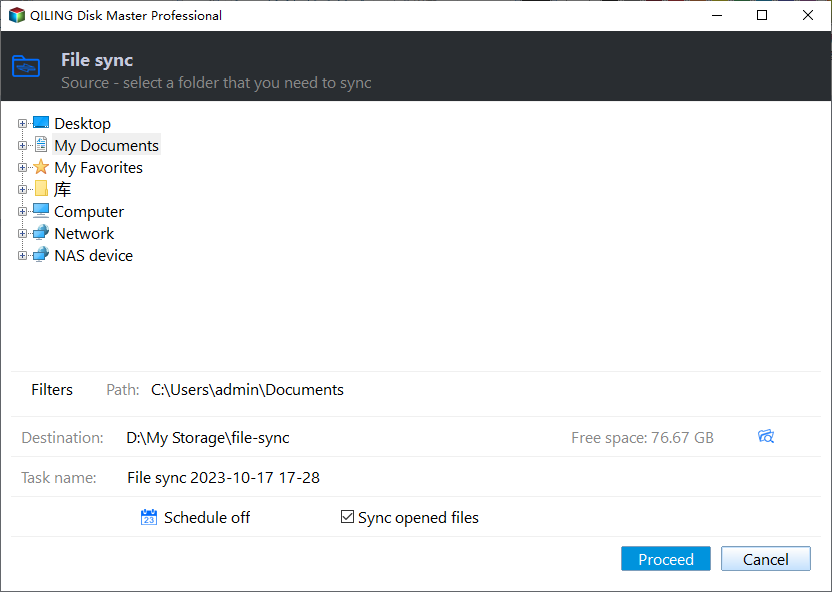
Step 3. Click Folder to select folder containing all the files you want to sync. Then, select the sync destination by clicking the folder-shaped button below.
Step 4. Click Schedule and Enable Schedule Sync, then select Daily, Weekly, or Monthly. To set the sync task more precisely, you can specify the backup time or intervals in the following.

- Event triggers: It helps when you want to sync files at system shutdown, system startup, user logon or user logoff.
- USB plug in: It makes syncing files between computer and flash driveflexibly, you just need to connect the USB drive when you want to sync changed files.
- Wake the computer to run scheduled tasks: Qiling Disk Master Professional offers a convenient feature that allows you to wake up your computer 2 minutes before the scheduled task start, eliminating the need for human intervention.
- Reconfigure the operation after the scheduled tasks: Qiling Disk Master Professional offers a range of options for managing your computer's power state after syncing. You can choose to shut down, restart, or put your computer into sleep or hibernate mode, depending on your needs and preferences.
- Sync the deletions in source directory to destination: Qiling Disk Master Professional offers a range of options for managing deleted files. You can choose to sync deleted files, depending on your needs and preferences.
Step 5. Qiling Disk Master Professional offers a range of options for syncing files. You can choose to sync all files, or only changed files, depending on your needs and preferences.
Safer way to copy only new or modified files
Except for Sync feature, you still can complete this task with the help of File Backup. It comes along with daily/weekly/monthly schedule backup as well as incremental or differential backup. By using it, you can still set precise backup time and intervals.
They are based on full backup, but not exactly the same. For differences, you can see from the comparison chart below.
| Full Backup | Differential Backup | Incremental Backup | |
| Backup Speed | Slowest | Moderate | Fastest |
| Storage Space | Most | Moderate | Least |
| Restoration Speed | Fastest | Moderate | Slowest |
If you want to backup files during off-peak hours, you can use the feature to wake your computer from sleep or hibernate mode before the scheduled tasks start. This way, you can ensure that your computer is running and ready to perform the backup tasks during the scheduled time.
To avoid the backup disk full issue, you can use the Backup Scheme feature to delete old backup images regularly. This way, you can ensure that your backup disk is not full and that you have enough space to store new backup images.
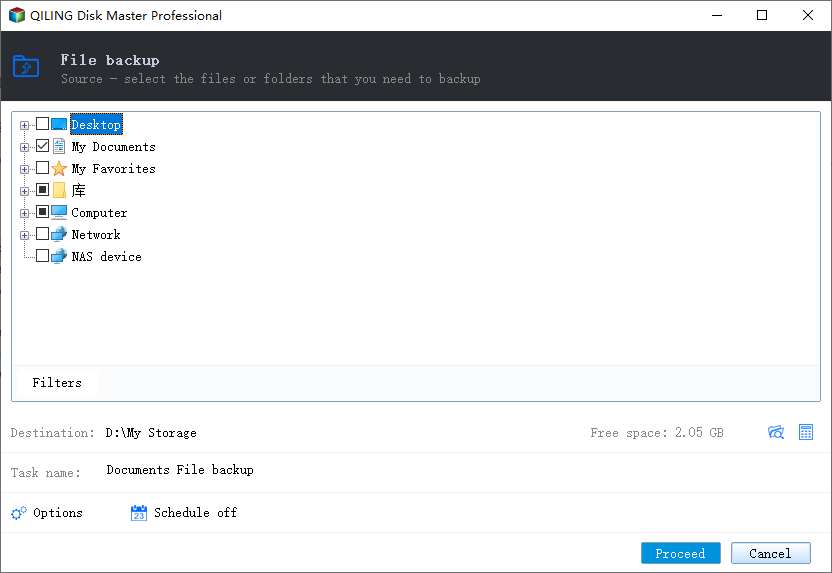
Step 1. Go to the Backup tab and select File Backup.
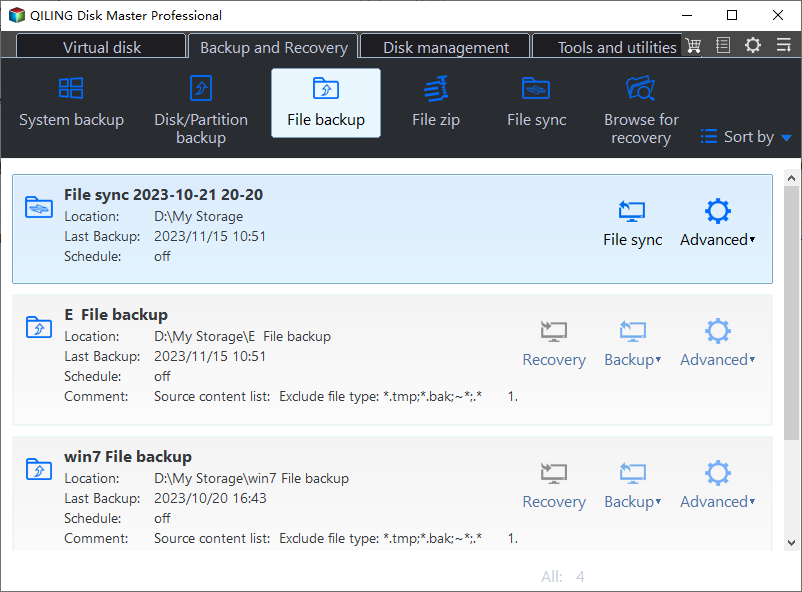
Step 2. Click Files or Folders to select the files or folders you want to backup and then click OK. Then, select the prepared storage device to store your image.
Step 3(Required). To schedule backups, follow these steps:

- USB plug in: To backup your files flexibly and take them everywhere, you can create a schedule backup with "USB plug in" feature. It does not require any human interference.
- Normal or High compression level: The feature allows you to compress image files to a smaller size, saving disk space. However, it's worth noting that high compression levels can increase backup time.
- Intelligent sector backup: The feature only backs up the used sectors of the file system, resulting in a more efficient backup process. This approach saves time and resources by only copying the necessary data, making it ideal for large or complex file systems.
- Backup Scheme: It offers you 3 options to delete backup files, including By quantity, By time, and By daily/weekly/monthly.
Step 4. After selecting the desired settings, confirm them to ensure accuracy. Once confirmed, click the **Proceed** button to initiate the backup process. This button will trigger the backup of your files immediately, followed by subsequent backups that only capture changed files.
Many cloud drives offer limited free storage, which can be a challenge for users who need to sync or back up a large number of files or folders. However, there is an alternative solution that can provide more storage space and flexibility: Cloud Backup.
Bonus tip
Syncing and backing up files can be a daunting task, especially for those who are not tech-savvy. However, with the right tools, it can be a breeze. Qiling Disk Master Standard is a professional file sync and backup software that makes it easy to manage your files and data.
Backing up your files can be a time-consuming task, especially if you have a large collection of files. However, with the right tools, it can be a breeze. Qiling Disk Master Standard is a professional file backup software that makes it easy to manage your files and data.
In today's digital age, data protection is more crucial than ever. With the increasing reliance on technology, the risk of data loss or corruption is also on the rise. That's where Qiling Disk Master TechPlus comes in – a powerful software solution that provides a complete protection of your data.
Best sync or backup software for Windows Server.
Related Articles
- Windows 7 Backup Only Changed Files through Incremental Backup
- Robocopy Sync Changes Only vs Easy Data Migration Software
- How to Transfer Files from Old PC to New PC on Windows 7/8/10
- Top Two Ways to Synchronize Files between Windows Servers